


Home again, home again, jiggety-jig!
My recent little spurt of traveling has ended, and I’ve brought my travel project – this hexie quilt that we last talked about here – home, safe and sound, with a little bit of progress on it.
Of all the articles that I published on the blog while out and about, that one generated a massive amount of emails filled with all kinds of questions about my hexie process. And since time won’t let me answer each email directly, I thought I would write an article on my grab-and-go hexie quilt project, covering my process.
Now, I’m sure you’ve probably noticed that Needle ‘n Thread isn’t exactly a quilting website. I don’t pretend to be a quilter. I can’t guarantee that my process is “right” or “the best way” – this is just how I do it, for those who are curious or who are wanting to take up a similar project.
That said, this isn’t really rocket science. There are many different ways to take on this type of project, and many different approaches to piecing this type of quilt. I don’t think there’s necessarily one right way. Just like embroiderers, quilters have their favorite ways of doing things, and the upshot is this: if it works, and you like doing it that way, then … have at it!
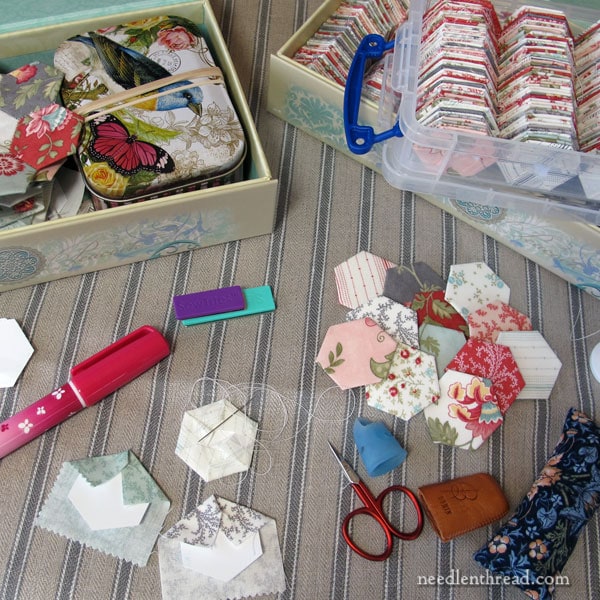
A couple little tools that I use, that I carry in the pouch I showed you in the previous article (and I’ve added a link for it at the end of the article – sorry I forgot to originally add it!) include a tiny pair of scissors, a Sewline glue pen, a couple SewTite magnetic tiles, my leather thimble, a silicone thimble for my thumb, needles, thread, and a little pin cushion that I made.
I have an extra thimble or two in the pouch, a needle threader in case I need it, some glue refills, and some extra needles, too.
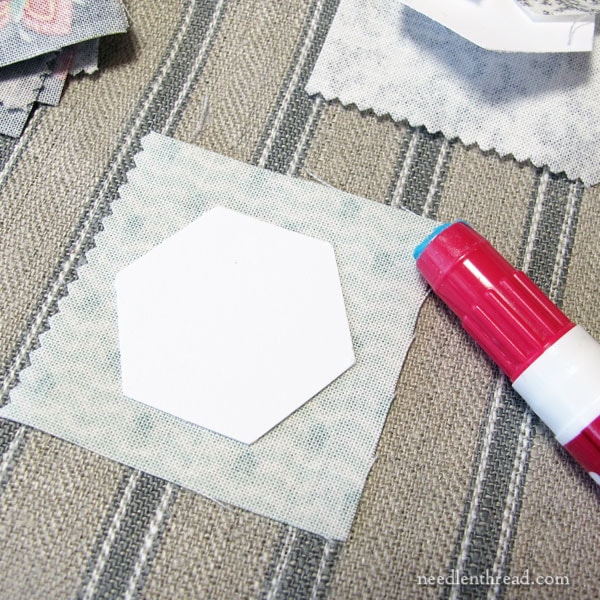
I do not cut my hexies into hexagon shapes with a seam allowance. Instead, since I’m working with 3/4″ hexies (3/4″ along each side), I cut my fabric into 2″ squares, and I just fold the squares over the card stock hexagon shape, to create the hexie. This saves an incredible amount of time, when it comes to cutting the fabric.
To baste the hexies so that they are ready for piecing, I place the fabric square face down with the card stock form about centered on top of it.
I use a Sewline fabric glue pen for the glue part.
Someone asked if I glue and baste, which seems like a waste of time. I compromise. I like the security of the basted hexie over time, rather than a hexie glued to the paper form.
But I also like the fact that the glue helps keep the paper form from shifting, while basting. It’s really annoying to be basting along happily, only to come to the fifth side and find that the paper shifted and you only have a very slim seam allowance.
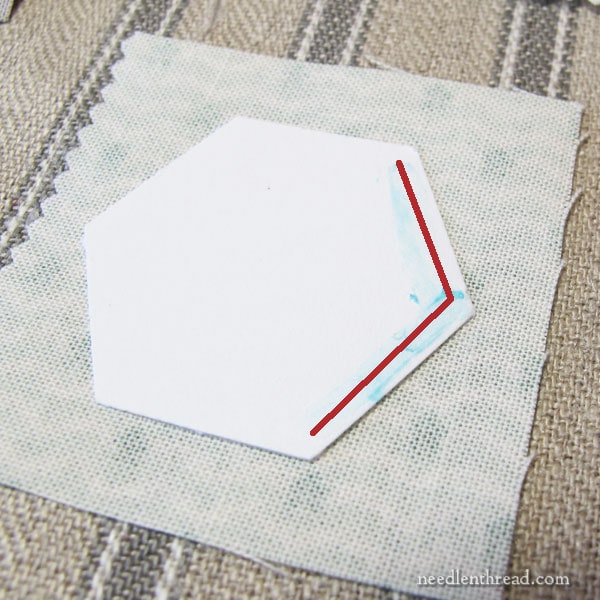
To keep my paper forms from shifting while I baste, I use the glue on one corner.
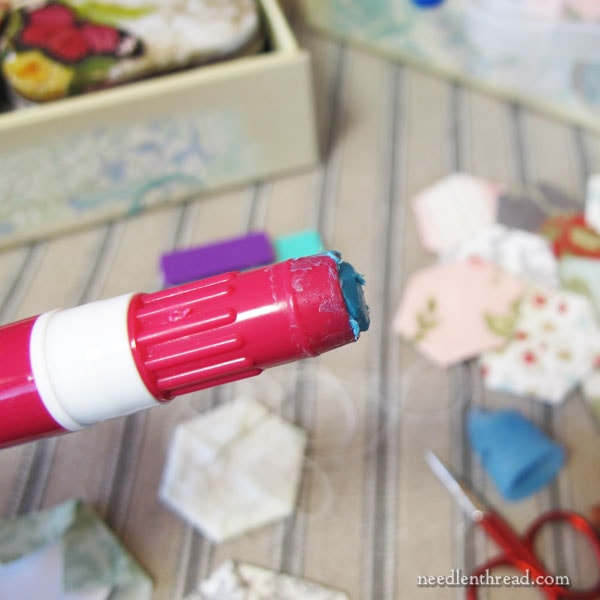
I run a quick smear of the glue on this one corner of the hexie. It doesn’t have to be a lot – it looks like a lot because my glue pen was a bit gunky at this point!
But it doesn’t matter. The glue is not permanent. It’s easy to remove the paper from the center of the hexie (more on that below), especially with just one corner glued.
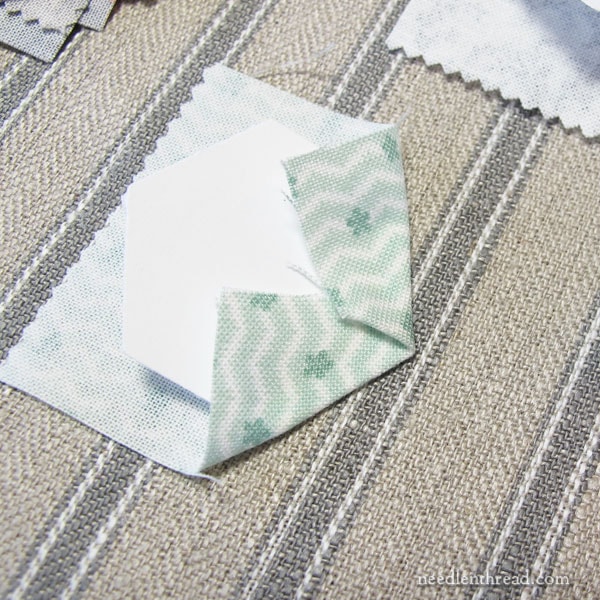
I fold the fabric over the corner as shown above. The direction of the fold is important to me because I’m right handed, and because of the way I baste. So I fold the lower side of the corner in first and the upper side over it.
I don’t put any glue on the fabric after the first fold, so there’s no glue on top of the first fabric fold.
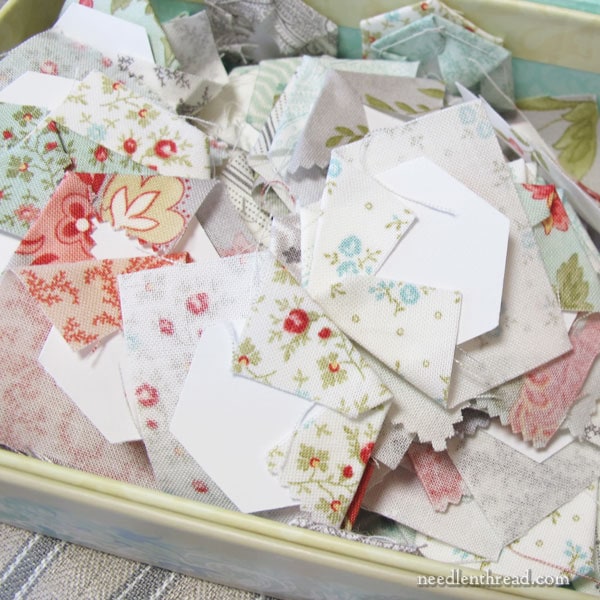
This gluing and folding goes very quickly and it’s easy to prep a whole bunch of hexies for basting, by just gluing the one corner and tossing each prepped hexie into a box until there’s a nice collection for basting.
Then I baste!
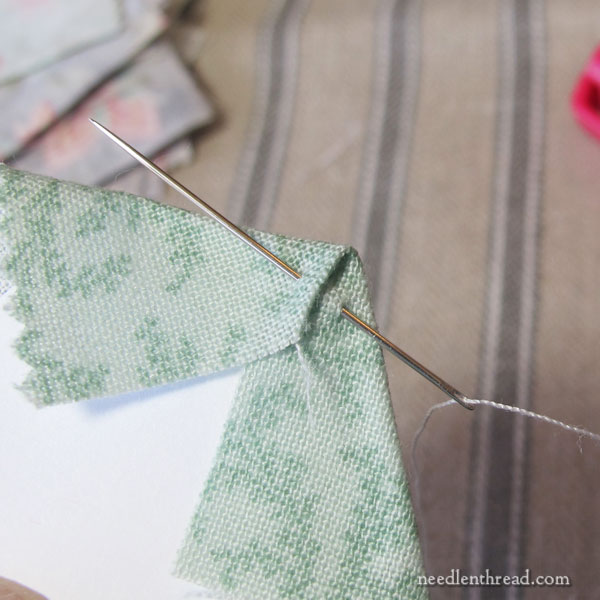
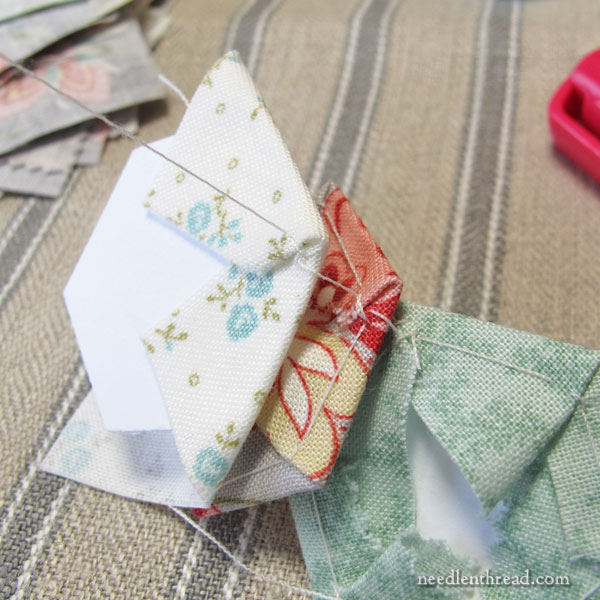
I use all purpose cotton thread, with no knot in it. I pass the needle into the first (glued) corner, as shown above, going into the “lower” side of the fold and out into the “upper” fold on the corner. I pull the thread through, leaving a small tail.
Then I pass back through that corner a second time. It’s like taking a little backstitch over each corner.
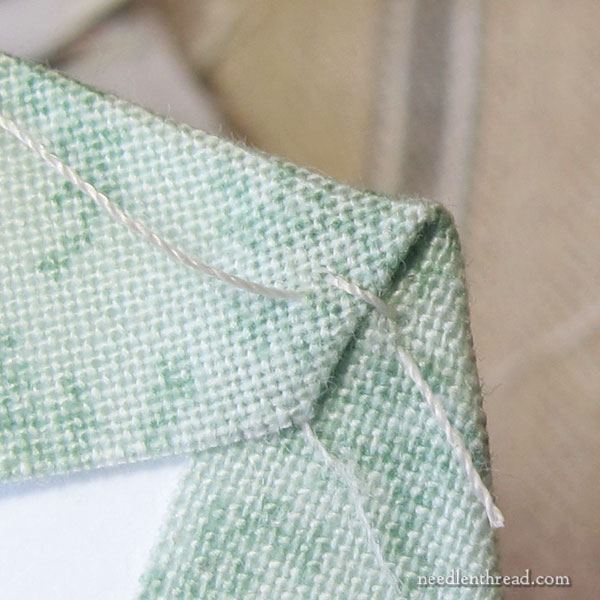
The stitch holds the corner neatly and firmly, and once all corners are basted, the hexagon shape is nicely defined around the paper form.
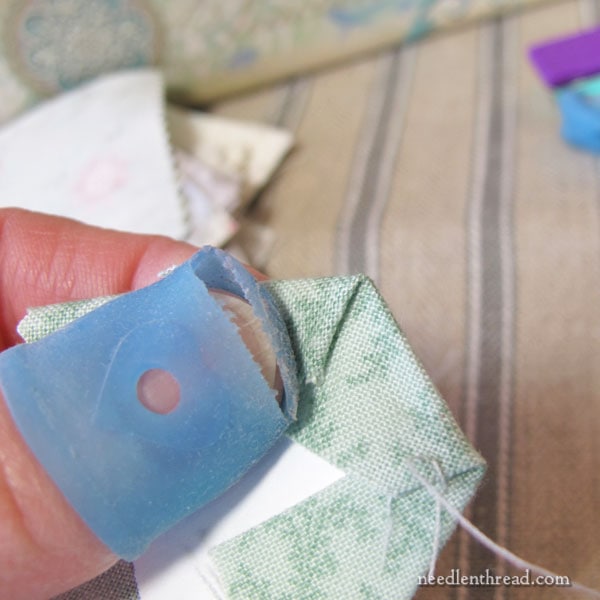
This looks dreadful, because it’s a fairly worn silicone thimble. I don’t remember the brand of this thing, but it’s ideal for using on my thumb when folding the edges of the fabric around the paper form.
I’m not using the thimble to protect the thumb from the needle. Rather, I’m using it to hold the fabric. The thimble is a soft and squishy silicone, and it holds the fabric in place for me without my having to use hardly any thumb pressure. Without it, I found that I was folding and holding the fabric too tightly, causing my thumb joint to hurt and the skin on the corners of my nails to split frequently. Once I started using the silicone thing, the silicone did the holding (because it has that slight stickiness to it), reducing the amount of work my thumb had to do.
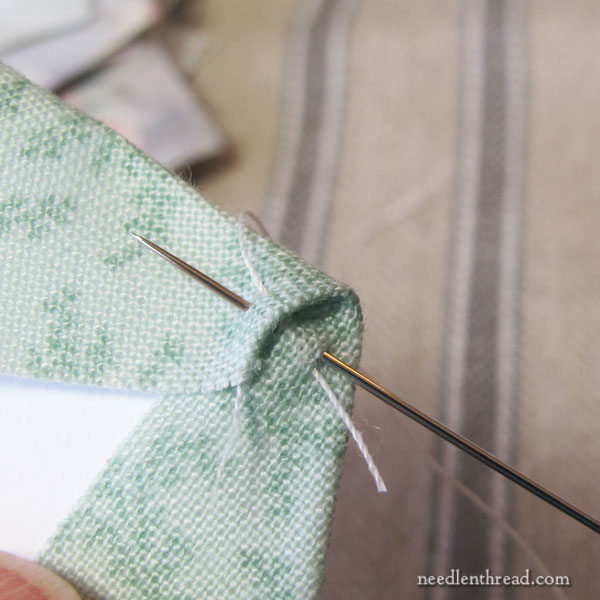
So, to continue basting, it’s just a matter of folding each side of the hexie down over the previous side, making sure to manipulate the fabric for a neat, tight fold.
As it’s folded down, each corner gets that little backstitch over it, just like the first corner.
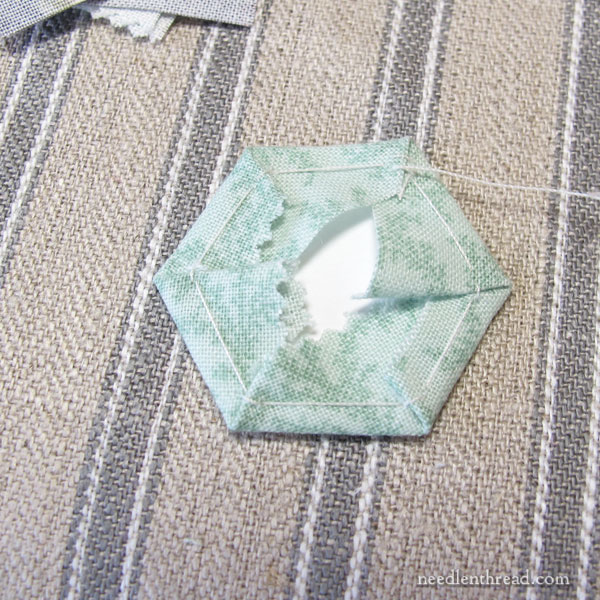
This is a basted hexie.
If I still have a lot of thread in my needle, I don’t cut the thread at this point. I just grab another prepped hexie and start basting.
This is a carry over from embroidery, I suppose! I don’t like ending a thread if I don’t have to, so I just baste a whole string of hexies until my thread runs out. I can baste about five or six hexies on the same thread without snipping the thread.
Here, you can see three hexies basted on the same thread, without the thread being snipped. It probably doesn’t save all that much time – it’s more a matter of laziness on my part. I just don’t like to end a thread if I don’t have to!
Once I’m out of thread, I’ll snip the hexies apart and I’ll add the little stack to my collection.
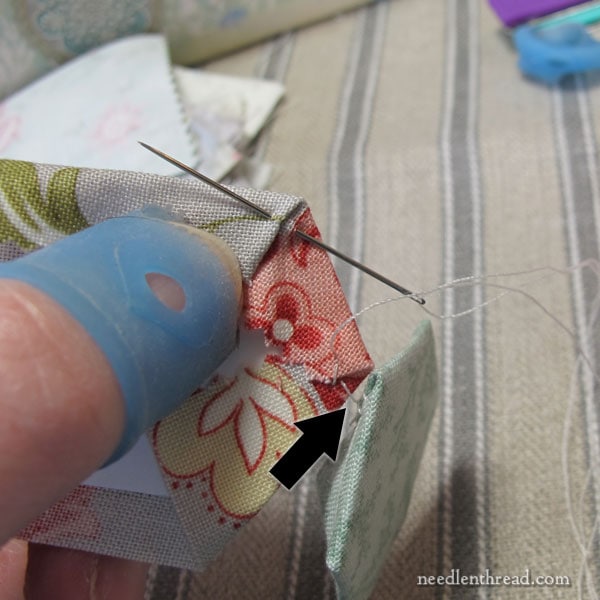
I sew my hexies together with a whipstitch, not a ladder stitch. The configuration of the stitch as it passes through from one hexie to another is the same (it forms a straight stitch across from one hexie to the other). The ladder stitch takes more time, so I prefer the whipstitch.
The paper form on the inside of the hexies makes a great guide for the needle, when whipstitching. The tip of the needle goes right into the edge of the fabric, just above the paper form. It’s important to avoid piercing the paper form when piecing.
Sometimes, I piece together strips of hexies. Sometimes, I piece the hexies in rounds and then sew the rounds together to make wider strips.
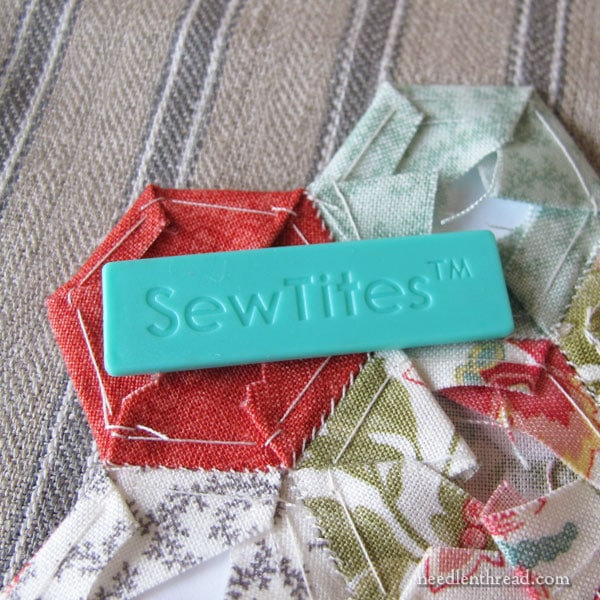
I use SewTite magnets that one of you kindly recommended to me to easily hold the hexies face-to-face when whipstitching them together. I like the way the SewTite magnets work – but I find them rather expensive for what they are. Still, it was a good investment for me, since they save my thumbs from inadvertently gripping the hexies together so hard as to cause joint pain.
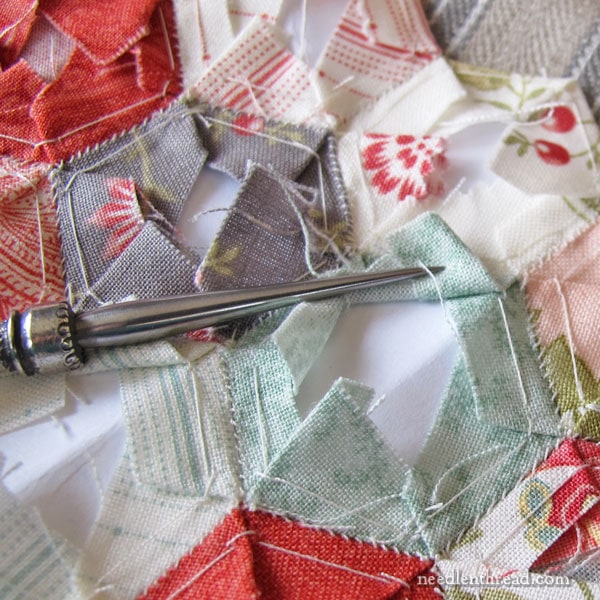
In the photo above, I’m using a laying tool to hold back the excess fabric to show you the paper form inside the hexies.
Two questions that came up:
Do I trim the excess fabric on the back of the hexies? No, I don’t.
Do I take the basting out once the hexies are sewn together? No, I don’t.
There’s really no reason to do either. The back of the hexies and the basting will be inside the quilt.
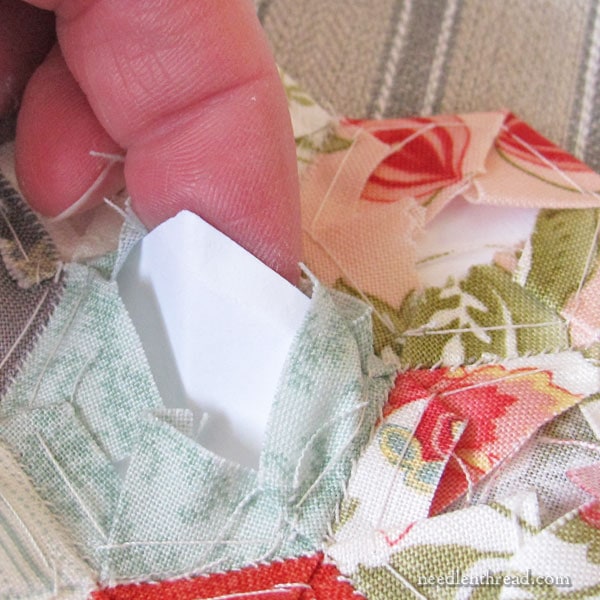
And another question: how do you remove the paper after basting?
I just slide my finger up under the fold of the fabric to the edge, and flip it out. It comes right out. The fabric peels easily from the corner that was glued, and unless you’ve pierced the paper and sewn through it when you stitched the hexies together, the paper is easy to remove. If you accidentally pierce the paper and sew through it, you just need to gently wiggle it until it comes loose. You might accidentally sew through the paper, but it would just be right on the very edge, so it doesn’t require too much manipulation to wiggle the paper out.
So that, my friends, is my process!
Whew.
I’m glad to be home for a bit – no more travel until the end of April, when I have a small sisters’ reunion to attend. That’s probably the next time I’ll play with my hexies.
In the meantime, I hope you have a wonderful weekend! Next weekend, I’ll share some fabric and other finds from my trip!
Where to Find
I’ve added a few of the handy items mentioned in this article – including the Sewline glue pen, the SewTites tiles, and other sundries I’ve used for my hexie quilt project – to my Amazon Recommendations page, under Tools & Accessories, if you’re looking for them.
My Amazon Recommendations page is an affiliate link, which means that Needle ‘n Thread receives a small commission for purchases made through that link at no additional cost to you. Every little bit helps keep Needle ‘n Thread online, so thanks!
Your first column on doing a hexi quilt inspired me and have a start on one. I have done several quilts but I am liking the change. I don’t use the glue stick but I pin the paper to my square and then take it out when I have basted about about half way around the hex.
Thanks for the inspiration!
Hi,
From the home of English paper piecing, I salute you, Mary.
Like you, am an embroiderer, not a quilter, and am often astonished by how fixed in their traditions such folks are. Your method is like a breath of fresh air, and so much easier than the old-fashioned way – it tempts even me to have a go!
Wholly unreleated to the topic of your post, a question: Could you please go over the various hand surface embroidery linens currently available, and list what each is best suited for? I’m finding I’m really not happy stitching on cotton, or even linen/cotton blends, even when the piece is backed for more body. But the stuff is expensive, and I don’t want to buy something that will sit for eons because it’s not what I really needed for a given project.
Also, do you have any suggestions regarding what to do if a kit you ordered arrives with missing crewel thread? I tried contacting the designer, then the company I bought it from. No answer from the former, a runaround from the latter where they said I’d get the replacement threat in “7 to 10 working days” and, 23 days later, after contacting them again during that period, was basically told they hadn’t and wouldn’t do anything. I ordered the full range of the missing color (because I didn’t know which were actually missing from that range) from a small company. The owner shipped the order out the next morning! Doing a happy dance that I can get back to work on this project 🙂
Ha, thought of another question 🙂 Please know that I don’t expect you to answer personally right away. I’d be content to know you have the answers someplace on your site and I just didn’t search correctly, or that you are planning a post in the nearish (in 2020? 🙂 future.
Anyway, question #3: I’d love to embroider on a pre-finished linen handkerchief blank. But those corners don’t exactly fit in a hoop. All I can think of is to baste fabric around the handkerchief very tightly, then hoop the whole shebang. I’m hoping there’s something easier! And even if I stitched on linen I plan to hem myself (which goes back to my linen question earlier, plus I’m not so good at hemstitching :), I’d be wasting a lot of linen if I cut it large enough to hoop the corner and enough space to do the embroidery.
Thanks for your patience 🙂
You have just answered all of my questions, Mary. Thank you so much!
Morning Mary ~ A wonderful tutorial showing your method of making a hexie quilt and I love what I’ve seen of your random placement of fabric, something my OC brain just won’t allow me to do. You made some very good points too, some of which I’ll be using in future paper piecing and applique. The thumb thing, mine actually developed into trigger finger, extremely uncomfortable and very annoying when the joint locks up so I’ll be trying one of those silicone thimbles next time I pick my projects, hopefully it’ll loosen the death lock grip I currently employ. I’m looking forward to seeing what you’ve added to your embroidery stash next weekend and hopefully you’ll be sharing what you plan to use them for too.
Happy stitching, Brenda
Thank you so much for this! I was thinking about following in your footsteps on this (my husband’s name is Hex, so it’s a fun idea to add to the ever growing to do list) and was wondering when to remove the paper.
I was just thinking of my mom’s grandmother and great grandmother the other day. They were seamtresses back in Siciliy and did piece work in the US. One of my mom’s jobs was to cut the connecting thread for them because, like you, they never took the time to start and stop if they had enough thread to keep going.
I’m really glad you posted this. There are so many little tricks to sewing hexies it really helps to see how others do it. I’m making a red and cream hexie quilt with 1 inch hexies. When I started, I punched out a whole bunch of templates out of card stock and hurt my hand. So now I just punch out 10 or 20 at a time, but using my left hand. I’ve also been using untrimmed squares of fabric but I thought I would be clever and get a template. It turns out the template gives me only a scant 1/4 inch of fabric to hold over, so that’s really difficult to do and I have quite a bit of fabric cut. I like your method of not knotting the thread and using glue on just one corner. I will definitely buy the Sew Tight tiles, they really look useful.
Mary – I suspect you’ll be happier longterm if you trim the seam allowances behind the hexies to a consistent depth of approximately 1/4″. With a pair of sewing scissors, it’s a quick matter to cut off the overhang. That’s because if you’re going to quilt this, the extra fabric is going to wear unevenly. It’s going to be lumpy and visible from the right side, through the fabric. In embroidery, the evenness of the seams matters less because it’s usually matted or there’s a thicker barrier but in a quilt, every lump and bump gets magnified. It’s like shopping for a bathing suit…suddenly every cookie you’ve ever eaten makes a reappearance in the changing room! 🙂
Oh, thank you, thank you. It’s wonderful to have each step clearly explained with photos. I learn much more quickly if I see pictures. Guess I’ll never grow out of picture books. 🙂 I’m not a quilter although I’ve made a few, one for each grandchild. Yet I’ve saved scraps of fabric from way back when I made clothing for my kids and this would be a great way to use the fabric and hold on to the memories. Definitely going to pin this to my Pinterest board. <3
Hi Mary,
Loved the post with all of the Hexies information!
I do have one question.
How many layer cakes did you buy?
Or in other words how did you figure out how much fabric you would need for your quilt?
How you calculated your fabric needs may be very helpful for your readers. 🙂
You have shared with us that you have a 1 1/2” hexagon punch and you are using 10” layer cakes which you are cutting into 2” squares so that you have a 1/4” seam allowance. How did you come up with the 5,000+ number of hexies that you would need?
When I piece hexies I use the clover clips. Love those things!!!
Thanks!
Cynthia M.
Well, I can get 25 2″ squares from a 10″ square piece of fabric, and there were 42 10″ squares in the layer cake. I needed about 5200 hexies, and each layer cake gave me about 1,050 hexies, so I think I bought 6 layer cakes, just to make sure I was covered (for half-hexies and for any side trim, etc.)
It’s actually a 3/4″ hexie punch, not 1.5″ – hexies are measured by their flat side, not the farthest distance between points. The 3/4″ hexie fits perfectly in a 2″ square.
I came up with the 5,000+ number by determining the size of the quilt I was making and then using this hexie calculator:
https://www.cddesigns.com/PaperPiecing/number.html
I have another hexie travel project I’ve done on a train ride across the US. I used a larger hexie for this. and I start out with one hexie face down, a piece of batting hexie shaped but smaller, then a hexie the same size as the batting, face up. I fold each side of the larger hexie twice for a finished hem, and sew it down, mitering each corner neatly. When I whip stitch them together it’s a finished quilt. I usually use a theme for the center smaller hexie. I’ve done baby quilts (even a match game where two hexies were identical for the child to find), Christmas themes, and fussy cut flowers with scrappy greens on the outside “frame.” Oh, I also did a patriotic red, white, and blue quilt this way. I hope you can visualize what I’ve described, it’s a fun travel project.
that looks like such a great store!!!! thanks for the link – good linen is hard to find
I sure wish I had thought of the glue and the silicon thimble. My hexies thurned out lousy compared to you, and you can see it in the quilt. Next one will be so much better. Thanks for sharing.
Thank you this info on hand sewing hexagons. I love the look of these but always thought it would be too much to fiddle with. With your method I just might give it a go!
Dear Mary
A great step by step guide on quilting, I’m not a quilter myself but I have always fancied making one and your article is so detailed that it would be easy to follow your guide. I do love the material you are using so lovely and bright. Thanks you for sharing the detailed quilt preparation with us and for the detailed photos and explanation on how you quilt. I hope you got loads done on your travels.
Regards Anita Simmance
How do you plan to quilt this? By machine since it will be so large? Will you do all over patterns or highlight individual hexies with quilting?
I’m considering attempting something small like a pillow cover. I’d like to attempt hand quilting as well. I just haven’t yet found an example of quilting something that has been made from such small pieces.
Thank you!
LOL! Sorry, Amanda – I haven’t thought quite that far ahead yet. It is most likely I’ll go with machine quilting, though. I doubt I’ll do anything to highlight individual hexies but I don’t know yet. Time will tell! 🙂
Thank you you are so generous to share learn’t so much from you.
Cheers
I have been working on my hexie throw for what seems like ages. But I love it because i can take it anywhere. My question is I am getting ready to finish it. I see you left the edges what I would call “ragged”. Thats fine, I like that look. How do you back it?
Hi, Rosemarie – I haven’t gotten to the edge yet. I’ll probably sew half hexies on there to straighten the edge, using whatever fabric I’m going to use for sashing and then binding. I’ll be backing mine with … well, batting of some sort, and then I bought yardage of this line of fabric, and I’m probably going to do a pieced back, so the quilt can be reversible. Not pieced with little hexies, of course! I might do a line of large hexies, some larger cuts of the fabric, and so forth – or something like that. We’ll see!
Loved the info about your Hexagon method. I am now a quilter but have extensive background in clothing construction, alterations also for many years. There is no right way to make a quilt- so many wonderful challenges to accomplish! A visit to the National Quilt Museum last fall illustrated that…..so many methods, so much to try!
I made a quilt top using large, 6-piece, hexagons only to find it was very wrinkled when attempting to put together. Only then did I realize it was meant to be put together in the straight edge rows. Tear apart, redo, still not best effort!
I found the silicone fingertip protectors at a Dollar Tree store on Shawnee Parkway at K7 in Lenexa. They have stocked them for two years now in craft aisle, pink, 3/1.00 (1.25 now?). Dollar tree also has an online sales but I have never used it.
This is a very nice description of your process. I have wanted to work with hexagon fabric pieces but was held back by the thought of trimming hundreds of pieces of fabric into hexagons. I like the way you explained the basting, and using the glue for one corner only. If this isn’t the “gold standard” way of piecing these things, it should be!
-Donna
🙂 Thanks, Donna!