


One of my plans for Needle ‘n Thread in 2021 includes going back to basics in some respects, with more emphasis on embroidery tutorials. But not just stitches – stitches in action!
While it’s important for any embroiderer to know the mechanics of embroidery stitches and to develop at least a small, ready repertoire of them, it’s even better to know how to choose and use different stitches in designs, to add interest to our embroidery projects and to make stitches work for us.
To help with that, this year I will highlight small practice projects that demonstrate how to interpret design elements with different stitches.
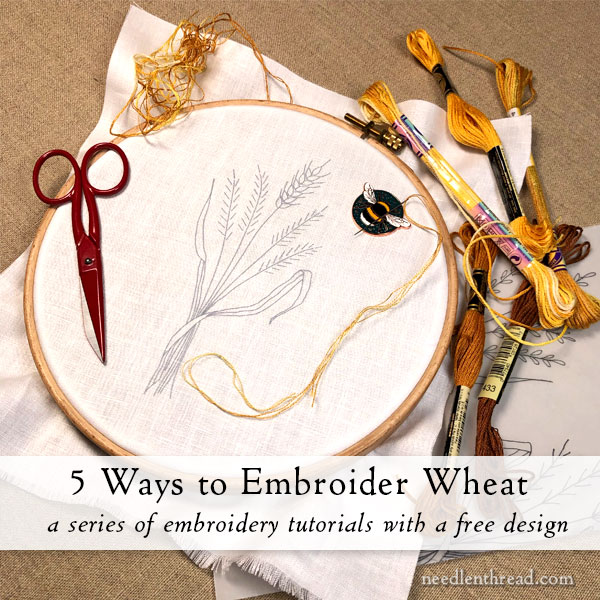
This first tutorial focuses on how to embroider wheat five different ways.
Why wheat? You’d be surprised how many people ask me “Do you have a simple, realistic design for wheat?” or “I have a wheat design, but I don’t know what stitches to use on it.” (Also, I’m from Kansas. We do wheat.)
To kick off to this short series of tutorials for five ways to embroider wheat, here is a simple, realistic design – it’s pretty! – and the materials I’m using, with some tips for getting started.
We’ve looked at one simple approach to embroidering wheat before. It’s this one, using the basic daisy stitch with a little extra manipulation.
I’ll be including this approach on the wheat design below, but with a little variation. There’s always a variation to explore, isn’t there?!
For the project as it unfolds on my end, the ground fabric is linen. It’s a closely woven, almost even weave that will support surface embroidery stitches well. I’m using white because it’s easier to photograph any instructional parts of the series on white fabric.
You can use any kind of fabric you want, and you can use any color. Don’t restrict yourself to what I’m using! Just make sure that your fabric has enough structure to support surface embroidery stitches. If it doesn’t – if it’s a looser or more open weave – you can always back your fabric with another piece of cloth like cotton muslin (“calico,” if you’re in the UK).
My fabric’s in a hoop. For this design, a 7″ – 8″ hoop is comfortable. Your fabric should be a minimum of 2″ all around your hoop, so you’ll want at least an 11″ – 12″ piece of fabric. If you don’t have a hoop that size, use what you have. You might have to move the hoop over different parts of the design as you embroider. That’s ok.
I’m using a #7 crewel needle for all the stitching.
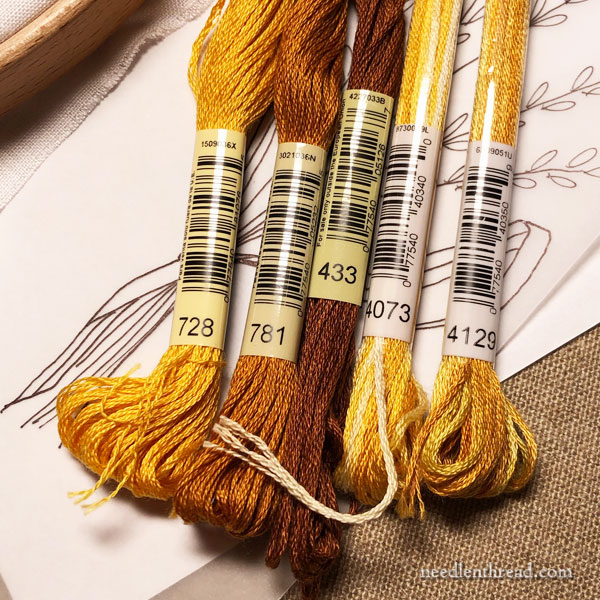
And I’m using DMC stranded cottons in a few wheat-ish colors, including a couple DMC Variations, which are overdyed. The color numbers I’m using are 433 (brown), 728 (golden yellow), 781 (light golden brown), 4073 (Variations) and 4129 (Variations).
I pulled that darker looking brown above (433) because I may want to accentuate some small edges or shadows on the leaves. It may not be necessary. We will see!
I pulled these from my stash. Feel free to substitute any wheat colors you have on hand. You can even use #12 perle cotton for most of the techniques we’re going to cover for the wheat itself, so go ahead and mix and match your thread colors and types if you like. It’s a practice piece! (That said, stranded cotton will work best for the leaves.)
Wheat Design Download
This is the design I’m using for this exploration:
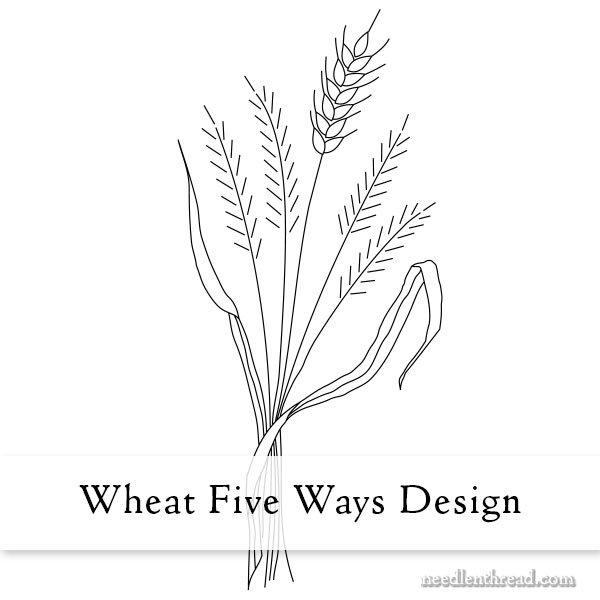
It prints at 5.5″ high. When you print it, please choose “actual size” or “100%” – or just don’t choose “auto fit” in your printer dialogue box.
Here’s a PDF of the design:
Wheat Bunch Embroidery Design (downloadable PDF)
To transfer your embroidery design, use any method of transfer that works best for you. We all have our favorites!
I’ve covered design transfer many, many times here on the blog, so if you’re looking for an approach to use, feel free to explore this link to articles on Needle ‘n Thread tagged “design transfer.”
This particular article covers a whole list of ways you can transfer embroidery designs, and the comment section below the article is filled with a great number of wonderful suggestions from the wider Needle ‘n Thread community!
Next time we visit this project, we’ll start stitching!
If you’re a Patron of Needle ‘n Thread on Patreon, you’ll find a downloadable PDF of Part 1 of this series posted today. As we work through these small tutorial series, I’ll be adding PDFs (like little e-books) to Patreon for you, so that you can collect the series in a printer-friendly layout as the series progresses.
Dear Mary
I’m really looking forward to the new tutorial on stitches in action, which I’m sure will be an adventure in to how to use various stitches in different designs. I always wondered how you choose stitches for different projects and how you choose the colour threads to go with them, which are always an exact match. This will be a great learning curve for me for future projects. Thank you for taking the time to show us how to use stitches in action and for sharing with us your stitches and designs in these new up and coming projects. I hope you have a great weekend.
Regards Anita Simmance
I am very very specifically excited about this. My grandfather’s favorite class in agricultural college was on grasses, and after his passing last year I inherited his lab notebook from the class. It’s filled with his lab reports, drawings, and amazingly intact 70 year old specimens of different grasses. I’m a biologist and art quilter and am in the process of making a quilt using his grasses and drawings and my microscope images of his grasses, and had decided to embroider several specimens. They’re not wheat specifically but they are all very wheat like so this tutorial is perfectly timed. I can’t wait to see what you have to teach us! Thanks so much for starting this!
Mary, this comes at a perfect time for me. I bought “In a Wheat Field”, and I wanted to use Wheat to embroider a coat. I’m using small sprays between the button. Looking forward to the rest of the series.
Instead of a monthly Patreon, can I just send you a year’s worth via Paypal?
🙂 Holly, you may do as you wish with that! Very kind of you to ask! I’m super DUPER intrigued about “wheat to embroider a coat” and “small sprays between the buttons.” I hope I get to see pictures!
Mary – I am unclear – will these be one wheatsheaf showing 5 different ways. or 5 separate sheaves? – Am I missing something?
Thanks.
It’ll be that design up above, with five wheat shafts on it, showing different ways of embroidering wheat, one way on each wheat shaft. Think of it like a wheat sampler.
OOPS! I posted my comment on the wrong post. Looking forward to your mini-projects this year.
Morning Mary – an on-line class, how wonderfully exciting, I’m in! (I also appreciate all the preparation this has required even with it’s loose parameters.)
Had to chuckle at ‘…we do wheat’
Happy stitching – Brenda
Sounds lovely. There’s a stitch named for wheat isn’t there? I know I’ve used that for seeded grass-type things. (But it depends on the scale – I was using it in a context where the entire picture had to fit into 3 square cm and the grasses weren’t the main thing.)
Currently wondering how to embroider barbed wire, but I don’t suppose you’re inundated with requests for that!
I’d probably use thorn stitch or twisted chain, and alternate the length and width of the stitches – and probably overlay them along the line of stitching.
Excited for this! Above all, I love baking and embroidery. I collect vintage dishes with wheat designs. Thank you for this pattern, Mary. I see lots of kitchen linens with embroidered wheat in my future!
Hi Mary,
Can’t wait to see the tutorials! Great design as always! Your note about the hoop allowing for space around the design reminded me of a quick question I had.
What if you’re working all the way to the end of a piece of already finished fabric (for example, embroidery on clothing)? Do you have any suggestions for embroidering right up to the edge, where you might not be able to get a hoop around it?
Thanks so much, and best wishes!
Very excited about this series! Please share your source/brand of linen. I am unsure how to determine how closely woven a linen is and have been a bit frustrated lately with that when choosing online. Thanks!
Hi Mary! Looking forward to this project. Wondering if the design is appropriate for a tea towel? Thanks!
Absolutely!
Wheat five ways inspired me to lay out a row of five wheat bundles. They will become a lovely pillow for the fall. Ready to get stitching on this project!
What is the thread count on the linen you are using? I really like the look of it for this embroidery design.
It’s a plain weave, Gail, so I don’t know the thread count. Pretty high, though. :-/ Sorry! I’m just using leftovers, and they’re not necessarily marked with brands or sources.
Muito lindo,amei seu trabalho
Thank you for the nice pattern, where can I find the stitch tutorial?
You can find all the tutorials for these projects listed here: https://www.needlenthread.com/2021/03/how-to-embroider-blank-project-index.html