


Today, I want to touch on a subject that may change your approach to hand embroidery forever!
This just might be the secret you’ve been looking for, to vastly improve the finished results of your embroidery projects.
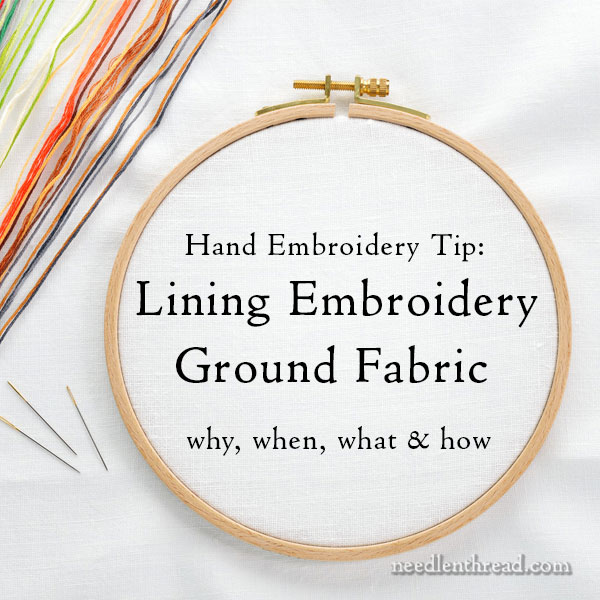
The topic is lining your embroidery ground fabric with another fabric – why to do it, when to do it, what to do it with, and how to do it.
For many of you, I’m sure this tip is Old Hat. But newbies to the embroidery scene might not even know they have the option of using a lining behind their ground fabric, and that doing so can make a huge difference in the outcome of an embroidery project.
Defining Fabric Terms
Before we start the discussion, it’s a good idea to define terms!
Ground Fabric
When talking about embroidery, the ground fabric is the fabric you are embroidering on. It’s the “background” of your embroidery.
Most of the time, at least some ground fabric is visible in a finished embroidery project, but there are times (for example, with this Marian Medallion Project) when the ground fabric is completely covered with embroidery and never visible.
Regardless of whether or not the ground fabric can be seen, the fabric you choose is always an important consideration in hand embroidery. Your choice of ground fabric can make or break your embroidery project, so it’s a good idea to always use a high quality fabric as your ground fabric.
I’ve written quite a bit about ground fabric here on Needle ‘n Thread. If you’re looking for more reading on the topic, you might find these two articles especially useful:
5 Things You Need to Know about Hand Embroidery Fabric
Choosing the Right Fabric for Hand Embroidery
Lining
By lining, I mean another fabric that is situated right behind the ground fabric before you start embroidering, so that you are embroidering through both the ground fabric and the fabric right behind it.
By lining, I don’t mean the silky-satin polyester lining found in the clothing industry, or fabrics (woven or non-woven) sold as “interfacing.”
Why Line Embroidery Ground Fabric
There are several reasons you might consider lining your embroidery ground fabric with a lining fabric:
1. Your embroidery ground fabric is lighter or semi-translucent, and you want the assurance that threads from the back of the work (especially tweakers that you aren’t expecting!) don’t show through to the front.
2. Your embroidery ground fabric needs extra support. If you plan to do some heavy duty stitching or you plan to use some heavy threads, a lining will provide an extra layer of support.
3. Your embroidery ground fabric is not densely woven or does not have a compact, smooth hand (for example, you’re using an even-weave linen made more for counted work.) If your embroidery ground fabric is more loosely woven or it does not have a smooth, compact hand that will support surface stitches, the weave of the fabric will try to dictate where your needle can go. With this type of fabric, it can be difficult to stitch smooth flowing lines or to achieve a smooth edge on satin stitch or long and short stitch motifs. Using a lining like a cotton muslin will give all your surface embroidery stitches more freedom – you won’t have to rely on the weave of the ground fabric to hold your stitches.
When to Line Embroidery Ground Fabrics
First, refer to the why to line embroidery ground fabrics, above. If your situation fits, use another layer of fabric to line your ground fabric.
Some examples of techniques that benefit from lining the ground fabric:
Goldwork and silk embroidery – for example, these projects are lined with another fabric: Marian Medallion, Mission Rose, Agnus Dei, this goldwork IHS ecclesiastical project
Crewel Work done on even weave linen instead of twill – for example, this project.
Regular surface embroidery done on lightweight fabrics – for example, the current kaleidoscope design I’m working on, which is on lightweight linen backed with a white cotton muslin.
Surface embroidery employing beadwork, dense stitching, or heavy threads – for example, Late Harvest, which is densely stitched in some areas and which is encrusted with heavy beads here and there, is worked on a linen / cotton blend backed with muslin for extra support.
When Not to Line Your Fabric
You don’t need to line embroidery fabric that will support the stitches just fine for the type of project you’re doing, and that aren’t too light or too transparent.
And, of course, in certain types of stitching, you wouldn’t even consider lining the project, because it would interfere with finishing or with the desired results. For example, shadow work embroidery like this would not work with a lining.
With household linens like this table runner or even simple flour sack towels like this, a lining fabric would either interfere with finishing or would just be pointless.
So keep in mind that not all embroidery projects need a lining fabric.
What Fabric to Use to Line Embroidery Ground Fabric
If your ground fabric is silk, velvet, or the like – used, for example, behind goldwork or ecclesiastical-type embroidery – then the lining fabric is usually a fine but sturdy linen. Some stitchers prefer to use a good quality cotton muslin, but when it comes to ecclesiastical embroidery, for example, I like to use a linen behind silk and velvet.
If the ground fabric is linen or cotton or a blend, then the lining fabric can very reasonably be a good quality cotton muslin.
For lining fabrics, you don’t have to break the bank by purchasing very expensive fabric, but they should be a decent quality fabric.
Don’t use polyester blends or the like! Use natural fiber fabrics, like linen or cotton.
How to Use a Lining Fabric
If you’re going to use a lining fabric behind your ground fabric, these suggestions will help you get the best results with your finished embroidery project:
1. If you pre-shrink your ground fabric (for example, I always pre-shrink linen or cotton, especially if I’m planning to wash the finished project), then definitely pre-shrink your lining fabric, too!
2. Cut your lining fabric on the grain and line it up with the grain of your ground fabric before you put the fabrics in your hoop or on your frame. You can read about fabric grain here.
3. For small projects, you can hoop up your ground fabric and the lining at the same time, without basting the two fabrics together. Just make sure the grain of both fabrics are aligned and that there are no “bubbles” or wrinkles in the lining fabric behind the ground fabric. Both fabrics should be pulled taut in the hoop at the same time.
4. For larger projects, you can baste your ground fabric and lining fabric together outside your design area, or in areas of the design that will be covered with stitching. I like to baste my fabrics together after I have framed them up, like I did with the Marian Medallion Project, here. But some folks like to baste both fabrics before framing or hooping.
5. For some projects – especially goldwork on silk or velvet, or large ecclesiastical projects, or projects worked on a silk ground with a linen lining – you can mount a large piece of lining fabric onto the embroidery frame first, and then baste your ground fabric onto the lining fabric, as I did with this ecclesiastical piece on velvet. First, I framed up the linen lining fabric, then I sewed the velvet ground fabric onto the linen with herringbone stitch. Another example: this crewel piece on even weave linen with a cotton lining – although with this one, I sewed the two fabrics together with the herringbone stitch, with the ground fabric sewn onto the larger lining fabric, and then the lining fabric was mounted on the frame.
Any Tips?
Do you often use a lining fabric behind your hand embroidery projects? Do you have any tips you’d like to share? Or anything pertinent I may have overlooked?
Do you have any questions about using a lining fabric behind your embroidery projects? Any points that you find confusing or you’d like more clarification on?
Feel free to join the discussion and leave a comment below!
Hello. I am completely new to embroidery and currently reading everything I can find. Is there a particular book that you would recommend for total beginners or is ‘you tube’ sufficient.
Hi, Cherie – I have a lot of books reviewed under the “Books” section of the website here. A good stitch dictionary would be essential, I think. YouTube is great for seeing particular stitches demonstrated, but a stitch dictionary will give you more variety and will help you learn other stitches that aren’t necessarily available on YouTube.
Hi Cherie — you’ve come to the BEST resource! The more hours you spend perusing Mary’s blog posts, projects, and video instructions, the better you’ll become. And you’ll be inspired by all the beautiful embroidery you see here. Mary is a great teacher and her enthusiasm is very contagious. Have fun with your new endeavor! — Cindy
Hi everyone 🙂
I am also new on embroidery and as I read more, I love more.
May we stay in touch Cherie to uphold on this amazing journey!
Inspired and be inspired!
Thanks ladies. I was given a lovely old fashioned stitch dictionary and a padded frame for embroidery last week while I was on holiday. Daniela, please do stay in touch. We can learn together
Would you do this with cross stitch as well if working on linen rather than aida?
No, with cross stitch, you don’t normally use a lining fabric.
I have used Wonder Under for lining my ground fabric when doing blackwork and have been satisfied with the results. It holds the two fabrics firmly together. I have not had any problem with getting glue on my needle as I stitch through the two fabrics although others have expressed concern about this possibility.
Hi Mary, I completely agree with you! I think adding a backing fabric (which is what I call it) really helps to support your background fabric. In Stumpwork, you need a backing fabric to help support the wired slips and to have a fabric that you can stitch your wires to without the stitches going through to the front of your work.
Celeste
Thank you! This was very helpful. I have been trying to find information on whether to preshrink embroidery fabrics for hardanger. To me, that’s the only thing that makes sense, at least for things like table linens, but I was afraid preshrinking would make the evenweave less visible or less precise. Your comment that you “always pre-shrink linen or cotton” was very encouraging. I’ll search your site for information on how to preshrink these fabrics. They are a bit more expensive than I want to experiment on!
You also said “you can mount a large piece of lining fabric onto the embroidery frame first, and then baste your ground fabric onto the lining fabric.” I have a question here: When the ground fabric is basted to the (already taut) lining, is there a trick to making sure I get a good tension on the ground fabric too?
Thank you for your site. I love it!! It’s inspired me to try some embroidery, which I haven’t touched since my grandmother taught me a few basic stitches, long long long (etc.!) ago.
Hi, Kathy – it helps to pin the fabric in place first. You don’t need to pull hard on the ground fabric that you’re sewing onto the already mounted lining fabric – just make sure that it’s taut and smooth on top of the lining fabric.
First of all, thank you Mary for an absolutely wonderful post. I’m filing it for future reference. I have done a bit of this, blindly, not really knowing what’s what.
I do have 2 questions. First, why do you use something other than muslin under silk? (I don’t do ecclesiastical stuff, but am planning on working on silk). Is there any reason I should not use muslin? This would be for my framed paintings/embroidery pieces.
Second, I’ve thought of using the non-woven interfacings in the future as I am thinking of adding some machine stitching to my work, then doing my hand needlework over that. I was thinking the interfacings would be better for holding the machine work in place. I would be using non-glued ones. Is there any reason I should not do this, due to the handwork? Thanks so much Mary for your insights and help.
Hi, Carol – I just prefer linen for backing silk and velvet, when I’m working on “really high quality stuff.” Linen’s got more longevity than cotton. But like I said in the article, some stitchers prefer using cotton. For your second question, just so you know in advance, it’s really hard on the fingers to stitch through interfacings made for machine work! But it can be done, so no worries, if that’s your plan!
Hi! Not intending to contradict our hostess, whose info is wonderfully helpful, but I will tender my one experience on working on silk. The piece was the various parts of a wedding dress bodice, ground fabric being doupioni. I knew it would need underlining (backing) anyway, and I knew the beads being applied would be relatively heavy. I used silk organza under the doupioni, and also used Sulky Solvy on top to temporarily stabilize it all and hold the pattern I was tracing out with my needle. Afterwards, to cover the thread ends–lots and lots of 6 pound Fireline–I added another layer of muslin. (This partly to hold the boning.) And then the bodice was also lined. Worked great! So I am a convert to using silk organza to back silk. YMMV.
True true! It really depends on what you’re using it for – in your case, a wedding gown, organza is a great idea!
I am a “Broderer” at York Minster UK, and we always use a good quality linen. It is firmer to work on, and will survive for longer.
I’ve found that a lining makes the finished project so much more beautiful. Of course I don’t line dish towels that are going to be laundered. I recently completed a bed quilt that had many different embroidered blocks. It is just so pretty. I just love to embroider!!
🙂 Me, Too!!!
Dear Mary
Great article and extremely useful on lining fabric before embroidering, like you I often line my projects with a cotton muslin especially if embroidering with goldwork or beads which are heavy on the linen and need extra weight. I know this sounds daft, But I have problems with lining on the bias as I don’t really understand the technique although I’ve read all our articles I just can’t work out which is the correct way to line the muslin and fabric, so I just guess and hope it’s right. Thanks for sharing with us the different tips and techniques on lining embroidery, very useful.
Regards Anita Simmance
Hi, Anita – you’re really just looking at the weave of the fabric and making sure that the horizontal and vertical weaves are going in the same direction on both fabrics – that you don’t have one fabric “off” and placed with the weave “diagonally” compared to the other fabric. Hope that helps!
Dear Mary
Thanks for your reply. You know after I had written my message to you I thought about it and realised that the weave should go in the same direction I never thought like that before. Thanks for you tip.
Regards Anita Simmance
Hi, Mary
I always use a lining fabric when working stumpwork, also, which you didn’t mention.
I have attended two workshops with an RSN trained teacher. Both times we used a lining fabric and it never occurred to me to ask why! We were doing goldwork in one class and stumpwork in another. Now it makes sense!
Great info. I have been lining things but was not always sure of why!!! Thank You. Skip
Hi, Mary–I was taught to make sure the fabrics were at the same tension to prevent wrinkles in the finished piece. I use a frame when embroidering, and mount the lining first, tightening it just enough to make it flat and stable. Then I baste the background fabric to the lining and tighten the lining and background fabric drum tight before beginning the embroidery. Is this what you do as well?
Yep. The final stretching is after the ground fabric is mounted.
How timely. I just finished a piece and was thinking about this very subject. Thanks.
Good morning Mary,
I have been embroidering the letters of the alphabet about 7″ high onto linen made for clothing. It is very rough and natural and that is the look I wanted to make the bright threads really pop. But it is very loose and caused me troubles in a hoop because it was so floppy. I used a high quality woven, very fine interfacing that irons on. I pre shrunk it in hot and cold water as Mary suggested then ironed it to the back of my linen. Magic! The grain on the linen stayed straight and did not move anymore. It also helped me in another way. I wrote the thread colors on the back so I could remember them if I liked that color. I usually keep a log of my colors but it gets misplaced. This way I always know what colors I used. I will try the muslin but I don’t think basting would keep the fabrics together good enough. These are in 8″ hoops and are take-along projects so I’m not in a frame where I can be sure it stays tight. Hope this helps someone. If the interfacing is very thin, I have not had any trouble with the needle. Also, I am teaching children how to embroider and this really helps in that case. Robin
I find it interesting that you published this piece at this time as your article was informative even for machine embroidery. I do machine embroidery as well as hand work and I wanted to make machine embroidery designs to go in the center of quilt blocks, but that would involve finding some fabric that would be sturdy enough to hold the sewn out design well, as well as not being see through. Then I realized that lining the square before embroidering would solve the problem. Some of your suggestions for lining fabric would work easily for lining machine embroidery as well and I especially like the idea of basting the ground fabric to the lining to keep things from slipping.
Mary, fabulous tutorial topic! – – always a lot to learn and great, constructive information. Discussion when you conduct these tutorials is fascinating too.
I agree. I love to read the comments, I learn from them also. Thanks again Mary. This was an absolutely GREAT topic.
I frequently line my work but this article was so helpful! My lining fabric was hit or miss depending on what I found in my sewing room. Now I have a much better idea of what to use and when to use it. Thanks for your help as always.
I use a lining ( In the UK usually called a backing fabric) nearly all the time. Another good reason for using it that you can start and finish your threads on the backing, by just stitching through this layer.
One tip regarding grain on fabric. Tight weave cotton rips on grain. It’s scary to rip fabric, but it makes a cool sound, and knowing it’s now on grain does make things easier….I rip when I need things on grain. As a quilter, it doesn’t happen much….
Hi, Jean – yes, that’s my standard route for “cutting” muslin or most cottons on the grain. I just rip it. Then I trim the hairiness!
Hi Mary, Thanks for this it is really useful. I have one question: would you line wool felt if you were going to work a lot of stitching on it and, if so, what would you use? Thanks.
Hi, Margaret – not normally. Wool felt is pretty heavy.
Mary
You are such a wealth of great information.
I am a ‘lurker’. Which means I’m gathering info before starting any project. You blog is inspirational and very helpful. Thank you, so much.
But I just googled ‘white cotton muslin’ and was surprised to see a variety of weights. I expect the correct white cotton muslin depends on the project.
Is this an item you would purchase at a big box store or where to you go for your muslin?
Thanks for all you do for us,
Peggy
Hi, Peggy – I just use a good quality quilters muslin.
Hi Mary,
I did an experiment where I embroidered on the ground fabric, cut the same size of lining material and then fused them together w an iron. It lightly stiffened the ground fabric and also
covered the knots. Does anyone do this? Thank
Hi Mary,
Have you tried fusing the ground and lining fabrics together? I do this with Wonder Under or similar light fusing and then you really are working with one pieces of fabric with all the benefits of 2. A light fusing product is important because you don’t want to fight with the ‘glue’ on your needle.
I don’t generally like to use a fusible interfacing with most embroidery. There are some exceptions, of course. But over time, fusibles are not always reliable, and certain environmental factors (like changes in humidity, for example) can affect the longevity of the fusible interfacing.
Thank you so much for all the information you give so freely!
I have tried lining my embroidery before I start. It seems my needles are not able to pass through the thickness. Is this normal, or am I using the wrong needles?
Thank you
I have always lined stump work for obvious reasons but I do a lot of crazy quilting, generally using old sheets as the backing….but in the last few ( many) years, the sheets are high thread count percale which are too hard to needle through and I have resorted to buying muslin no matter what the face fabric is. The old ladies w count well washed muslime n sheets were great.
Boy, did I miss that autocorrect! The old well-washed muslin sheets were great to work with.
Not my day…my first comment disappeared entirely. I commented that I do lots of crazy quilting and no matter the face fabric, I had been using old well washed muslin sheets as backing, but find the more recent high thread count sheets too hard to needle through so now buy quilters muslin.
I’m working on a silk embroidery kit by Susan O’Connor, which had us attach fusible interfacing to the back of the silk dupioni. It has given the silk the necessary body to hold up to the dense stitching, with no gumming of the needles. I love it and will try to find more. This is one case in which fusible interfacing is certainly the method of choice.
I’m about to explore a slate frame and use the linen that I tie down to the frame as a lining and use silk as my ground fabric, because I’m obsessed with silk. It will be dupion with lots so slubs (if that’s the word) and I’ll be leaving it all tied together for ages as it will be a big project, the poem The Kings Breakfast illuminated and eventually bound in a small embroidered book. By the way I’m not an experienced embroider, just ambitious. Is the lining too heavy for dupion silk please?
I suppose it depends on the weight of the linen you’ve chosen. Linen comes in various weights, from heavy to light. But I’d imagine that if you’re using just a standard medium or light weight linen it should be fine.
Excellent article & Tips as always ! You cover all bases 🙂
A few years back I hand embroidered a saree. The fabric was plain yellow cotton Kota Doria, with a very open weave. The chose a trellis pattern, all embroidered on the pallu. Chains were fine, but the filled-in parts needed a closer weave.
Since it was the pallu, any lining would show when draped. I solved my problem by cutting a narrow strip from the saree itself. Small folded (double) pieces were then used under only the satin & Romanian stitch parts.
After embroidery was completed, the lining fabric that jutted out was snipped close to the edge.
Thus nothing of the lining was visible on the underside and I got the body needed for filler stitches.
This reminds me that I need to upload this saree project to my blog – huge backlog 🙁 But now I can simply add link to your post , instead of detailing the process 🙂
How can I be sure which is the right side of the fabric? Some linen is very similar especially if there is no selvedge on the piece you want to use?
Does muslin also have a right side?
Normally, there’s not a difference from one side or the other when working with linen or with muslin.
A friend of mine has told me to always use lining with blackwork, so it doesn’t shadow through. I have a piece all set up and did a very small amount of stitching before I got frustrated and put it away. Since the holes in the linen are so important in blackwork, I felt I was getting great distortion at the “holes” because the lining was a finer weave and I wasn’t hitting the same holes of the lining. I didn’t know what to do. Can you help me here? Thanks. Great article.
I’ve not used a lining behind counted work before. If your ground fabric is a normal counted linen or other counted fabric, I wouldn’t really see the need for it. Maybe you should remove the backing fabric?
I’m currently using this approach for the first time, attempting to embroider on taffeta. While the embroidery isn’t going spectacularly well (I blame the embroiderer), using a fine woven cotton fabric lining/backing is what’s made it possible at all. It’s something I would not have thought of or known about without your earlier mentions of backing fabrics on your blog, so once again, Mary, Thank You! Thank You! Thank You!
Thank you, Mary, for this article. I have only just begun to line some projects and it gives flexibility to the types of ground fabric which can be used. Previously I have always chosen fabrics which are suited to the type of embroidery I’m doing; now I can (a) use up my stash, so I don’t have to buy more fabric and (b) embroider on things which I couldn’t have before I began to line.
The only thing I thought of – I have done a lot of silk ribbon embroidery on silk and have used fine pellon as a lining. It softens the silk dupion (a good thing now that the fabric available is not as soft and spongy as I could buy) and you can get beautiful dense freeform stitching without the nasty thick fastenings of the ribbon showing from underneath, even with wider ribbon. I can add cotton, silk threads, beads, anything, and the pellon protects the surface. I never use an iron-on one, just the very thinnest one.
Thank you once again! Best wishes.
The idea of lining embroidery is sound. Any one who has done machine embroidery knows the project MUST be lined (though this type of embroidery uses non woven type lining) the project still has to be lined or you will get all sorts of distortions. It stands to reason that hand embroidery results in a far better finished project if it is lined as well. I do line my projects and have been more pleased in the results than I ever was in my earlier (just learning) projects. If you are new to embroidery…take it from the expert (Mary) she knows what she’s talking about.
Thank you for this article, Mary. Hand embroidery is new for me and I have been wondering what to use as a lining. I am very happy to learn that a good quality muslin is appropriate in most cases! I really look forward to reading your blog every day. I have a lot of catching up to do and I find myself referring to past posts often.
Thank you again for this one on linings.
Hello Mary,
I prefer to use a lining for my Brazilian embroidery! I used to stitch with several other, more advanced stitchers and was taught to use a lightweight quilt backing behind the surface cloth. This gives the piece some body and hides the stitching in the back. It does make the piece a little more bulky for putting into hoops, but I like the advantage of it’s stability for stitching on. I use my sewing machine and attach the backing piece to the cover piece and the machine stitching helps hold the fabric when the time comes to stretch it for framing. It makes a very nice finished piece.
Thank you!
Hi,
When I use the backing fabric, it’s usually a good quality cotton muslin. I pre-shrink both the ground and the lining fabrics, and iron them with plenty of steam. I am careful to keep the iron moving with the grain, I don’t want to warp it out of shape. Then I will spray a good quality starch on each one on one side, then spray a second time on one of them, then lay the second fabric on it, starched side down, and then give it a really good pressing with steam. Going forward, I can treat it as one piece of fabric. Then I’ll put it on the frame and I am set, ready to go!
Although I am not new to embroidery, I haven’t done any of the really fine sort that you do – up till now at any rate. But I don’t know much about mounting fabric, what fabric to use and so on. Since I have done mostly crazy quilting there was no need to worry about the fabric, it was just there, and latterly I have worked all over embroidery mostly on calico since none of it shows. I have done a few small things on silk with calico backing.
My biggest problem is in getting the fabric really taut. I am using Evertite bars but I find as I go along that the fabric loses is tautness (is that a word?). Should I remove all the tacks and start again?
In the past I confess to losing patience and transferring to a hoop but I don’t think that is the best option really, I think I need help.
For crazy quilting, where I like to have a lot of definition to my stitches, I usually use a pre-shrunk diaper flannel lining behind the muslin I use for the base fabric to attach the “patches” to. It makes for a rather thick sandwich, but since the chenille needles I use for heavier threads are quite sturdy, it works.
Thnk you for this Mary – to line or not is always an issue fore me. For those on the other side of the Atlantic to the U.S.A., the cotton muslin which mentioned here is what we call calico.
Good morning…wonderful article. I would like to pin this article to my Embroidery pinterest board but find that the embedded Pinterest buttons on this page are not operational. Can you assist?
Thanks so much for all you share!
Hi, Sharon – if you touch or scroll over the Pinterest image on the photo, it should take you directly to Pinterest, to pin the photo on your boards. You can also use the social media buttons in the top left column. I just double checked all of them and they’re working from this end. Hope that helps!
Great tips Mary! May I contribute a suggestion based on my experience with colored linen? The ground fabric for my project was 28ct linen in a rich red color & a friend recommended that I back it with batiste. The craft store had a nice selection in various red tones but what an effect when I auditioned my linen over them! The backing fabric definitely influenced the shade of my linen. This was even more pronounced when I took pictures with my iPhone. With a more densely woven ground fabric, it could be less of an issue but I would still audition first! Also, for this project, my ground linen was mounted on the bias because the finished piece was laced on a domed circle. The top is wrinkle free so I assume my friend recommended the bias placement for that reason.
Isn’t it wonderful not only to have your fantastic expertise, Mary, but also to have a forum where so many people can ask questions, provide input and extend the knowledge of so many embroiderers worldwide! I love you! Cannot start the day without you!
This is such good information, very clear and informative! Thank you!
Hi Mary,
I have tried lining, but then the needle does not go through the thicknesses. Is there a solution to this?
Thanks,
Pat
I assume your needle will go through your ground fabric. If it will no longer go through when the piece is lined, then the lining fabric is much too densely woven or too thick/heavy. A lightweight muslin should be fine. An old sheet – especially a densely woven one with a high thread count – is terrible.
I have been doing embroidery on and off for more than 50 yrs.all self taught. I had never been told about lining a piece of work. This was interesting and informative information.
What happens when you need to take a stitch or two because it didnt come out right? Will the lining make it more difficult or leave uneveness?
Thank you
Hi, Marlene – it doesn’t really make a difference, which is good because I’m always taking a stitch or two out and reworking them!
Hi Mary. I love your posts.
I’ve been working on an experimental piece using embroidery, beads and small pieces of metal. My background fabric is painted muslin and I backed it with lutador. (I’m not sure I spelled that correctly.) It is easy to stitch thru and it has held up to the weight of my project. Have you ever used it?
Hi, Tree – No, I generally stick with muslin or linen, and sometimes silk organza, depending on what I’m doing. But mostly cotton muslin or linen work great for me. I don’t really like using synthetics (Lutradur is 100% polyester) and normally, with the type of hand embroidery I do, I don’t need anything heavier or thicker than a good cotton or linen. I’ve heard lutradur is good for mixed media textile projects – it apparently takes paint or printer ink well – but I’ve not had a use for it up to this point.
Thanks so much for this valuable lesson, one forgets these things over time? Hope all is well with you.
Thank you Mary, I appreciate this post!
Thank you. I have never heard of using a liner. Now I know 🙂
Hi Mary. May I ask why not use say a lightweight fusible interfacing with ground fabric (also a lightweight linen) if I just need stability?
Thank you! I just LOVE your website!!
Never mind Mary. I read your previous replies and see why you don’t use interfacing. That’s a very good reason I hadn’t thought of. Thanks!!
Hello!
I’m new to embroidery (I’ve done some cross stitching) and I’m having trouble finding the right fabric. I can’t seem to find a good place to purchase it online. I’d like to do it online but whenever I search for embroidery fabric, I get counted cross stitch options. Perhaps you already mentioned some stores in another post but I thought I might just ask here!
I’m finding your site very helpful far! It is much appreciated in my hand embroidery adventures.
Thank You!
Annie
Hi, Annie – check Hedgehog Jandworks. They’re going out of business, but they do have some good linen still available on their website. Also, Needle in a Haystack carries Legacy linen from Access Commodities. The Alba Maxima is a good all-around medium weight white linen perfect for all kinds of embroidery.
When you discussed backing fabric, you didn’t mention using “stabilizers, iron on, etc. Do you ever use one?
Nope! They’re a pain in the neck to stitch through by hand!
Hello. I plan to embroider on hemstitched linen hand towels. The towels are white and very transparent. I know I need to use a liner but am not sure how to finish off the lining fabric once the embroidery is complete. The pattern is a delicate, intricate snowflake. I plan to use a light blue thread rather than white on white. Do I place the liner just beyond the snowflake or do I line the entire towel? In either case, how do I finish off so the towel looks fantastic?
Thanks in advance for your thoughts and suggestions.
Anita
Hi, Anita – Usually on hand embroidered household linens, no backing fabric is used, even if the ground fabric is relatively sheer. Just be sure to be very careful with traveling threads across the back of the work and beginning and ending threads neatly.
Loved your article! For my lining I always use Shape Flex by Pellon. It’s just perfect. Texture, weight, fusible…it’s never once let me down and comes in white or black.
Hi, Carolyn – Thanks for your comment! I never recommend fusible interfacings with hand embroidery. They’re not always reliable over time (especially in cases of varied environmental settings – changes in humidity and whatnot). I find that they increase strain when stitching by hand and they often tend to muck up the needle. I’ve not tried Shape Flex, but I have tried other Pellon products. It’s not a favorite approach for me, but I know it works well for folks doing machine (and sometimes hand) embroidery on multi-media textile art.
I just received your four-corners floral tea towels. The fabric feels so good. I am wondering about the back embroidered items – if the back is not hidden because the embroidery is framed, or is a cushion cover, doesn’t the exposed back need protection so that it doesn’t snag or otherwise interfere with use of the item? I just received your four-corners floral tea towels — I am so eager to start and look forward to your guidance on this issue in general, not just for this particular kit. Thanks!
Hi, Elaine – You’ll rarely find the back of embroidery on household goods (like tablecloths, towels, table runners, etc.) or personal goods (like handkerchiefs) covered with anything for protection. It shouldn’t really need it – most hand embroidered household linens aren’t being used for heavy duty household cleaning or anything like that.
Hi Mary, I’m really confused by the terms Muslin and Calico. I’m from the UK and muslin is a fabric used to strain liquids or as lining in babies Terry towel nappies, almost like a gauze, whereas Calico is a more densely woven cotton fabric that comes in white and cream and a pinkish colour and is much thicker than muslin. However some high count muslins are used to back quilts. I have heard that in the States what you call muslin is equivalent to our Calico. But then what do you mean when you say Calico? I once tried embroidery faces on muslin and it was awful. I think it was because I was using completely the wrong fabric. Would you consider adding photos please so we can see the difference between these two fabrics? Thank you for all your embroidery tips. I find them invaluable. Except when it comes to muslin!
Muslin in the UK is somewhat equivalent to cheesecloth over here. Muslin in the US equates to your calico. Calico in the US is usually a printed fabric (like quilting fabrics, with floral designs and such), whereas muslin is usually a natural or white fabric used for backing quilts.
In case anybody comes across this, the use of the word ‘muslin’ in the UK is itself now thoroughly confused, if online stores are anything to go by. You can now find ‘calico, ‘muslin’, ‘English muslin’ and ‘butter muslin’. Some of the ‘muslin’ is muslin (for straining things etc.) and some of it is calico. High count calico seems especially likely to be called ‘muslin’ (possibly because it is often from US companies?). I *think* ‘English muslin’ is muslin. I have no idea what ‘butter muslin’. (Is it for wrapping butter? Or does it have to do with the colour or texture?)
Moreover, historically, ‘muslin’ appears to have referred to a different fabric entirely. So references in Jane Austen, for example, seem to be to an imported fabric which no longer exists.
Disclaimer: I could be entirely wrong about all of this, with the exception of the claim that the use of the term ‘muslin’ in the UK is now thoroughly confused!
I like to line my embroidery fabric with cotton flannel. It is not a tight weave so needles easily but is a better screen than muslin. Also gives a slight puffiness without using batting. Because flannel ‘sticks’, I usually iron the layers together before hooping. If using a frame you might want to sew the layers together as you described.
Thanks Mary for all of your wonderful hints and suggestions.
Embroidery with silk ribbon what do you suggest for backing of batiste ground fabric?
Thank you,
Anna B Holmes
Another layer of batiste, if you’re going to back it. The whole point of batiste as a ground fabric is usually the sheer lightness of it. To back it with anything heavier would take away from the airy lightness of batiste. So I’d just use another layer of the same batiste, if I were going to back it.
I am trying to do a knitted jacket from the Rowan magazine NO 47 (CHARM) page 140 and finding it so difficult even though I’ve tried everything even googled. Just want to know if I should rather knit the jacket and do the embroidery afterwards.. By the way I do hand embroidery so thought it would be easier.
HELP!
Kind Regards
Anne
I don’t know what to tell you, Anne. I don’t knit!
Thank you for addressing this. I am brand new and trying to embroider on a knit cap. Would a backing help stop the movement of the stretchy fabric and what kind would you recommend for knit? Thank you!
If I use a muslin lining on the linen towel I plan to monogram, how do I finish off that muslin when I’m done? trim close to edge of design? tuen edges under and stitch (will be visible on front)?
Thank you for offering suggestions; i am a newbie and embroidered a cotton t shirt for my son for x mas, and wonder if there is a way to “protect” the stitching by either ironing something onto the background fabric or sewing something on after the image has been embroidered. Any suggests are greatly appreciated
If I hoop the two fabrics together, start embroidering and then move the hoop, how do I make sure the two remain properly aligned? Should I have basted them together before hooping in this case? I see you recommend basting once hooped for large projects, but I’m not sure how that can work exactly?
It’s not a large project, but it isn’t small either. It’s your long-and-short stitch sampler, which seems medium-ish to me. I’d just like to know how to avoid issues if I need to use a lining fabric again in the future, because I seem to be making a bit of a mess of this one. Since it is a learning project, this isn’t too big a deal. I’m thinking I could always cut away the empty backing fabric at the end, if I need to.
Some of the issues might be that the fabric I’m using isn’t really good for this kind of embroidery, but I think some of it is because it is hard to keep the two layers aligned when I move the hoop from one element of the sampler to the next?
I usually just hoop up together and rely on the stitching to hold the fabric. If I move the hoop, make sure everything is smoothed out and then hoop the two together again. If you want to baste – before or after hooping, use a fine sewing thread and fine needle (to avoid noticeable holes) and baste around the perimeter of the design area within the hoop. There’s no point in basting the two fabrics together on the very outside edge of the fabric only, because it can still shift. If you’re going to baste, it makes more sense to baste throughout the design, to guarantee the fabric won’t shift.
I make handsewn organic cotton knit shirts and am interested in doing hand embroidery with some light beading on them. Would you recommend a lining on this type of fabric, especially when it is white? I didn’t see any reference to knit fabrics in the article.
Thanks so much.
I have a very fine silk embroidered sahri which I found about 15 years ago in an antique shop. I made it into a wall hanging by supporting the top and bottom with lightweight wooden slats. Over the years it has faded at the top and become slightly torn. I want to line it with a similar colour which I think will show through and disguise the faded area and strengthen the delicate fabric. Can you recommend a good technique please? The piece is set through silk with seed pearls, gold and silver threadwork,sequins and in some areas appliquéd silver material. It measures approx 2.4 meters long.
Hello Mary,
You always have such a wealth of information on this site and I use it often. I am in a BOM sampler class and the linen ground is lined with a fusible though I don’t know what kind but it is woven. Are there any fusible linings, woven or nonwoven, that you would recommend using behind linen embroidery projects?
Also, thanks for all the stitch tutorials!
Ann
Hi, Ann, I think your best bet would be to contact whoever is running the class that you’re following for the BOM. I don’t use interfacings often behind embroidery – practically never. I prefer to use regular fabric if the embroidery requires extra backing. I only use interfacings when constructing things, after the embroidery is already finished, in which cases, I’m a fan of sew-in interfacing (non-fusible) rather than fusible. All that said, I’d still help if I could, but the fact is, I find the world of fusible interfacings so varied and sometimes-overwhelming, that I’d have to go do the research to find you a suitable answer. You’d probably be better off inquiring with whoever is teaching your class. Sorry I can’t be of more help!
I used a fusible woven cotton for my backing and it buckled. Should you use fusible or not. The piece is about 12 inches by 30 inches
I never do. I generally recommend against it. What is the purpose of the fusible interfacing? Are you simply adding support to the fabric? This can be done with another layer of fabric, without the risks that fusible interfacings pose on your finished work, especially over time. But if you are going to use it, be aware that there are different types that are used different ways. Some require a damp pressing cloth.
Hello Mary,
I started embroidering in earnest over the pandemic, and I have learned so much from you and your website. Thank you, thank you! I started out working a reproduction historic sampler, so I could experience different stitches, and also used “The Proper Stitch” by Darlene O’Steen as well as several stitch books. I am now working on a full size tablecloth that I designed myself, and since I plan to use it, I realize I will need to wash it fairly often. I (think I) would like to protect the back with a separate sheet of cloth, but I am not sure. I will want to be able to get back in to make the occasional repair which I’m sure will happen during the course of life. I would appreciate any advice. Thank you, Pat
Embroidered tablecloths and the like are not usually backed with another piece of fabric, and I can tell you from experience that if you do, you will most likely regret it. It will make the table cloth significantly heavier and more difficult to manage, plus, depending on the fabric, you’ll get different rates of shrinkage, and it’s not unlikely that it will be close to impossible to achieve a very smooth table surface and a very even hanging edge around the table. I wouldn’t do it, personally.
I’ve been struggling for the last two years thinking how I can stabilise silk taffeta for hand embroidery. And I wish I’d thought of it before, but basting the ground on top of the stabiliser(fine cotton/linen mix) makes so much sense. Each time I try it in a hoop or slate frame the two fabrics buckle. I’ve tried using the taffeta on it’s own but that’srisking little holeseverywhere, even though I use the tiniest between needles I can get. So, I thank you for pointing out what should have been obvious to me. I studied costume, but silk hand embroidery is my hobby which I’m sure will improve tenfold after this little nugget. Thank you again.
Hello Mary,
I wrote on July 22, asking about backing for a large tablecloth I am working on, and as soon as you mentioned how heavy it would be, I realized you were absolutely right! Thank you for that. Do you have an opinion on iron-on backing, such as Sulky Tender Touch? I am loathe to do that, as I always like the ability to go back in and fix things. (I use all the things I have made.) Although I am trying to be as neat as possible, the tablecloth I am working on does have many many of running stitches in back, and most on the part of the cloth that drops down.
I am happy to make small samples and try ahead of time. Any thoughts?
Thank you, thank you, thank you ahead of time!
Pat
Hi, Pat – On household hand embroidered goods like tablecloths and the like, rarely is any kind of backing ever used. It is not abnormal to see stitching on the back of the embroidery, and as long as the stitching is “neat” or follows a predetermined path, sometimes, you’ll see a hint of the stitching that’s crossing on the back, on the front. That’s not unusual. You have to take care to follow a reasonable path with your embroidery, to minimize build-up if possible, and to make sure you don’t have any threads that are carrying long distances from one embroidered element to another. Additionally, it helps to be careful with knots and the cut ends – you want to try to make those things as minimal as possible. If you attend to those details, the piece should be fine without any backing at all. You can’t expect hand stitched to look as if the design is printed on the front – in fact, that would take away all the charm and beauty of hand stitching.