


If you’ve been hanging out with me on Needle ‘n Thread for a while, you already know my secret love for the stem stitch!
But if you’ve just jumped on the Needle ‘n Thread wagon in the last year-ish, my infatuation with stem stitch might be news to you, since I haven’t extolled the virtues of this underrated stitch for quite a while.
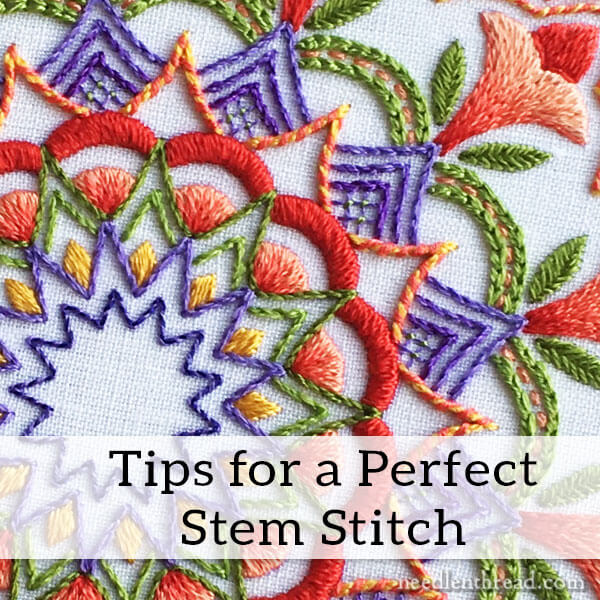
With the advent of the Kaleidoscope designs I’ve been sneak-peeking to you lately – like this one worked with DMC cotton floss, and this one worked in Au Ver a Soie silk – I’ve received a jolly influx of email about stem stitch, some of which expressed real frustration and angst over the stitch.
Stem stitch is, without a doubt, my Absolute Favorite line stitch in hand embroidery.
It’s not the only line stitch I ever use, but it is the one line stitch I turn to most frequently to achieve all kinds of good effects in embroidery.
It can be used for delicate lines and curves, tight curls and squiggles, elegant swooshes and swashes, pointed pinnacles and sharp corners.
When done right, it always looks good.
Stem stitch can also be used for fillings, including shaded fillings. It’s a super-useful and super-beautiful stitch to know, and it’s definitely worth learning to do well.
Some stitchers have a difficult time with stem stitch, though, so they often opt for other stitches, not realizing what they’re missing by avoiding this versatile, gorgeous – yet simple – little stitch!
The Key to a Perfect Stem Stitch
The key to a perfect stem stitch, in three parts:
1. Understanding the movement and structure of the stem stitch.
2. Understanding how stitching direction and thread twist influence the outcome of the stem stitch.
3. Practicing the stem stitch!
The first two points are already supplied for you here on Needle ‘n Thread, in this previous article:
12 Tips for a Better Stem Stitch.
Everything you need to know about perfecting the stem stitch is in that article. If you follow the various links to listed tutorials and tips for stem stitch, you’ll discover everything you need to make your stem stitch look great under any stitching circumstance, whether you’re stitching sharp corners, circles, fillings, shaded areas – it’s all in there!
Practice Makes Perfect
Do you remember your mom telling you that practice makes perfect? Well, guess what? She was right!
When it comes to the third point above – practice – I’m afraid I can’t supply that you. Practice is all up to you!
But I can tell you this: whether you’re brand new to embroidery or you’ve been doing it for years, when you first try any stitch, the outcome may not be terrific.
Whether it’s you or me, this is an absolute fact. When I try a stitch I’ve never worked before, it’s not unusual that it turns out looking pretty c-r-a-p-p-y. Rarely is anything perfect on the first try!
So practice – practice – practice. And I promise you, if you read the information supplied in 12 Tips to a Better Stem Stitch and you practice, you will, without a doubt, achieve the perfect stem stitch.
Cross my heart!
And the Needle ‘n Thread Community…
Don’t hesitate to chime in if you have further tips or encouragement for stitchers who are struggling with the stem stitch.
That’s the great thing about Needle ‘n Thread – there are lots of folks here willing to cheer you on through your stitching struggles, and they’ve got heaps of good advice, too!
So feel free to chime in below if you’ve got some good ideas that will help others conquer the stem stitch once and for all, or if you have specific questions about the stem stitch that aren’t covered in the article mentioned above.
We’re all ears!
Brilliant! I’ve learned stem/outline stitch at age six, 65 years ago!!! And have never known this. Looking for a dramatic improvement of my stitching.
PS how are you?
Hi, Joan! I’m doing great right now. I’ve got another appointment next week followed by some further biopsies, so I’ll update everyone again once I know exactly what’s going on. But in the meantime, I’m chugging along just fine! 🙂
I have enjoyed you teaching the stem stich. I agree, it takes practice, and patience. I have been practicing the stich over and over, with sometimes remarkable success and others – c.r.a.p.p.y. patience is truly a virtue as you learn this beautiful stitch.
Stem stitch is so truly practice and your instructions during the Secret Garden Humming birds project were such a lot of help. I am now confident when working stem stitch. This was such a learning process stitching along with you on this wonderful project, thank you Mary.
Thanks so much for the tutorials and posts..I’m new to your site and it really explained changing directions…I’m sure my stitching will improve..again thanks !!!
I love stem stitch too! I’ve been embroidering flour sack towels for my niece and mainly use stem stitch for the outlines and any fillers. After two sets of towels, I’m getting pretty good at it! I’d like to incorporate some chain stitch on my next set for my sister.
Glad you are doing well!
Dear Mary
Like you I love the stem stitch it’s so versatile and can be used on any project and blends in perfectly with other stitches. My favourite way to use it is on edging where I think it comes into it’s own and also the same applies to using the stem stitch like L&S stitch blending in with different shades of the same colour this also looks lovely, as you have pointed out. So hooray for the stem stitch it’s certainly a stitch-in-time etc. Thanks for sharing the tips and techniques on how to use the stem stitch and how to use the stitch with different threads.
Regards Anita Simmance
I accidentally came to love stem stitch, and still find it one of the absolutely most versatile stitches. As a very novice stitcher I decided to make yards of embroidered Celtic knot trim for an outfit, and after much fussing about found that stem stitch was the fastest and gave me the most consistent line. Later on I revisited it when I was doing heraldic embroidery and needed a clean, easy filling for fairly large spaces – stem stitch ended up filling that role, as well as making all the details. Because i embroider in-hand most of the time, I find stem to be much easier to control than a lot of other filling stitches in terms of preventing fabric puckers.
The hardest/most important part for me was being consistent – keeping stitch length the same, the under-stitch the same, and noticing when those changed based on the day, the working conditions, and my mood 😀
Dear Mary, my mother taught me both stem and split stitches when I was eight years old, and I’ve used them since then for the last 48 years. They not only create perfect lines and curves for vines and letters and more, but also, when combined with other stitches, add texture to my projects. Texture is always as important to me as color and design. But my favorite outlining stitch is the Portuguese stem stitch. It always adds the elegance and flow I often need or want in a piece. It is in using a variety of these stitches that I am most pleased and interested. The variety augments the design, adds texture, and creates various heights and levels. In my current whimsical project I have many twisting vines and tendrils emerging from the same branch. I use stem, Portuguese stem, split, and chain stitches, a different stitch for each vine or tendril. I even combine two different outlining stitches on one flower stem for extra detail. In the end, embroidery is my meditation and my sanctuary. I thank my mother for starting me on this journey. I thank you for this website and for the continued inspiration you generously give your readers.
Sounds lovely; any chance you’ll share a photo when you’re done?
Oh yes!
Hi Mary (and everyone else),
I plan to do just that, practice. I bought a skirt at Goodwill for $4 and I plan to “write” some quotes as the pattern around the base. The stem stitch is the technique I will be using. This is relatively inexpensive with plenty of material and simple design.
God bless you,
MaryR
What a fabulous idea!
I so love all the things you cover! You think you know something because you do it, but it’s the little things that really explain it all. I understand the slants and now I know why my lines have never been consistent. My question, (everyone please ignore this it could be unrelated and I don’t want to confuse) is the twist s and z only about the tightness of the twist or does it have anything to do with what I have heard is a left or right hand twist or is that something else? Sometimes when I stitch my thread opens up. I try to let it dangle and then twirl it back up. It doesn’t happen always. Very glad you’re chugging along.
Lisa ~ there is a difference in the “S” & “Z” twist, which does make a difference in the way you stitch with the different twist. Cotton threads have a “S” twist, while the Rayon thread we use for Brazilian Embroidery and a very few others are “Z” twist. With in the Brazilian Embroidery rayon “Z” twist, there are different weight/sizes, some have a loose twist, some have a tighter twist – which gives different effects – these thread you do not separate. If you stitch in the wrong direction or wrap the thread in the wrong direction, it will intwist the tread – that may be why your thread is opening up. Mary has done a nice tutorial on the difference (ck in her archeives or do a search on her website ) Hope this helps
I love stem stitch also. At first I had difficulties with curves and corners and it got better as I decreased the length. I see many projects using back stitch which I’m not as fond of. If the back stitch looks crappy I substitute my beloved stem stitch in it’s place. I’m going to read the 12 tips again for a refresher.
Mary, glad that you are doing ok. I have enjoyed your blog so very much. I’m mostly–at the moment–a quilter, but I did counted cross stitch for over 20 years and do enjoy simple embroidery stitches. Thank you for sharing with us!
Your stem stitch always looks beautifully neat, Mary.
For anyone who’s still confused by the stitch and thread direction, especially if they are using a variety of different types of thread, the first thing is to learn to tell an S-twist from a Z-twist thread. Then if your thread has an S-twist, you need the stitches to lie like a Z-twist for a neat stem stitch. If it’s Z-twist, then you need an S-twist angle to your stitches. And once you’ve ‘got’ that idea, then it doesn’t matter which direction you’re working in, which hand you use or whether you stitch or stab. Your stitches need to be made with the opposite angle to the twist that’s in the thread to get a true, rope-like stem stitch. (If you want the softer, looser look of outline stitch instead, you keep the stitches angled the same way as the twist in the thread, not the opposite way.) I never, ever understood this until I learnt about twist in thread – and I’ve never looked back since!
Thank you, Sue.
Your explanation was so clear – like a light globe in my brain!
I never knew the difference between stem stitch and outline stitch! Very effective post and helpful instructions – thank you! I really only do counted work, and have found, for stem stitch in such an instance, that it is really a nice, strong stitch for joining two pieces together – I use it for ornaments and biscornus. I’ll often turn the piece over and stitch from the back side – back stitch. If i do that, I find that the stem stitch on the front side looks very good.
I read the articles a while back and just got to the point in my most recent project where I needed to do the stitch on actual steps. The stitches came out so wonderfully even though I didn’t reread the articles! It was like it just came naturally. Thank you for the coaching!!!
Happy world embroidery day to everyone for the 31st.!!!!yahhhhh
Don’t forget that you are supposed to embroider in public sometime on the day to celebrate .
Hi, I’m new to your site and new to posting comments but I find your help, tips, visual aids etc brilliant and felt compelled to say a big thank you for taking the time to pass your knowledge on in such an informative way. I have been a sewer/embroider for most of my life, I’m retired and now have the time to really practice and improve my skills. Thanks again for bringing the enjoyment and excitement back into embroidery. Karen
What about all those printed stitch diagrams that show stem stitch worked at a slight angle to the pattern line? Is there ever a reason or use for that approach?
Hi, Gloria – good point! When you work the stem stitch at an angle to the design line like that, you just get a wider line, so it’s useful for making wide lines. Incidentally, you can widen or narrow parts of the same line, simply by changing the angle. This can be a really useful approach to lettering.
I love stem stitch; I use it all the time.
Wow, I really needed this information and tutorial.
As they say, “The devil’s in the details”.
Thanks again Mary.
Thank you, Mary for your posts.
I like the fact you writing about your previous posts. You are a good teacher.
Now, today , I understand what is real stem stitch and what is not stem stitch and I can recognize them in my embroidery. Hourra!!
I’m back. Just want to say how very much I enjoy
reading the other responses.
Please show me how to stitch sharp points.
Hi, Margaret – In the article above, I linked to “12 Tips for Better Stem Stitch” – which you’ll find here: https://needlenthread.wpengine.com/2014/10/12-tips-for-a-better-stem-stitch.html and in that article, you’ll find directions to “Perfect Corners with Stem Stitch,” which is here: https://needlenthread.wpengine.com/2010/10/embroidery-tip-stem-stitch-corners.html
First off, I am confused about the sign in info….what do I put for Mail and Website?
Now, I have had a good laugh about your love of the stem stitch….I was so excited to find your wonderful embroidery site so I could learn new stitches. I wanted to graduate from the very useful but seemingly ordinary stem stitch, but now I see it has a highly useful purpose! Now, I will practice to improve my stem stitches. My question for you Mary and for others is, hoops. I have always used an 8″ or 10″ hand held hoop, but I am wondering about the type that is upright with the wooden slat to sit on. I have never used the up, down stab method of stitching, always the slip the needle under to meet a finger and push it up. Is there a right or wrong way?
I love your site, look forward to improving my skills…..and wish you improving health.
Lois
Hi, Lois – when you sign in to leave a comment, the website line is for a website address if you have your own website. If you don’t have a website, you can leave it blank. The email address is for your email address. Some people like to stab stitch, others like to sew. There’s no right or wrong to it – just whatever you prefer. But if you work in a hoop or on a frame and your fabric is drum taut, then it is much better to stab stitch, rather than sew, because sewing can distort your fabric. I pretty much always stab stitch, because I think it gives a neater, better result over all.
I love stem stitch, but must revisit Z v S twist again and again. My biggest problem is checking what direction I’m loading my needle before I stitch. Any hints?
Mary, I had to stop stitching to thank you. I am a left-hander and have been doing needle work since I was 14 years old, some 50 years. I could never figure out why sometimes my stem stitch would look good and sometimes terrible. Since learning from you, as a lefty, to keep my thread above the needle as the way to do the stem stitch, my stitches are now consistantly looking good. Thank you, Adele
Bonjour Mary, je comprends l’anglais mais je ne l’écris pas assez bien. Alors je veux vous dire que je suis très heureuse d’avoir pris connaissance de vos articles quotidiens. J’apprends tellement de choses. Je croyais que je savais broder mais en lisant vos articles à tous les jours, je m’instruis de plus en plus. Surtout qu’il est souvent possible de reculer en arrière pour voir d’autres articles, ce qui nous permets de suivre un cours complet sur certains points de broderie.
Alors je vous dis un gros merci pour tout. C’est un plaisir de vous suivre. Gisèle
Merci, Gisèle! 🙂