


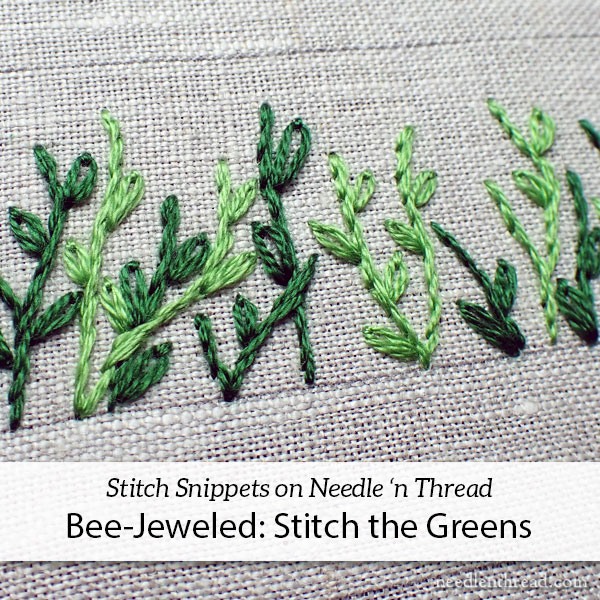
Moving right along with the Bee-Jeweled Pincushion embroidery project, today we’re going to stitch the greens.
If you are awaiting a kit, gathering your own supplies, or you just haven’t had a chance to start your pincushion yet, don’t worry! You can work this at your own pace. Next week, I’ll be adding a Project Index for the pincushion so that you can easily find all the installments on the website when you’re ready to start stitching.
Last week, we embroidered the top of the pincushion – the hexagon filling in white using stem stitch. We’re going to continue with stem stitch today as we work the greenery on the strip that makes up the sides of the pincushion.
In the order of work, you definitely want to stitch all your greens first, because the floral bits made up of embroidery and beads will sit on top of the stems and leaves.
“Eating greens is a special treat. It makes long ears and great big feet. (But they sure are awful things to eat!)
I made that last part up myself.”
Whenever I work on embroidery that has a lot of green in it, Thumper (of Disney’s Bambi fame) always comes to mind, especially if the greens get overwhelming!
On this project, this strip of green stems and leaves is the longest part of the embroidery. It’s not actually very long – the whole project isn’t big enough for it to be That Much Embroidery – but after the relatively quick top, and with the anticipation of getting on to stitching the beads, it may seem like the greenery is taking a while.
Just relax and enjoy it. It’s relatively simple, uncomplicated embroidery, and you can have a little fun with it by improvising here and there.
Today, we’re going to look at a couple points: how to avoid carrying your thread when stitching small motifs across a long space (when you don’t want to keep starting and ending threads); and adjustments you can make to your stitching to personalize the design.
You’ll find a tutorial for stem stitch here. We also talked a bit about stem stitch in last week’s lesson, so if you want further information, please refer to the previous lesson, too.
Start with the dark green thread first, with two strands of floss in the needle and with a knot on the top of the fabric away from where you want to begin stitching. This is the same technique for beginning the thread that we used on the hexagon top in last week’s lesson.
I started my stem stitch at the top of the first stem on the left of the design, and worked the stem stitch down the stem towards the base of the grassy line. So my waste knot on top of the fabric is about halfway up the stem, and I’ve worked a couple tiny backstitches in the fabric to take me to the top of the stem.
Start stem stitching down the stem, covering the tiny backstitches, until you come to the knot, which you’ll pull up on and clip right next to the fabric.
Careful when you clip!
Continue the stem stitch to the base of the stem.
I added leaves to most of the stems, but not to all of the stems in the strip, so I didn’t add leaves to this first one. If I decide later on that it needs a leaf or two, I’ll add them later.
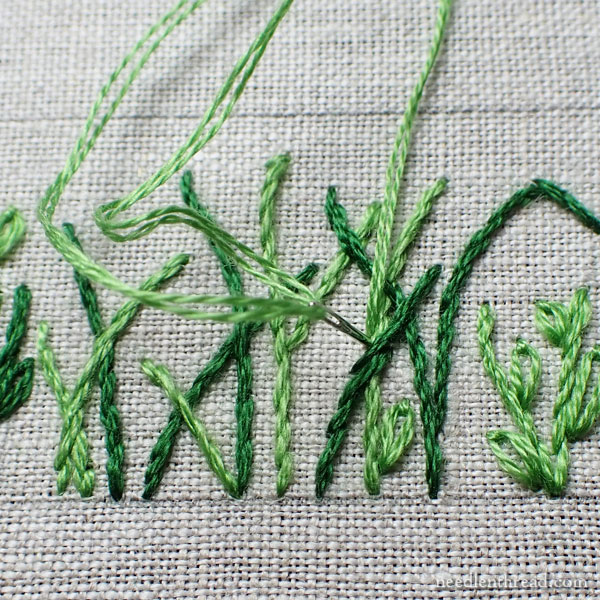
To move from the base of the first stem to the base of the next stem that I wanted to stitch in dark green, I had two choices: I could end the thread and start a new one on the next dark green stem, or I could carry my thread across the back of the fabric to the base of the next dark green stem.
I didn’t want to end my thread, because I really wasn’t moving that far away, and I’d waste more thread by ending and starting a new thread.
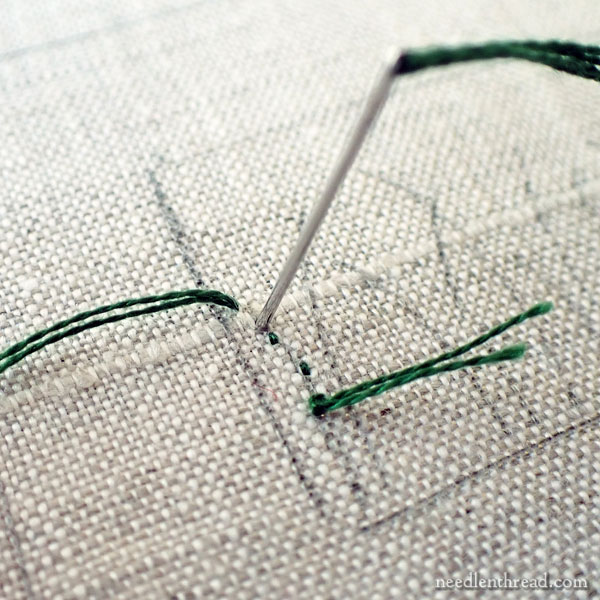
So instead, I want to carry my thread across the back of the fabric to the base of the next dark green stem.
But I don’t want a loose thread traveling that distance. Sure, it’s not really far, but it’s farther than I like to have long, loose threads on the back of the fabric.
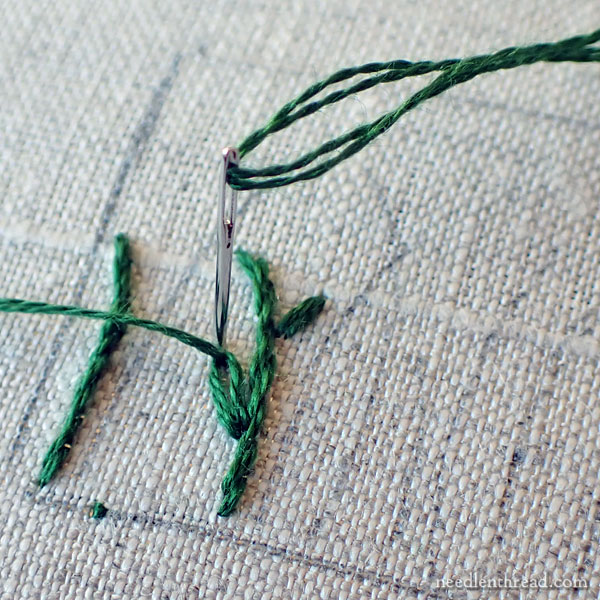
So, about halfway between the base of the first stem and the base of my next dark green stem which I would be stitching from base to tip, I worked a teeny tiny holding backstitch right along the baseline of the design.
This helps keep things neat and tidy on the back, it allows you to carry threads that won’t be seen from the front a small distance (I wouldn’t use this technique for long distances), and it ensures that you’re not going to end up with a looser thread that might get in the way later.
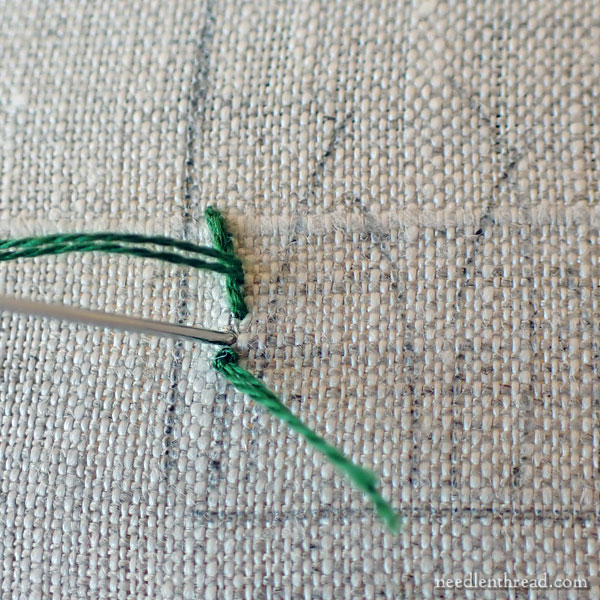
That green stitch will be covered in the finishing, or it might show on the base of the design, but it won’t matter. It’s green. It’s part of the grass.
Heck, if you wanted to, you could stitch a tiny little upwards shoot of grass right there – just a little straight stitch jutting up (slightly diagonally) from the base line of the design – just to hold your dark thread so you can travel with it. Just think of it as a little bit of grass or a sprouting flower stem!
Don’t stitch little bits like this perfectly perpendicular to the base line. It would look weird. If you want to add in small bits along the baseline when carrying your thread, make sure you slant them on a slight diagonal in either direction.
Balancing Color Placement
Moving across the strip of greenery, you’ll want to balance your dark greens and light greens, but don’t strictly alternate every other stem dark and light. That might look a little too balanced. Instead, stitch a dark green, skip a stem or two, then stitch a stem or two of dark green again, skip a stem, stitch one dark green, skip two stems, stitch a couple dark greens, etc. And then you’ll go back and fill with the light green.
After working up the second stem, I came down it and added some leaves.
There are a couple ways you can add leaves on these little stems. You can work a little jutting straight stitch out from the stem, or you can work a heavier detached chain stitch (daisy stitch) for larger leaves.
You can find a tutorial for the detached chain stitch here.
Work little leaves here and there on the stems, anywhere from one to three on each stem, randomly placed but always pointing upwards in a natural growth arrangement.
Occasionally, where your stems are closer together, you can skip leaves.
Just a hint: It’s better to go sparse on the leaves than to stitch too many of them. You can always go back and fill in more leaves if you want denser green, but it is a pain in the neck to take previously stitched leaves out.

If you have to travel your thread down from the top or center of a stem to the base line, it’s best to turn your work over and pass your needle and thread behind previous stitches on the back.
Just like the tiny backstitch on the baseline while carrying to a new stem, this helps keep threads secure and avoids longer threads on the back of the embroidery that might get in the way later on.
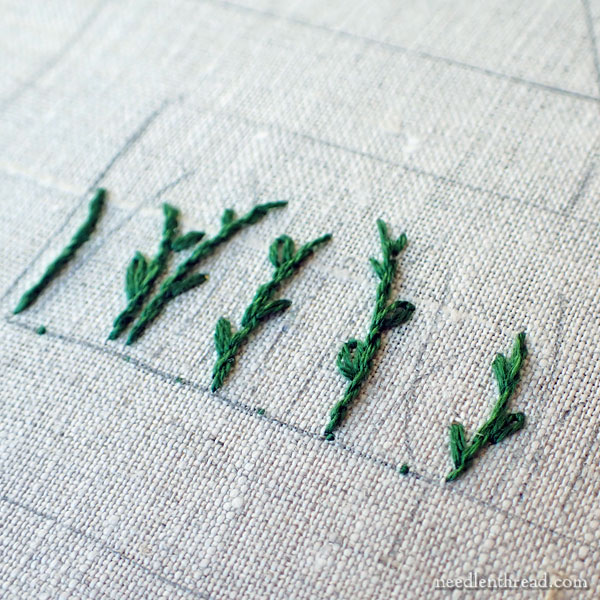
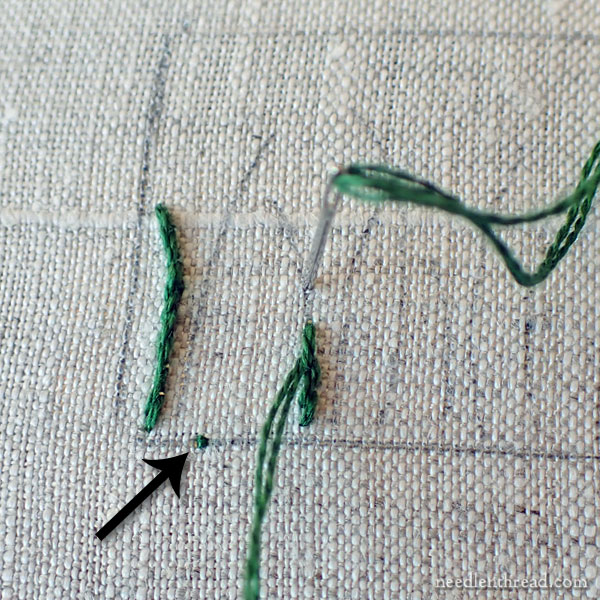
Here’s a little line of dark green stems with leaves, ready to go.
Notice the tiny little backstitches down at the base of the design, where I carried the thread over to a new stem.
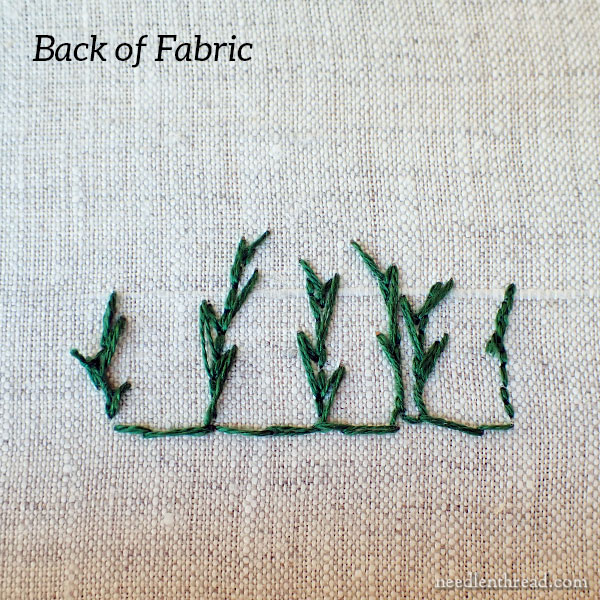
For those who want to know what this looks like on the back, here you have the back of the fabric.
Notice that there are no long dark threads carrying across parts of the design where they might be seen from the front, or that could get in the way or snag or cause other threads to knot later on as we continue building up stitching in this area.
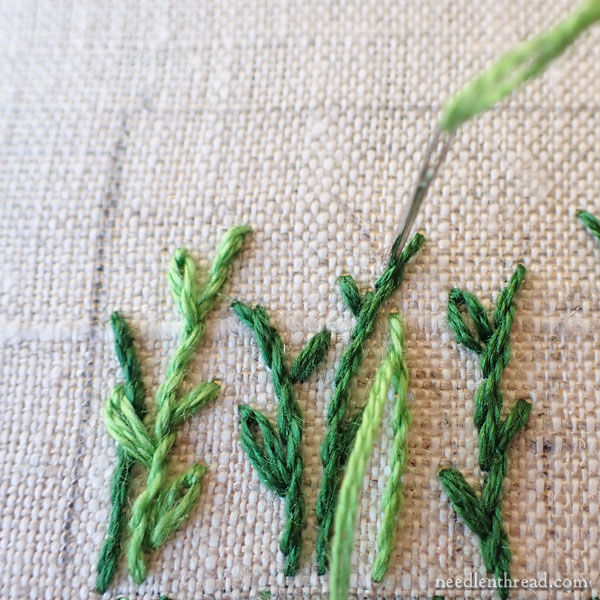
Once you get your dark green finished – and you can work across the whole strip, or in small sections at a time – go do the same exact thing with the lighter green on the stems that you skipped.
Feel free to cross right over the dark green stems where you need to, or to stitch light green leaves across a dark green stem and so forth.
Occasionally, you might decide you wanted a dark green stem to cross over the light green, but you’ve already stitched the dark green.
In cases like this, just end your stem stitch on one side of the dark green stem that you want to cross over the light, and then pick up the stem stitch on the other side of the dark green stem.
Improvising Stems
As you stitch, you might find that the design as it is drawn is a bit regular in its stem-ish-ness. You can tuck in an extra stem here or there, or you can make your stem tips drop down, or you can add a curving droop to a stem as you go.
You don’t have to be rigid with the grassy area. You might not want to go too overboard with building up the grassy stems, but feel free to fill in between stems, to adjust the shapes of stems, or to add little extras to the stems as you go. Not only will this make the design seem a little more free, but it will make your particular pincushion unique.
If, however, you don’t feel comfortable with improvisation yet as you embroider, don’t worry about it. Just follow the stems as they are, and add leaves here and there as you go.
Next!
Once you finish the greenery, we’ll move on to the floral bits, which we will work in two parts.
Stitching the greenery will take a little longer, so next week’s Stitch Snippet post will be the Project Index for the pincushion, and then we’ll move on to the floral bits after that.
As usual, members over on my Patreon page will find a downloadable PDF of today’s installment available a little bit later. You’ll be able to save that to your computer or mobile device, or print it out to add to the previous PDF for this project. Eventually, as the project develops, they’ll all compile into a nice printable instructional manual.
Previous Posts on this Project
You can find the previous articles on this project through the following links, in chronological order:
Introduction to the Bee-Jeweled Pincushion
Bee-Jeweled Pincushion Design Download
Bee-Jeweled Pincushion Fabric & Set Up
Bee-Jeweled Pincushion: Stitching the Top
Have you notified people who will be receiving the second round of kits? I haven’t heard anything and am wondering if I should continue on hold or just realize that I will not be getting one.
Thanks,
Carol
Not yet, I’m afraid. There’s been an ongoing delay in getting the remaining supplies. Apparently they will be here this coming week, and then we just need to put the final touches together for the kits to be ready.
Is it possible to get a description of the remaining supplies for the project? I think those are only beads. It’s possible some of us have those in our stash and as well are using other supplies from our inventory. Or we might be able to find them from a local source.
I like that this stitch-along will result in an item. It’s a double gift.
Happy stitching,
Linda
When starting with 2 strands of floss, I start with one long one and double it over. Then I make a loop start. Is there a problem with this?