


Howdy, and welcome to the next installment of the Bee-Jeweled Pincushion project, which is part of the Stitch Snippets series here on Needle ‘n Thread!
The idea behind this series is to take you step-by-step through small embroidery projects, and we’ve kicked of 2022 with a beautiful little pincushion. We’re going to embroider it and we’re going to assemble the parts into a pincushion that’s not only useful, but also mildly attractive.
It’s a fun project, and I hope you get a chance to try it out!
Last week, we chatted about fabric for the pincushion, and I showed you how I set mine up for stitching.
Before we launch into today’s short lesson, in which we embroider the top of the pincushion, I need to update you on materials and other news relating to the project. Please read carefully, so that you know what to expect in the coming weeks with this project. There have been some hiccups (which I will explain), so things are not unfolding as I would want them to. I expect them to straighten out within the week.
So let’s get started!
Materians Information
Trust me, I am as devastated as you are when I tell you that I can’t release a finalized materials list for this project just yet. The supply chain situation is an ongoing issue, and before I release a materials list, I have to make sure of a few of the supplies.
As a small example, not all the original beads I used when I first started stitching this project have been available along the way, so I’ve had to shuffle and make substitutions, altering my plans and notes as I go.
Eventually, I will write out an official materials list and include it with the series. But I don’t want to publish an official list and then have to backtrack and say “Whoops, not this – use this instead.” Imagine how that would work out for those who order supplies online. Not well! It would be inconvenient and frustrating for all of us.
Concerning the second round of kits, I will be releasing them as soon as possible and I’ll notify those on the advanced notice list right away, once I have the materials in hand. I had hoped for today, but there’s been a shipping glitch. This is why I won’t actually sell the kits until all the supplies are physically here.
DMC Embroidery Thread Colors
That said, we can start off with a DMC thread color list and get this ball rolling! This will at least get those of you who have the kit or are working from your stash going.
There are only four colors of DMC thread that I’m using. After traveling around to local stores to check stock (just to get a feel for availability) and checking online stores, these look widely available at the moment.
The four DMC colors I used for the embroidery part of the pincushion are:
Blanc
703
986
3838
For most of the stitching, I used two strands of floss from the six.
Needles
I used a #7 crewel needle (also called “embroidery” needle for some brands) on most of the stitching. If you don’t have a #7 crewel, use whatever sharp-tipped needle you’re comfortable with for two strands of floss. Tapestry and other blunt-tipped needles will not work well for this kind of surface embroidery.
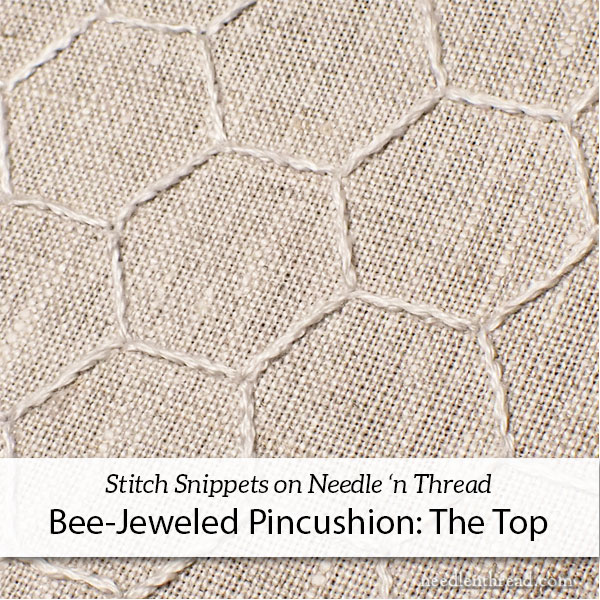
Stitching the Top
The top of the pincushion is the hexagon-shaped piece with the hexagon pattern on it.
It’s embroidered with two strands of DMC in Blanc, using stem stitch.
If you’re not familiar with the stem stitch, I recommend watching this video tutorial for stem stitch. If you need help improving you stem stitch, this article on 12 Tips for a Better Stem Stitch may come in handy.
This article on stitching stem stitch corners will come in especially handy, too, although the video tutorial will show you clearly how to manage turning a sharp corner when using the stem stitch.
Stitching Overview
Please note: The black dashed line in the diagram below indicates the outside line of the main hexagon shape of the pincushion. Don’t stitch over this line! It is left unstitched. In the design layout, it is represented as a solid line, because you need to transfer the line. But you won’t stitch over the transferred design line until you assemble the pincushion.
The diagram below represents the paths I took when stitching the top of the pincushion.
It doesn’t matter if you start on the right or the left side of the hexagon shape. I started on the right simply because of the way I was seated and the way my frame was mounted on my stand. You can start on either side.
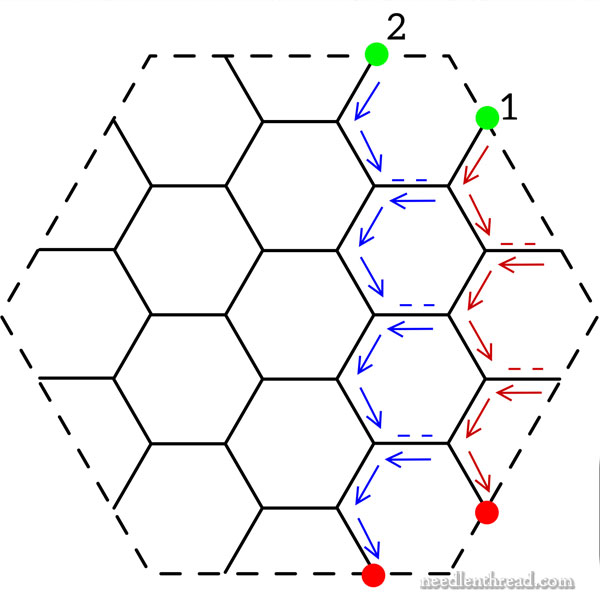
The idea here to make a reasonable work path for the stitching that will require the least amount of starting and stopping, as well as the least amount of “traveling” the working thread on the back of the embroidery (especially around the perimeter of the hexagon shape).
I figured starting at the top and working down in columns made more sense than starting in the center, or stitching individual hexagons, and so forth.
Beginning at the green dot marked #1 at the top, I progressed down to the red dot, following the arrows.
Where you see the horizontal short dashes, that’s where I took teeny tiny backstitches along the horizontal design lines, to bring me to the starting point for stitching on that little horizontal line. Then, I stem stitched from right to left on those small horizontal lines, covering the tiny backstitches.
The arrows point in the direction that I worked the stem stitch. The dashes represent the lines that required tiny backstitches to get to the starting point for the stem stitch on that line.
I hope that’s clear! But ask questions below if you have any.
When I got the end of the first “column” (marked out by red in the diagram), I ended my thread, started a new thread, and started at the top green dot #2. Then, the second column (represented in blue) was worked just like the first.
I filled the whole shape in this manner, working each column from top to bottom.
Stitching Particulars
On the top of the pincushion, I think it’s pretty important to avoid starting the embroidery with knots that will remain on the back of the work.
Why? Well, it’s a pincushion and you’ll be sticking pins in it. You don’t want your pins to accidentally pierce a knot on the way into the cushion, since this could pull on your stitches.
You also wouldn’t want a knot to inadvertently show through on the top with a little bump.
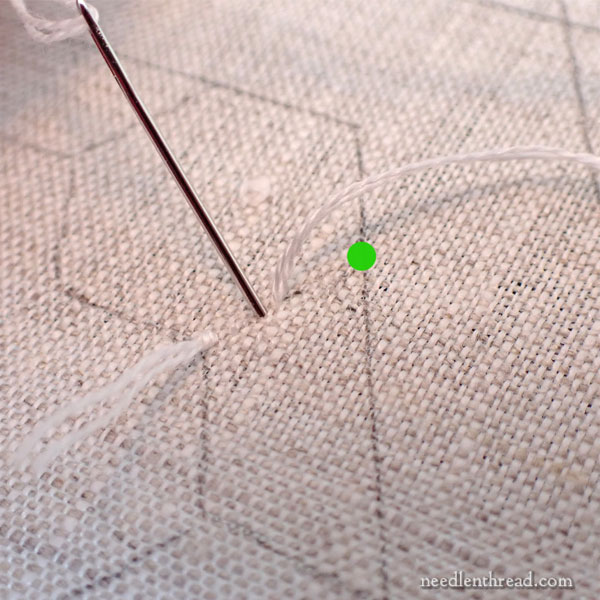
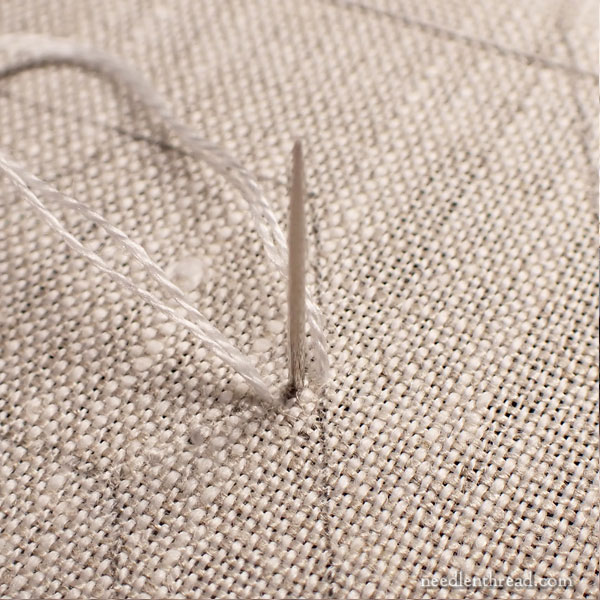
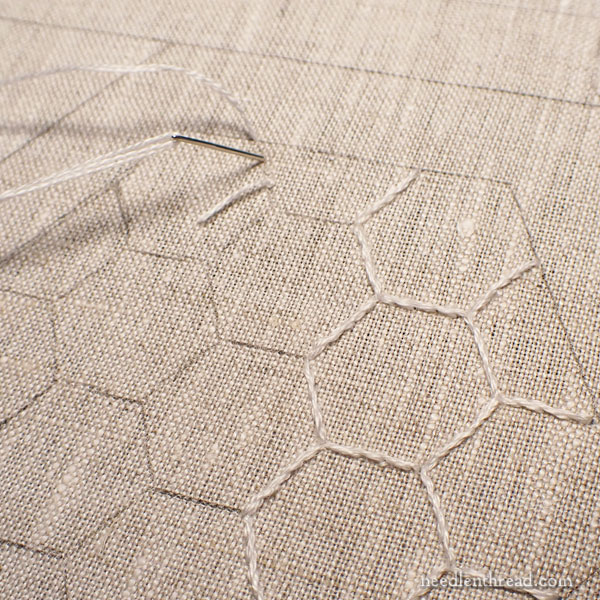
So, to start stitching, I use a waste knot on the top of the fabric, away from where I want to begin the stem stitch line. Then, working towards my starting point, I take teeny tiny backstitches along the stitching design line towards the starting point (represented by the green dot in the photo above).
Once I get to the green dot, I’m ready to start stem stitching over the same line, covering those tiny backstitches.
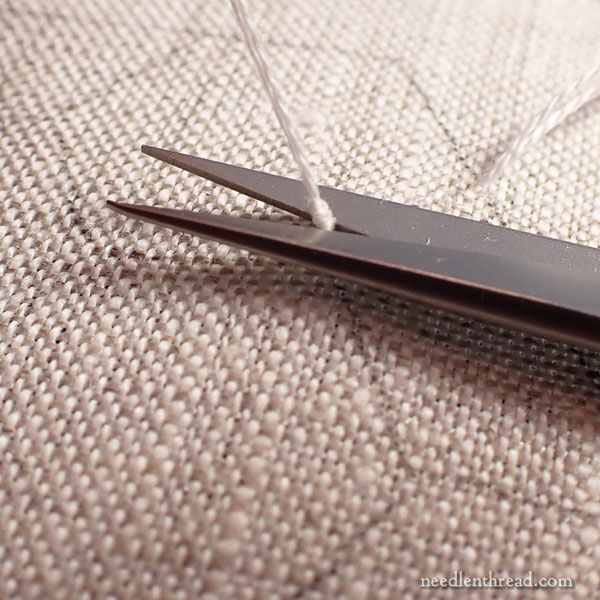
Before you start stem stitching, pull up on the knot on the top of your fabric, and cut off the knot close to the fabric. The ends of thread should pop to the back of the fabric, and you can now stitch that line without running into the knot.
The thread will be securely started, without any knot on the back.
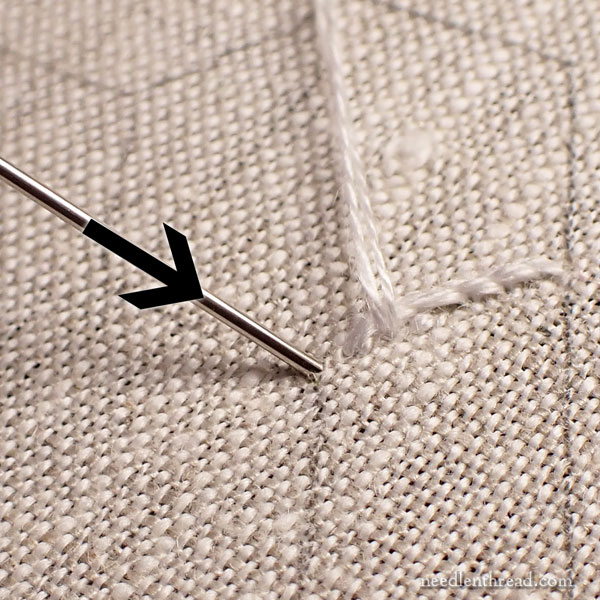
Here, I’ve begun the stem stitch, working from top to bottom (down the line towards me).
This is the correct configuration for the working thread, when stem stitching from top to bottom (down a line towards you). The thread is to the left of the needle.
Stem stitch over the design line (and the little backstitches you used to start your thread), to cover the design line. The stitches are around 1/8″ long.
When you get to the corner of the hexagon, you have to end this segment of the line by taking the end of the last stitch down into the corner.
It’s important to finish this segment as if you are ending a line of stem stitch, because you want sharp corners here.
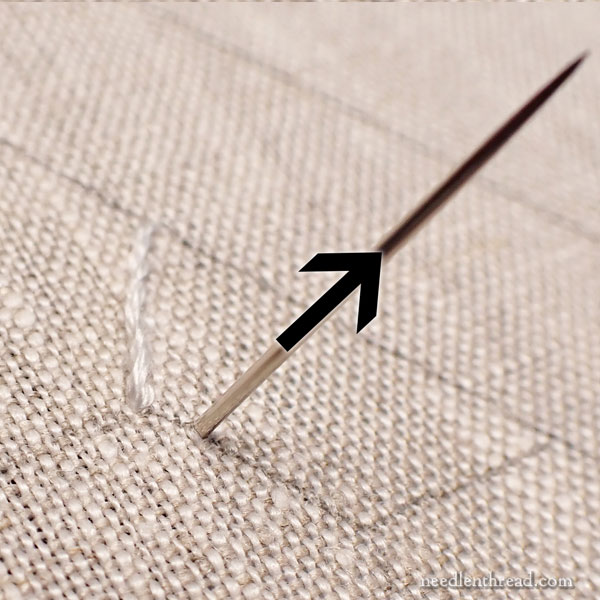
Start the next segment by bringing the needle up into the fabric a stitch length away from the corner where you ended the previous segment.
You’ll take that first stitch down into the corner where you ended the previous segment (the small arrow points to the corner).
Now, you’re ready to stem stitch the next segment, and you have a perfectly sharp corner.
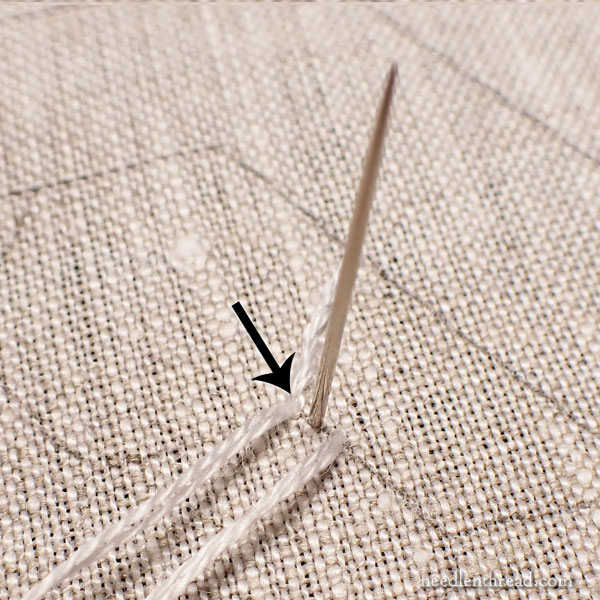
Whenever you come to a horizontal line as you work down your column, make two tiny backstitches along that horizontal line, to bring you to the opposite side. Then, stem stitch back towards the main downward path, covering those two backstitches.
When you get to the end of a column, turn your work upside down and end your thread by whipping it around the backs of a few stitches. The last time you whip it, make a small hitch knot over the thread and snip the thread close.
Start a new thread for the next column.
Here, I’ve gone back up to the top of the third column, where I’m starting a new thread and will work down that column in the same manner as the two previous columns.
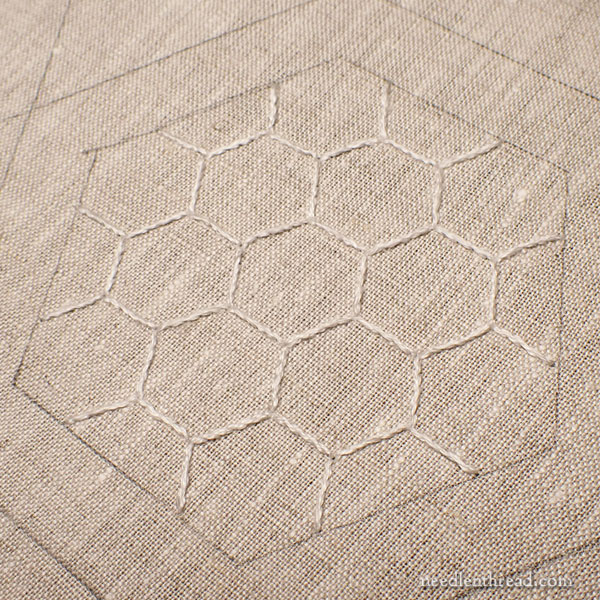
And that’s the finished top of the pincushion!
We have a little more work to do with it, when we assemble the pincushion.
But for now, the first step is finished. Congratulations!
I’m sure I’ve made these instructions a little more complex than they need to be for most stitchers. I probably could have said “stem stitch the design using two strands of DMC in blanc,” and that would have sufficed.
But I wanted you to see how to think out a work path on a design like this, in a way that uses the thread efficiently without a lot of build-up on the back and without carrying the thread loosely to new starting points.
If you have questions, feel free to ask them in the comment section below.
This Project So Far
You can find the previous articles on this project through the following chronologically arranged links:
Introduction to the Bee-Jeweled Pincushion
Bee-Jeweled Pincushion Design Download
Bee-Jeweled Pincushion Fabric & Set Up
Members on Patreon
Members over on Patreon can look for the first downloadable PDF of the project very soon – hopefully this weekend! It will include some introductory information, the design, information on fabric & set-up, and today’s lesson. If I get in more information on particular supplies today (which is what I’m waiting for), I plan to include the complete supply list as well.
Hopefully, from here out, the project will move along more smoothly, as planned, rather than constant hiccups and holdups for supplies. We shall see! It’s just something we have to work through, I suppose. I appreciate your patience!
As a self taught stitcher this information was very helpful. I have learned so much and gained a lot of confidence from the technique pieces you’ve taught over the last year. Thank you! You are a gifted teacher!
As a complete newbie, I need the detailed instructions and really appreciate them. So thank you Mary.
Mary, I cannot thank you enough for your detailed instructions. No knots, teensy back stitches, direction of lines, starting and endpoints, etc. are the important things we need to know.
Wonderful explanations and beautiful photographs, Mary. I enjoy and always learn a lot when you explain things in depth. It’s very helpful. Keep up the great work!
This is only barely relevant, but I just realized that bee-jeweled is not just a description of the pincushion, but also a play on the word bejeweled, and I’m delighted by this and felt compelled to let you know. 😀
LOL! Thank you, Emma! I’m glad you caught it! 🙂
I, for one, appreciate the added instruction you have included. I learned to embroider as a young girl way before the internet – so pretty much self taught employing “Margot’s approved method”. Not all my work has been beautiful and the education I’ve gained from you and other internet sources has provided a welcome improvement in my skills. Thank you!
Mary, just to let you know, in the pdf for Patreon members, the links at the end to the stem stitch tutorials are not “live” and the URL is not typed out. I’ve made a note to myself to go back to the 2/4/22 blog post to find the links.
Thanks for letting me know! I will fix that and re-post ASAP.
Good day! I am ready to start the stem stitch, but before I start I have a question for you! I am using a round wood embroidery hoop : is it better to put the fabric on top of the hoop or on the bottom of the hoop. I usually install my fabric over the hoop but I saw some pictures where the fabric is installed under the hoop so I am not sure what would be best.
Thank you!
Anne-Marie
Hi, Anne-Marie – Place your inner ring on the table. Place your fabric over the inner ring. Place the outer ring over your fabric. That’s the normal configuration for a hoop. Otherwise, the majority of your stitching will be with the sides of the hoop sticking up around your dominant stitch hand. Plus, much more of your hand will come into contact with your fabric (at least, with the back of the fabric). It makes no difference on the tensioning of the fabric, but it does make a difference in the comfort of stitching, especially if your design comes close (within, say, 1/2″) of your hoop. It would be a bother.
Thank you very much for your detailed explanation!
How do you do the Hitch Stitch? Have not been able to find it.
Thanks, Helen Dolph
I’m not sure what the hitch stitch is? Did I miss something?
Re the design lines that touch the outer hexagon edge, which I think is a seam line. Do you ever stitch beyond the design line, including the beginning and ending anchoring stitches/half hitch? Then the outer seam line, assuming machine stitched, also anchors the embroidery on the top. I’d only do this with a simple stitch, like the stem or back stitches. I like things to be really secure.
Not on this type of little thing. This is all hand constructed. You’ll be hand stitching over the seam join. There’s no reason to extra-secure the top embroidered threads – they won’t go anywhere if you’ve started and ended them securely.
I’ve used a similar technique to start/stop using a single thread on cross stitch. As long as you stitch through the thread before clipping the knot, it’s not going anywhere. I don’t know why I should so surprised that it works so well. When I catch regular sewing thread with the needle while mending, it can make a royal mess to get undone.
Isn’t that the truth!?! LOL!
Sorry Mary, I did not mean a Hitch stitch but rather the Hitch Knot. I will try to search it out on my own and if unsucessful I will be back.
Thanks again, Helen
Hi, Helen – I just mean after whipping around the backs of your stitches, you “hitch” the thread by running through your last loop (like tying a shoe, almost). Just to secure the whipping thread so it doesn’t tweak out beyond the backs of the stitches. You don’t have to do it – it’s just my preference for ending threads this way.