


Last week, we chatted about setting up this Massive cutwork embroidery project – an altar linen (three of them, actually) – that’s about 7.5 inches high x 18 feet long.
I thought we had found the solution for the transfer of the repeat designs across the approximately-18 feet of linen.
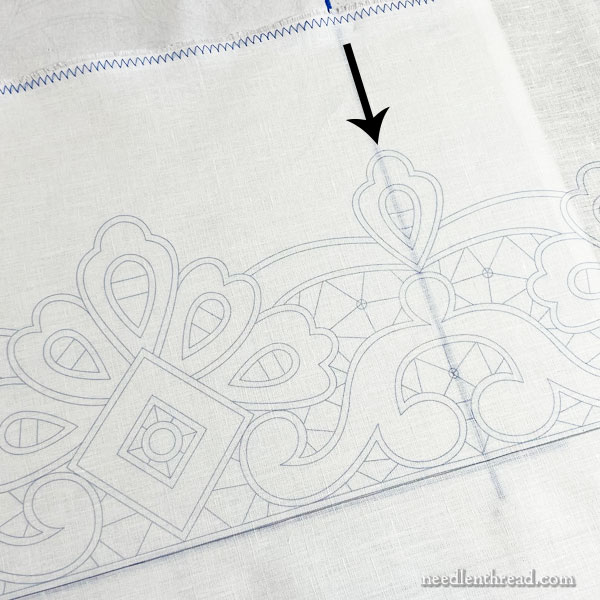
Boy oh boy, was I wrong…
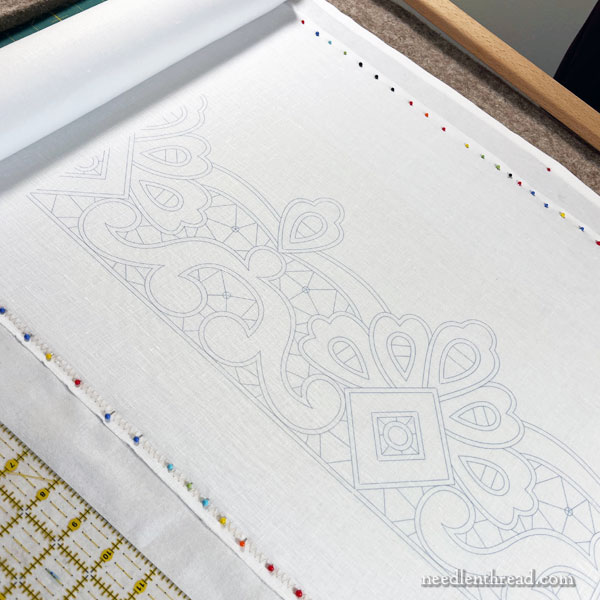
Doesn’t it look nice? Doesn’t it look like things are working out great here?
In fact, things worked about pretty well for the first many feet of the project. We had tested this approach over about four feet before moving on to the Real linen, and it seemed to work well.
After moving on to the Real Linen, we managed to get almost 8 feet of the design transferred (thought not perfectly) before I called it quits. Better to salvage as much as you can from a failed attempt, than to keep going and ruin the whole length of linen, after all!
What happened?
While tension seemed to be a necessary part of the equation when doing this type of transfer over a long distance (you’ll have to read the previous articles to see the backstory on this line of thought), it was, in fact, a bad idea.
If you can tension the entire project evenly, over the whole project, then tension makes sense.
But if you are tensioning the fabric one small area at a time, what we realized is that we had no control over the tension overall, because with each change of the fabric area where we would transfer the new repeat of the design, we couldn’t guarantee that the tension would be the same as the previous fabric area where the repeat had already been transferred.
Moving the fabric along as we were, there was no way to guarantee consistency in tension.
So, as we transferred the repeat designs, it became clear that the discrepancy in tension between each section of fabric was playing out in a very unsatisfactory way with each transfer of the design repeat.
About four feet in, we saw that the design was climbing ever-so-gradually across the grain of the fabric with each transfer.
Any modifications in placement of the design resulted in ever-widening gaps on the lower part of the design transfer, so that the design simply didn’t meet up. And while small differences could be made up by the embroiderer, as we moved down the design, the gaps become too pronounced.
The design continued to climb towards the edge of the fabric, even if minutely. Taking the difference from where we started and where we were at 8 feet in, and doing the math, by the time we reached about 13-14 feet of transfer, we would be off the fabric.
And you know, that just wouldn’t do! L. O. L.
Did I take pictures at that point? Um. No. My mind was elsewhere, in the Land of Frustration and Fury where I berated myself for making dumb decisions too hastily without working out all the scenarios. True, I couldn’t see the scenarios, but I think I should have known this.
Once I calmed down, I went back to what I know for sure:
If you have a piece of fabric cut true to the weave – that is, on the grain – and if you transfer a straight line along a thread in that fabric (along the grain), then your design will not run off the fabric.
But if you’re stretching the fabric and losing control of that straight line along the weave… well, what can you expect? Especially over such a great distance!
I asked myself “What do you need in order to keep the weave of the fabric straight and true, so that you know that it is straight and true?”
You need two reference points: 1. a line in the fabric (provided by the grain or weave); and 2. a line outside the fabric, to keep the line of the fabric in check.
Knock, knock.
Who’s there?
Earwig.
Earwig who?
‘Ear we go again!
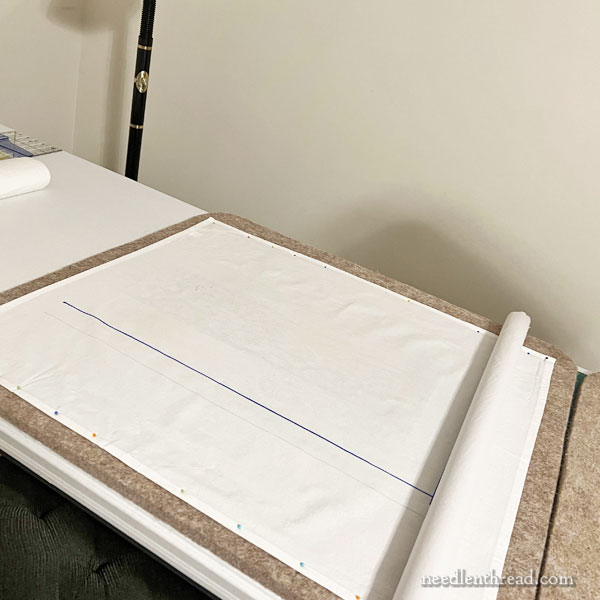
To establish the line outside the fabric, I drew it with a Sharpie on the pressing cloth that covers the wool mat that I use when ironing.
The pressing cloth is pinned to the wool mat so that it doesn’t shift.
Then, I scrapped the idea of tension that couldn’t be controlled.
We drew a line in pencil along the length of the whole 18+ feet of fabric.
We used a mechanical pencil, drawing it (with the pencil at a low angle) along the thread of the fabric. This is the same principle as using a pin and drawing it along the weave in a piece of fabric, so that you can see easily where to cut to cut along the fabric thread.
What happens is this: the thread in the linen provides a groove to hold the fine tip of the pencil in place as you pull it along the fabric. This only works on a fine plain weave linen if your pencil has a very fine tip (hence, we use a .05 mechanical pencil), and you’re on a hard smooth surface, and you’re careful.
But we’ve done this a lot, so we’re pretty good at it.
This pencil line became the marker for the top line of the embroidery design, which features a straight line running across it.
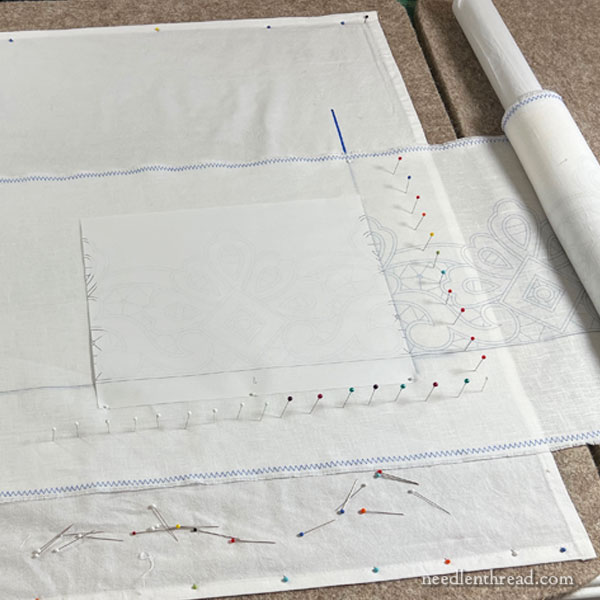
Using a T-square, I also marked a perpendicular line to the horizontal line on the pressing cloth. This became the leading edge of the design that we were transferring.
On each transfer repeat, we traced the very edge of the design onto the back of it, using a light box, so that we could see where each repeat would meet up with the previously transferred repeat. We also traced, with a ruler, the straight edge of the top of the design.
Aligning the pencil line on the fabric with the horizontal line on the pressing cloth, and aligning the edge of the previously transferred repeat design with the perpendicular line of the pressing cloth, we pinned the fabric on two sides, near those lines, so that it wouldn’t shift.
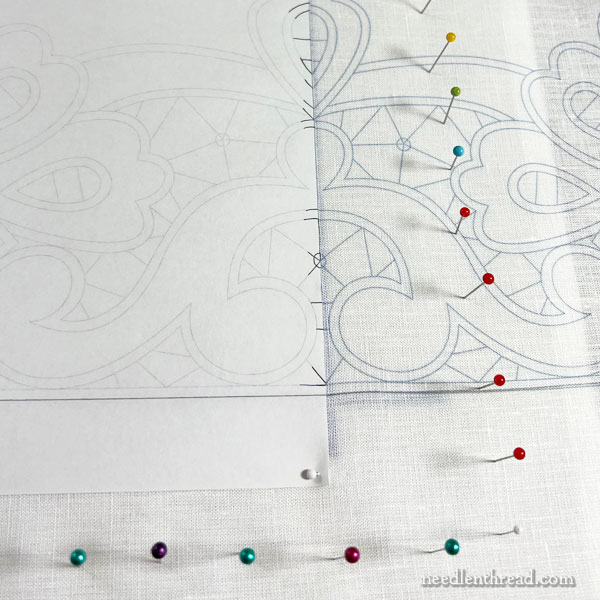
Then, we aligned the transfer with the previously transferred edge of the design on the fabric, making sure that the top line on the transfer was aligned with the pencil line on the linen (which was aligned with the line on the pressing cloth).
We pinned the transfer in place and then applied very hot heat with specific pressure for a precise amount of time.
We repeated this process over 18 feet of linen, pinning and unpinning, lining everything up carefully with each repeat design.
We ended up with about 18 feet of practically perfectly-transferred design, with no gaps, and imprinted right along the pencil line on the linen, which was true to the grain of the fabric.
It was grueling.
But it was Sooooooo Satisfying.
Bravo!
wow……. utter awe and admiration from an OCD type….
you ROCK girl
Curious as to your use of a pencil vs a heat or water removal pen? Aren’t pencil marks difficult to completely remove?
PS- Love your site & posts. I’ve learned so much.
DN
The pencil line will be stitched over. If there’s residue – which isn’t usually the case with a hard lead lightly drawn – it’ll wash out.
Bravo Mary!!! We’ll done! That’s so impressive!
Painful! And BRILLIANT!!
Wow. The engineer in me admires your persistence and many adjustements. What did you do with the linen where the transfer was creeping up?
I salvaged as much as I could (unmarked) and the marked, I will wash and use for demos and such. I cut off some sections to give to the embroiderers to use for test stitching, too.
Oh Mary! I totally feel for how much time this took. Silk screening such a big design started to look better and better! Whew what an ordeal.
So what are you going to do with the practice linen?
I’ll just use it for scrap, demos, etc., here in the studio. I’ll wash it and get as much of the transfer out as possible, but it won’t all come out with one washing. So I’ll just use it as I need to. Not throwing it away, that’s for sure! I did cut off sections of it to give to the embroiderers to use for test stitching, too, which should be helpful for them.
Congratulations on your brilliant solution! ….and whatever you are being paid for this project — it’s not enough!!!
Heh heh. I’m just glad it worked!
Wow, wow, wow. Fantastic work! I’ve made sets of altar cloths for four different churches now and I know how painstaking and all-consuming this work can be….but like you say, SO worth it! Congratulations on the transfer. Looking forward to seeing the continuing progress and (one fine day) the final results! Thank you for bringing us along for the journey!
Thank you for sharing this, Mary! I am in awe of your willingness to share your challenges as well as your triumphs. This must have been so difficult, but you won! You are a rock star.
With much admiration, L
LOL. Not something I’ve ever striven to be! But thank you! It was a bit of a slog, admittedly. Just glad it’s over and it worked!
Congratulations!!! This is quite the undertaking.
Thanks, Sharon! 🙂
Such patience and care and skill. Congratulations
🙂 Thanks!
So how to do you get the pencil line out of the fabric? I am confused?
It’ll be completely covered – it’s underneath the satin stitched top line. It’ll launder out eventually, but it won’t show, so it doesn’t really matter. 🙂
What you have accomplished this far is amazing. I would have “lost it” long before you discovered your 4’ glitch. Your fix to set your straight of grain line is perfect! Best of luck as you progress through your project.
🙂 Thanks!
Were you at least able to wash out the inaccurate markings and save the linen?
We can wash most of it out. I’m definitely saving the linen – I can use it here in the studio for demos and whatnot. And with time and laundering, the transfer lines will fade considerably and altogether eventually.
Congratulations on a job well-done!
🙂 Thanks!
Really interesting, even if I don’t ever expect to face 18 feet of linen!
How do you make the transfer and do you have to make one for each repeat? I know you can get pens/pencils paints which you go over a design with and then transfer to fabric (though I made a horrible mess and gave up), but that would introduce all kinds of inconsistencies. Are you able to print them somehow?
I have a commercial set-up for this. It’s part of my business.
What a fantastic job…after what had to be massive frustration. I hate to ask…did you have to scrap the incorrectly transferred linen, or were you able to work over it with the correct method? Also, kudos to those people who will actually be embroidering this beautiful project.
Thanks, Mary, for taking the time to share with us, even the mistakes…it helps all of us stay encouraged, even with our mistakes.
The scrap fabric became a test piece, and we salvaged as much as we could, for use here in the studio, for demos or what-have-you. I don’t like throwing good fabric away – I can always use it for something. And with a bit of laundering the lines will fade significantly and eventually, completely.
I will never need a method for transferring a small design to 18 feet of linen but it is very fascinating and suspenseful to read about it.
Thank you, Mary!
Just found your site and I love it!
I’d be a bit more worried about graphite getting on those pristine white threads than it remaining on the linen. But if you avoid stitching right through the lines, not so much worry? Especially if using a hard lead and light touch as you said.
I also remember – in quilting world, seeing a few pencil marks *can* be a good sign that the quilt was a special posession, rarely used, and never/rarely laundered.
These will be cleaned and whitened before sewing up. They might even boil them. Some places do. I’m not worried about that line. The top layer of stitching (the satin stitch) will never pass through it.
What do you recommend as the most functional floor standing embroidery frame? Thanking you for your advise,
Janet Shew
Do you mean the stand? Or do you mean the embroidery frame that you would put in a stand? It really depends on the size and scope of your projects. The stand I use most frequently for medium to small projects is the Needlework System 4 with the frame clamp head, and for frames, I use Evertite stretcher bars, hoops, and sometimes certain slate frames with that stand and head. Hope that helps!