


This morning, we’re going to head into the final stretch on creating your own Bee-Jeweled Pincushion – the finish work! This is where we construct the pincushion into something beautiful and serviceable.
Now, this is The Thing about finishing: it is a multi-step process. To make it as clear as I can, I’m including a lot of photos in the process. In order to accommodate the whole process here on the blog, it will be broken into multiple parts, which I’ll publish over the next several articles.
If this is the first time you’ve built a pincushion or something similar and you are hesitant or a little worried about the finishing process, I recommend waiting until all the articles on finishing the pincushion are published before you start finishing your project into a pincushion. There are some steps below that you can do ahead of time, though, to prepare your work.
If you’ve finished embroidery projects into things like pincushions before and you’re confident about what you’re doing, then you can probably guess where I’m going with each step of the process and you can most likely move ahead and finish your pincushion with techniques that you’re already familiar with.
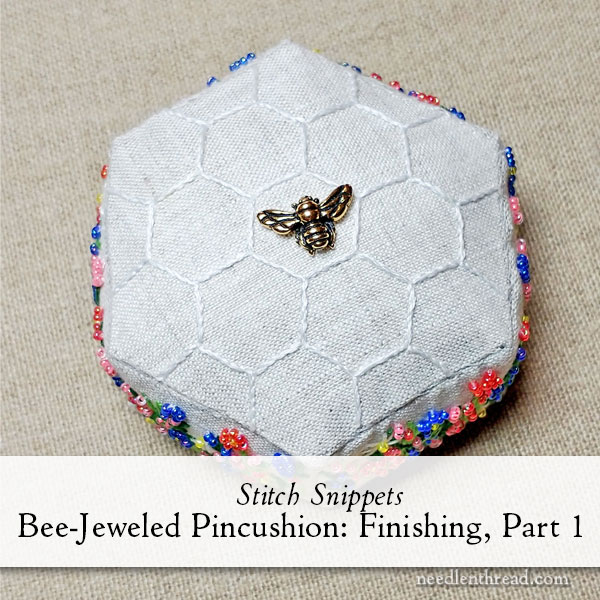
The Back Story
For those just joining in, the Bee-Jeweled Pincushion project is one project in a series of tutorials called Stitch Snippets here on Needle ‘n Thread, where we work through, step-by-step, different embroidery projects and steps for finishing. You can find the index for all the articles in the Bee-Jeweled Pincushion collection here.
The project will remain available in blog format on Needle ‘n Thread during 2022. You can buy a kit for the pincushion in my shop. They are not in stock right now, but I will be restocking a small supply of them. If you want to be on the advanced notice list for a kit, drop me a line!
Members of Needle ‘n Thread over on Patreon can enjoy the Stitch Snippets projects this year with handy, easily printable PDF downloads that are posted there as the projects develop.
Prepare the Embroidered Fabric Ahead of Time
The first step in finishing any embroidery project, once it’s stitched and when necessary (sometimes, it’s not necessary) is to damp stretch and block the work.
Here on Needle ‘n Thread, you can already find instructive articles on damp stretching and blocking embroidery projects:
Damp Stretching & Blocking Embroidery
Damp Stretching & Blocking: Easier on the Hands
With this project, pin it face down (so the back of the work is exposed) when you damp stretch and block it.
Note: When blocking and damp stretching, you remove the project from the hoop or frame, but do not cut out the pieces. Block and damp stretch the entire piece of fabric.
If you worked this project on stretcher bars or a slate frame or something similar, so that you don’t have hoop marks and so that the whole project has been consistently under even tension, you may not need to block it. If, however, you take the work off the frame and you find it is puckered, wrinkled, or a little wonky, you’ll want to damp stretch and block it.
Give the piece time to dry after misting it with water. I usually damp stretch the day before I’m planning on doing the finish work.
Gather Your Supplies
You’re going to need a variety of supplies and tools to finish the pincushion. Some of these are already listed in the supply list, which you will find here, and the rest are toolish things that you probably have on hand.
These are the supplies and tools that you should assemble when you are ready to do the finish work:
- Mat board (explained in the supply list – also part of the kit)
- Interfacings (explained in the supply list – also part of the kit)
- Sewing thread in a natural color to match the ground fabric
- Needles
- Fiber fill
- A chopstick or similar blunt stick for stuffing
- Glue (fabric glue, PVA PH neutral craft glue, fabric glue sticks, or something similar. I used Sobo glue on this.)
- Craft paint brush (as a glue applicator)
- Craft or paper scissors (sharp and strong)
- Fabric scissors or craft scissors sharp enough to cut fabric
- Clips (I use Clover Wonder Clips – they’re great to have on hand for this kind of work! If you don’t have them, clothespins can work.)
- Sewing pins (long, sharp, strong)
- Craft knife (optional, but handy)
- Metal ruler
- Cutting mat (if you’re using the craft knife)
Cut Things Out
You’ll need to cut out several things.
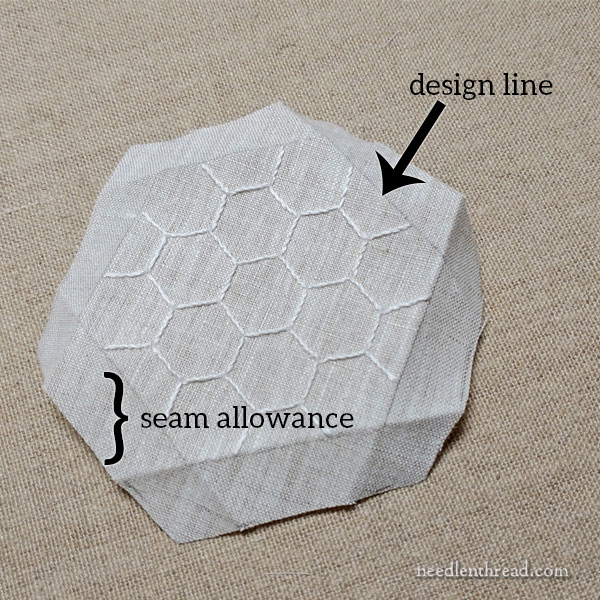
First, you’ll need to cut out your embroidered pieces. The cutting line is about 1/2″ away (maybe slightly less) than the design line to give a finishing allowance (called a seam allowance in sewing), and it should have been transferred onto your project during the set-up of the piece.
Cut each hexagon and the side strip from the fabric, cutting along the cutting line.
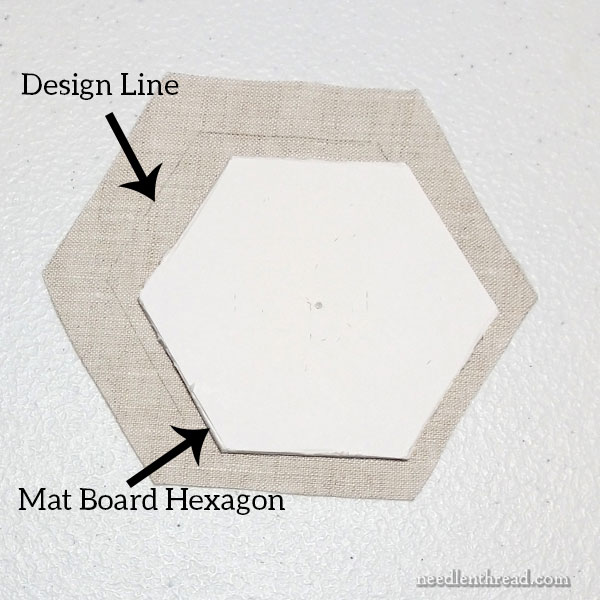
Next, cut the mat board into a 3″ hexagon, using the inside design line on the original pattern as a pattern. So, print a copy of the original pattern (you’ll find it here), and cut out one of the hexagons along the inside solid line. If you cut carefully along the inside of the inside solid line, you’ll have just the right size.
Use this paper hexagon to mark out the cutting line for your hexagon base on the mat board, and then, using a craft knife and a metal ruler (or using your very strong and sharp craft scissors, if you are used to doing that), cut out the hexagon from the mat board.
Cutting with a Craft Knife
When you cut with a craft knife, don’t try to cut all the way through on the first slice. Line up your ruler guide along the design line, and then draw the angled tip of the craft knife lightly across the mat board to score it.
Then, without moving the ruler, draw the knife again along that line, applying just a tiny bit more pressure. You should be in the groove you previously scored. Then draw the knife again and maybe again, each time cutting a little deeper into the board, yet without having to use much pressure on the knife.
Eventually, you’ll cut through. This will result in a smooth cut edge. It sounds like it would take a long time, but these are just light, quick draws of the knife across the board, in the groove made by the previous cuts.
Cut the Interfacings

Cut a hexagon out of the lighter interfacing using the same pattern you used to mark the mat board.
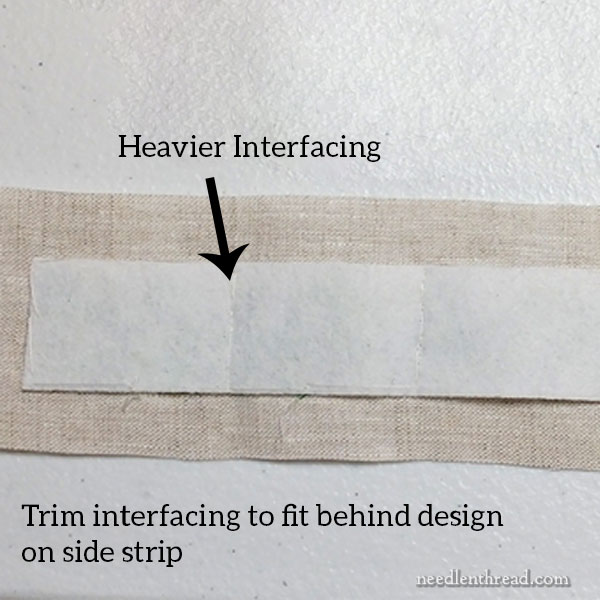
Cut approximately a 1″ x 9″ strip of heavier interfacing. This should be the size of the solid line that marks the perimeter of the design area on the side strip. If you have the kit, this strip is already cut for you, but you may need to trim it. It should fit just inside the design area on the back of the embroidered and beaded side strip.
Prepare the Base
Place the hexagon shaped mat board on your blank hexagon fabric piece, inside the design line. It should fit just inside the design line.
If you used Canson’s bristol board or anything similar that has a logo on the back of the board, you’ll want to face the white part of the board down, onto the fabric, so that the logo is up facing you. This will keep the logo part hidden inside the pincushion when it’s finished, and it won’t be visible through the fabric.
You’ll need your glue (fabric glue stick or paint brush and glue) and your clips for this part.
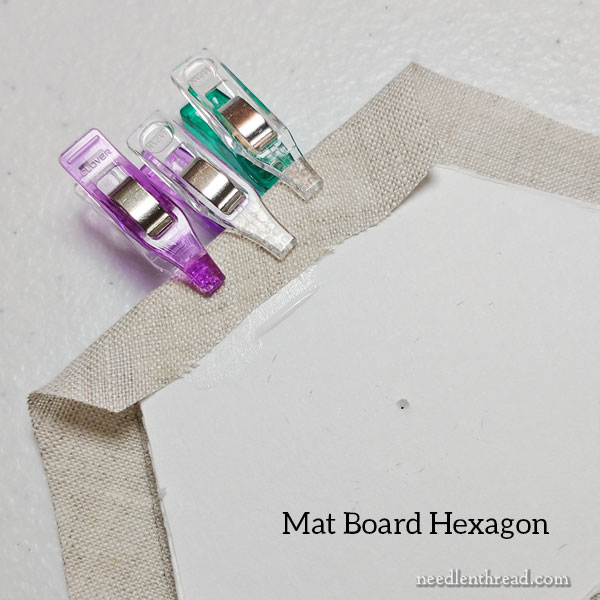
Paint a light line of glue or place a stroke of glue stick along one edge of one side of the mat board. Fold the fabric up over the mat board edge and press onto the glue strip.
Clip that side and move around the hexagon to the next side.
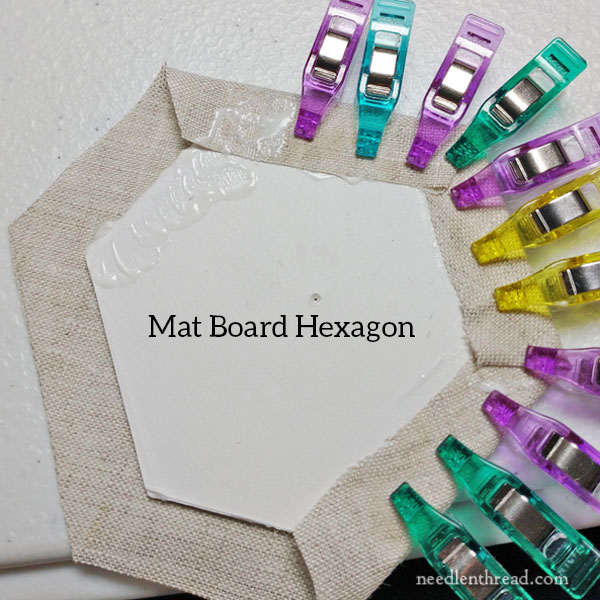
Apply glue lightly to the top of the folded fabric and the next exposed edge, and fold the fabric up over the edge and onto the new glue line, pressing it firmly, especially where it folds over the other edge’s fabric.
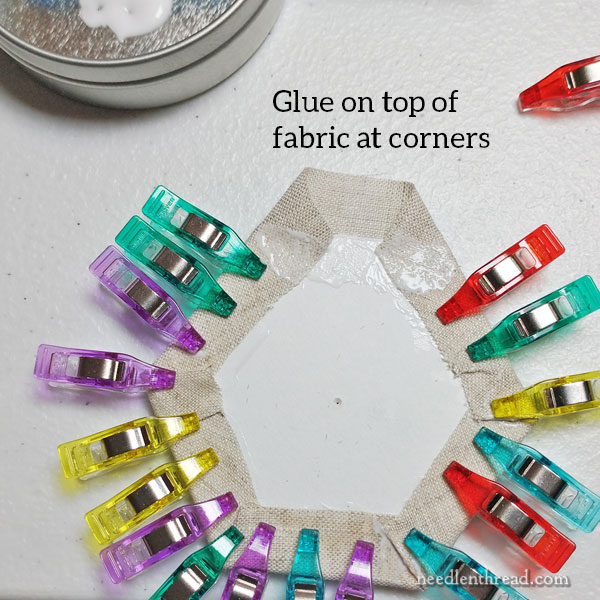
Clip to hold it in place, making sure that you clip over the double layer of fabric at the corner especially.
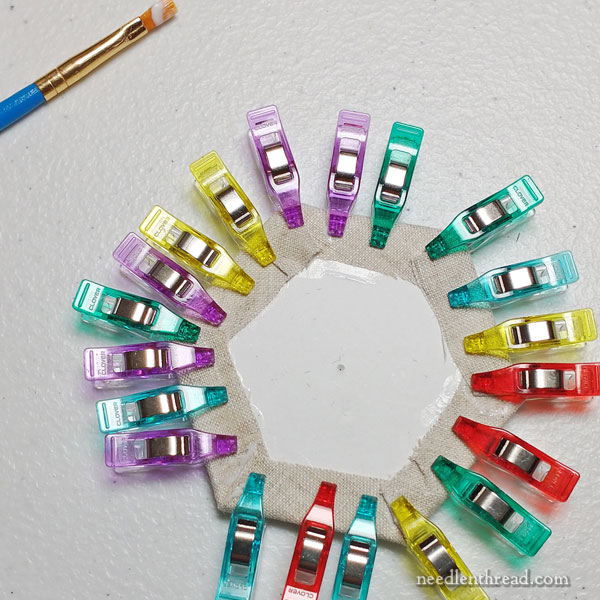
Work all around the base, glueing and clipping each side in place in this manner.
Be careful not to get glue over the edge of the mat board. You just want it on the exposed part of the mat board that you can see – you don’t want it dripping inside the edge between the board and the fabric. You don’t need a lot of glue – just enough to hold the fabric in place when it is dry.

If you are using wet glue and not a fabric glue stick, you’ll need to let the base dry for a while. I usually let it sit for at least an hour if not longer while I go about doing other things.
You need the base dry and ready to go to move on to the next step.
In the next step, we’ll prepare the side strip and top with the interfacings and sew them onto the base.
The Index
Remember, you can find all the articles for this project, with step-by-step instructions, listed in the Bee-Jeweled Project Index here.
Members of the Needle ‘n Thread community on Patreon will have the final PDF soon! It’s undergoing editing today. It’s turning out much longer than I thought it would, on the principle that too much information is better than too little information when it comes to finishing instructions.
Plus, you know me. I tend to go on a bit!
If you have any questions, feel free to ask them in the comment section below!
I’m working on a needlework covered box, and the instructions said to leave 1/4″ seam allowance around the bits. It’s really *not* enough to work with, especially to get the corners to lay nicely. I’m so glad you show leaving more. I think I’d be up the creek without a paddle if I hadn’t zig-zagged around all the pieces! I’m writing notes on the pattern, not that I’ll make it again, but if someone else does it might help them out.
Yes, I think 1/4″ is not quite enough, especially if you are folding over something with any thickness to it!
Where can we get those pointy nosed clips? I have lots of the wide nosed ones, but haven’t seen these!
They’re the minis! You might have to search online for them. I bought them through Amazon initially, because I couldn’t find them locally.
They’re mini Clover clips. If you have a sewing or quilting store handy, you might find them there. If not, they do carry them on Amazon. 🙂
You mention the instructions will be on the blog thru 2022. Does that mean they will be gone after that??? I plan to start this when I can, but so much on my plate right now, that “who knows” when I can get at it, let alone finish it! I have the pattern printed out, but if they won’t remain perhaps I should forget starting it. Thanks Mary. I love the project. Hoping I can create it in time.
They’ll be free on the blog through this year, with all the detail. After this year, they’ll still be here, but the step-by-step detail will likely be moved into PDFs.