


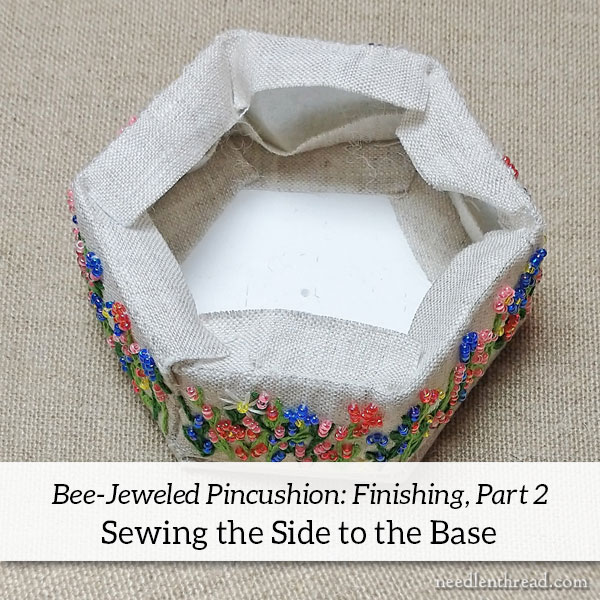
Today, we’re going to continue with the finishing instructions for the Bee-Jeweled Pincushion project, and we’ll just jump right into it!
If you want the backstory, or the previous step in finishing and constructing the pincushion, check out this article, where we started the finishing process by preparing the embroidered fabric, cutting it, and preparing the base of the pincushion.
Today, we’re going to prepare the side strip and sew it to the base.
It is important to read all the way through the instructions, making sure you understand the sequence of steps, before you start. Please read and don’t rely solely on the photos. Some steps are not shown in the photos because they are easily explained (and there’s simply not space for every move), so you have to read the instructions to follow all the steps.
The pincushion side strip has already been cut from the fabric at this point.
Let’s look at how to add the stiff interfacing (if you have the kit, it’s the narrow strip of interfacing) to the back of the embroidered side strip, how to prepare the side to stitch to the base, and how to work the blind ladder stitch to join the side strip to the base.

(You can click on that photo above to get a slightly larger photo.)
First, trim the interfacing strip (which is approximately 1″ x 9″) to fit just within the design line that marks out the embroidered area for the side.
Note: Even if you have the kit, where the interfacing is already cut for you, you may still have to trim it.
If you finger press along the border line for the embroidered area (that you transferred at the beginning of the project), you’ll see easily where the strip of interfacing should fit. You want to be able to fold the seam allowance of the fabric over the interfacing strip. If the interfacing strip is slightly too large, you’ll have to trim it carefully so it fits behind the embroidered area and inside the design line.
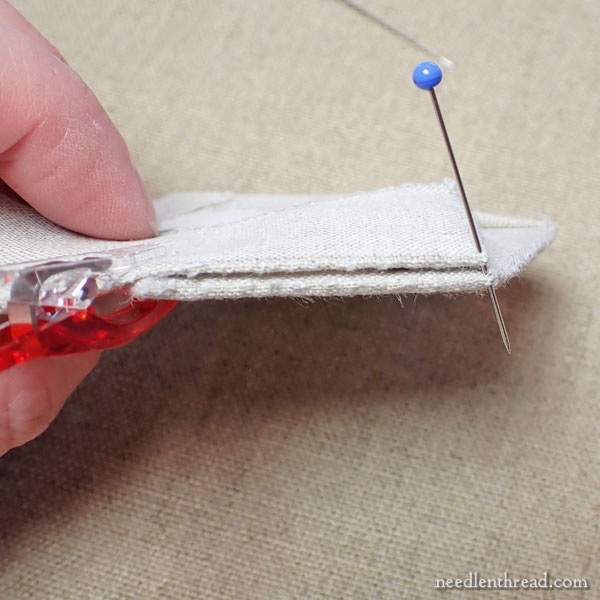
You can pin the interfacing strip in place, as shown in the photo above. Place the pins where you transferred the short lines within the seam allowance. These short lines indicate where each corner of the hexagon is, marking out each side section on the strip.
Using your sewing thread – which should be a natural color that blends with the ground fabric so that it is more or less invisible – tack the interfacing strip onto the back of the embroidered area.
Do this by taking tiny stitches at each fold line that marks the side section, at the top and base of the strip, and on each fold line within the section, so that there’s one or two tiny tacking stitches through the interfacing along each corner line.
You will have tiny stitches on the front of the fabric, along the edge and within the embroidered area, but they will be invisible because your finishing thread matches your ground fabric and the stitches are small.
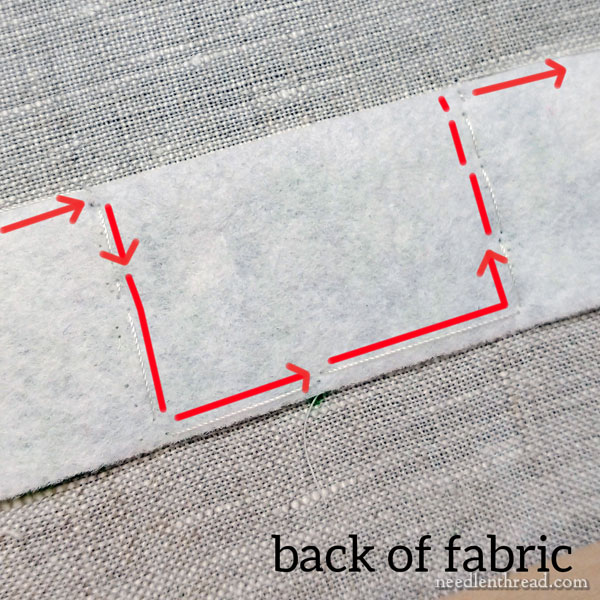
On the back of the piece, where the interfacing is, the stitches will be long, but on the front of the piece, they should be tiny.
In the photo above, you can see the stitching path to follow. The path goes along the top edge with a stitch at each corner fold mark (the stitch passes through the interfacing and the front of the fabric), then follows down one corner line, taking one or two tiny stitches along that line (make sure to turn your work to the front so that you can place these stitches in a discreet place among the embroidered elements), and then the line passes across the base, taking a stitch at each corner, and then up the next fold line.
If you need to mark the interfacing where the corner lines are, you can do that with a pencil. No one will ever see!
The idea is just to tack the interfacing inside, so that it remains in place when the pincushion is constructed and adds a little side stability to the pincushion.
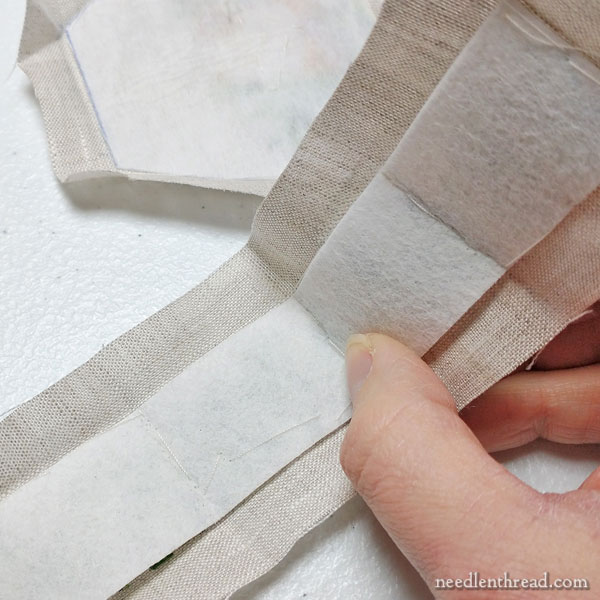
Now, finger press the sides again, pressing the seam allowance over the tacked-in interfacing on all four sides, finger pressing the long sides in first, then the short sides.
Then fold the side strip at each side section, and finger press it firmly into a tight fold.
You want the interfacing and fabric to fold as one, firmly, to establish a corner for each side of the hexagon.
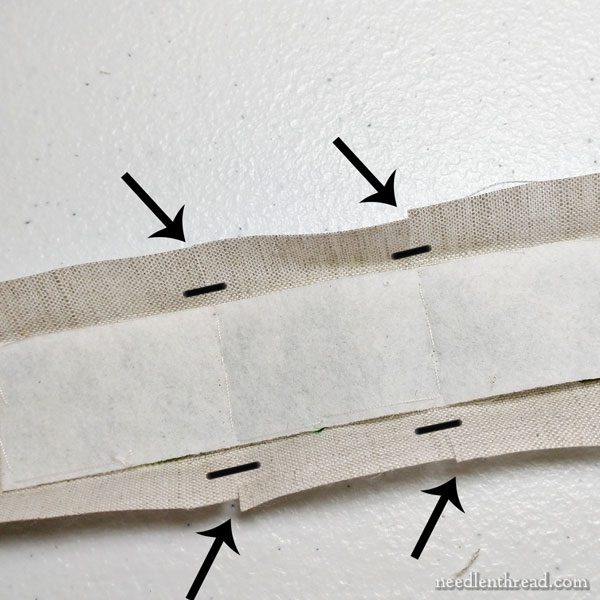
Next, make small snips into the seam allowance at each corner fold, snipping towards the interfacing, to about 1/8″ – 3/16″ away from the interfacing. The black dashes indicate where the cuts into the seam allowance end.
This will help the sides ease as you sew the side strip to the base.
Once these are snipped, finger press the seam allowance, long sides first, over the interfacing on the back. Then finger press the short sides over the long sides and the interfacing.
Pin through the short sides, to hold the folded seam allowances in place.

Here, you have the prepared base and the prepared side strip, with the short sides pinned.
(The instructions at this point do not involve an embroidered side panel. This is the construction of the prototype that hasn’t been embroidered.)
Make sure the glued part of the base of the pincushion is facing upwards towards you, so that the fabric-covered part ends up on the outside bottom of the pincushion.
Pin the lower corner of the right short side of the strip to a corner on the hexagon base. Pass the pin through the corner of the base, slipping it between the fabric and the base. Don’t pierce the board base.
When you sew the pincushion together, you’ll always slip the needle into the fabric between the fabric and the edge of the board base, not through the base.
On the opposite corner (to the left) of this side that you’re working on, clip or pin the side strip to the corner, where the corners are marked (and folded) on the side strip. This will keep the side aligned as you sew it together.
Left Handed?
If you are left handed, you will most likely be more comfortable stitching from left to right around the base, rather than right to left. The stitching instructions are the same – just work in the other direct, pointing your needle from left to right as you sew along the base.
When we work through the decorative edging on the pincushion, I’ll have specific left-handed instructions, because it’s the only area on the pincushion that requires significant consideration to get the stitch configuration correct for both left and right handed stitchers.
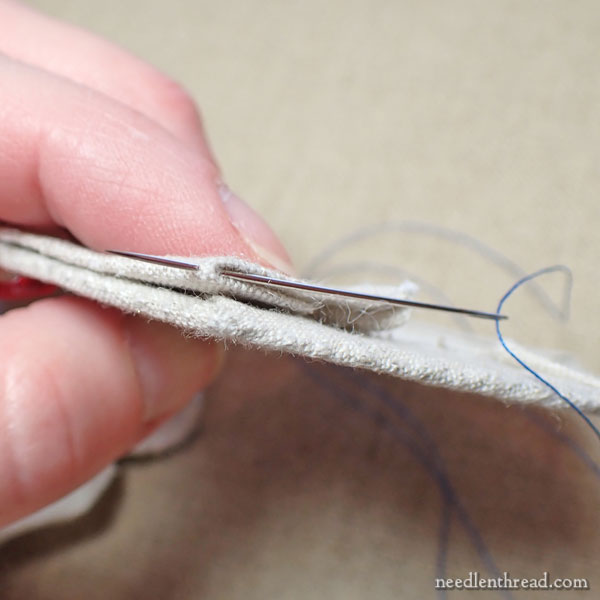
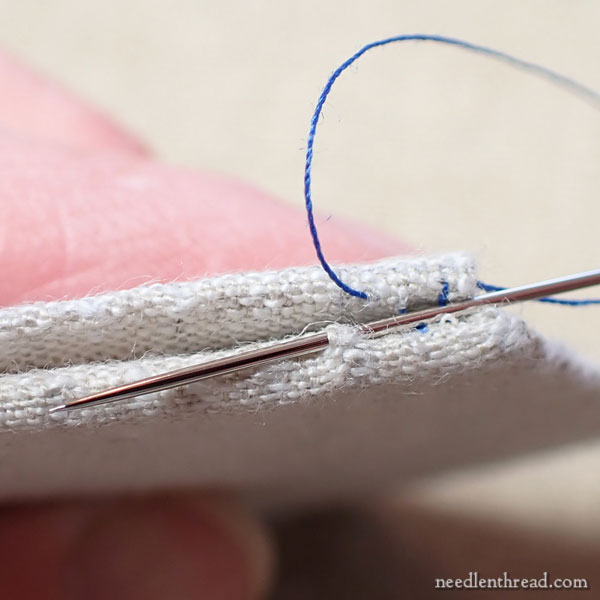
Knot your sewing thread and bring the needle and thread out through the lower corner of the side strip, so that the knot catches inside the seam allowance on the inside of the pincushion.
Move down to the corner of the base and pick up a little bit of fabric on the top outside edge of the base, as shown above.
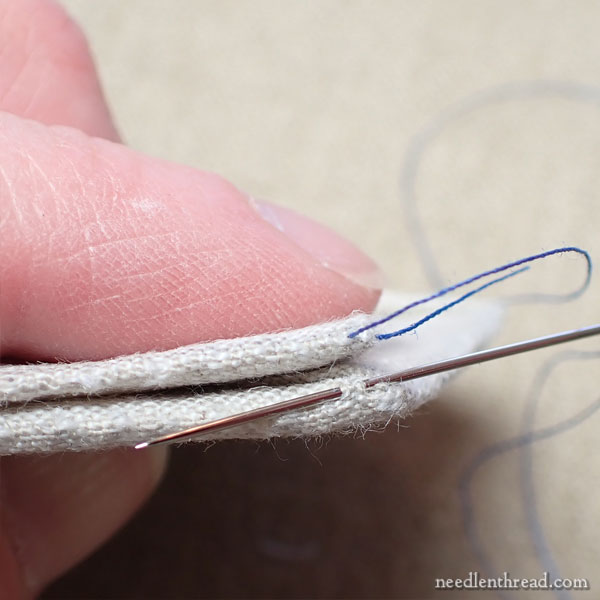
Pull through, and then step up to the lower edge of the side strip, at the base where the seam allowance folds over the interfacing, and take the needle and thread into the fabric, picking up just a little bit, and out again – as shown in the photo above.
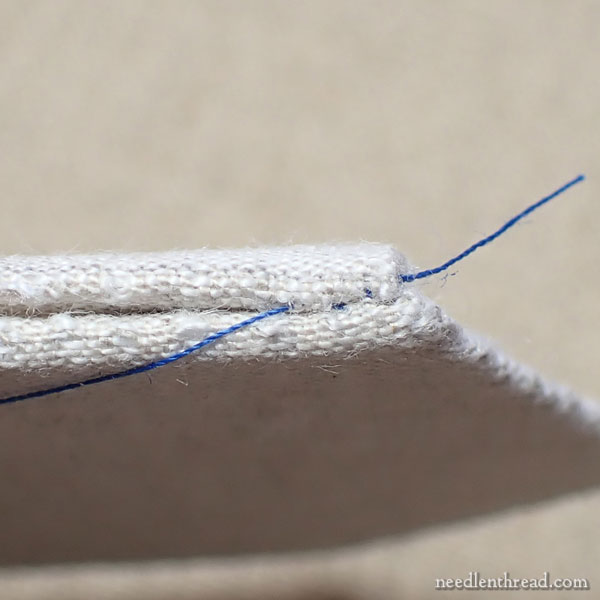
After two stitches, if you pull the thread, the side and the base will come together, and your stitches (which are not blue – I use blue so you can see what I’m doing more easily) will be virtually invisible.
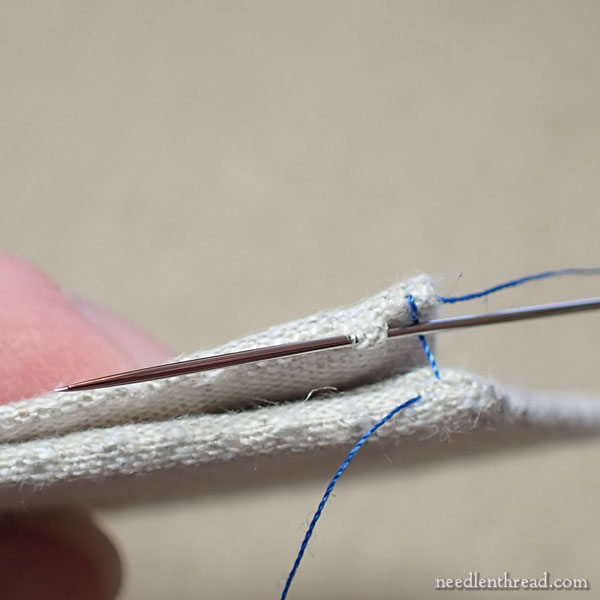
This is the blind ladder stitch, and it is used often in finishing embroidered items. It’s also used in mitering corners and the like. It’s a useful technique to know!
You’re going to continue the blind ladder stitch all the way around the pincushion base, sewing the lower edge of the side strip to the base.
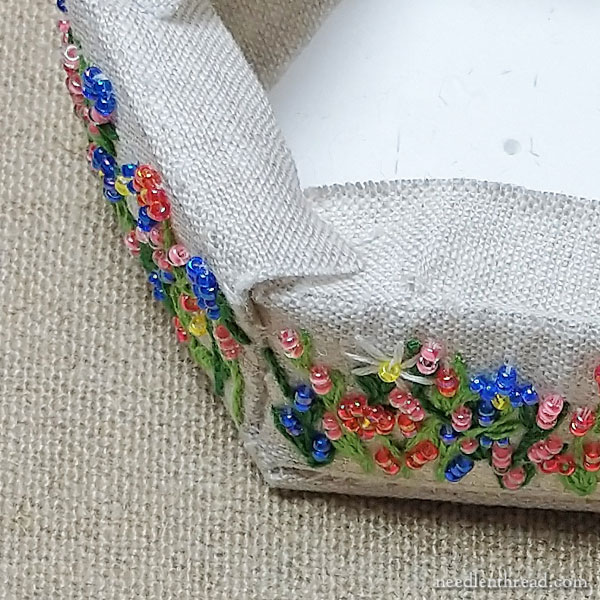
As you come to each corner, adjust and pin or clip the opposite corner of the side you’re working on, to keep things aligned.

As you continue around the base, you’ll see that the sides will stand up from the base using this sewing technique.
And, as you approach your last side, you’ll see that the two short ends of the sides should meet up at the corner where you initially started.
Continue the ladder stitching straight up the short sides, to form the seam that joins the ends of the side strip.
End your sewing thread with a good sturdy knot or two inside the pincushion and snip it off.
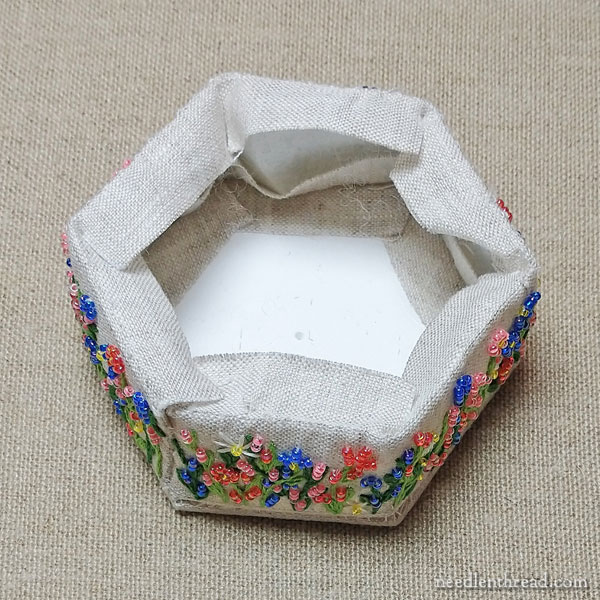
There’s your pincushion base and sides, all sewn together and ready to be topped off in the next installment!
Next up, we will look at preparing and adding the top of the pincushion, stuffing it, and then we’ll add the decorative edge that hides all the seams.
More Information on this Project
If you are looking for all the articles in this series on how to create your own Bee-Jeweled Pincushion, you will find them listed here in the Bee-Jeweled Pincushion Index.
For members of the Needle ‘n Thread Community on Patreon, I’ve already posted all the finishing instructions in one PDF over there, so you can download, print it if you want, and finish up your pincushion this weekend. Yay!
If you are looking for a kit for the Bee-Jeweled Pincushion, they will be in my shop again soon. If you’d like to be on the advanced notice list for a kit, just drop me a line. The kits are an affordable way to find all the supplies in one place, so that you can create your own pincushion.
If you have any comments or questions, please feel free to join in the conversation in the comment section below!
Leave A Comment