


Now that you’ve finished up the cover for Cotton Quartet, it’s time to embellish the gingham lining and prepare both the cover and the lining for construction.
Today, we’re just going to look at the gingham embroidery inside the tool wallet, and then we’ll talk about prepping the two pieces for construction.
If you’re just joining in on Cotton Quartet, you’ll find all the articles for this project listed here in the project index.
If you are a member of the Needle ‘n Thread community on Patreon, you’ve already received these instructions in the PDF that was posted last week. The next PDF will cover all the construction instructions, but at this point, you have already received all these instructions.

For the lining of Cotton Quartet, I selected a yarn-dyed 1/8″ gingham cotton. This particular fabric is from the Carolina Gingham line by Robert Kaufman. The gingham in that line comes in all kinds of colors, but I picked the periwinkle because I love this shade of blue with white and natural.
If you don’t have the kit (which comes with a generous cut of the periwinkle) and you can’t find this particular periwinkle gingham, you can use any color from that line, or any other type of 1/8″ gingham. The 1/4″ gingham is simply too big, scale-wise, so definitely stick with the 1/8″. Pink, greens, other blues, violet – they would all work well for the lining, too.
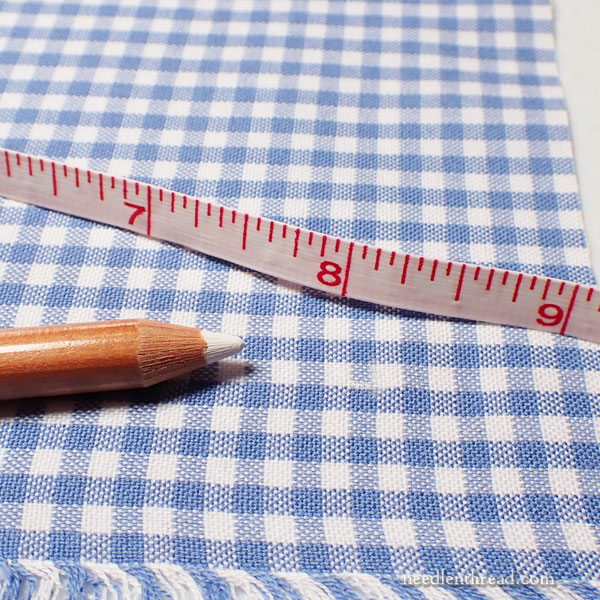
First thing to do is measure out the 4.5″ x 9″ perimeter of the lining. If you can’t get it right on the square of the gingham, you can move your marking line in one square or partial square of the gingham, so that the outline is just slightly less than 4.5″ x 9″ but follows the straight edges of the gingham.
I used a white chalk pencil at this point to mark the outline of the perimeter of the lining, but at one point, I switched to a blue chalk pencil because I could see it better. Whatever you use to mark, make it very subtle. You might just mark outside the perimeter, so that you can see where it is.
The line that you mark here is not the cutting line! It is just some marks so that you know where the edge of the finished lining is going to be. You’ll need an extra 1/2″ – 3/4″ beyond that line for your seam allowance when it’s time to construct.
Measure in 1/2″ from a short edge inside the perimeter area of the gingham lining.
The embellished area of the lining goes behind the “flap” area of the cover, so once you embellish the gingham, remember that this goes behind the “flap” side, or the shorter 2″ section of the cover.
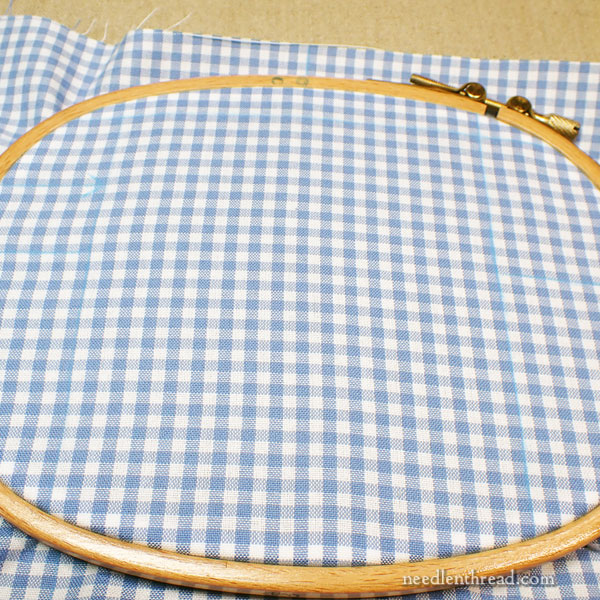
Use a hoop or frame to work the gingham embroidery. I used the square-round hoop because it fit well, so if you have that hoop, that’s a good one for this. You can use a round hoop – the fabric will fit in a 6″ or 7″ hoop, or on the same frame that you used for the cover. Make sure that the 4.5″ x 5/8″ band fits within the hoop area.
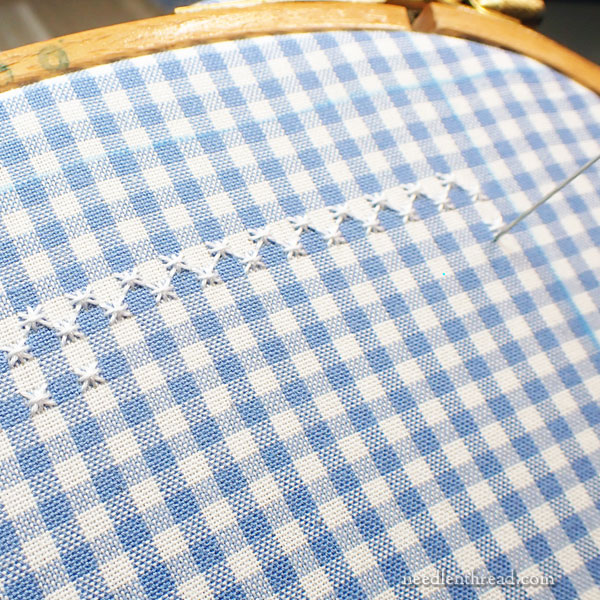
Find the row with all light blue checks (or whatever color your gingham is) closest to your half inch measurement into the lining perimeter.
This is where you’ll begin the gingham embroidery. It’s the same method used for the previous band “M” on the sampler, but the layout is slightly different, since there are mirrored double rows on each side of the laced squares.
You’ll use coton a broder for the double cross stitches and perle #8 for the laced squares.
Here’s a diagram that shows the layout on the gingham:
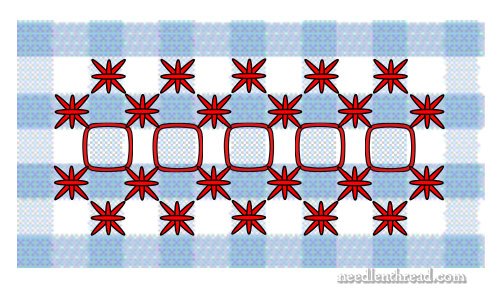
Notice that all the gingham embroidery is done over the lightest squares in the gingham pattern.
After finishing the top two rows, skip a row and start the bottom two rows directly opposite (mirroring) the top two rows.
Remember, make sure the topmost stitch in your double cross stitches is always in the same direction on all your stitches! That’s the one tip you don’t want to forget, to achieve a consistent result on this type of embroidery.
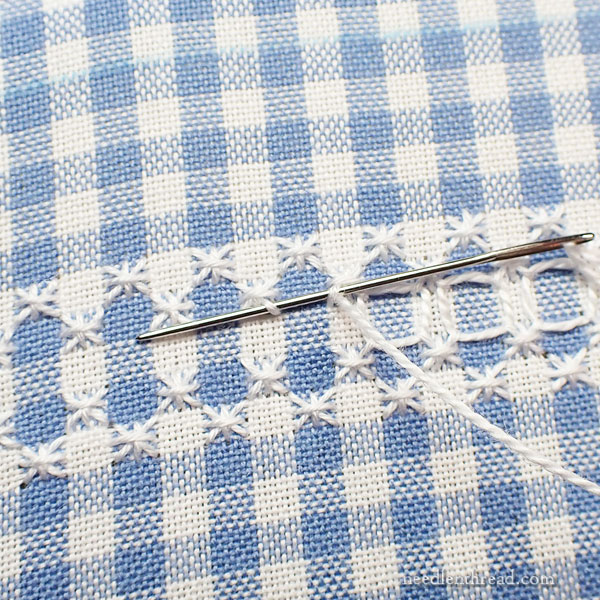
Once your double cross stitch rows are complete, lace the squares using perle cotton #8.
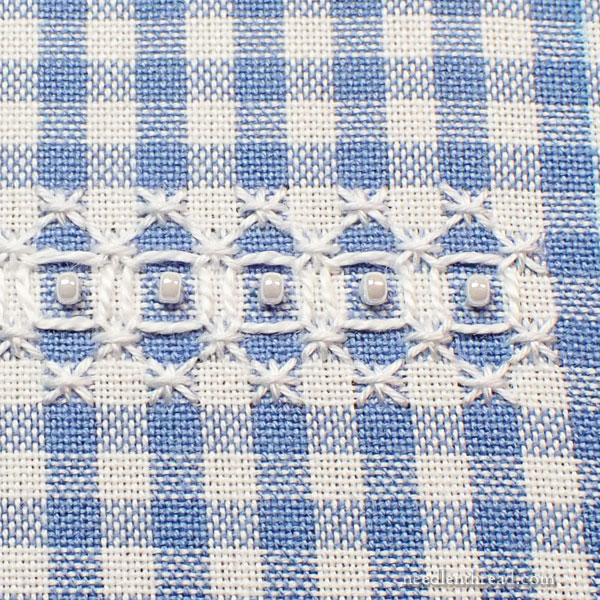
Finally, use the beading thread to sew beads upright inside each laced square.

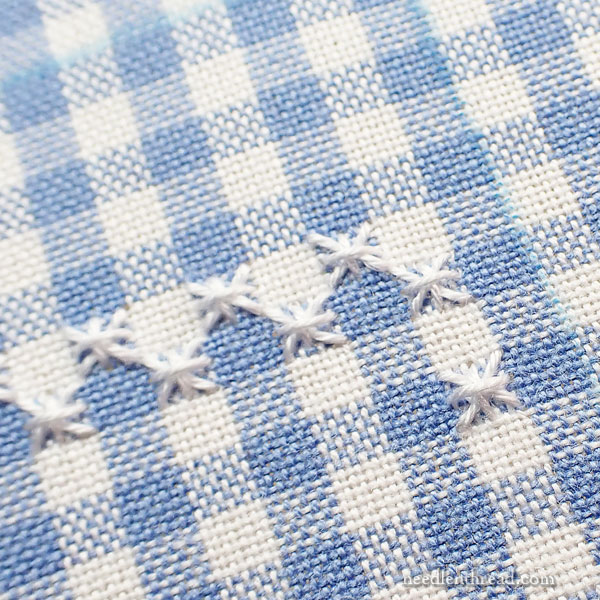
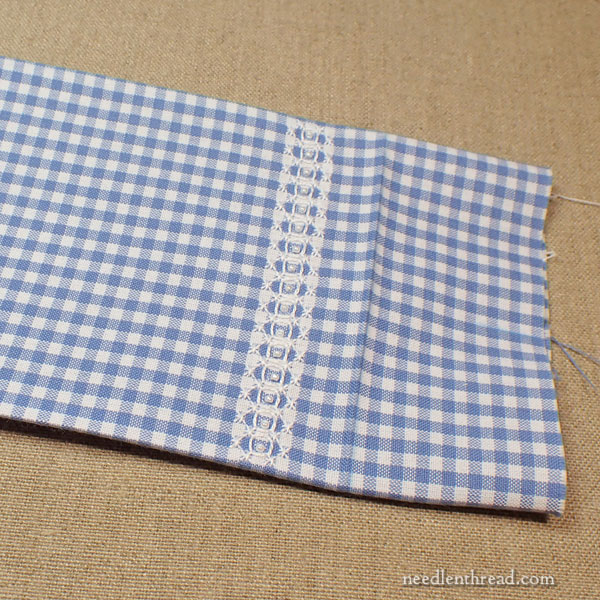
Here’s the finished strip of lacy gingham embroidery!
Now you’re ready to prepare both fabrics for the construction process.
Damp Stretch and Block
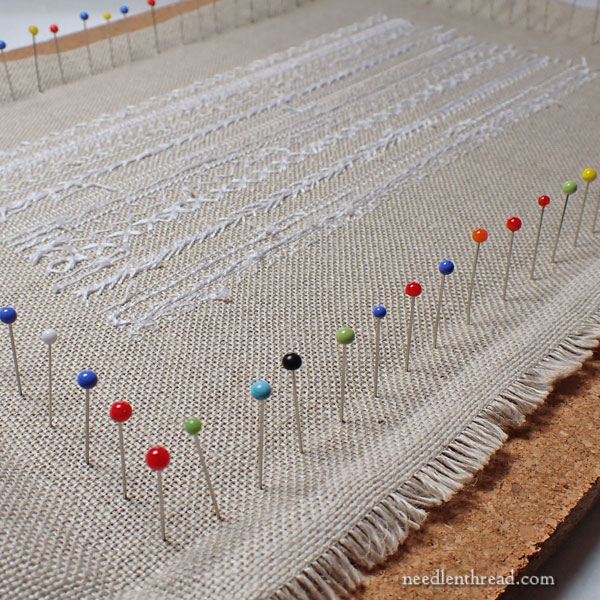
After removing your sampler from your frame and removing the gingham from the hoop, you should damp stretch and block both pieces of needlework.
If you are not familiar with the process of damp stretching and blocking needlework, you’ll find instructions in these two articles here on Needle ‘n Thread:
Damp Stretching & Blocking Needlework
I exclusively use regular sewing pins to damp stretch and block needlework now, as they are just easier to handle. I have dedicated cork boards for this process. If you don’t have a cork board, you can use even a thick ironing board cover that’s firmly fixed on your ironing board. Just make sure it’s clean.
Don’t skip the damp stretch & blocking step! It’s much more accurate than ironing, and you don’t have to worry about beads and so forth interring with ironing. It’s definitely worth the trouble!
Once your pieces are damp stretched and blocked, you can iron or finger press the edges at the perimeter of your design lines, to see how things are going to come together, size-wise. You might have to make some small adjustments on the gingham – you want it to fit just inside the perimeter edge of the cover, without sticking out beyond it.
I did my best to iron along the gingham lines, to keep the inside lining nice and straight. This is important for a clean finish on the inside.
Looking for More? And What’s Coming Up?
The index for this project, with all the articles pertaining to it laid out in chronological order, is available here.
We are slowly preparing Cotton Quartet kits, and will notify the advanced notice list first when they are ready. Then, any leftovers will be available in my shop here.
Speaking of the shop, I do have a limited number of square-round hoops remaining. And we have a small batch of linen sampler packs in natural available now as well.
Coming up, I’ll be sharing some little tidbits on current projects and plans. Some very exciting studio news is in development, so if that works out, we’ll have some Big News to share soon!
I’m still plugging away on goldwork testing – there will be more of that coming up!
And we have received new shipments of Giuliana Buonpadre’s Reticello books – I have seven of her books currently in stock, if you are looking for them! When things calm down again (oh please, let them!), I hope to get back to playing with my sampler.
Nothing is boring here in the Studio, that’s for sure!
Hope your week’s going well!
Is this embroidery what we also called Hen Scratching? We used to use it to decorate the bottom of aprons and casual table linens. I think it was my sister’s first embroidery project in Home Ec. I started embroidery by working designs that were printed on pillowcases we used that my mother purchased at the Woolworth’s 5 and 10. I still have one of mine. Although the pillow case is not longer white, the design is still colorful. I still use dresser scarves and table covers I find at antique malls. I love the beautiful of any handwork.
Dear Mary
I do like gingham and I really like the stitches you have chosen for the gingham project it looks lovely. It’s great that you give such detailed instructions for the project. I can’t wait to hear the exciting studio big news. Thanks you for sharing with us the detailed tips and techniques on the cotton quartet project.
Regards Anita Simmance
I still remember when I started to learn how to do an embroidery at elementary school, this was the type of embroidery we used to do at school, the teacher was also in charge to teach the students how to do an embroidery project.