One of the techniques we used on the goldwork altar cover we recently finished was coating the back of the embroidery with adhesive or paste.
When I mentioned this briefly in the finish article on the project, it generated a lot of discussion and questions via email. Several people asked if I would revisit the topic and explain how we did this step.
So, today, briefly – because it’s a very simple, uncomplicated process – I’ll show you what we did.

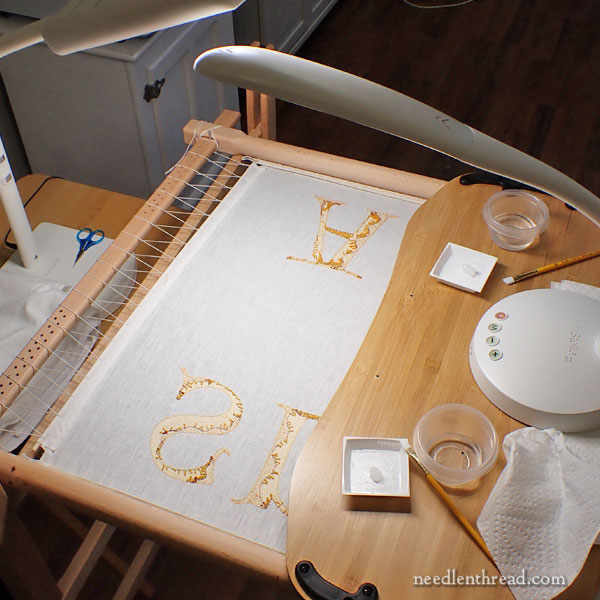
Once all the goldwork lettering was finished for the altar cover, we flipped the massive slate frame that the lettering was set up on, so that we could finish off any threads on the back of the work, trim up anything that needed to be trimmed, and then paste the back of each letter.
We set up a workstation so that we were working across from each other, and we worked methodically over the letters. Anna and I each had five letters on our own side of the frame, so we could pretty much work right in sync with each other, shifting the table that we used to hold supplies and an extra light as we needed to.

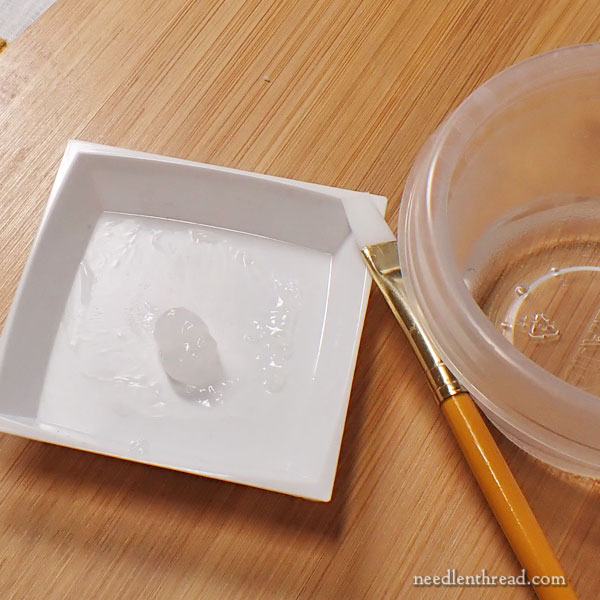
The rice paste that we used comes prepared in a tube. It’s a bright green tube with a yellow lid. It’s called “Yamato Nori Rice Sticking Paste.” You’ll find it in different size containers, but we only ever use a tiny bit when we use it, so the 55 gram tube I have has lasted a while. Folks have asked if it expires, if it’s usable if you’ve had it more than a year, and so forth. I’ve had this particular tube for about four years and it was fine, but it had not been opened before this application. I don’t know how it would stand up once it’s opened.
Rice adhesive can be diluted somewhat with water, so we used water (very sparingly) to loosen the paste up a little bit. To do this, I dipped the tip of the brush in water to pick up just a little bit, and then I worked the brush into the paste, loosening it to the consistency I wanted, to make it smoothly brushable without its being too gloppy.
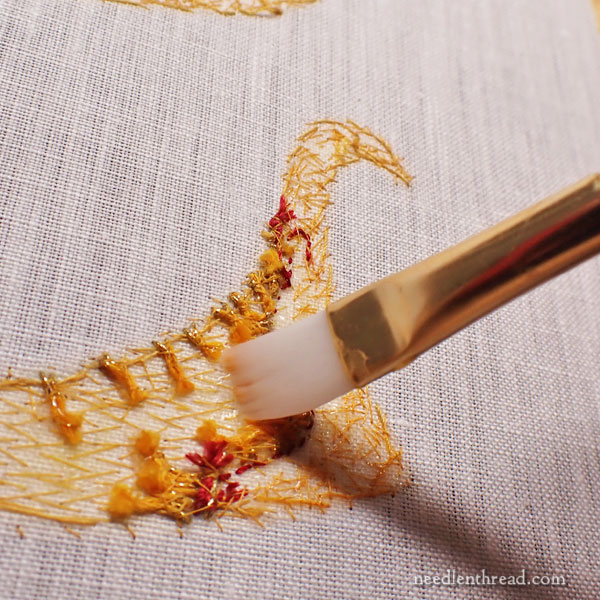
It’s important that the paste doesn’t get too wet – you don’t want it soaking through the fabric. But you do want to be able to work it into all the little valleys around the bundles of thread ends on the back of the work.

It goes on in a kind of viscous-slimy way. I generally will put it on somewhat thick, and then run over it with the brush to remove excess.
In the areas where there are little bundles of thread ends, I kind of work the brush into it ever so gently, just to make sure each area is pasted.

The adhesive does dry fairly quickly, so sometimes, it can be difficult to see whether or not you pasted in this place or that. It’s a good idea, then, to work methodically in a specific direction around the letter. If you haphazardly approach different sections of the letter, it’s would be easy to miss an area.
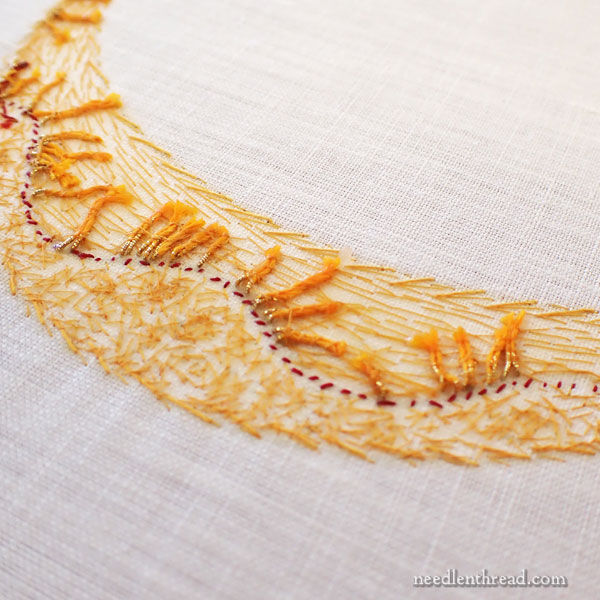
We pasted out to the edge of all the stitching and just a hair beyond – about 1/8″ beyond.
When we were finished pasting the backs of all the letters, we left the work overnight to dry thoroughly before removing cutting the linen away from the slate frame.
I followed the same process when the medallion was finished.
And that’s how we pasted the back of the goldwork!
The pasting does a couple things: it secures threads, it adds a little bit of stiffness (though it doesn’t make it board-stiff like some adhesives would), and it also acts as a kind of “fray check” when cutting out the letters (or “slips” – the pieces that will be appliquéd to other fabric)
In Defense of Paste
Remember that this is not meant to be a museum piece. It is meant to be used, until its life is over. Eventually, the gold threads will tarnish and the piece will become weary-looking and it will need an overhaul or a replacement. It may even become damaged – like any textile that’s used rather than displayed as art behind museum glass. So, it wasn’t created to be housed like a museum piece, only to be occasionally viewed in some sterile, controlled environment.
If you disagree with using rice paste or similar on the back of embroidery, if you have dealt with it in the repair or conservation of pieces that are now housed in museums or used for display and you’ve have wished that people had never used paste on the back of embroidery because it makes conservation that much more difficult, please remember that this piece is not museum-destined. Most textiles that we now find in museums weren’t created with museums in mind. They were created to be used.
This piece will serve its purpose for as long as it can – for as long as it holds up and looks beautiful – and then it will be replaced. Think of it as drapes in your house. Eventually, they become worn, they become dull, the color goes out of fashion, they get damaged, whatever the case is. What happens to them? You replace them, because they served their purpose. And they’re either recycled into some other use (like Scarlet’s drapes in Gone with the Wind!) or they’re disposed of. Granted, most of our household curtains don’t have hand-embroidered goldwork on them – but the analogy should help explain how these things work!
To create the altar cover, we use the methods and materials that are available, that help make the components do what we need them to do. And this type of paste is just one of those components that helps make a beautiful and useful textile.
Just In!
As we’re catching up here at Needle ‘n Thread, our shop is being replenished slowly. We’ve got hoops restocked; all the Tulip needles are restocked; the holiday metallic thread sets are replenished, and I’ve added gold and silver metallic thread sets as well.
We’ve got the reticello books and kits (and some new ones) coming in shortly from Italy – keep an eye out if you’re waiting for any of those!
All Elisabetta Sforza’s books are in stock now. And we’ve got pretty much all the Inspirations books available, too.
We are working on more Little Blooms kits as we speak and should have those ready for you next week. And we’ve got floche coming out of our ears. The floche packs will be available again soon, as well as a few more color packs.
Once we finish restocking kits and thread packs, we’ll be restocking all the ready-to-stitch goods, and adding a few more to the line-up.
So everything is trickling in! Feel free to stop by the shop and see if there’s anything available that you’ve been waiting for —- or that you’ve discovered you really, really need!
Have a great weekend!


Thanks for the description.
While I apparently missed the earlier discussion of pasting on the back of embroidery, I’m going to come down hard in favor of making things that are fit for their purpose and then using them. Museums are fine things, but all of life shouldn’t be a museum and we deserve to take pleasure in the use of beautiful things.
Here, here! I agree!
I agree with the general sentiment here….BUT!…..it would not surprise me one bit if Mary and Anna’s beautiful piece ended up in a museum one day, all of its usefulness notwithstanding!
Ohh thank you for writing this post! I’m working on my my first ever gold work and was wondering about how to use the paste that’s in the kit. It will be good bit before I get there, but at least I know now to use sparingly.
As to using paste, new products, or nothing at all, I’ll leave it at “to each their own”. However if someone thinks today’s modern materials like PVA or iron-on interfacing are the best way to go, consider that the paste has been used for centuries, and it is reversible, or at least repairable. It has a long and well tracked history something we won’t be able to say about the new products for another century or two.
Thanks for this information! It is very helpful, as I am about to do several goldwork appliques in the next few weeks for a set of green vestments and paraments for my church.
I love this large stitching frame ! Could you please tell me where to get one or the plans to build me one !!
Thank you , Joyce
I ordered mine from http://www.ecclesiasticalsewing.com