


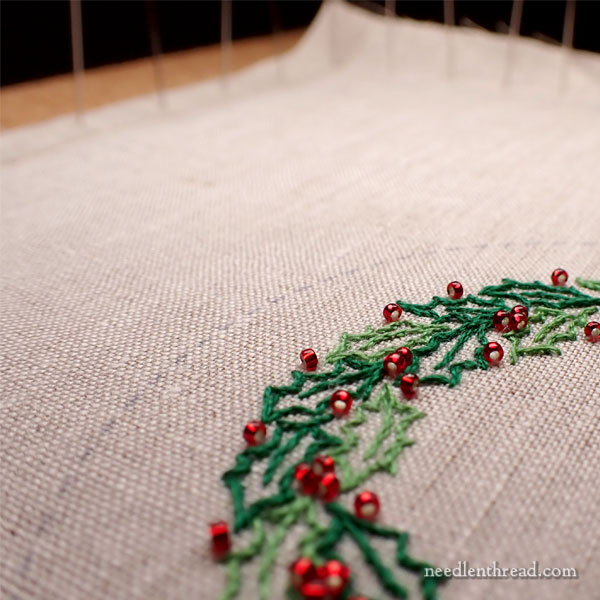
As we finish up all our sample embroidery projects for the next Stitch Snippet – and for a new Christmas ornament PDF that we’ll be releasing next month (oh, and for a kit!) – it occurred to me that this is an ideal time to reiterate one of the most important steps that you don’t want to skip when you’re finishing an embroidery project.
It is by far the most satisfying step of the finishing process. It’s easy, too, so there’s no reason to skip it, as long as you’ve allowed yourself just a little bit of time for its magic to happen.
The step is damp stretching, and if the concept is new to you, then here’s the how and the why you should do it.
Damp stretching is the final step to take with any embroidery project that is going to be finished into something or framed. There are some (very few) exceptions when you might not damp stretch a project, but for the most part, this step is the key to a longer-lasting professional and successful finish.
Today, with hoop art so prevalent in the embroidery world, many stitchers have not heard of damp stretching. They don’t know why they should damp stretch it, even if they are finishing their work in the hoop it was stitched in.
Damp stretching is a process of pinning your work flat, misting it with water, and letting it dry before finishing it in its final form. I’ve already written tutorials on how to do it here on Needle ‘n Thread. Below, I’ve linked to two tutorials that explain the process. The second one is the method I use exclusively, using sewing pins and 1/2″ cork board tiles.
Damp Stretching & Blocking Embroidery
Damp Stretching Tip: Easier on the Hands
In the second article, the sewing pins and the thick cork tiles make damp stretching a breeze.
We’ve worked about 18 embroidered samples in the last few weeks here in the studio, and after each one, we automatically grab a cork tile and the box of pins. It takes maybe three minutes to pin and mist the piece – three well-spent minutes! The results are always worth it.
We stretch the piece slightly from side to side and top to bottom while pinning opposite sides, mist it with water, and then wait about an hour.
When we return to it, we find a beautifully smooth and flat piece of embroidery, ready to finish however we want to – whether we’re going to frame it, sew it on something, or make it into something.
All hoop marks are gone. The fabric looks taut and smooth, even when unpinned. It’s just magical!
Why You Should Damp Stretch
There are several reasons why you should damp stretch your embroidery before you move to the final finishing step:
1. It removes any hoop creases or any creases from holding the fabric in hand.
2. The mist of water causes the fabric fibers to relax and then stretch as they dry. This final stretching helps keep the fabric smooth and taut later on, after it’s been finished in a frame or made into something. There’s nothing worse than seeing your masterpiece sag in its frame down the road!
3. The thread fibers also have a chance to relax. If they have been slightly crushed in a hoop, they re-plump. The embroidery generally looks better after damp stretching.
4. Damp stretching makes precise finishing much easier. It gives a certain “body” or “stiffness” to the fabric so that you can finger press, fold, cut, measure, etc., with greater precision.
So that’s the tip for today!
I hope that you take up the practice of damp stretching your embroidery projects before finishing them. It’s an easy and relatively quick process that helps your embroidery look better, longer. It’s super-satisfying to see the results. And it makes precise finishing a whole lot easier.

Mary, I’m so looking forward to when these projects will be revealed. I’ve been waiting rather impatiently for every new blog post, hoping that you’ll share the complete project(s). The wait continues but the best things are worth waiting for. Well, at least that’s what I’ve been told. God bless.
Hi Mary,
I agree with you about damp stretching but wonder what you do when you are dealing with specialty threads or hand dyed threads? Since the colors seem to run when damp, how do you control that?
I pin the embroidery face down and lightly mist the fabric. The water is cold, and the mist is so light that it doesn’t build up “wetness” that permeates the threads usually (unless you go overboard with the spritzer!). Normally, in that kind of situation, the color isn’t going to run. With such a light misting and cold water, you really shouldn’t have a problem with color running, even on hand-dyed threads. But always test first! (and it does help to use a “mister” type spray bottle – more of an atomizer – than something that sprays out heavy amounts of water).
Sure, but WHAT is that Christmassy project??
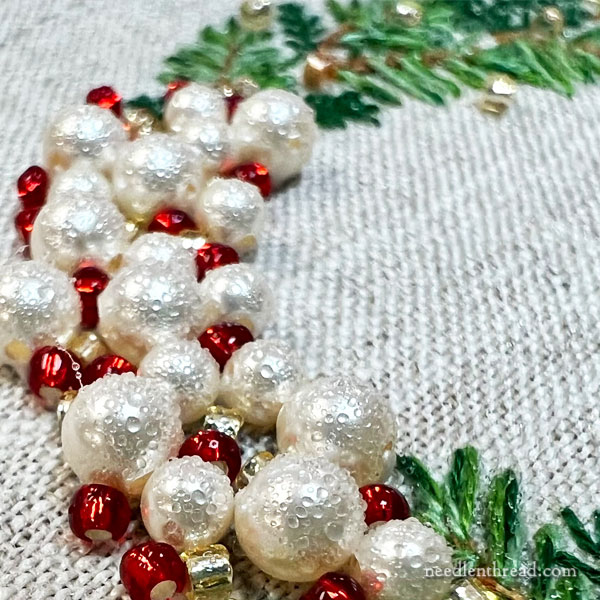
My sister loves beaded projects, soooo….
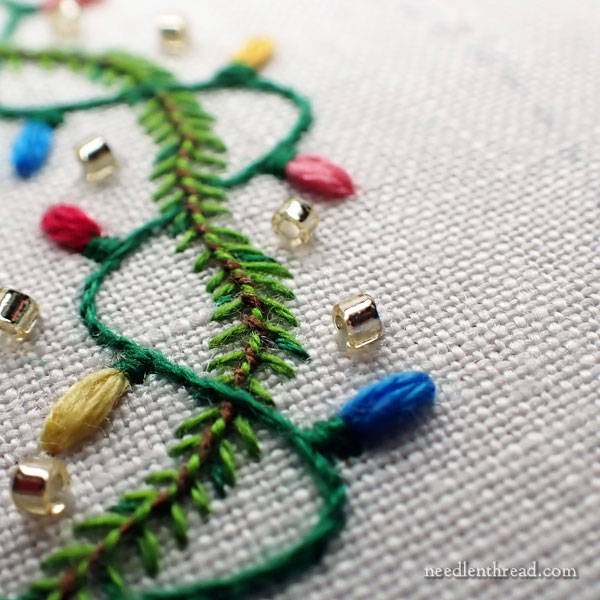
Mary, may I ask what stitch you used for the Christmas bulbs? Is that a granito? Thanks so much, beautiful greenery and beads as usual.
Yes it is! 🙂
Thank you for this wonderful tip.
Would you damp stretch a stumpwork or goldwork piece?
Mary, do you also damp-stretch embroideries that use silk threads or are done on a silk background? I’ve steamed (both with a steamer on a really big piece, and with the ‘silk’ setting on the iron & a press cloth) silk but maybe there’s an easier way?
Kathy
Years and years ago I made a stretching board with red and white checkered contact paper. Each red and white square was perfectly squared. I think it was about 1/2 inch squares. The reason I don’t know the exact size is that I loaned it to someone and never got it back. I’m not sure if contact paper comes in the red and white checkered anymore, but it is worth a try to find it. I did the damp stretching back then and it worked perfectly every time.