


On Friday, I shared with you this exploration in wool thread, using DMC’s new Eco Vita line of crewel-weight needlework wool.
I had planned to finish the piece that very day – after all, wool stitches up Fast – but as luck (and Time) would have it, I never did get to my coveted afternoon stitching session. And I didn’t have one minute of stitching time over the weekend, either. What is this world coming to, I ask you?!?
But Monday came around, and lo! I snatched time in the afternoon to finish the project up.
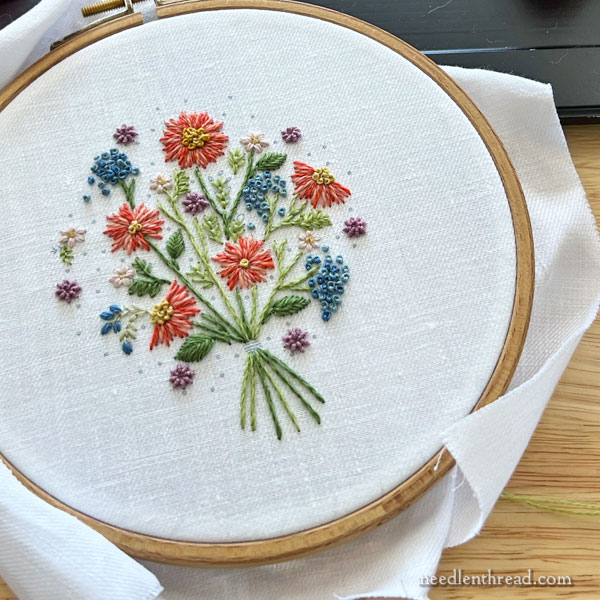
It wasn’t long before the only remaining stitches to go into the piece were the small French knots scattered all around.
I set to it, and before I knew it, the project was ready for damp stretching and all was well-ish with the world.
I say well-ish, because two things happened as I finished up:
1. I looked at my notes and found too many little things that I needed to change; and
2. I blotched something on the linen.
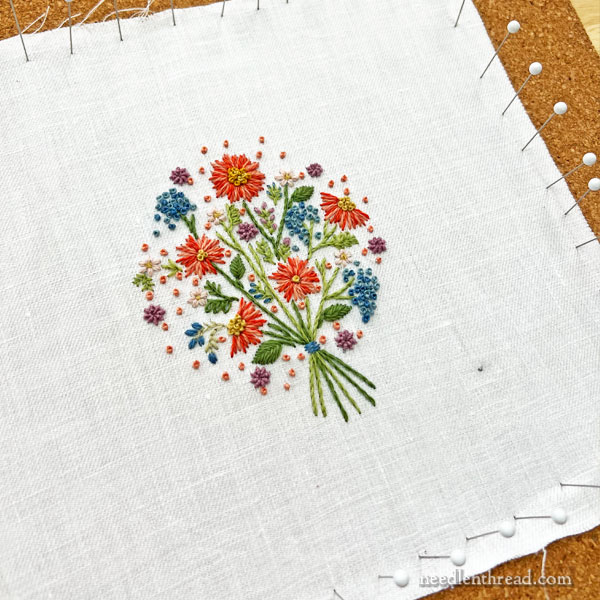
While overall I’m not disappointed in the piece – it was, after all, just a quick doodle to test the wool thread – I wasn’t 100% satisfied with the outcome, either. The design has too many areas where the stitching seemed cramped. Some of the elements were just too small for wool. And overall, I thought the design looked off-balance.
It’s true that not every design in the world need be symmetrical – wouldn’t that be boring if this were the case? – but a design should still be balanced. It shouldn’t look wonky-off-to-the-side. And to me, the finished design looked just a wee bit wonky-off-to-the-side.
Additionally, there’s The Black Spot.
If you’ve ever been a pirate, you already know that The Black Spot is a Bad Thing.
In this case, The Black Spot is the residue of some kind of greasy filings that came off a screw head on my old embroidery stand. Normally, I think to wipe that kind of stuff off before I use my old frame clamp, but I missed it, and hey presto! I got The Black Spot.
Eventually, I’ll attempt cleaning that off.
But in the meantime, it doesn’t completely matter on that test piece.
Why not?
Because I’m doing it again!
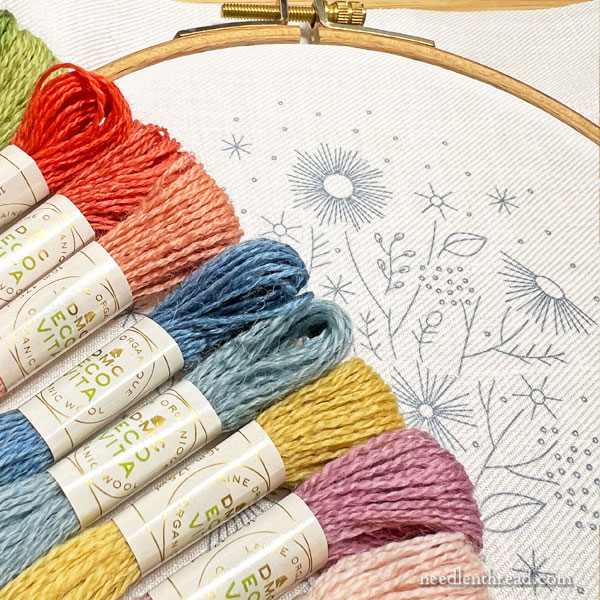
Accompanied by my notes and by the original design, I set about to make adjustments in the embroidery pattern, until I liked it better.
First, I enlarged the design overall to give the wool a little more room to work. Instead of the design being only 4″ high at its highest point, it is now 4.75″.
I also enlarged some of the elements within the design, independent of the rest of the design. They look a little better enlarged. They make more sense.
Then, I moved some elements around to bring a little more balance to the design overall.
Finally, I reduced the original number of colors. Instead of using colors that I gathered in an impromptu manner on the chance that they might look good on the project, I made a very meticulous and exacting evaluation of all the colors in order to achieve a unified palette that was simple but effective, without being superfluous.
Why did I do all this on a test piece?
Well, it occurs to me (and many of you have made it known to me) that some of you might want to stitch this piece, too. And if I am going to send it out into the Big Bad World, I have to be satisfied with the whole structure of the design and with all its requisite parts. It needed adjustments.
Now I’m stitching the second version of the project. It is going quite fast. I’ve approached the second round in a definite order of work, which I didn’t necessarily follow in the first round. It makes a difference!
I think the greatest thing that I’m reveling in with this project and its offspring is that there’s a really good quantity of thread on each skein. I could easily stitch at least four (or more) of these designs without running out of thread. I love it when thread is abundant!
I’ll share a bit more down the road on this project. We’ll talk pros and cons on the thread and we will also make some photo comparisons so you can get a good sense of the thread, it’s weight, structure, behavior, and so forth. So stay tuned for that, especially if you’d like to stitch the project, too!
And On Friday…
And on Friday, we begin Purple Posy!
It’s a banner week, isn’t it?
This is so pretty!! I can’t wait to see what it looks like with the new(ish) colors too!
I just ordered some of this wool and cannot wait to give it a go.
I just purchased a variety of this wool thread after seeing how lovely it looked in your test. Thanks for the hints on how to choose a design suitable for the thread. I have also been experimenting with different design transfer methods. The design on this post looks immaculate. Can you share how you got the design onto the fabric?
I thought it appeared somewhat cramped, too, especially with the knots. Good for you that you thought of enlarging the design and some components – this will be interesting to keep up with if you post the details.
Such a lovely design. What thread was used for the blue flowers (french knots). I love the tonal effect.
Thanks Mary,
Janet Bright
Hi, Janet – It’s all the same wool thread. 🙂
Hello,
I just found your blog. It’s got so much helpful information. Thank you for your investment here for all of us! In the wool flower piece here, where did you get the pattern? I didn’t see it mentioned, and I am intrigued at how well it gets covered. Do you have a post about your patterns? Thanks again!
Hi, Holly – I drew that, and I’ll be releasing it as a kit shortly. 🙂