Last summer I released Something Fishy – a ready-to-stitch towel set featuring some very stylized tropical fish.
I know summer must be nearing, because many of you are stitching Something Fishy again, and I’m getting a few questions on stitch choices and other inquiries.
So I thought I’d pop in and share a few tips again for embroidering these ready-to-stitch projects. Even though I’ll be specifically talking about the fish I stitched last year, the concepts can be applied to any similar projects. So whether you’re stitching tropical fish on Something Fishy, or any of the floral or Christmas ready-to-stitch towel sets, or even an Aunt Martha transfer that you’ve pressed onto your own flour sack towels, hopefully you’ll find some tips and ideas here that will be helpful.
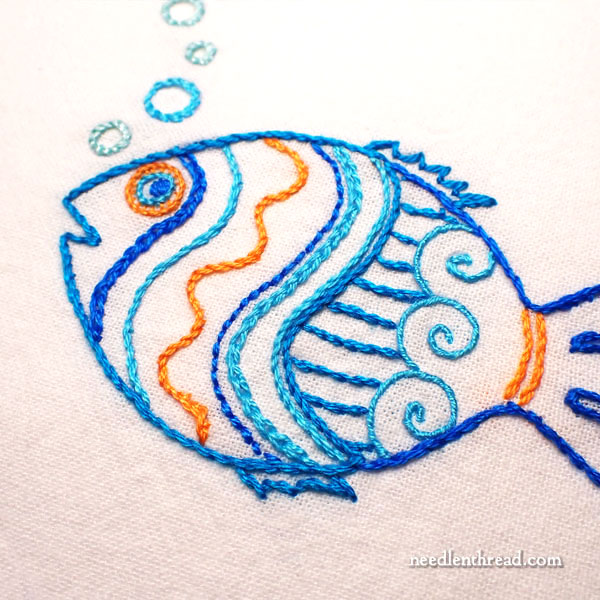
Previously, I wrote about picking colors and stitches for Something Fishy here, around the time they first came out. If you’re looking for color suggestions, I shared the initial line-up of colors I used in that article.
As my towel set developed, I added in more colors and shades here and there, expanding on the same palette. On this type of project, I’m not particular about working out the Absolute Ideal Color Scheme. If I like it and it works, I use it.
I usually just pull threads from a drawer or box of loose, partial skeins. I see these projects as a great way to use partial skeins and to “stash bust.”
If you closely at any of my versions of ready-to-stitch towels, you’ll find that I stick with a fairly limited number of basic stitches. If you take a look at this article on Top Ten Embroidery Stitches You Should Know, you’ll find that the stitches I generally stick with are in those top ten – and not even all those top ten.
You can find all the stitches that I use on these types of projects demonstrated here in videos.
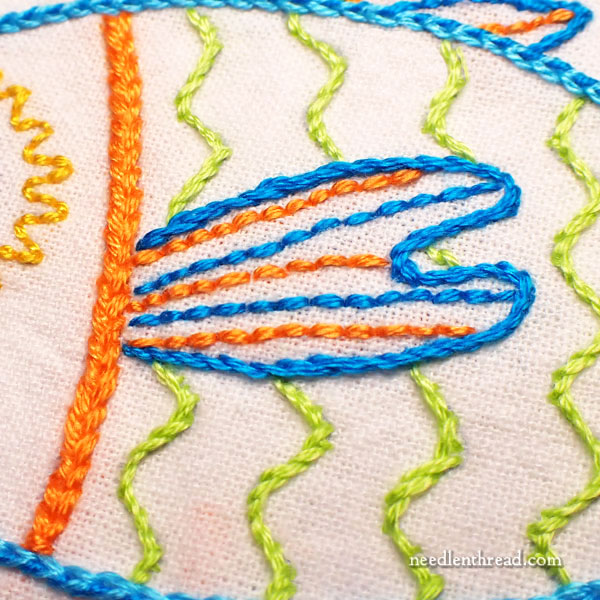
Mostly, when it comes to these types of projects, I’m a line stitch sorta gal!
These are not projects that are meant to be a Magnum Opus. They aren’t meant to be particularly complex. They aren’t meant to show off the wide range of skills you’ve acquired through your stitching life. They aren’t intense projects. You should feel no stress when you’re working them. And so line stitches, are absolutely ideal for them.
Line stitches work up quickly. Unlike denser filling stitches, they sketch out the design pretty fast!
So, stem stitch, backstitch, whipped backstitch, chain stitch, – and varieties thereof – all work great for these projects.
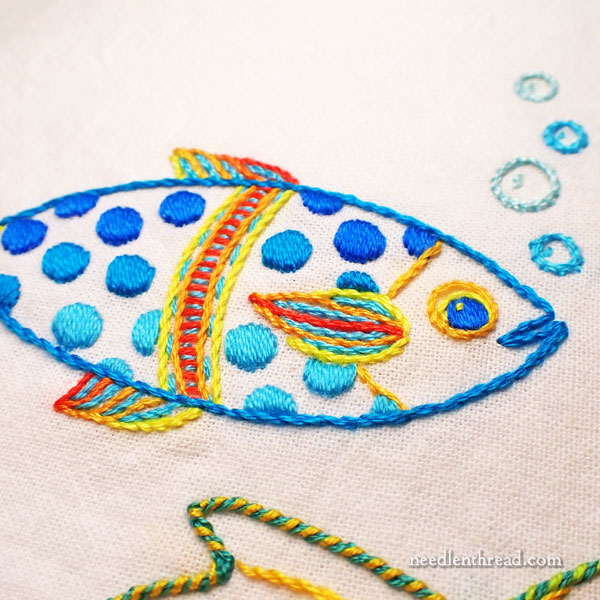
If I use something like satin stitch on a project like this, I always work it with two strands so that it fills quickly, and I don’t obsess over The Perfect Satin Stitch. Sure, I don’t want the satin stitch to look awful, but I’m not going to break out magnifiers, laying tools, and whatnot to make sure each satin stitch spot is spot-on!
The way I see it is this: these aren’t really “heirloom” pieces like fine, monogrammed embroidery on beautiful linens or anything. They are cotton towels that most likely will be used in some way or another, and over time, they may even get all used up. That is simply the nature of this type of project.
And so I’m not inclined to spend a whole lot of time on embroidery that requires concentration to accomplish an outcome that I don’t necessarily need for these projects. I just want cute towels! And my satin stitches may not be perfect, but they get the point across.
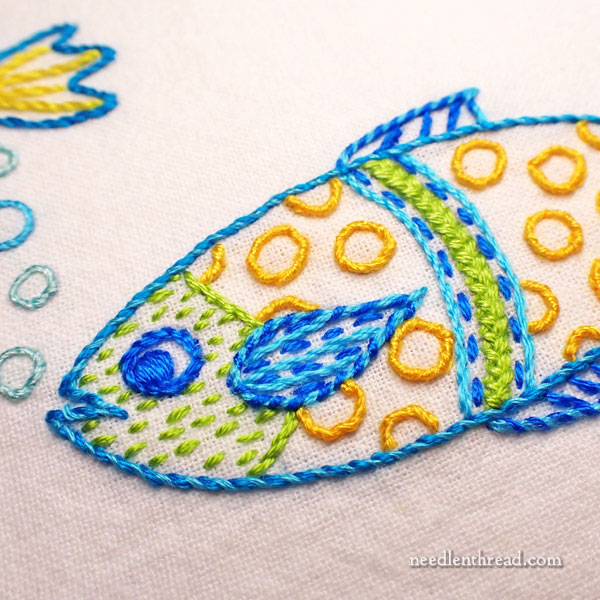
Having said that, even the quick approach to satin stitch in the previous fish was a bit much! The next time I stitched this particular fish, needless to say, I skipped the satin stitch dots! Instead, I reverted to a whipped line stitch (whipped backstitch), which was much – oh-so-much! – quicker to work!
Best Tip for a Good Outcome
One thing that does take time – but that’s totally worth doing if you want a good outcome on this type of project – is being careful about carrying your threads across the back of the work.
I switched from satin stitch to whipped backstitch on the dotted fish above to save time and to enjoy a quicker outcome, but I still didn’t carry threads between each dot, even with the whipped backstitch. I treated each dot as its own individual element, which it is, and didn’t move from dot to dot with the thread stretching across the back of the work.
If you’re careful not to carry threads any noticeable distance between design elements on these projects, the outcome on the front of the project (and on the back) will automatically be that much better.
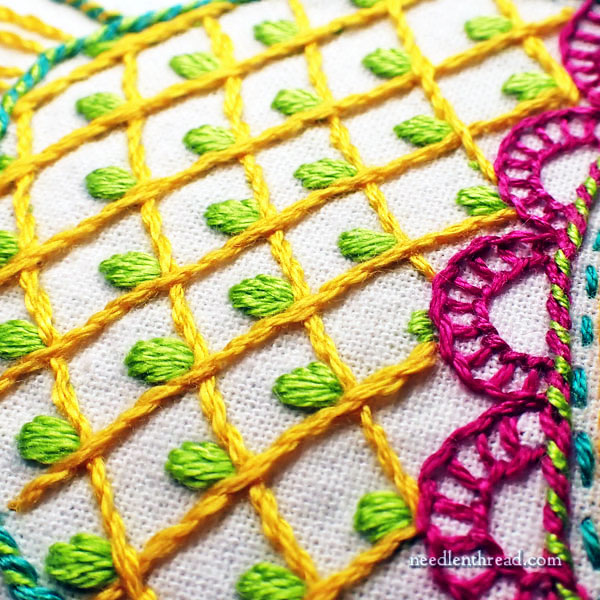
Occasionally, I use satin stitch for small accents, like these brighter green bits, and like the eyes on all the fish.
If these bits are small and you’re using two strands of floss or more, it doesn’t take much time or effort to stitch them. There might be anywhere from 3-5 satin stitches in a small space like this.
In this case, I moved between each satin stitched element by turning the work over and running the working thread under the backs of those yellow stem stitches that create the grid in the design. I didn’t start and end each thread that I used for the satin stitch.
These types of little satin stitch bits, then, can work up really quickly.
Take a Shortcut, Work a Cheater Stitch
I also tend to take shortcuts with some stitched elements and work “cheater” stitches.
For example, the scallops on the right side of this design area in dark magenta might look at first glance as if they are worked with buttonhole stitch.
But we all know that buttonhole stitch on a curve like this can be persnickety and that you have to be particularly careful with your tension, to get the wheel to lay right.
So instead, I worked stem stitch on the two sides of the wheel, and filled in between the two sides with a straight stitch.
It’s not really cheating. There are no set rules in embroidery, and there are no Embroidery Police. You can do what you want, and no one will fault you for it! Do what you enjoy. Pick the stitches you like to work. And if you want the look of one stitch but without its attending hassle or frustration, think of how you can achieve the look in a different way.
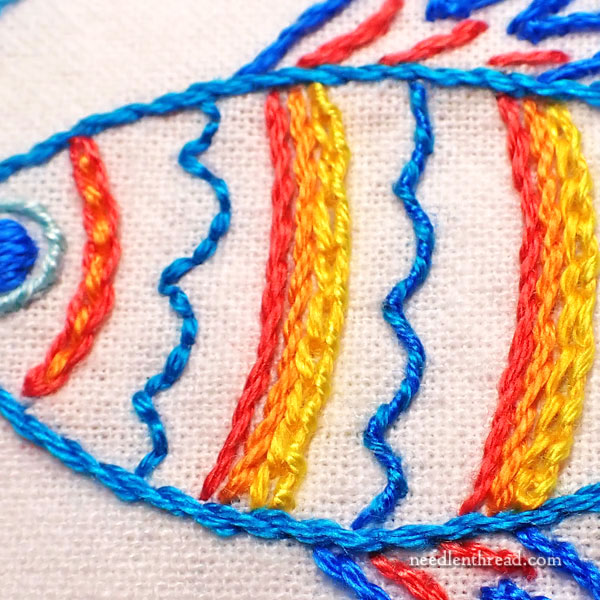
On these types of designs, you don’t necessarily have to be consistent in your stitch choices, and you don’t necessarily have to strive for absolute symmetry in everything.
I whip stitched that center blue scalloped line in the photo above, because I wanted to move from one side of the fish to the other with my thread, so that I didn’t have to end the thread. I didn’t whip stitch the other scalloped lines. If anyone ever notices that, I’m pretty sure they won’t really care!
Concerning Thread Weight
When working with DMC floss (6-stranded cotton), the “weight” or thickness of the embroidered line is determined by the number of strands you use when you stitch.
If you stitch with one strand of floss, the line will be delicate and fine.
If you stitch with six strands of floss, the line will be heavy, bold, and a little chunky.
Normally, on the ready-to-stitch towel sets, I use 2 or 3 strands of floss. I always strip my floss for the best stitching results and the best coverage with the thread.
Coming!
At the moment, we don’t have any of the Something Fishy sets in stock, but we will be restocking them soon. You can find other ready-to-stitch sets available here.
Have a terrific weekend!


Leave A Comment