Good morning! Today, we’re going to start the finishing process for Harvest Hues – yippee!!
Due to the length of explaining the process, I’ll be presenting the finishing in two parts here on the blog.
If you are a member over on Patreon, you already have all the information on finishing available over there in a downloadable PDF. It was posted yesterday.
If you’re just starting or catching up with Harvest Hues, you can find all the lessons involved in this project available here in the Harvest Hues Project Index.
Let us begin!
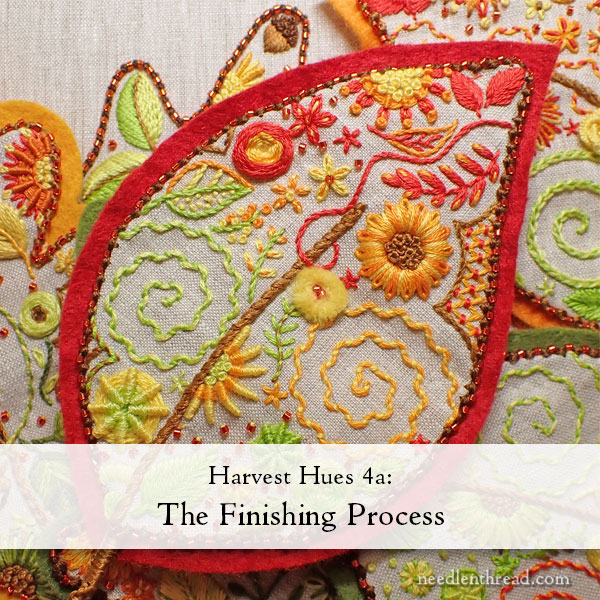
As always when finishing a project like this, start by reading through all the directions first. Sometimes, you might have to read through them a few times. You want to have an idea of where you’re going as you work through each step of the process, so it really helps to read through everything first.
Set aside an hour or so, hopefully in a quiet space, to dedicate to the finishing process. Gather all your supplies together in one place, so that you don’t have to go foraging for something specific. Being prepared will help the finishing process go smoothly.
Materials and Supplies for Finishing
You’ll need to gather the following materials and supplies.
- Finished embroidered leaves (damp stretched and blocked)
- Wool blend felt for backing
- Non-woven sew-in interfacing (I used Pellon 40)
- Cutting template for felt backing (below)
- Wrapped florist wire (18 or higher gauge)
- Brown embroidery floss (either light or dark)
- Colored embroidery floss to match felt backing
- 11/0 delica beads (included in kit)
- Sewing thread
- Sewing pins
- Needle-nose pliers are helpful
- Fabric scissors
Preparation & Cutting
The interfacing should be cut to the size of the embroidered area of the leaf, using the BACK of the leaf as a directional guide. (The interfacing goes on the back of the leaf, and you need it to point in the same direction as the embroidered leaf.)
Both the felt and the interfacing should be cut to match the orientation of your embroidered leaf. Be sure to double and triple-check that you are cutting the correct shape to back your embroidered leaf, especially if you stitched mirror images in order to have a variety in the direction your finished leaves will hang.
Below, you’ll find a PDF for the cutting template for the felt backing of the simple leaf.
Cutting Template for Felt Backing (PDF)
Please choose “100%” or “no scaling” on your printer when you print the cutting template for the felt. Then, do a test cut with the paper. Cut out the template and make sure that it extends at least 1/4″ around on all sides of the embroidered area of your leaf.
You can cut out your felt by pinning the cut out paper template to the felt and carefully cutting around it. You can also use a pen (like a very fine Sharpie) to trace around the outline of the cut-out paper template – but if you do this, be certain to cut inside your marker line, because you don’t want the marker showing on the felt cut-out.
When you cut your felt, you want to cut in smooth, long cuts, to make sure that the edges of the shape are as smooth as possible.
Hemming and Basting the Embroidered Leaf
Now that your embroidered leaf has been damp stretched, it’s time to cut it out. Cut out the leaf, leaving 1/2″ around all sides as you cut.
Gather the cut-out leaf, the cut-out interfacing, a needle and some sewing thread. Thread the needle with a knot.
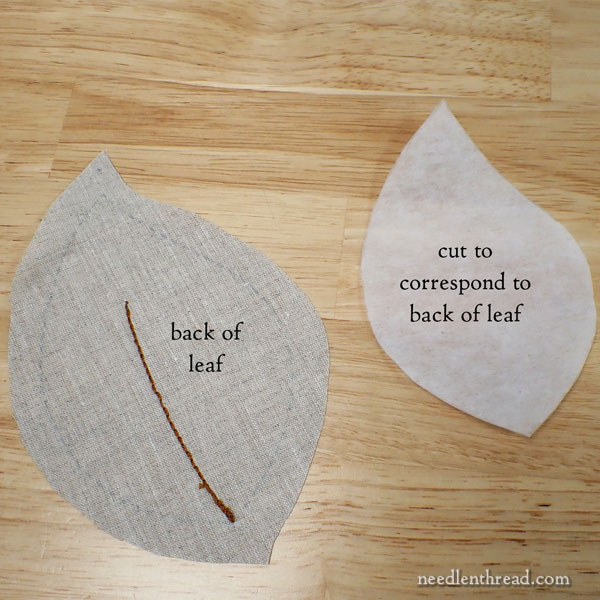
Make sure that your interfacing is cut to fit the back of the leaf.
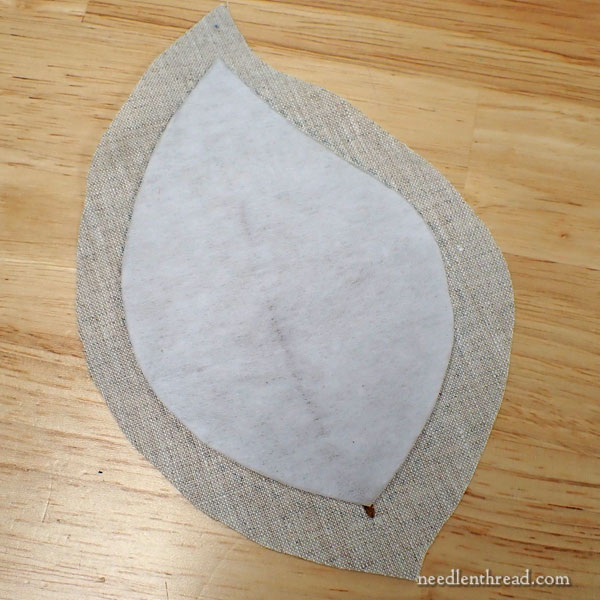
You should be able to see a good 1/2″ of linen all around the interfacing, when you place the interfacing on the back of the leaf behind the embroidered area.
Pin the interfacing in place with sewing pins. It’s ok if the pins pass through the front of the linen – just make sure they don’t snag any embroidery!
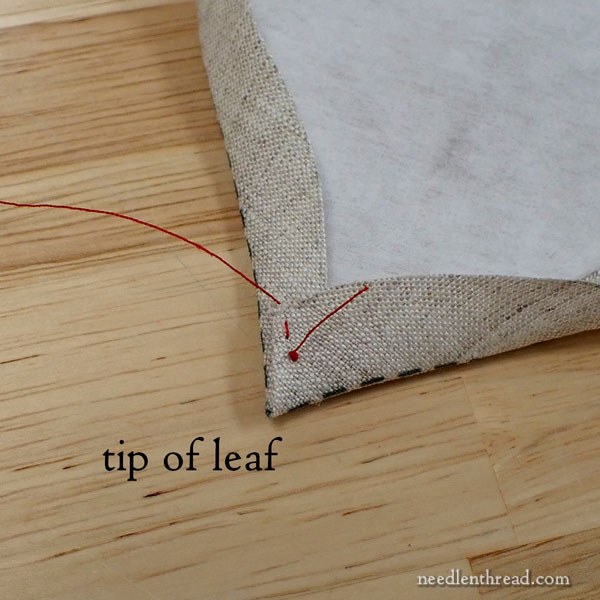
Finger press all around the leaf, pressing the “seam allowance” over the interfacing along the design edge of the embroidery.
(Note: in the photos in this guide, there’s no embroidery on the leaf. This was one of the leaves worked to test different finishing processes.)
At the tip of the leaf, fold the seam over as shown in the photo above, to achieve a sharp tip.
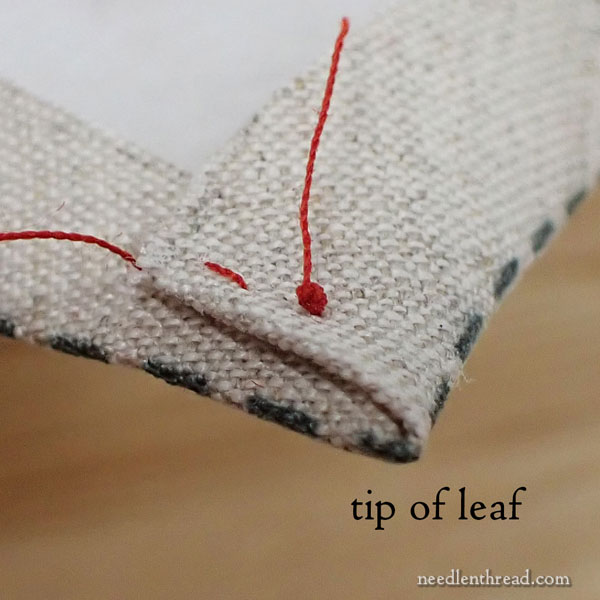
Take your knotted sewing thread into the back of the tip of the leaf where the fabric is folded over, but not out through the font of the leaf.
Stitch through just the interfacing, picking up just a bit of it with each running stitch, as you work basting stitches around the leaf to hold the turned hem in place.
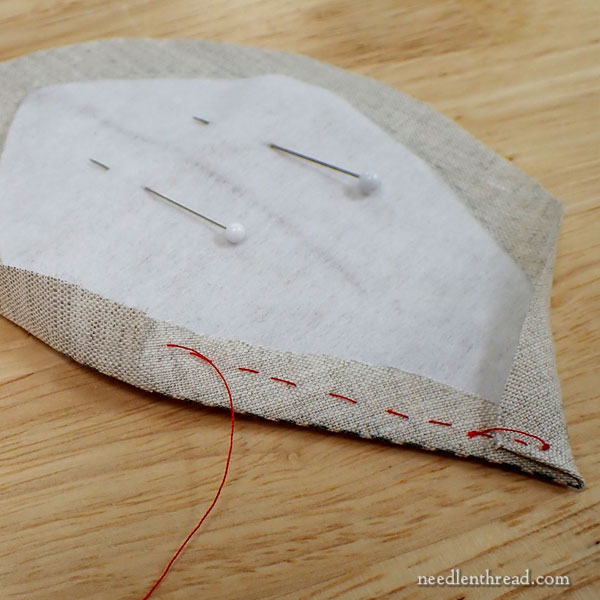
Continue basting the turned hem onto the interfacing.
When you come to the curved parts of the leaves, you will need to snip the turned fabric.
Cut small snips into the turned linen, with the cuts perpendicular to the edge of the leaf. Don’t cut any closer than 1/8″ from the edge. You don’t want to cut all the way to the edge!
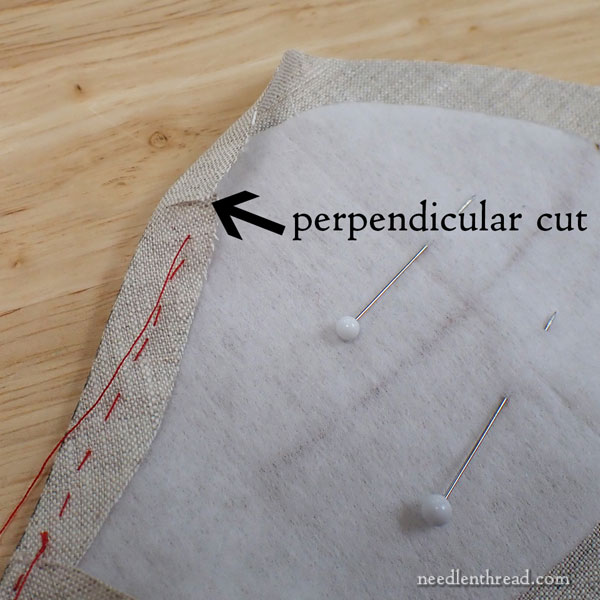
In the photo above, you can see a perpendicular cut in the turned fabric. Make these cuts as often as you need to, to keep the edge of the leaf smooth as you baste it.
You will not need to make too many cuts – maybe 4 or so – on each side of the leaf, anywhere that seems to be difficult to keep a smooth turned edge.
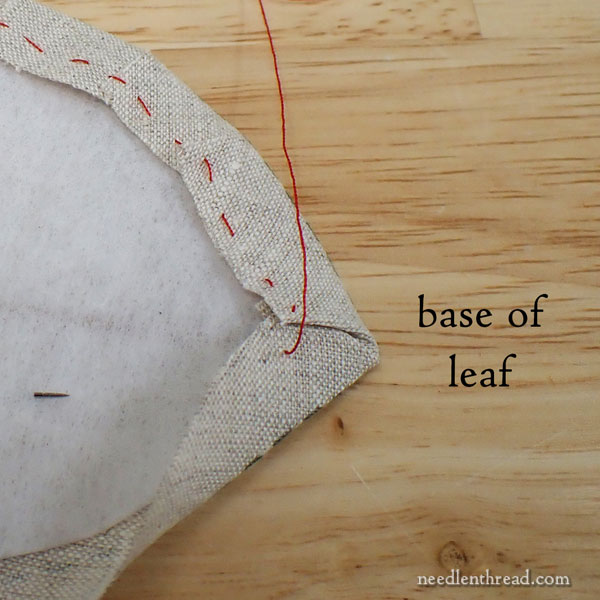
Continue basting over the fabric cuts, around the edge of the leaf, until you reach the corner at the base of the leaf.
Here, you will make a rough miter on that corner. With the leaf face down on your work surface, and the interfacing side of the leaf face up, with the base pointing towards you on the table, finger press the fabric up over the base. Then, fold the two sides of linen on each side of the base in towards each other, to make a miter.
Baste through the miter and the interfacing to hold it all together.
The miter does not have to be perfect. You just want the corner to be smooth, when you look at it from the front. No one will ever see the back of the linen area that you are basting!
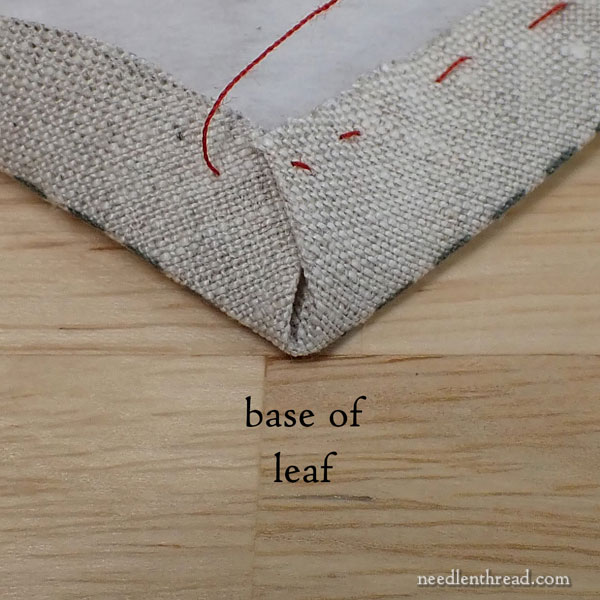
Here you can see what the miter ends up looking like up close.
You will find a step-by-step tutorial for mitering a corner here. You may not need to trim any fabric off the leaf, for the miter on the leaf. But if you want to, you can! Just be judicious and don’t trim too much!
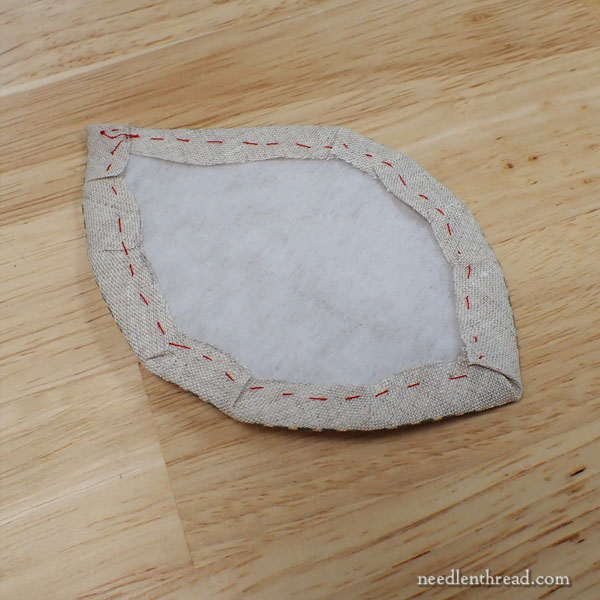
Here is the leaf completely basted to the interfacing.
The Decorative Edge
Now that the leaf is hemmed and basted on the interfacing, it’s time to stitch the decorative edge around the leaf.
This is done with beaded Palestrina stitch. On some leaves, we used 3 strands of floss, on some 4. I think I prefer 4, for the plumper knot.
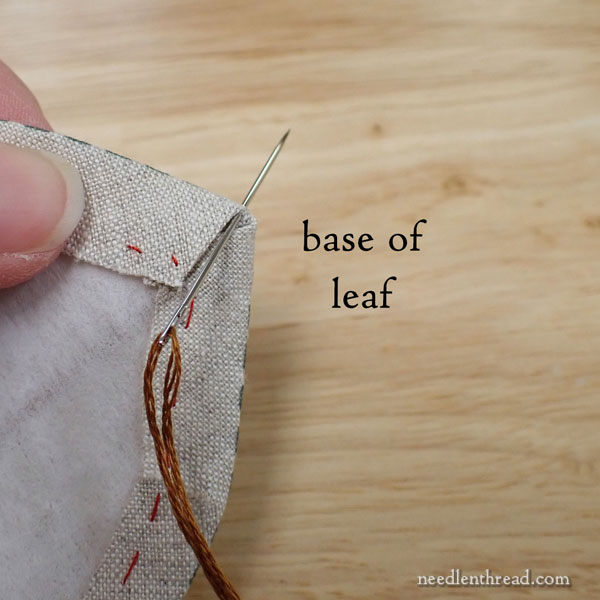
I used brown for all the stitching, but on some leaves, I used dark brown and on some, I used the lighter. It’s up to you! I chose the brown that I thought contrasted best with the felt.
Knot the thread, and pass into the hem of the linen on the backside and out at the edge, at the corner formed at the base of the leaf.
This is where you’ll begin the beaded Palestrina stitch edge.
You will find a step-by-step tutorial for Palestrina stitch worked on an edge here.
Add the first bead after you’ve completed your first knot. Thereafter, pick up a bead after each knot that you stitch.
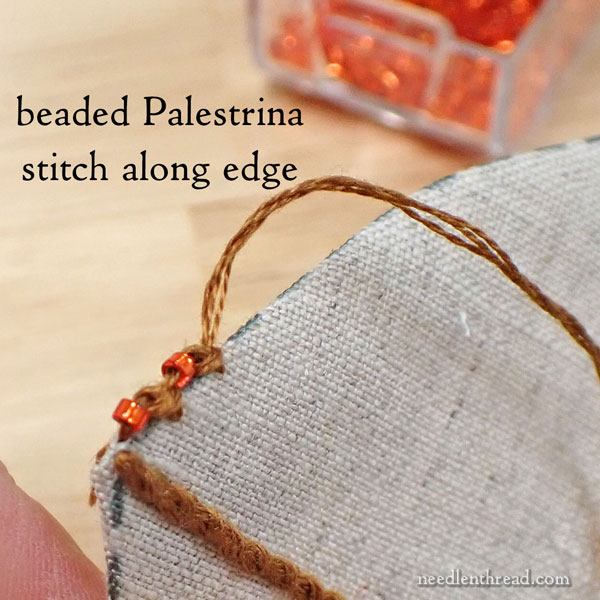
When you stitch the knots, pull gently through on the final step of the individual stitch, where the stitch forms the knot. If you pull tightly, your knot will be tight and small. If you pull gently, you can make a nice, plump knot. That’s what you want to achieve.
The more I examine the sample leaves we stitched for this project, the more I like the 4-stranded Palestrina, but feel free to test to see what you like.
Work the beaded Palestrina stitch all the way around the edge, to finish off this part of the leaf.
Alternative Stitch
If you really have difficulty with the Palestrina stitch, you can work a regular chain stitch around the perimeter of the leaf, right on the edge. Use 4 – 6 strands of floss to achieve a nice heavy edge with the chain stitch. Work the stitches somewhat long – between 1/8″ – 1/4″ (not as long as 1/4″, though), and don’t pull them too tightly. You want plump chain stitches rather than elongated, skinny chain stitches.
Then, if you decide you want to add beads as well, go around the edge again using two strands of floss, and add a bead to the center of every other chain stitch, by stitching two backstitches through each bead in the center of every other chain stitch.
Coming Up Next!
Ok, we have two more steps to finish the leaf, but we have exhausted our space for the finishing. Tomorrow, we will tackle the wire and add the felt.
You can find all the lessons for this project in the Harvest Hues Project Index here.
If you’re looking for materials kits for this project, you’ll find them available here in the shop.
And if you are a member on Patreon, you already have all the finishing instructions to finish up your leaves, so you should be good to go on the Leaf Front for now!
Tomorrow, we wrap up! See you then!


Leave A Comment