After finishing the embroidery on the main part of the pall, I made a small, square, detachable back for it, so that the back can be removed and washed without having to take the whole pall apart for cleaning. The detachable back of the pall is made from linen, and it is hemmed all around with a small hem with mitred corners. Then the center is embroidered with a tiny red cross.
For the embroiderer, it’s handy to know how to mitre corners on a hem. Imagine making a long table runner with a drawn thread line running just inside the hem. Wouldn’t it be nice to know how to finish the corners on that hem so that they looked professional? What about a fine hanky, where people will see the back of the work? Sloppy corners just wouldn’t do, would they?
So, today I’m going to show you how I created a quarter-inch hem on a small piece of linen and mitred the corners. You can take the concept to any proportion hem around a piece with 90-degree corners.
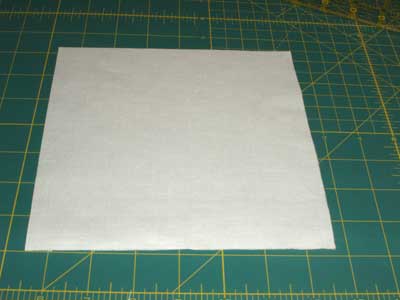
I began with a square of linen one inch larger all around than the finished piece would be. This allows for half an inch extra on each side of the fabric, out of which the hem (two quarter inch turns) will be made.
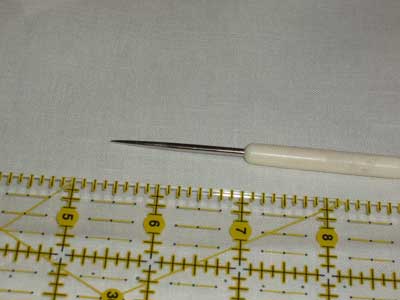
Using a stiletto that doesn’t have a super sharp tip (it’s not like the tip of a needle, more like the tip of an ice pick) and a ruler, I marked off my folding lines by “scoring” the fabric. You can use any tool here to make marking lines on the fabric, though you probably wouldn’t want to use scissors or anything that would cut the fabric.
I scored the fabric in two quarter-inch increments on all four sides of the square. Scoring is simply running that tool firmly over the fabric, along the edge of the ruler. It marks the path of the of your folding lines with a slight dent in the fabric, making folding along the measured line much easier.
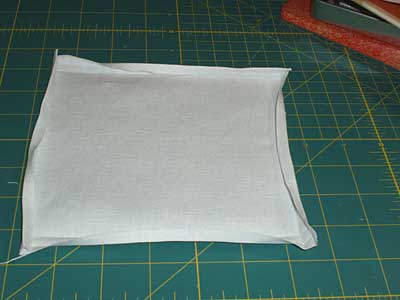
After scoring two lines in quarter inch increments (from the edge of the fabric) all around on all four sides, I finger pressed the hem in.
First, I folded the fabric from the edge inward on all four sides at the first quarter inch line. Then, I folded these folds (on all four sides) one more time on the second quarter inch line.
I firmly pressed each fold as I made it, using my fingers (not an iron).
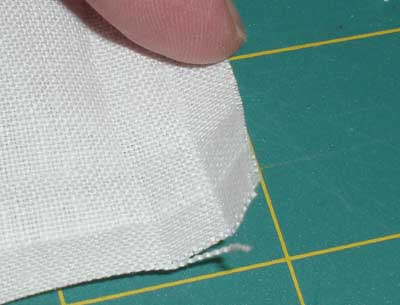
Unfolding the folds, this is what the fabric looks like. You can see two distinct quarter-inch lines where the fabric was folded and finger pressed.
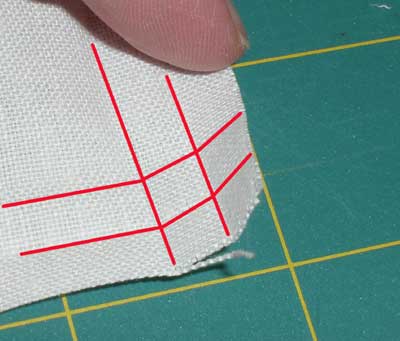
Notice the intersections of the lines.
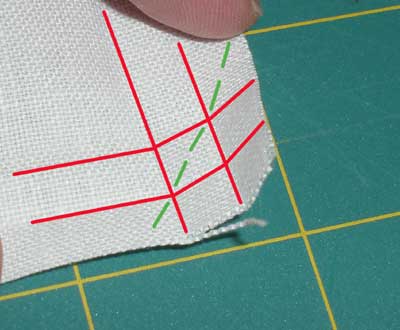
See how the green dotted line passes through the diagonal on the second square in from the corner?
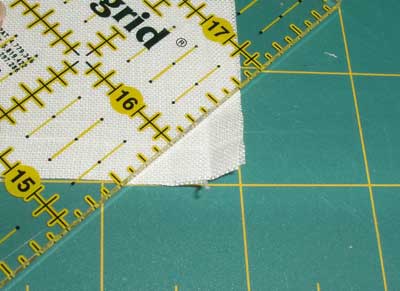
Using the diagonal on that square, form a cutting line by laying your ruler across the square diagonally.
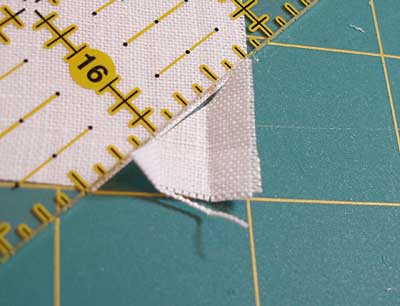
Cut the corner off. A rotary cutter is helpful here, but really, you can just eyeball the cutting line along the diagonal and use scissors just as effectively!
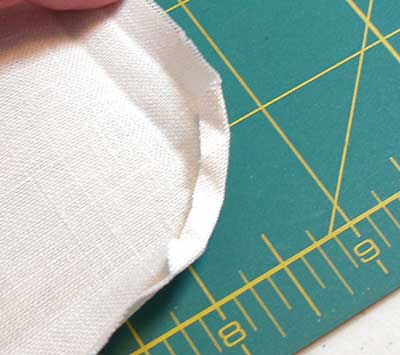
After cutting the four corners off, finger press the diagonal cut an eighth of an inch in. The fold will actually be as deep as the lower tip of the remains of the second square in from the corner (the top of which you just cut off). Finger press this small fold right across the corner…
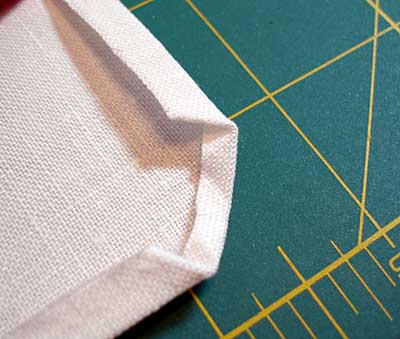
…and then, using your previous fold lines as a guide, fold your first quarter-inch fold all along the outside hem and finger press it is firmly again…
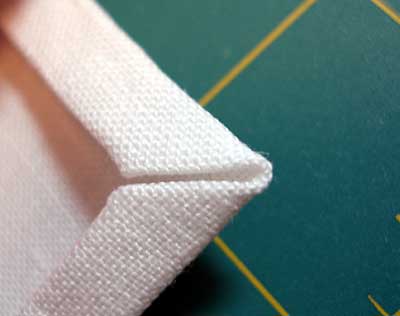
… and then make your second quarter inch fold all around the hem, finger pressing the turned edge in, and aligning the corners so that they fit up as in the photo above.
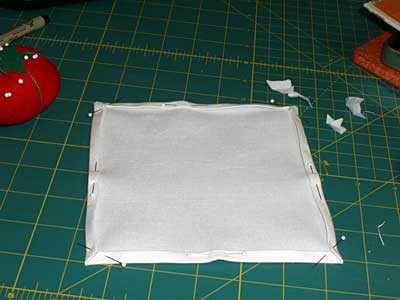
Then, pin everything. Since my square is relatively small here (the finished size is 6.25 inches), I didn’t use many pins. Pin through the mitred corners to hold them in place, and then pin down the edge of the hem.
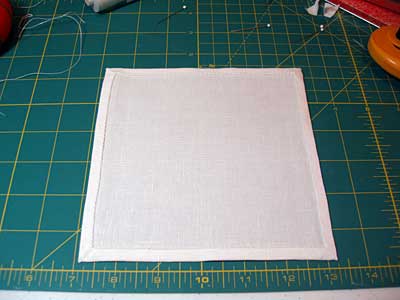
You can then do whatever kind of stitching along the hem that you want to do. I just used a regular small whip stitched hem. When you get to the corners, you want to stitch them neatly, either using a blind stitch or even a regular whip stitch.
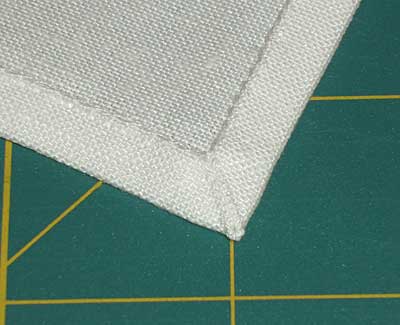
I stitched inside the fabric in a blind stitch fashion, and then I pulled the thread tightly, to form a slight ridge where the corners meet up. This is actually a mistake – the corner should be smooth and flat – but once I did it on one, I went ahead and did it on all four, so that they match. (That way it doesn’t look so much like a mistake!) There shouldn’t really be that rounded bulge at the edge of the corner. One of the reasons for this (besides butting up the corners too tightly there) is that the small quarter inch hem is rather thick, in a small space, so it’s kind of tight in there when you’re stitching. Still, I could have avoided that with looser stitching on the corner, so keep that in mind as you stitch up your mitred corners.
And that is how you mitre corners by hand on the edge of a squared hem!
Hope you find the technique handy!


I Know you are already travelling and hope you enjoy your holidays!
But I'll like to know why you press with fingers and not an iron?
In a small piece this is easy but in a larger piece…
Oh, Thank You for this Mary. I was once taught this technique by a whitework teacher and have long since lost track of the instructions…now I will have it electronically!! You're a gem!
Wow! Mary,
This is exactly what I am looking for right now. Thank you for making it looks so easy.
Thanks, all – glad you like the tutorial. Wow. I'm blogging from a hotel connection – first for me!
Ok, Meri – you're right – on a larger piece, I would DEFINITELY use an iron. On a small piece, though, I find it much easier to finger press the seams in. You can also finger press, get everything situated, then iron for a nice sharp seem!
Thanks heaps for the comments!
Signing off again!
MC
Wow Mary this is so cool! I just started making quilts and have struggled with mitered corners on binding, I am definately going to try this!!
Kat
Mary many things for this tuto ;so clear and helpful.
Michèle
Thankyou so much for posting this tutorial! Such a case of serendipity – I finished my first drawn thread work last weekend and was going to try and nut out how to finish it when I stumbled across your blog. Your instructions were very clear and the photos were great. Here's a photo (sorry for the bad quality, I finished it rather late last night!)
I am just finishing up a handkerchief, so this is perfect timing!
I'm being extra picky, and actually withdrawing a thread at my fold points as a guide line for the folding so that they'll be even. My piece is a "blackwork" (in red) and the corner motifs come quite close to the hem, so it needs to be very exacting 🙂
Thank you so much! I’ve been struggling to mitre the corners on some communion linens for church…and finally decided to look online. Your instructions were very clear and easy to follow.
Thank you again.
This was so helpful! I’d never have thought of scoring fabric. I was trying to figure out how to take the bulk out of square corners… this is the perfect solution.
Thank you! Helped me get 6 handkerchiefs made for the Queen.
That was beautifully explained. Thank you so much.
Thank-you for this, was a fantastic tutorial with perfect pictures! much better than a video as you can really take your time to look at each image. I was still not able to line them up all perfectly, but they are looking better than before I saw your tutorial 🙂
Good morning, Mary! Thank your for pointing us in the direction of this very helpful tutorial! I am wondering if you used embroidery or sewing thread for your whip stitch? I’m guessing sewing thread, so… cotton, polyester or blend?
I usually use a cotton sewing thread, but I suppose whatever you have on hand would work fine!
It’s great! Today I learned the most correct way to do a corner.Thank you Mary!Thanks a lot
Thank you. I’m doubling 2″ hems on linen fair linen. That is the altar cloth. Have a lot of fabric at corners but will sample but this looks like the answer. Thanks so much and yes still pictures much better than video for this.