


Oh, golly! I love deadlines.
Here in the studio, we’ve been working on the appliqué lettering project that we talked about here.
I really want to thank the Collective Mind of Needle ‘n Thread – that’s all of you – for your input and advice on the appliqué process for these letters.
We’re applying letters to an altar cover (which is exactly what it sounds like – a cloth that covers the top of an altar in a church, in order to keep the linens on the altar clean.)
Remember this one, that was worked entirely in goldwork and silk, a few years back? We’re making another one, but not nearly as complex, and certainly without the mega-hours that we put into that one.
Our deadline on this one is next Thursday, May 29th. Uuuuuuh…. hmmm.
That’s less than a week, and although it’s not nearly as labor intensive as the first lettered altar cover we did, it is not not labor intensive. Hand stitching takes time, no matter how you slice it.
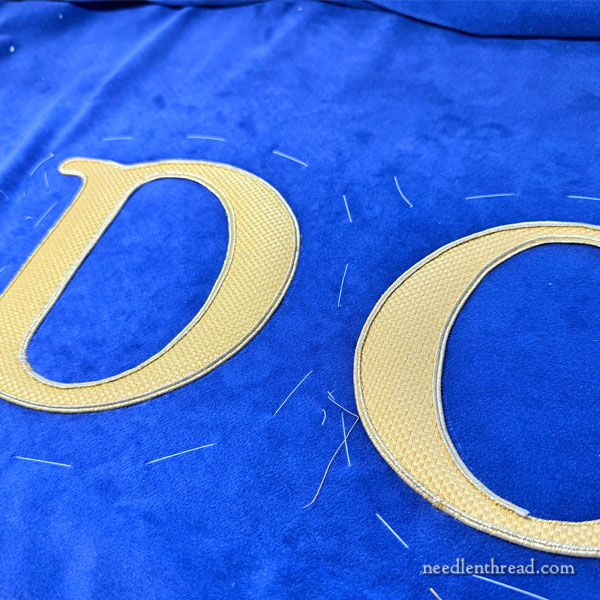
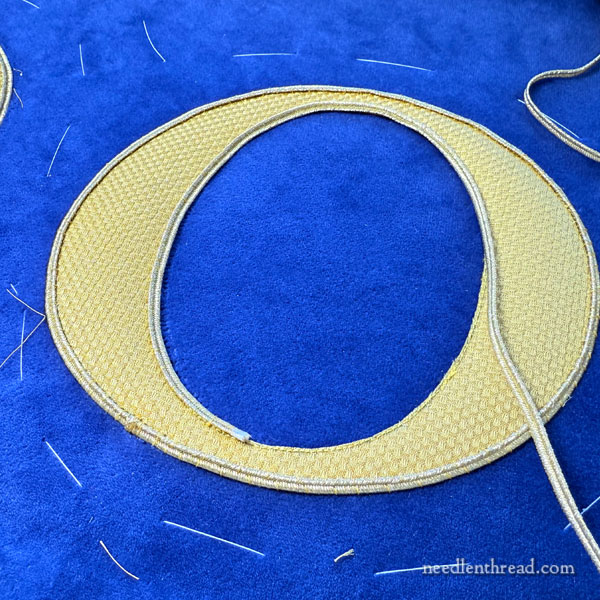
To recap, for the letters, I’m using a “cloth of gold” (I use the term loosely – it’s not cloth of gold, like cloth of gold of old, that was once really woven with threads wrapped with gold; rather, this is a synthetic / gilt approach of the same concept).
The altar cover cloth (the ground fabric the letters are going on) is velvet.
I melded together many bits of advice that you all offered and that I found in various books and through some experienced sewing friends I contacted, and we ended up preparing the letters with this approach:
First, we cut 7″ x 8″ pieces of the cloth of gold and corresponding pieces of yellow wool felt. We applied a light weight heat and bond to the back of the cloth of gold, and then we adhered the cloth of gold to the wool felt using the heat and bond. Next, we transferred the letter shape to the resulting melded cloth. Then, using a slow sewing machine filled with yellow thread that blended into the gold cloth, we stitched around the outline of the letter.
Then, we cut the letters out, trimming just outside the machine-stitched outline. We painted the edges of everything with – yes – glue. We used a slightly diluted PVA glue that is archival friendly and flexible and clear upon drying. We used small paintbrushes and just touched the very edges of both the felt and the cloth of gold. Mostly, this step was to prevent the cloth of gold from fraying while appliquéing.
Next, using waxed 50 wt silk thread, I appliquéd the letters into place on the cloth by stitching from the ground cloth into the appliquéd letter, just over the edge and just over the machine stitched outline.
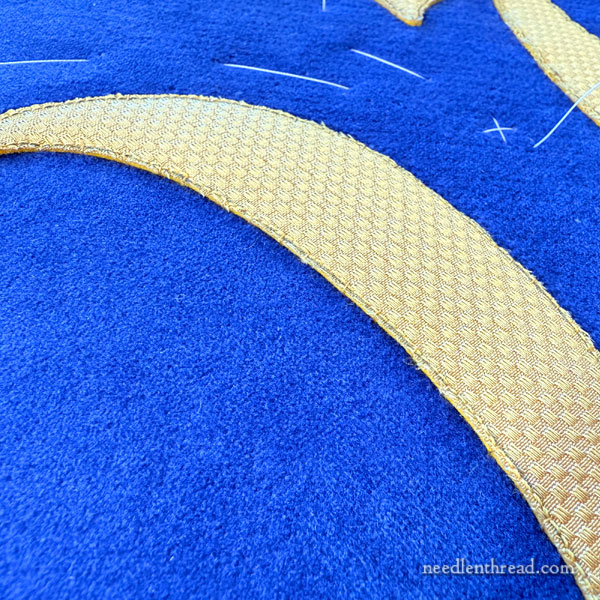
Finally, I’m finishing the edges with gold Russian braid, couching it into place over the edge of the letter, covering the machine stitched outline and the very edge of the letter, and a tiny bit of the cloth. The braid overlaps both the ground cloth and the letter.
The couching of the Russian braid is in two passes. On the first pass around the letter, I bring the needle up inside the letter, just inside the machine stitched outline, and pass into the middle of the Russian braid, and down into the ground fabric, just along the outer edge of the letter.
On the next pass around the letter, I come up from the ground fabric, just outside the outside edge of the Russian braid, and down into the middle of the Russian braid.
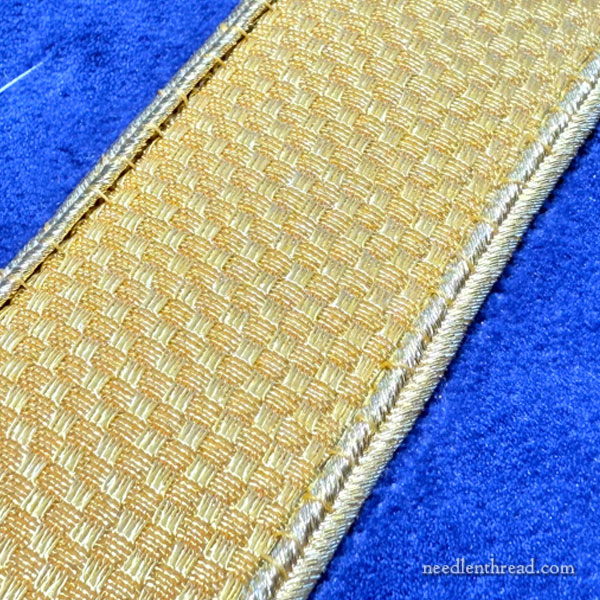
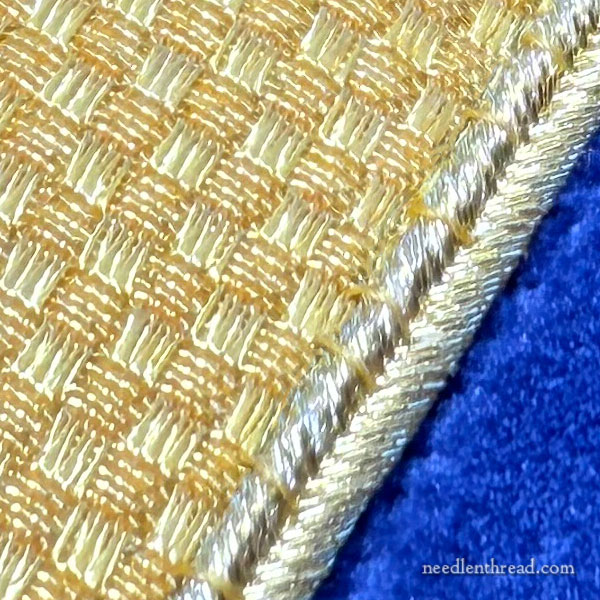
Now, if you look at the up-close photo of the gold Russian braid above, you’ll notice that the braided cord is a two-sided thing, and the “herringboned” gold passes down into the center of the cord, in a kind of interlocking “V” configuration.
It would definitely make sense to follow the direction of the gold on the Russian braid, working the couching stitches also in a “V” configuration, so that they kind of sink into the braid and aren’t so noticeable.
BUT… noticeable and Noticeable are two different things. I notice it, because I’m right on top of it. You notice it, because you’re seeing close-up photos.
From a distance, you can’t see any of that. It’s just easier to pretty much stitch perpendicular to the trim, without having to think about angles and such. So that’s the way I’m doing it.
The worst part of the whole process, for me, is the join.
I really can’t stand figuring out the joining process on trims, especially where you can’t sink the trim ends. And I can’t sink these ends.
Soooo…. out comes the tape and glue. A bit beyond where the actual join will be, I wrap the braid with a bit of tape and cut it off from the main braid spool. Then I carefully paint about 1/4″ of the braid with glue, where the actual join will form. When I cut off the tape end, I paint the very end of the braid with glue as well.
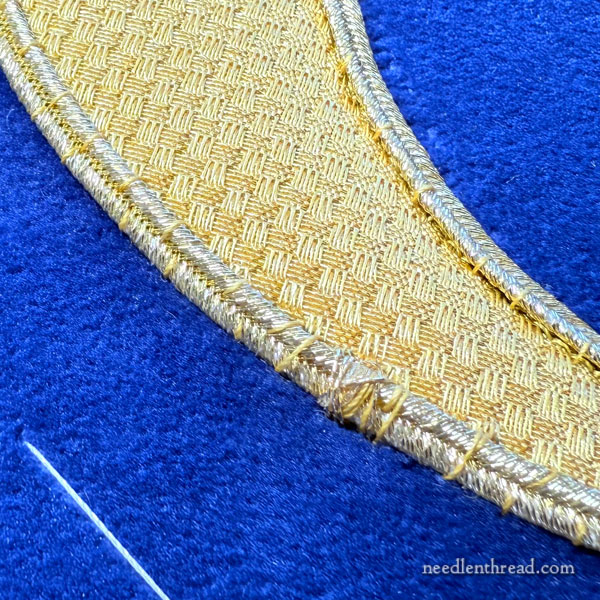
The two ends overlap each other by slightly less than 1/4″, and I stitch over them with the waxed gold-colored silk. I overstitch that area securely, and probably I overdo it. I always overdo things like that!
Then, I use a gold (as in metallic gold) machine sewing thread, and just whip over the silk thread area with a bit of the metallic gold machine sewing thread, just to “lighten” that join area and let it have a bit of sparkle back. This helps make the join slightly less visible.
Again, it all goes back to noticeability. Up close, the join is noticeable and it looks pretty sloppy.
From afar, it’s not noticeable at all. And that’s pretty much all that matters!
So that’s that! Will I finish by next Thursday? Well, that remains to be seen – but keep your fingers crossed for me, will you?
Have a terrific weekend!
Thanks so much for this clear and detailed description of all the steps you’ve taken. I always have trouble with joins and forget the difference between what I see close up and what viewers will see. I learn so much from all your posts and refer back to earlier articles regularly. I really appreciate all you do — and good luck on your deadline!
Your work never fails to amaze me. To create something that is so beautiful for the worship of our Lord is a real blessing. May God bless you
Looks great Mary. I think you have done a wonderful job on working out the best options for this piece