


When I was finishing up the hem on Clara’s Garden – which we last looked at here – I found myself sad that the hem stitching was coming to an end. That meant the project was coming to an end.
It was late at night. I was wide awake. I was enjoying the rhythm of working the hemstitch, and all was well with the piece. I had a mere four or five stitches left. It was, for all practical purposes, finished.
And I didn’t want it to be!
I didn’t have another “home project” set up. What would I do at night, when I needed something to occupy myself?
In a moment of impulse, I said to myself, “Hey, why not withdraw another strip of threads and work another line of hem stitch a little further in?”
And I answered myself, “Hey! What a great idea! I’ll do that!”
And I picked up my scissors, and I started snipping fabric threads.
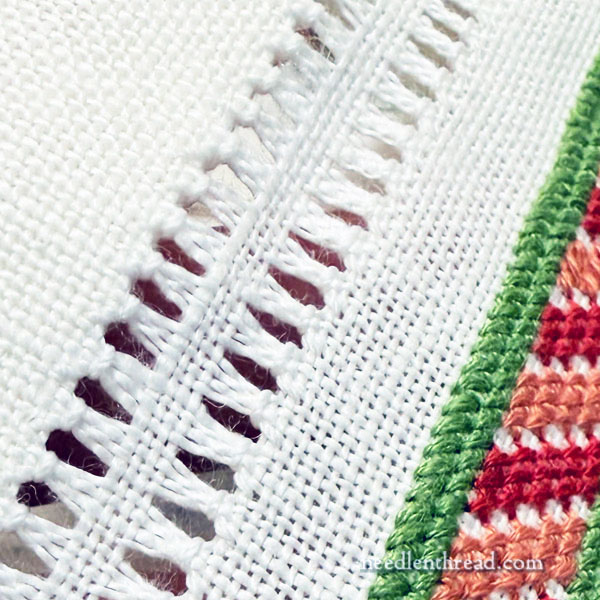
Now, my intention was to accomplish pretty much what you see in the above photo.
Spoiler Alert: It happened, as you can see.
I had the idea that I could withdraw a path of four more threads, equally spaced from the original path of four removed threads for the original hemstitch, leaving a solid path of four threads between the two withdrawn areas.
Why not? Seemed like a great idea to me!
Snip.
Snip.
Snip.
I didn’t take any photos to illustrate my blunder, because I didn’t know I was blundering at the time.
I’ll try to explain the problem.
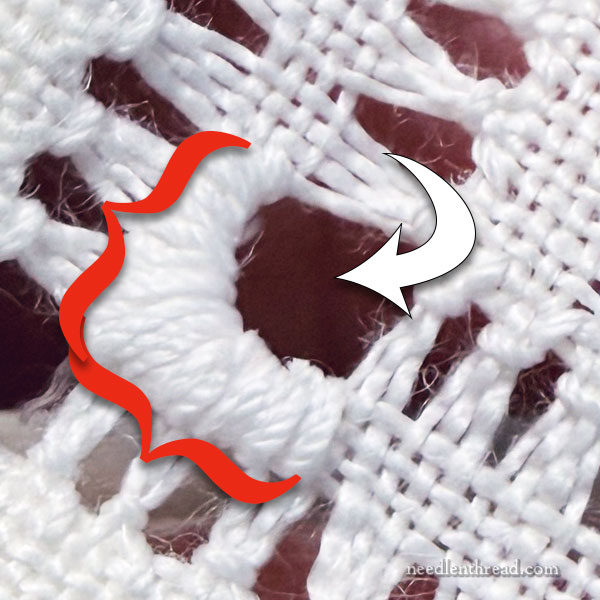
See where the white arrow points? When withdrawing the threads, of course the intersecting area of withdrawn threads at the corners ends up entirely empty.
But if I just removed threads up to that point, the area indicated by the red markers would become entirely unstable. The hemstitched threads already worked wouldn’t have any “anchor” area – they’d just be floating in a small woven space of four threads.
And as I started pulling my snipped threads, I suddenly realized I’d have empty corners and that wouldn’t do. I had to have some kind of “stopper” for the withdrawn threads – something that finished the area of withdrawing and held the threads securely.
I wasn’t really thinking very clearly, and I obviously didn’t have any plan. And I had already started cutting the fabric threads and withdrawing some of them.

And without thinking it though again, I developed a faulty plan for the corner.
Since I hadn’t withdrawn the threads completely into the corners yet, I very weirdly decided to stitch an eyelet (an “Algerian Eye” stitch) on the corner that formed the intersection, erroneously believing this would solve my thread-stopping problem for the corners.
The green lines in the photo above indicate where the corner threads along the withdrawn path would be, and the red lines indicate an Algerian Eye or eyelet right there.
I stitched four of those eyelets, one in each corner on the withdrawn path.
But if you pause and think – which I did not do – you would understand the problem I ran into.
The holding area for the withdrawing threads could not be right there in the corner, because once the threads were withdrawn, I’d have an eyelet that was not attached to anything on two sides of its square.
And lo! I did indeed discover my misconception as I withdrew threads towards a corner. The eyelets in the corner would not hold, of course.
It didn’t help that this was all happening in the middle of the night. I was so furious at myself, because I had, in effect, pretty much just ruined a perfectly good hem job.
I went to bed.
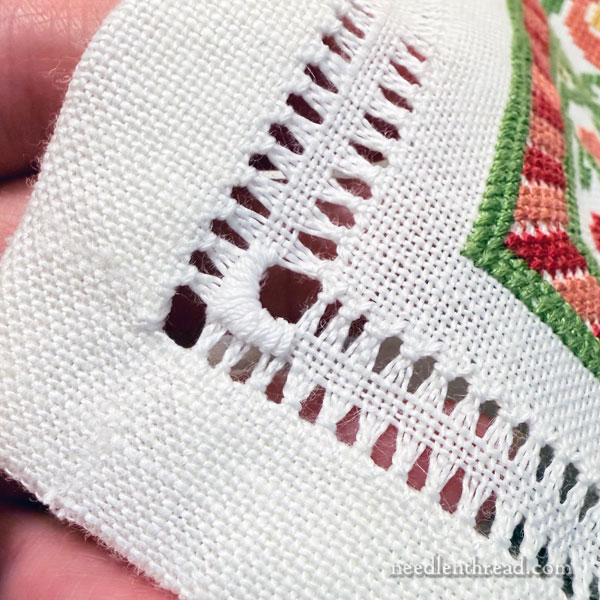
The next evening, I did the only thing I could do at that point, which was to satin stitch the corner areas as you see above, to provide a barrier for the withdrawn thread area.
I don’t really like the look, but … needs must!
It was the only way I could salvage the situation.
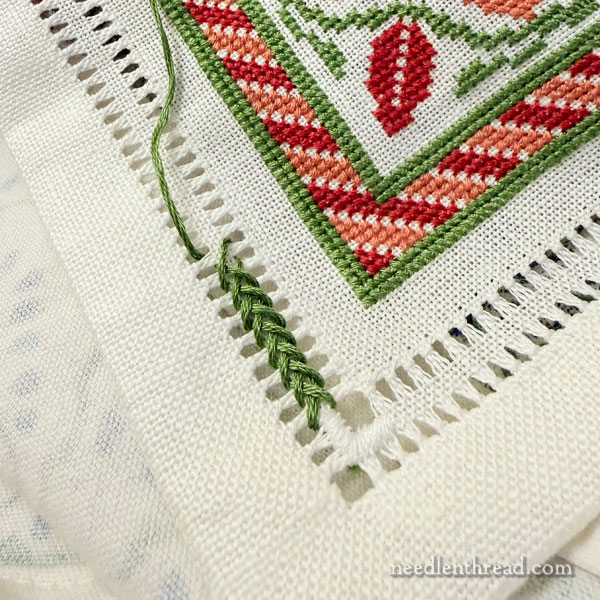
After I finished working the inner line of hemstitch and the shoddy corners, I toyed with the idea of embellishing the inner strip of intact fabric between the two hemstitched areas.
Using all six strands of the green floss used in the project, I worked a very satisfying-to-work braid-like herringbone stitch over that area.
It was fun to work, and I do like the look of the stitch itself, but I didn’t like the look of it with that particular project. It was too heavy and textured and not in keeping with the rest of the design.
Plus, it just accentuated the corners. The shoddy corners.
Hmmmm…. Perhaps if I had satin stitched the corners in green…?
Uh. No.
I finished the project with just the plain double line of hemstitch.
I haven’t taken photos of the whole finished piece yet. Down the road, when I press it and put it out for use, I’ll take some photos and share them with you so you can see the overall effect of the double hemstitched area. The double hemstitched area isn’t bad – it looks good, in fact.
Had I planned that approach from the beginning, I could have avoided the satin stitched blobs in those corners, and it would be fine.
But I don’t like the shoddy corners. They are messy and unstable because they were stitched when there wasn’t enough fabric left to hold the threads well.
Moral of the story: think things through, and certainly think them through before you snip threads!
I wish I had left well enough alone with the first line of hemstitch, but at least I learned a good lesson. And along the way, I also found a decorative approach to hemstitch that I can use on future projects.
The End.
I hope you have a lovely weekend!

What is it about those decisions one makes late at night?! I’ve done it many a time, either with paining, sewing or embroidery. It’s like half the brain is asleep, even if one is feeling wide awake! And sometime I smugly think- “that’s really good” at midnight- come midday I’m tearing my hair out at what I’ve done!
Now your efforts look perfect as usual, really nice cross stitch, I’ve not done any for a long time. You’ve tempted me I think!
Pity we can’t buy your kits here in Europe!
Thank you as always for really interesting posts
Kind regards from
Vivian