



Happy Friday, everyone! Today’s the last installment of Blackberries Brambles & Berries, where we look at how to prepare the project for framing.
If you’re just joining in on this project, you can find the Project Index here, where you’ll find all the previous lessons.
If you’re a member of the Needle ‘n Thread Community on Patreon, you have already received the PDF download for this lesson.
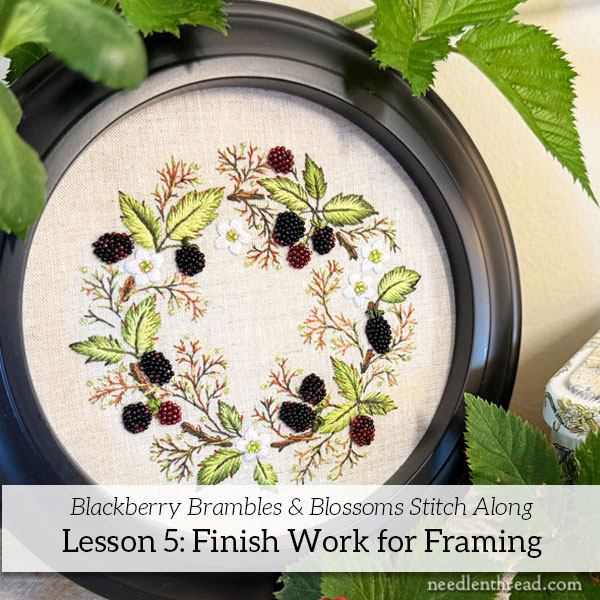
To frame this project, I initially wanted a round frame with bubble (convex) glass, but the cost of a good frame with bubble glass was a bit steep. I searched online for 6” round frames in black and ended up finding the one I used on Amazon. You can find it listed on my Amazon Recommendations Page here, under Embroidery Tools & Accessories. (Please note that this is an affiliate link, which means Needle ‘n Thread may receive a small commission for purchases made through that page with no extra expense to you.)
The frame has both a hanger and a stand on the back, so it can be used either way. It has glass, but when I use a photo-type frame for embroidery, I remove the glass. I only use glass when I use a custom frame that can be matted or spaced to accommodate the embroidery under the glass, so that the glass does not touch the embroidery.
You aren’t restricted to a round frame. This piece would look great in a square frame with a round-cut mat, too!
In addition to a frame, you’ll need a piece of white mat board (I prefer acid-free) and a piece of thin, low-loft batting. Cut the mat board into a circle the size of the insert in the frame. The easiest way to do this is to take the provided paper / decorative insert in a purchased frame and trace its outline onto the mat board. Use a craft knife or even a strong pair of scissors to cut out the mat board. Cut a corresponding piece of batting.
You will also need pins, a needle, and strong thread for lacing. I often use a double length of heavy cotton hand quilting thread for lacing, or any other strong cotton string that won’t stretch. Sometimes, I use linen thread, which will also work.
Block & Damp Stretch
When you’re ready to finish an embroidery project for framing or for making up into some specific item, it’s always a good idea to block and damp stretch the work.
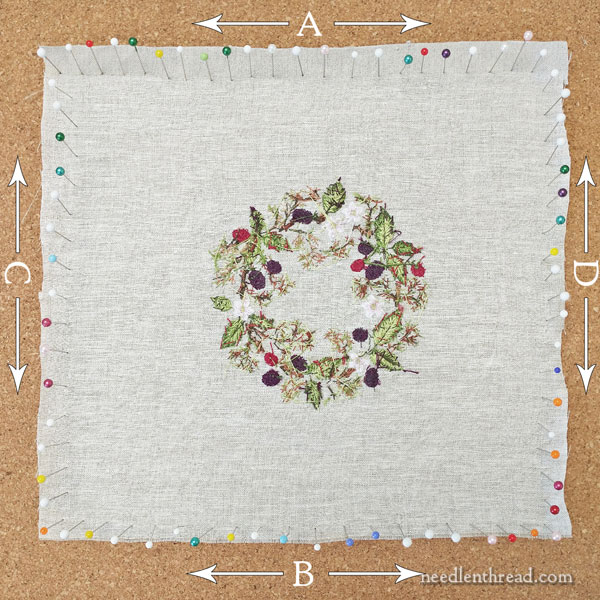
To do this, pin the work, embroidery side down, on a surface that will receive pins. I use 1/2″ thick 12″ square cork tile for blocking.
Pin one side at a time, starting with A. Pin along the outer edge of the fabric, starting in the center out to one side. Then go back to the center and pin out to the other side.
Next, pin side B (the opposite side) in the same manner, then C and D.
As you pin, slightly pull the linen out so it is lightly stretched between the pinned sides. Make sure the sides are straight and square.
When the piece is pinned out as shown above, lightly mist it with water and leave it to dry. The fabric will shrink slightly and smooth out.
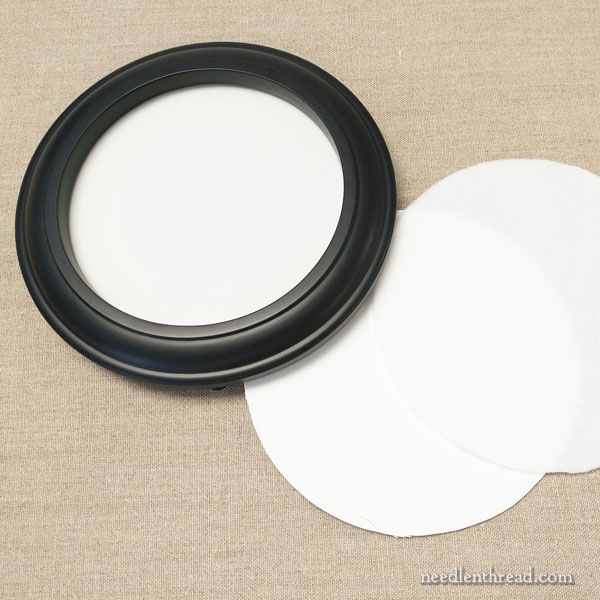
Gather your frame, the cut mat board and low loft batting, and your damp stretched embroidery.
Have some decent ball-headed pins on hand, the thread you chose for lacing, and a needle.
Place the mat board circle on your table. Place the low loft batting on top of it. You can secure the batting if you want by either applying a light coat of glue to the mat board and then pressing the batting onto it, or using some double-sided tape. It’s not essential, but it can be helpful to secure it if you’re having trouble with shifting.
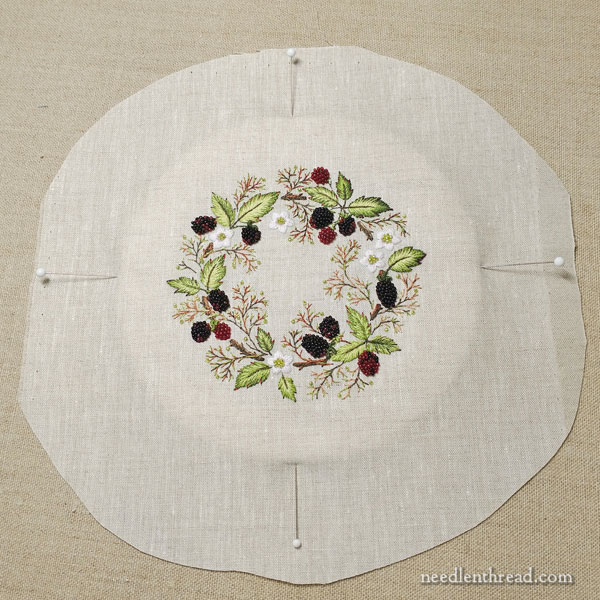
Cut your embroidery out in a circle, so that it extends at least 2″ all around the mat board. Make sure that the embroidery is centered before you cut.
Then place the embroidery over the mat board and batting, face up, and centered.
Pin the embroidery over the mat board by pushing just the tip of a pin into the edge of the mat board. You don’t have to go deep – just enough to hold it in place.
Pin at each point of the compass, north, south, east, and west (or, if you consider the face of a clock, noon, 3:00, 6:00, and 9:00), as shown above.
Make sure the fabric is pulled smoothly over the board and batting. You don’t have to pull it tight, but you do want it to be smooth and not loose.
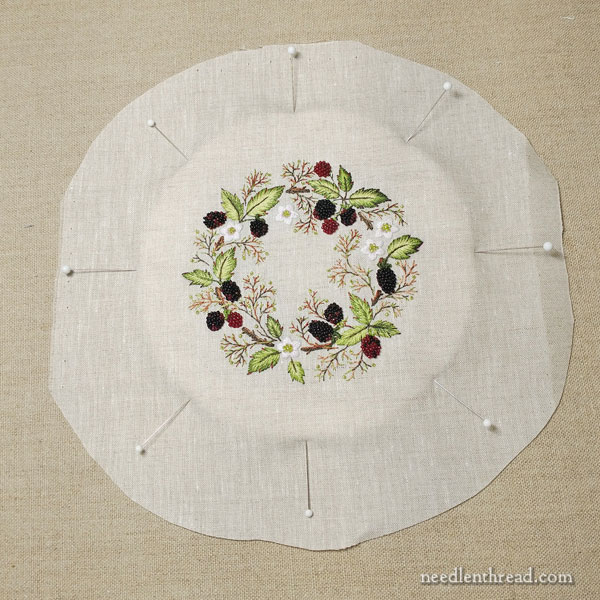
Then go ahead and pin halfway between those points, so that you have 8 pins in, as shown above.
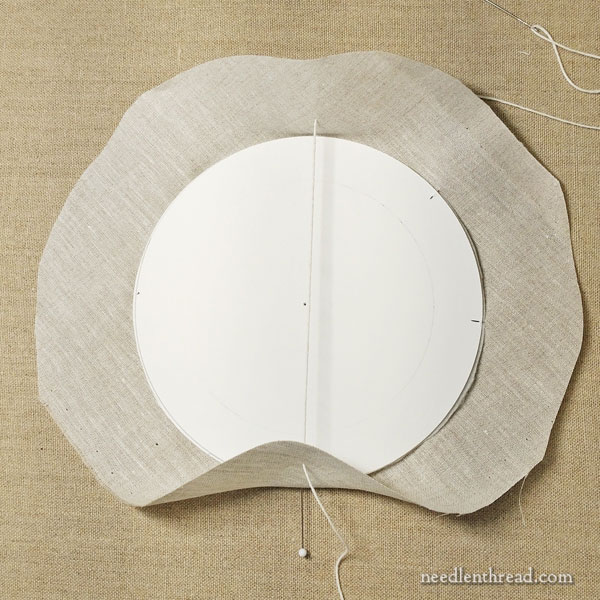
Cut your lacing thread about 40″ or so long, and knot one end. Turn the pinned piece over and begin lacing by passing the thread through one side of the fabric, across and circle and into the other side of the fabric, to pull the sides in over the board foundation.
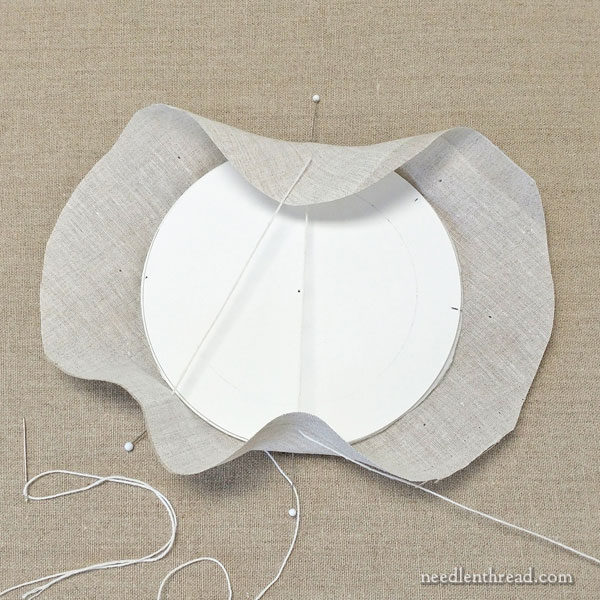
Work all around the circle, always working opposite sides to pull the fabric in over the board.
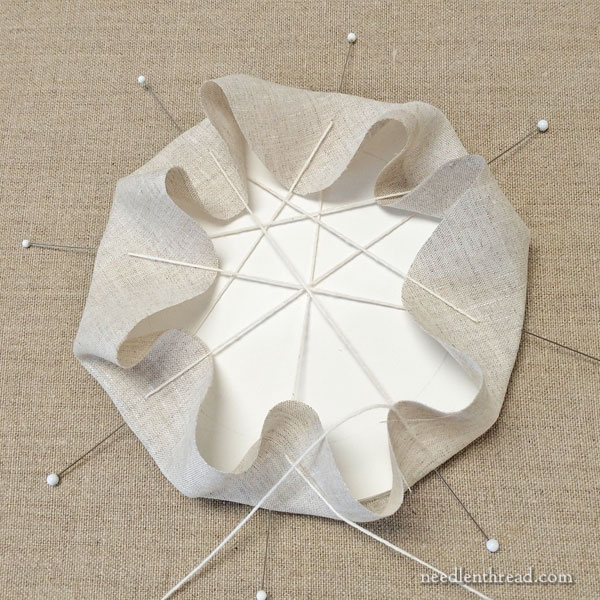
Do not remove the pins!
Continue until you’ve laced all around the circle (about 8 spokes) and pulled the fabric over the board all around.
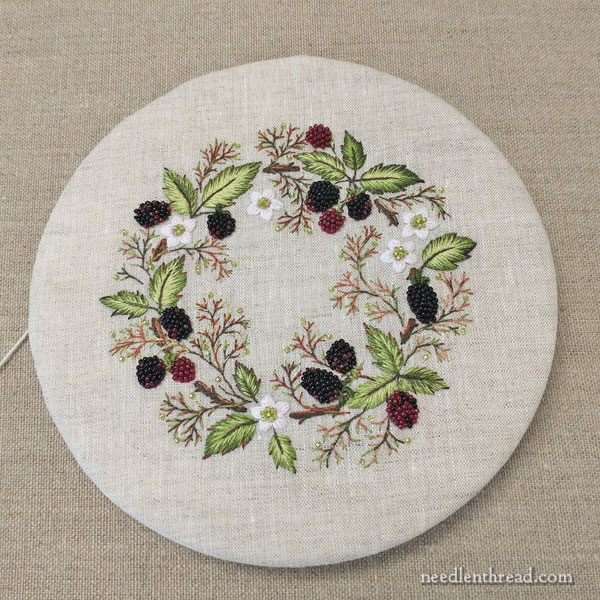
Turn the piece over, make sure the centering is still good, and then you can remove the pins. You’re not finished lacing yet, though!
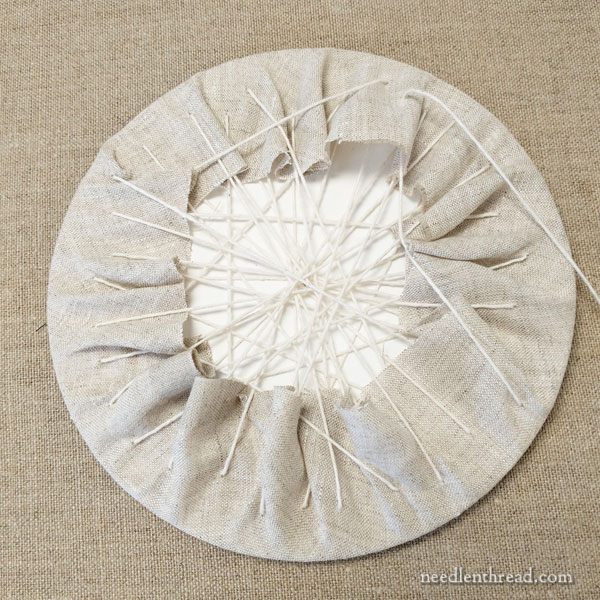
Now you can just go hog wild with the whole thing, lacing all around, pulling the fabric into the center, and kind of “pleating” it as you go. Your lacing stitches should be providing constant and consistent tension across the back of the board.
Do this until the fabric is all relatively flat and “firmly” laced in place. Tie off with a knot and cut away any excess thread.
Why Lacing & Not Glueing?
When I prepare a project like this for framing, I prefer to lace instead of glue. You can remove lacing. It’s very difficult to remove adhesives.
Down the road, if I want to re-frame the piece, clean it, or use it for something else, I can cut away the lacing and still have a perfectly good piece of embroidery. I wouldn’t be able to do the same thing – or at least, do it easily – if adhesives were involved.
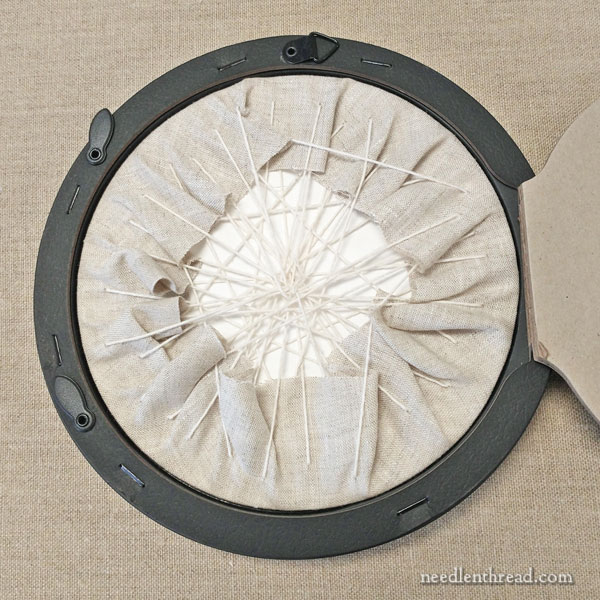
With the glass removed from the frame, place the piece in the frame, embroidery side out.
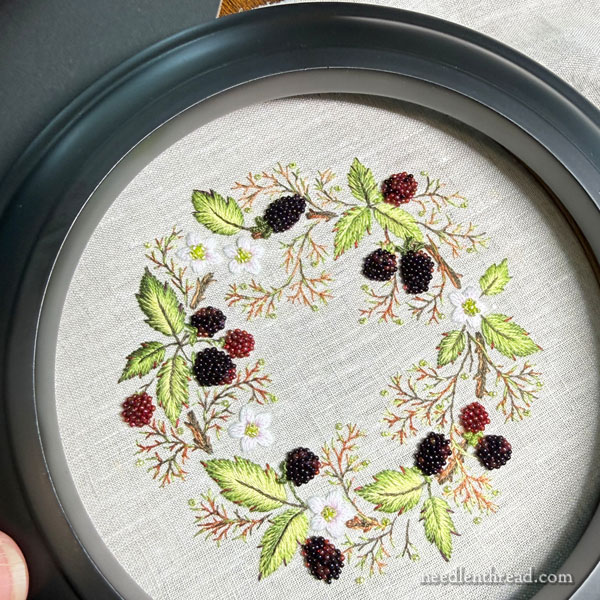
Turn it over to check the placement of the embroidery in the frame. Turn the embroidery until you get the design where you want it, in relation to the hanger or the stand, so that the finished piece is situated nicely in the frame.
Turn the frame back over, close the back, and turn the holding tabs over the back cover.
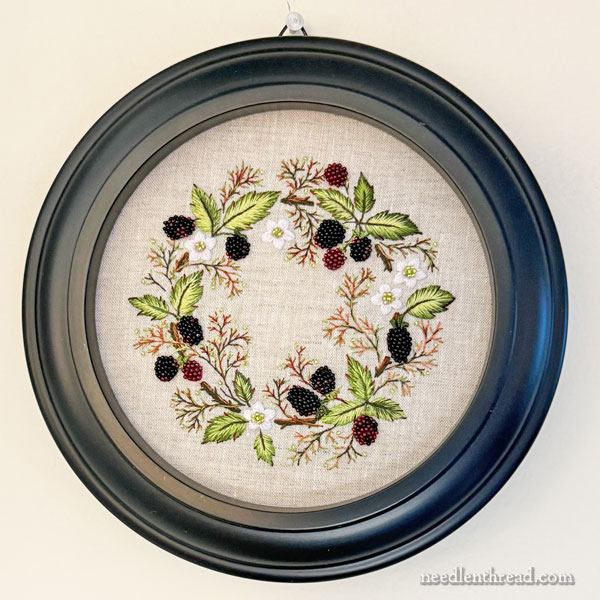
I tested the hanging apparatus and it worked fine.
Though my intention was the hang the piece on the gallery wall at the studio, I ended up keeping it at home, sitting on my entrance-way table where it serves as a great conversation piece. All my visitors want to eat the blackberries.
That, my friends, is the end of this stitch-along project. I hope you enjoyed the process!
More Kits
We will have more kits available for this project next week. The instructions will remain in the Project Index here on the website so you can access them and work your way through each lesson.
Have a wonderful weekend!

Leave A Comment