June 12, 2011
Church Embroidery: Inspiration!
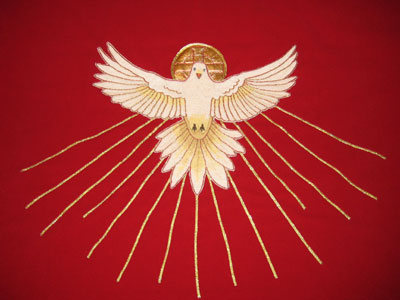
In ecclesiastical embroidery – both historical and contemporary – it’s fairly easy to find representations of the Holy Ghost in most collections. The Holy Ghost is symbolically represented as a dove, from Christ’s baptism in Luke 3:22: “And the Holy Ghost descended in a bodily shape, as a dove upon him.” As a symbol, the dove evokes certain images – it is gentle, pure, peaceful. Within larger images on historical vestments, you might look at the whole picture and completely miss the dove, but if you look hard enough in Christian figure embroidery on vestments, sure enough, you’ll often find a little dove figured into the needlepainting somewhere.
Lately, I’ve been in touch with several embroiderers out there who have been working on different pieces of ecclesiastical embroidery for Pentecost. A couple sent photos, so I’d like to share them, and I’ll also show you some photos of historical pieces with the Holy Ghost discreetly figured into the embroidery.