


Here are five points that are helpful to know about hand embroidery needles:
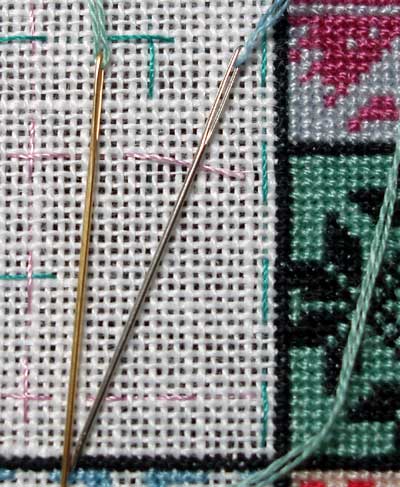
1. Types: Different embroidery needles do different jobs. There are several commonly used embroidery needles. Embroidery (or “crewel”) needles have sharp points and slightly elongated eyes. They’re used for crewel work and most surface embroidery where piercing through the fabric threads is necessary to the stitching. Tapestry needles (pictured above) have long eyes and blunt points. They’re used for counted work, drawn thread work, canvas work, or other types of needlework in which the point of the needle is not meant to pierce the fabric threads. Chenille needles have a long eye like the eye on tapestry needles, but a sharp point, and can be used effectively in crewel work and other wool embroidery, or any surface work where a longer eye and a sharp point is desired. Straw or milliner needles have an eye and shaft that are equal in thickness, which makes them ideal for French knots and bullion knots, or any stitch where the needle must pass through multiple wraps of thread.
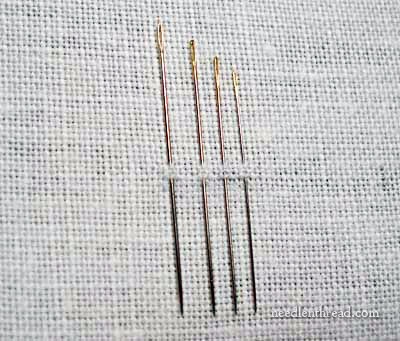
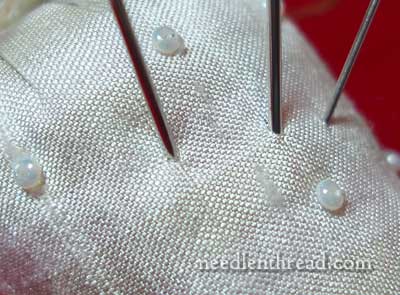
2. Size: The higher the number, the smaller the needle. This is true within types of needles. Embroidery needles are commonly numbered 1 – 12, and size 12 is significantly smaller than size 1! Tapestry needles and chenille needles are numbered commonly from 18 – 28, with 28 being the smallest.
3. Relativity:: The choice of needle size is relative to the type and size of thread. For example, crewel yarn will require a much larger needle than fine silk will, because crewel yarn is a lot thicker than silk. The needle should be the right size to allow the thread to pass through the fabric with minimal abrasion, but not so large that the needle leaves a noticeable hole around the thread.
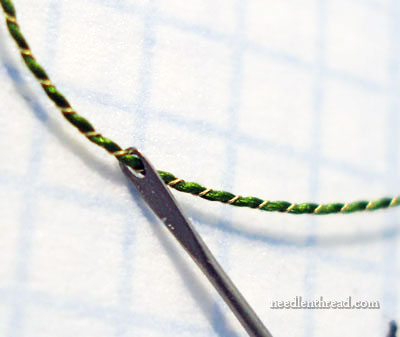
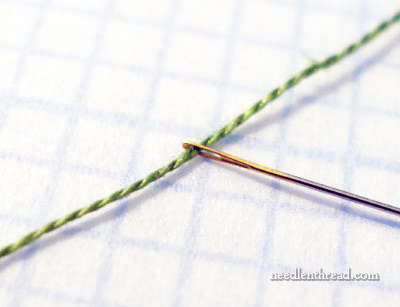
4. The Eye: On machine-made needles, the eye is larger on one side than it is on the other, because of the manner in which the hole is punched or bored by the machine that makes it. If you have trouble threading your needle from one side of the eye, turn the needle around. It might help! There is also a “ridge” on the inside of the eye of machine-made needles. On hand-made needles (like the one in the image above), the eye is perfectly smooth and round, making these needles ideal for metal threads (and other similar threads), as the thread will not wear as readily as it will in a machine-made needle.
5. Threading: Did you know you aren’t supposed to lick your thread when you thread your needle? The primary reason for this is that the wet thread can cause the inside of the eye to rust, which can quickly fray your embroidery threads while stitching. To polish up your needles (including the eye), run them through a strawberry (or other shape) filled with fine emery sand. This will help remove rust that may have formed in the eye of the needle.
If you’re looking for it, there’s plenty of other reading on hand embroidery needles here on Needle ‘n Thread!
I didn’t know about rusting out the eye of the needle. I confess, I’m a thread licker. Any suggestions on how to keep those fuzzy ends together while putting them through the eye? Especially when using more than one thread for blending?
I think I recognize that project up top. 🙂 How is Angel Pavement coming along? I haven’t started mine yet.
Thread Heaven is nice for this and conditions your thread so that it passes through fabric smoothly.
Mary,
I love your site. You’re so awesome! It’s so invaluable to learn about embroidery and have it broken down into easily digestible chunks.
Thanks Mary.
You always seem to hit a subject foremost on my mind. The latest being is kicking myself at not paying attention to what needles I use.All my needles are never put pack in their case. I seem to accumulate them on my magnet stuck to my sew kit. I just grab the size needed at the time. Yesterday I saw someone had what they called Cross stitch needles on Ebay 100 #26 for $10 free shipping. The kicking came about when I realized I use my needles by look. I have no idea what size they are. So thanks again for teaching a novice to know her tools of the trade.
Handmade needles! I did not know there was such a thing and I can’t imagine the process they must go through to do it! I would imagine some magnifying glasses would be a requirement. Thanks for all you helpful information!
Deb
That was very useful – I didn’t know some of those facts!
Thank you so very much for this informative post. I am a cross stitcher and embroiderer for years but am just now understanding the different types of needles and what they are specifically used for. I’ve been picking up John James needles of late as I like the quality. Right now I’m trying out DMC #26 needles for a cross stitch I’m working on 16ct fabric, seems to work well. It’s amazing how a different size needle can change the look of how even your stitches are. Thanks again!
Concise and so helpful, Mary. As always. I was attempting to keep a binder with some of your “best” posts, printed out. Quickly realized they’re ALL “best,” so the binder was cumbersome. Now I have an ipad and can easily check your site while I’m stitching, if I have a question.
Yes, I too will confess to being a former thread licker. It seemed to be the only way to get the thread though those seemingly microscopic eyes. Then one day I pulled the thread between my freshly ChapSticked lips. It worked like a charm! The end stayed together and I didn’t need to relick again and again as the thread glanced off the needle. It’s more supple than my beloved beeswax and being petroleum based it may even help prevent rust. Granted, it may discolor or otherwise negatively affect fine thread, but I mostly hem & reattach buttons and occasionally “doodle” with generic cotton.
Good article. I just posted a picture of the hand made needles under Ask & Share Pictures.
I use them all the time. They are very pricey, but worth it after you get used to them. The price also causes one to be very careful and take care of needles. For those, you use a small, folded piece of very fine sand paper to clean and sharpen them.
To make threads easier to pass through the eye, I dampen my index finger, then stroke the strands together. Works for silk.
Thanks for the great pics, Mary.
I’ve had problems with the eyes of my needles catching/tearing/snarling the rayon threads I use. To fix that (and any rust that might occur, yes I lick my threads too) I load up some quilting thread with Dremel polishing compound and pull it through until it all seems smooth.
It’s not as nice as the handmade needles, but I save money buying machine made needles and then polishing them myself.
And like Therese, I *really* need to find a way to organize my needles so I can figure out what size they are.
Here’s a link to the dremel compound, I buy mine at the hardware store…
http://www3.towerhobbies.com/cgi-bin/WTI0001P?I=LXC606&P=8
I’m a licker too! And I agree about the chapstick, it really does work beautifully. I’ve never had a problem with rusted eyes from licking, so I’ll continue. I finally bought a cute strawberry kit that came with emery, so I’ll start keeping needles in it.
Here’s a tip: use a size 7 between when working with floche. The needle is fat enough to make a good sized hole so the floche won’t fray from going through the fabric. And good fabrics will readily close up around the hole. I’ve noticed a significant difference when using this size. Most of us want to use the smallest needle possible, but that’s just not practicable.
No matter how many times I read about needles I always find that there is something to learn… Thanks for the concise post covering the important aspects
I think Cynthia has hit the needle on the head with her comment about us wanting to use the smallest needle. It has taken me years to realise that there is really no joy in jamming a too thick thread through a too small needle eye – the thread frays, the hole the needle makes isn’t large enough for the thread to go through etc, etc. Enough already!
Thank you Mary for your words of wisdom. Now if you can just wave your magic wand and make me put my needles back in the needlebook where they came from, life would be (almost) perfect.
Hi Mary,
I have been reading through the online crazy quilting magazine. I accidentally came across it and when I realized it was free, well I was having an absolute ball looking through all of the current and past issues. Tons of inspiration and cool things to stitch and make. I even found an article from our endeared author here Mary! It is so funny how when you follow someones work, like we do by reading daily here, you can see a photo of needlework and without even knowing who worked the piece, you can somehow “know” that the work you are looking at is from a certain needleworker, like when I saw Mary’s pretty stitching photos in her article, and I thought to myself, “Hey, this looks like Mary Corbet’s work! Then I looked at the authors name who had written the article, and it WAS Mary! I was surprised! Pleasantly so!”
So anyway, as I have been looking at the crazy quintets magazine I read an article that talked about needles, sizes, use, and stuff, and I recall seeing something that said that a lot of the needles that we all commonly buy come with a coating of some sort on them to protect them from rusting, like nickel plating or fold or what have you. The article said that when we use a pincushion with emery in it to keep our needles sharp that we are actually doing the opposite of what we intend to do by using the emery. That we are really damaging our needles as the emery actually scrapes off the plated coating that is meant to protect the needles from rust and that we are then opening our needles up to rusting by scraping the coating off with the emery!
I was super surprised and it made me think. I don’t wan’t to mess up my needles.
Continued from my post above…my way of saving so I don’t accidentally get my post deleted if I lose connection:-)
…So I kept reading and it said in the article that a good way to keep our needles safe and lubricated and not scrape the coating off our plated needles is to store our plated needles in natural wool fabric, as it has natural oils in it, lanolin I think it was, and that it is really good for all of our needles as it protects them from rusting and it keeps them lubricated to slip through the fabric threads more easily and also helps to keep our thread from getting snagged by lubricating the eye of the needle and so it is good and useful to use a natural wool fiber pulled through the eyesnof our needles to help to care for the eye.
Another tip about keeping needles organized that I read on the crazy quintets online magazine was to keep them in a Needlebook and that you could designate certain pages of the Needlebook for certain sizes and types of needles so that when you need a certain type of needle of whatever size you simply flip to the corresponding and appropriate page in your Needlebook!
…continued again from above…
…so anyway of course you would need to make sure to consistently return your needle to the correct and appropriate page of your Needlebook to make such a system work, as opposed to the nearby couch cushion or a corner of the fabric you are working, like I often do, which is bad because not only do you end up mixing up your sizes and types of needles, you also risk losing them or you risk someone getting hurt by stepping or sitting upon said misplaced needle!
I am sorry this response was so long and I hope that it is helpful. I hope it was ok to mention crazy quilting magazine, I am sorry to not remember which specific article the information came from but if someone wants to know, if you ask me I will try to find it.
As someone above said, it is interesting how Mary seems to posses the uncanny ability of posting relevant articles that while they are very specific in nature, they DO always seem to be of a topic that seems to be one that is currently on my mind.
I wonder…could this article about needles be leading up to one about needlebooks, and making one?
🙂
Thank you for reading my super ramble response!
Mindi Hammerstone
I did not know that the reason you aren’t supposed to lick the thread was the risk of rust in the needle eye – I thought it was risk of the threads discoloring. But I will attest to the “turn the needle around” part if you are having trouble threading it. And sometimes I have to break out the threaders (even if just using a strip of paper) because some days are just that way.
That hand-made needle looks yummy! Bob – thanks for the tip on polishing the eyes yourself.
I have this book and I LOVE it! So glad you enjoyed it too!
I have never heard about the rust issue. Don’t think I’ve ever had a rusty needle, although I have had some get some gray corrosion on them.
What I learned is that if you need to lick, lick the eye of the needle, not the thread. The moisture will then draw in the thread. It works too, unless the thread is very frayed at the end. Then sometimes, licking the thread also will help, but cutting the end straight works best. The main reason I heard not to wet your thread is because it will swell up and make it harder to pull through the eye.
Mary,
Where do you purchase hand made needles?
Hi, Sherry – hand made needles are available through the Japanese Embroidery Center in Atlanta, GA. You can find them here on their website: http://www.jecstore.com/Needles.php ~MC
Wonderful article. Very helpful
Thanks so much
What do you call that embroidery needle with its eye at the tip of the needle? I like the finished work looks .Thanks
Hey Mary! The other day I found that my favorite needle had turned browinsh blackish in the middle. Will running needle through the emery strawberry get rid of the rust? Is there any way I can fix it? Or should I order some new ones? Thanks!
Mary,
thank you so much for your details on different needles. For some time I have searched for Crewel/26 needles only to be told they had their name changed – did not know what the new name was – nor stocked in our local store.
Knowing it is an embroidery needle has solved my problem. I’ve bookmarked the page. 🙂
Hello Mary,
I live in Sydney, Australia and and discovered you wonderful website. I just wanted to thank you for your recent post about supplies needed for beginner embroider, which I am. What a great post on the information. Thank you. Kathy
Amazing I was not aware of it. which type of needles we can use for embrodery work. Thank you very much.
Hi…I am looking for Embroidery/ Crewel needles, on the needles packet the needles size is mentioned as 3/9, What does it mean? Does it mean in one packet the needles sizes range from 3-9? On another packet the size is 5/10, does it mean the needle sizes range from 5-10 ? Please let me know,
Yes, that’s correct. The ones in the center – the larger needles – are the lower numbers, and as they get smaller out to the edge, those are the higher numbers.
Thanks for the guide, so it means if I buy the packet of needles (3/9), it contains the different sizes needles: 3 to 9?
That’s right!
Hi, hope you are doing great. Can you please tell me what size of embroidey needle is perfect on medium weight fabrics? And one more thing I want to know can the regular sewing needle with large eye and same size be used for embroidery? Is there any difference between the sewing needle and embroidery needles, how the both needles are differentiated if they both have the large eye?
Embroidery needles are chosen first by the weight or size of the thread being used, not the type of fabric. An embroidery needle (also called a “crewel” needle) has a long eye and a very sharp tip. A sewing needle has a small eye. The longer eye works better for floss.
Thanks Mary :-), so needle eye size is the main difference between sewing needle and embroidery needle, sewing needles never have large eye? I have one question: If I use the 3 strands of embroidery floss which size of needle I shoud use & if using 6 strands which needle size is the best to use? I know that as the numbers get bigger the needles get finer, I need to know do the numbers also change the length of the needles, needles can get longer as the numbers increase. Please help
It helps to purchase a package of assorted sizes. Then you can select the size that works best for what you’re embroidering, and for the thread you’re using. Regular sewing needles generally have a small, roundish eye. They’re called “sharps.” Embroidery needles have a longer eye and a sharp tip. They’re called “crewel” or “embroidery” needles. Other needles, like milliner needles (also called “straw” needles) can be used for embroidery, too – they have a roundish eye, a long shaft, a sharp tip, and the eye and the shaft are the same diameter. ~MC
Just the few short paragraphs that I have read her I have learned a lot about needles an which kind to use. I would really like to know more about the threads an proper needles to use in my embroidery an crewel needles an thread. An the proper way to get the best looking work out of my embrodery.
I do mostly needlepoint, but also embroidery. My needlepoint store provides 2 needles with every canvas and the owner believes in discarding needles after one project, or more often, depending on the size of the project and damage to the needles. How long do you use individual needles? Over and over? Do you recommend using separate needles for metal threads due to wear and tear on the eye?
I learn so much from you and I appreciate it so much!
Just noticed that at point 4 of your 5 things about embroidery needles you wrote SIZE, where I think you meant SIDE. Thank you for your guide
Thanks! Fixed it!
Hi is a quilting between needle size 7 the same as an embroidery between needle size 7?
Thank you!
Hi, Jill – needles are not always consistent across types. I’m not sure what an embroidery between is, actually. I’m familiar with betweens and with embroidery needles (which are also called Crewel needles), though. I’m not sure how they compare in size to a quilting between. They might be the same gauge if they’re by the same manufacturer?
Im making a Polynesian style skirt from burlap and will be embroidering designs using 1mm jute strong. I’m a newbie at crafting and am completely at a lose as to what needle I should use. What size needle should I use? Thanks for your help!!
Correction: *jute STRING
Hi, ZW – I’d have to see the string to know. If it’s string – heavy string – you might have to get an upholstery needle of some sort. You might be able to find a chenille needle in a size 13, too, which is a pretty hefty needle. Hope that helps!
How do I know what size embroidery needle I have if I don’t have the packaging?
Hi, Laurel – you might try these needle ID cards I reviewed here: https://needlenthread.wpengine.com/2012/07/needle-id-cards.html You’ll find information on where to find them as well.
would like to have the long needle do you sale them?
Hi, Elizabeth – I don’t sell retail supplies on Needle ‘n Thread, I’m afraid. There are plenty of online needlework shops that sell needles. Another option in the US is Colonial Needle.
I find your article on hand embroidery very interesting as I am a beginner .
You say Crewel needles are sharp but ones I’ve bought never have a big enough eye for the 6 stranded thread
There are different sizes of crewel needles – all the way down to 1 (12 is the smallest size available, 1 is the largest). One is really too big for six strands. I often will stitch with all six strands using a size 7, but if your fabric is tightly woven, the 7 might be a bit small – in that case, I’d use a 5.