


Previously, I mentioned that we’re using iron-on patterns for my embroidery classes this summer. Actually, I’m beginning to re-think that! Ironing on a repeat pattern can be a bit of a hassle! Still, it worked, so I thought I’d show you how I did it.
The first embroidery project that I mentioned using an iron-on pattern was the monogrammed linen guest towel. Putting the pattern on the guest towel as a pretty simply endeavor – it was just one letter, after all.
But I wanted to iron on a repeat patter, to decorate the edge of a kitchen towel. So I contemplated how to line things up and get the pattern on the towel in such a way that the design – a straight line of flower-like motifs – began and ended with the same figure.

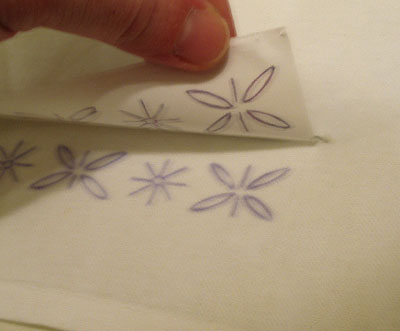
This is the pattern – it begins with the 8-pointed spoke, and ends with the four-petaled flower thing. If you transfer it once, then repeat it, your beginning motif and ending motif won’t be the same… you could flip the pattern, but then you’ll end up with two of the same figures in the middle. So that’s something I had to take into consideration.
I knew that the design had to be centered, and that it had to be lined up with the base of the towel. To mark the center of the towel and the line along which to transfer the pattern, I thought about using a pencil. However, I didn’t want to risk leaving a residue that might not disappear, especially considering that the heat from the iron might set the pencil marks. I also thought about a water-soluble pen, but this presented the same problem – you shouldn’t iron over water-soluble ink, because it sets with the heat.
Soooooo. This is what I did.
First, I laid the towel out to measure it and to check how the repeat pattern would fit. I figured it would take two patterns, plus one of the single motifs. Then I measured up my towel and prepared to mark it.
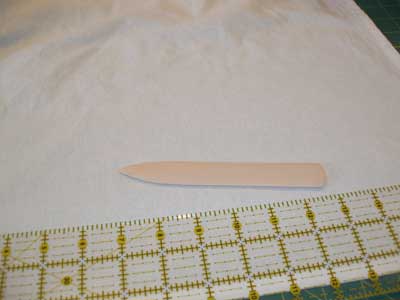
Instead of using anything that leaves an actual mark on the fabric, I decided to use a little bone folding tool. These are tools that are usually sold in the paper crafts area of craft stores. They’re used to score paper to make a folding line. Alternately, you can use a piece of sanded, smooth wood with a tip on it, or a burnisher used in other art forms, or probably even the back of a kitchen knife (not the serrated edge!).
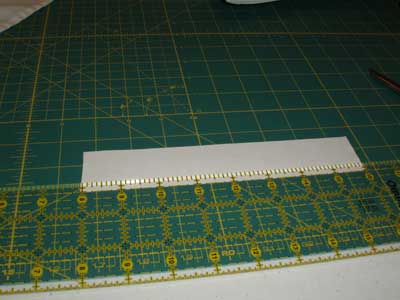
I lined up the towel on a straight edge, then measured up a couple inches, where I wanted the top of my design to be. In measuring, I noticed that the fabric was not exactly cut on the grain. It’s just slightly off. I was tempted to follow the grain of the fabric, but that would’ve made the design slightly crooked. So I measured from the base of the hemline on the towel and kept the line even.
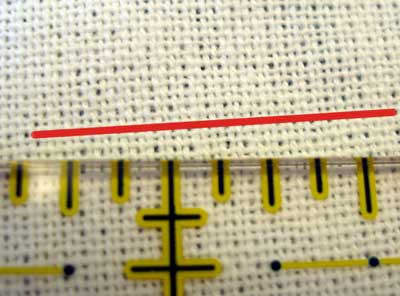
I used a ruler as a guide, and drew the bone paper scoring tool firmly across the line which would mark the top of the design.
This left a definite crease in the fabric.
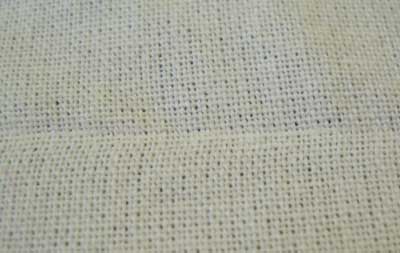
Then I measured the center point, and used the same tool to mark the center of the towel. Now I had my positioning marks in place, without using anything that actually marked the fabric.
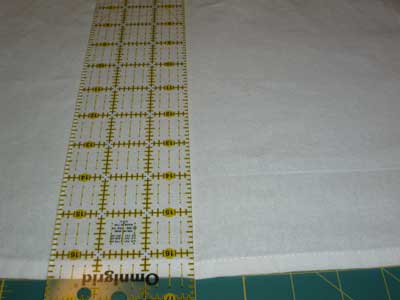
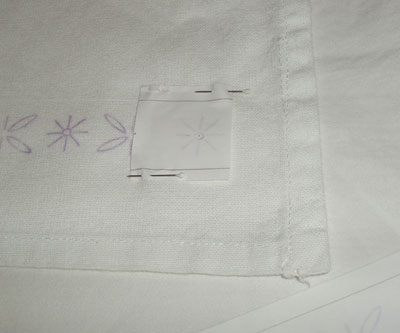
After this, I took my pattern and carefully measured it, marking on the back side (the un-inked side) a quarter inch line. This is what I used to line up the design with the mark on the towel.
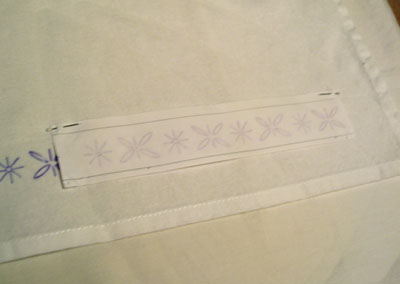
I pinned the iron-on transfer ink-side down onto the towel in the correct position.
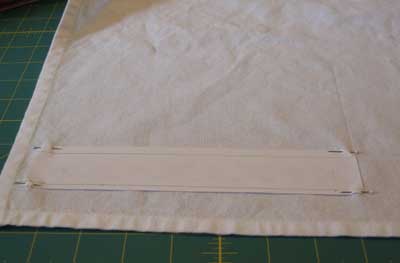
Pinning the pattern is essential for ironing on a repeat embroidery design! If you eyeball it without pinning it, and you apply the iron, you risk not getting a transfer and having to re-apply the iron-on, which is virtually impossible.
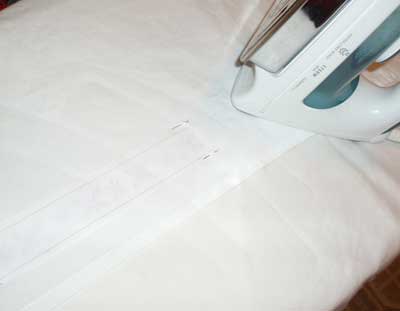
Whenever I’m ironing anything for embroidery, I always use an old pillow case underneath the piece. The instructions recommend putting something over your ironing board cover, anyway, in case the ink bleeds through.
So I applied the iron to the back side of the pattern for about 10 seconds, as prescribed in the instructions in the iron-on transfer book. When you do this, it’s important to place the iron directly on the transfer, apply firm pressure, and don’t move the iron back and forth.
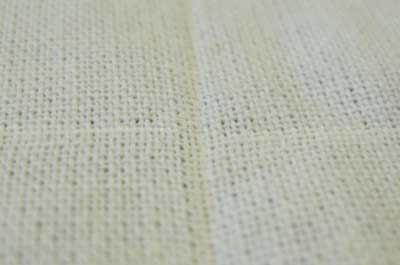
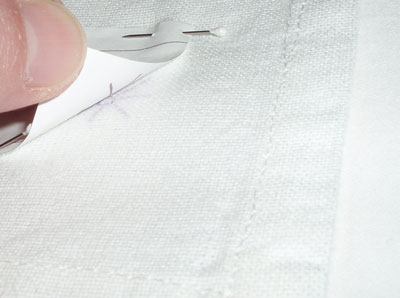
And this is what I got for the first transfer:
The picture is partly blurry (out of focus), but so is the design on the fabric. The ink, especially with the first transfer, seemed to fuzz out a bit – not actually bleed in an irreparable way, but just “spread” in a kind of fuzzy way. This may very well be the quality of the transfer. I did not notice anything like this on the monogram.
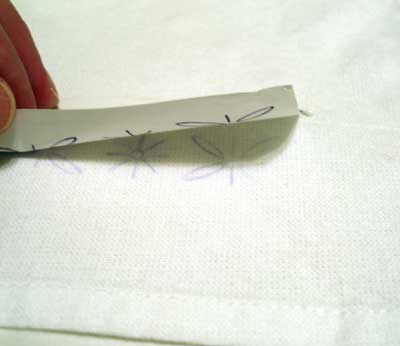
Anyway, after you’ve held the iron on for the prescribed amount of time, unpin one corner of your design and check the transfer. You want to make certain it transfers! And if you take the pattern off, and only part of the design transferred, you’re pretty much sunk, as it’s really hard – if not impossible – to place the design in the exact same spot. And if you don’t, you end up with duplicate lines (like double vision!).
Now it’s time to line up the next repeat. By the way, I suggest using pins with a steel head or a glass head, because it is likely the iron will have to rest on the pins.
With the second application of the transfer, you will need to hold the iron on a bit longer.
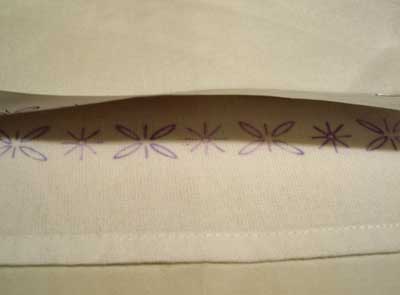
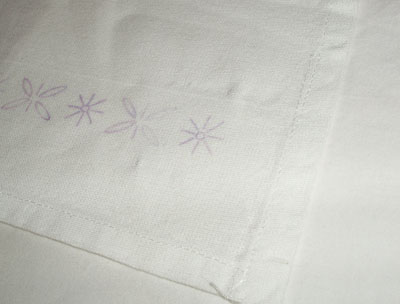
You can see that the transfer is not nearly as dark the second time. But I prefer it like this! It’s visible enough to embroider over, but not dark enough (and the lines aren’t wide enough) to worry about not being able to cover it up.
Still, part of the repeat didn’t transfer, so I applied the iron for a few more seconds – and I ended up with a sort-of dark pattern in some areas.
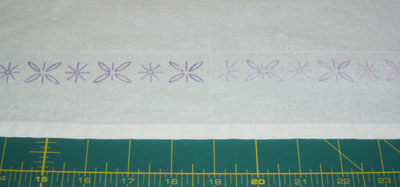
Now there’s the question of the “balance” of the design. I wanted the whole line to begin and end with the same figure, the 8-spoke little design. So I cut my transfer, and isolated that one figure. I measured the distance from the center of the flower to the center of the spoke design, and lined up the isolated piece.
And I ironed it and checked it – very pale on the third application, but that’s ok! I like it that way. So I left it.
In some of the books I was using, they suggest placing aluminum foil under your fabric before ironing on a used transfer, to increase the strength of the pattern. I don’t know if this technique works – I should try it! – and I don’t know if it’s applicable to just a certain type of iron-on pattern. If anyone’s tried that, I’d love to hear about how it works!
So that’s the extra motif…
And that’s the center of the towel. You can definitely see the difference between the first transfer and the second!
The whole process was somewhat time consuming, but not that bad, actually. If I were doing a stack of towels, I’d do each step at the same time on all the towels, then move on to the next step. That might speed the process up!
If you have any input or advice on ironing on a pattern, or a repeat, do share!
If you iron on the pattern for a little bit less the result isn’t so blurry and the second time you iron on is more clear and even one third, I think.
did I express myself correctly?
Thanks for the lesson! I can’t wait to try this on a few pillow cases. Do you have any tips for the back of the work? So far none of my stitching has worked it’s way loose but I’m always looking for techniques that will improve my finishes. I really enjoy reading your blog each day.
MichelleAZ
What a great write-up of your process.
Thanks, Mary!
Glad you like the write-up, Allison and Michelle!
Meri – very good point. Thank you! Yes, you expressed yourself perfectly!
You’re a clever bunny, aren’t you!
Hi all !
Thank you very much for the detailed pictures, is very he;pful. Here is mine experiencing with transfer. I use a tracing creion on the aready pale iron on pattern and then a iron on that way. OR, prick holes in the pattern paper and by scraching the pencils I got a powdery mass wich then I will scater on the pattern holes. Then I trace it with a regular pencil. For me, allways did work. My best wishes to all of you, have a nice sommer where ever you live, Zita
PS.
(I am sory for my gramatic, BUT I never went to english school and university is everything in diferent language NOT english. I do hope that you can understand me)
I have many original drawings I would like to put on the transfer paper and then sell as charity items for my guild. Where do I find the transfer paper that we use to iron on to fabric for redwork? Thanks
Hi, I was also wondering what kind of paper will go through a inkjet printer so I can transfer my own designs onto fabric. I don’t see an answer to the May 12 question, so I’m following up on that one.Thanks
Hi, Anne – Well, any kind of paper, really, will go through an inkjet, as long as it’s not too thin and flimsy or too thick (like mat board). I’m not sure what you want to know, though – are you talking about paper with fabric fixed to it, both fed through the printer…? or something else? Thanks, MC
Hi Mary,
I meant paper on which I could print my embroidery designs in my inkjet printer that could then be ironed onto fabric.
Is there such papers. And if so, who makes them?
Thanks for your thoughts on this.
Anne
Hi, Anne –
I haven’t heard of anything like that, where the inkjet ink transfers to the fabric by ironing. There are other options: there’s sticky-solvy, which you can print in your printer, peel off the paper backing, stick the solvy onto your fabric, and then embroider through the solvy and the fabric. Then, you soak the whole thing and the solvy disappears, just leaving the embroidery. In fact there are two products that do this: sticky-solvy and transfer-eze. You can see a post on transfer-eze here: https://needlenthread.wpengine.com/2010/12/transfer-eze.html But as for creating an iron-on with ink-jet printers, I haven’t heard of any paper or product that makes it possible. Hope that helps a little bit! ~MC
Just added the Right Handed Embroiderer’s Companion to my collection, and it is the best book I have! Thanks for the review and all the great info. I look forward to the Nesting Place class with you teaching. Having hip surgery I turned to a craft, and embroidery was the right one. I’m having a great time as a beginner and working some pieces that have already been great challenges. My husband keeps asking how I can stitch like this, it’s such a peaceful craft! Your site has been a great companion.
Hi, Byrnn – I’m looking forward to “seeing” you in class! I think you’ll love the little needlebook. I can’t think of any better way to recover from surgery – it is a very relaxing art! ~MC
actually i do not know where can i get this water soluble ink?pls
hi my dear
thank you so much for all send me.i have a question you.Can I print design on fabric by ironing.i can not it to do.
Hello! Sulky makes a special pen that does this. It is called a Sulky Iron On Transfer Pen. I wrote about it here: https://needlenthread.wpengine.com/2011/03/sulky-iron-on-transfer-pens.html It produces somewhat thick lines.
Thank you for this post. I have watched many of your how-to videos about basic stitching and techniques for beginners and found them very helpful. I searched for a post on your blog about iron-on transfers because I tried them recently and they didn’t turn out as expected. I used the iron-on tee shirt transfer pages that another reader mentioned. You print from an ink-jet printer onto the paper and then iron it on to fabric. The problem is that the paper leaves a thick, plastic-like residue so it doesn’t do well for template transfers for embroidery. (I assume they must be meant for full-color image transfers instead.)
My question is, did the transfers that you’re using come pre-printed on special paper? I see all these basic embroidery books talk about using iron-on transfers with little detail about how the design gets on the right type of paper, what kind of paper to use, etc. So any additional details / information would be greatly appreciated! I feel like this shouldn’t be so complicated! Thank you 🙂
Hi, Beth – Iron on transfers that you buy (like the ones in this post) are printed commercially with a special ink. They don’t transfer a plastic residue to the fabric. If you want to make your own iron-on transfers at home, economically, using regular paper, I suggest picking up some of the fine-tipped iron-on transfer pens from Sublime Stitching. They come in different colors, but I like the blue one best. They work really well.
I really enjoy reading and listening to your articles! I am doing some embroidery on my Jean jacket. I came across an iron on design that I just fell in love with but when attempting to iron it on my Jean jacket the design did not show up as the denim is to dark. I am horrible at free hand drawing. What recommendations do you have to use iron on transfers for denim. I have read mixed reviews about trying tear away or water soluble stabilizer products and would like to hear your thoughts too! Thank you! Carolee
I’ve used the Solvy printable water soluble stabilizer with decent results. The needle might gum up occasionally, but it’s not too bad. It’s called Fabri-Solvy, and you can print the design sheets directly from your home printer and then peel them off and stick them on your fabric. When you’re finished stitching, you soak the item until it’s gone. I prefer this to tear-away stabilizers, which can distort stitching during the removal process.