


False starts are a part of life. They’re also a part of needlework. What do I mean by a “false start,” you may very well ask… Well, let me explain.
A “false start” is the experience of beginning that isn’t really a beginning, and that really requires you to begin again!
For example, I have a ritualistic false start about two times (out of five) a week, when I leave my classroom after my last class of the day. Amidst the “See you tomorrows” and “Have a good afternoons” and “Don’t forget to reads,” I close the windows and curtains, I straighten stray things on my desk, and I head out of my classroom with that peculiar eagerness of ending that part of the day. (Yes, it’s true, teachers often look forward to the last bell just as much as the students do – especially when that last bell comes right before lunch, as mine does!)
I close my door and lock it, and head down the hallway. If I’m lucky, about halfway down the hallway is when my false start ends. I realize, inevitably, that I forgot something. I must go back to the classroom, dig out my keys, unlock the door, and find and retrieve the forgotten item.
Sometimes, though, my false start doesn’t end until I’ve gone down two long hallways and two flights of stairs, traversed an outdoor walkway, and arrived at my car in the distant corner of the parking lot. The realization strikes that I forgot something, and I stop, turn around, and head back to the classroom.
In embroidery, I make similar false starts. But the more I embroider, the more I realize when the false start must end – and, if I know when to stop, then I save myself a lot of time, trouble, and grief, not to mention conserving precious supplies.
You might be inclined to think that a false start is a mistake. No, no, dear reader! It’s not a mistake! It’s a learning experience! False starts can actually be a very good thing.
I’ve had quite a few false starts lately. There’s the whole baby bootie experience that you’ve already heard about. Then there’s last night’s table cloth experience:
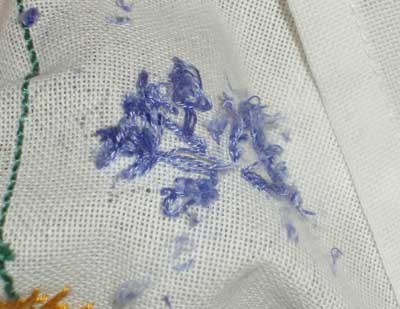
This is a pre-printed tablecloth kit from Anchor – I think it’s called “Spring Garden” and it’s a Fleur de Lis kit. Overall, these kits are pretty nice, and I like working on them for a “casual” project that can be done in the living room. But sometimes, I don’t like their stitch suggestions. On this particular table cloth, they call for these satin stitched blue-bell type flowers, worked in three strands of floss. After the first two (out of six) flowers on the stalk, I knew I didn’t like it, so I picked out the stitches. Was it a mistake that I worked them in the first place? No. It was simply a false start! How would I have known how much I didn’t like the satin stitched flower, if I didn’t try it?
That was a small false start – like getting halfway down the hallway.
But yesterday, I had the pleasure of a Big false start. This wasn’t just reaching the car in the far corner of the parking lot. It was like walking all the way home! Let me show you.
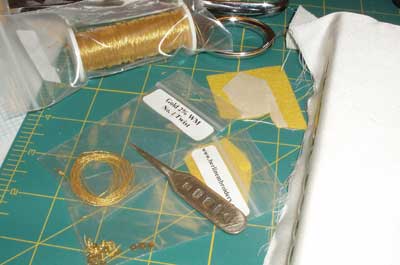
When speaking about designing a project yesterday, I showed you my plan for a hand embroidered Christmas ornament that incorporates silk shading and goldwork. During the afternoon I concentrated on this project! I started by sifting through supplies and tools and seeing what I had to work with.

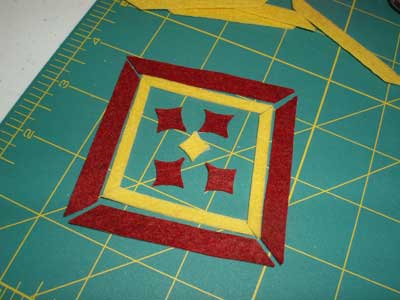
Then I started the actual work. I traced the design elements that would be padded with felt onto fusible interfacing. This is a great tip that I actually learned from Margaret Cobleigh, when I was working her pomegranate. Normally, under goldwork (such as couched gold passing or chipwork), there’s a layer of yellow felt over which the gold is worked. The felt accomplishes two things: it lifts the embroidery and it provides a background color that blends with the gold, in case the background peeks out behind the gold.
To cut out the appropriate shape of felt, you can trace the pattern pieces on fusible interfacing, then iron the piece to your felt, then cut out the shape, and place the interfacing-side down on the ground fabric. You don’t fuse it on; you just stitch it on as you normally would. The fusible web left on the base of the felt is handy, because it supplies a bit more friction, so the felt stays put until it’s tacked down.

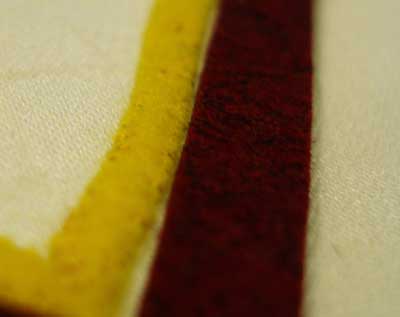
You can see here that I’ve fused the interfacing to red felt, which will be underneath the silk shading. I wanted the stitching to be a bit padded and raised, so, again adopting the idea from Margaret’s pomegranate, I cut out red felt to work the shanding on.
My red and yellow felt ready, it was time to tack the felt onto the design. My plan was to make the ornament out of white satin silk, so I transferred the design onto the white silk (which, because it’s satin, is really rather thick) by using a light table and tracing. I used a tailor’s white chalk pencil to do the transferring. After the design was transferred onto the silk, I mounted the silk, lined with muslin, on an embroidery frame.
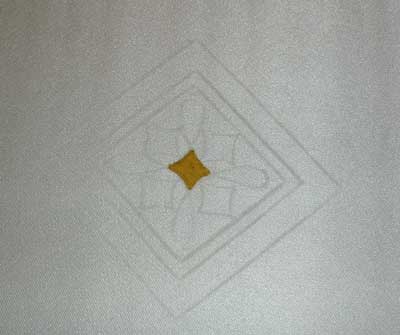
I was ready to start tacking the felt pieces on. As I added the first little center piece, I noticed that the design looked somewhat lopsided. I thought I could fix this by touching up the lines with the chalk pencil. It worked a wee bit, but still, the design just didn’t look right to me.
I went back to the drawing board to determine why the design would look crooked. Having drawn the design on graph paper, measuring out all distances and curves, I could see the problem wasn’t the actual design. I considered that it could have been the frame – maybe I pulled the fabric to taut in one direction, causing distortion in the fabric and design. Or maybe I was just careless when tracing with the chalk pencil. I finally concluded it was the latter, as the silk had probably shifted in the transfer process.

Still, I pressed on. I began tacking down the other pieces of yellow felt. But I didn’t feel too good about the whole situation. I kept envisioning a finished product that looked just slightly skewed. I tacked on one yellow felt edge, then the other. And one of the yellow felt edges came out looking warped! I lined up the red felt with the yellow felt…
And that is when my false start ended!
I learned a couple things:
1. I don’t like this satin silk for this kind of stitching (and obviously not for this kind of transferring). I’ve used this fabric before, and I like it fine for regular delicate surface embroidery. But I don’t like it for a Christmas ornament. Besides, the whole time I was working with it, I was thinking ahead to the pain it would be to finish the ornament.
2. Keep your transfer pencils (tailor’s chalk pencil in this case) sharp! It really helps with precision tracing!
3. Double check straight edges on the felt before cutting. If necessary, use a ruler and rotary cutter to straighten and cut an edge. I don’t know why I didn’t think of the rotary cutter and ruler in the first place!
4. With a geometrically shaped object like this – when it isn’t clear which is the top of the design – mark the top on your fabric, outside the design area, so that you know which end is up. You’d think it doesn’t matter, but I think it somehow does. The whole movement of the piece – stitch direction, etc., will be determined by which end is up.
So that was yesterday’s false start. I’m glad of it, actually, because I learned a lot from the experience. I also realized what the kinks or difficulties would be in this pattern, so I’ve been able to address those (at least in my head). This means that, when I go for the “real” start (today), I will be better equipped to make a go of it.
I’m going to stitch the piece on linen, instead of the silk. That was my original, original plan, but somehow, early, the silk idea crept in. Linen takes a transfer better, anyway. On the silk, the micron pen (.005 tip) bleeds into a thick line. I’ve ever had that happen on the linen, and on this type of project, the micron pen is my preferred choice for transferring a design.
False starts are just a step in the journey – and they’re quite alright with me. Besides, they give us the opportunity to make fresh starts, and would we ever know the pleasure of making a fresh start if we didn’t know what it’s like to make false starts?
The credit for putting the Wonder Under on the felt really goes to Jane Nicholas. I learned this nifty trick in one of her classes. Besides giving you a little friction for holding the felt in place I think you also get a cleaner cut because you don’t have a fuzzy outline to cut along as you do when you draw the outline directly onto the felt.
I’ve read of felt under chipwork but not under passing.
I take it you would use it whenever you are using multiple threads of purl together as well? (I can’t think of any other cases)
elmsley rose: Yes, you can put it under passing or Japanese thread. It helps with filling in the spaces between the metal threads and gives you a really nice look. I’ve used both felt and string padding under cut purl. I think as long as the purl is well-supported you can use whichever you like.
Hi!I wanted to say “Thank you!” for this post! Not only has your entire catalog been incredibly helpful, but this particular post made me realize it’s okay to start over (esp on a big project!) than it is to press on, dissatisfied with the work and trying to fudge it as I go along… You’ve saved me so much dissapointment in my final project! Thank you! 🙂
Hi Mary! What a brilliant article, thank you. So I’m not the only one who sometimes makes mistakes! I agree, it’s how you learn. I have actually taken to writing my ‘lessons learnt’ in a notebook for future reference…
Best wishes
Joey