


Once I finished the embroidered anniversary card a couple weekends ago, I got it in my head that it would be a good idea to make some cards for upcoming occasions – and, for a change, to make them ahead of time!
Through April, May, and June, my family is beset with – oh, just about everything: my parents’ anniversary (52 years this year), Mother’s Day, my Mom’s birthday (75 this year!), graduation, a couple birthdays at the beginning of June, weddings, wedding showers, baby showers, and on and on. It’s not as if I don’t know these things are coming up. But they still tend to take me by surprise!
So I determined at least to prepare some nice cards in advance this year for the big Spring / Summer Onslought of Card-Giving Days.
It really doesn’t take that much time to prepare the cards for stitching. I pierced about 8 cards in a little more than half an hour.
Then I took the pierced cards, selected thread colors, and made up little “kits” for each card by placing the card and selected threads in a little zip lock bag, along with the original pattern for the embroidery design on the card. I arranged all the packages in a little box, with a roll of tape, a couple needles, and a pair of scissors.
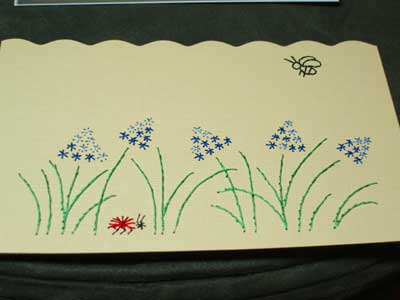
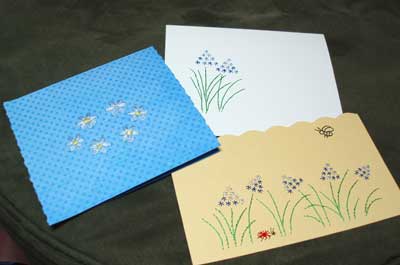
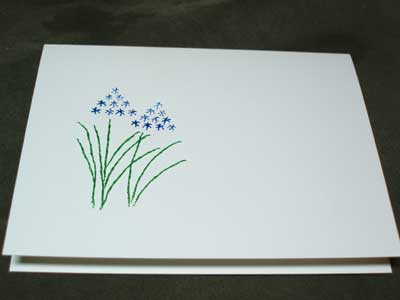
With everything ready, then, at my fingertips, it’s just a matter of grabbing a few minutes here and there to stitch up parts of the cards. In fact, when I only have time for a 15-minute session, I can get at least half-way through simple designs, like this little bug and garden card.
This one took me even less time – very simple, but it will make a nice little card for an upcoming event.

This one took a little longer, only because I decided at the end to satin stitch the yellow centers on the flowers, and to do that, I had to pierce the paper with the needle as I went. (Note to self: satin stitch doesn’t work that great on paper!) Still, they came out cute enough, and in the center of the one flower left blank (yes, I got sick of satin stitching on paper!), I’ll stick a little rhinestone or something sparkly.
The finish work hasn’t been done on any of those cards, and that’s actually where most of the time will come in, if I end up doing anything “interesting.”
I’m planning to put together several more card kits to have on hand for a bit of variety. It’s really easy to chat and stitch on paper, but for some reason, I’m not good at chatting when doing “serious” embroidery! Pre-assembled little kits for fun things like this are also great to hand off to the kids when they’re looking for something to do!
This is a great idea. I don’t do cards, but I have other little things I could make up kits for and tuck in my bag or work basket, thanks for the kick!
Very cute and clever! Love the bugs!
MGM
Yet another brilliant idea from you. Do you use any card-appropriate paper, or card stock, or? Are you designing these yourself or taking designs from somewhere else? How do you know where to pierce? Can we see more as you do them?
Thanks, all!
Hi, Jill –
I mostly use scrapbooking cardstock (12 x 12), which I cut to the size I want. Sometimes, I’ll use pre-made cards. You can use paper, but it’s a lot easier on cardstock. Whatever the case, make sure that you either mount the embroidered piece onto a card (when the embroidered piece is separate, like the yellow bug one above) or cover the inside of the card with decorative paper, to cover the back of the embroidery (which is what I’ll do with the white card and the blue dotted card).
Hope that helps!
were did you get the pattern for the purple/blue cone shaped flowers? I do embroidered card often, and would love to add the flower pattern to my collection.
Hi, Pat – these are from different books. For embroidery on paper, I mostly use Erica Fortgens’s books. Hope that helps! ~MC
Could you please increase the size of the photos? It’s really hard to see the details with such small photos. Thanks
Where can I get the floral patterns you are showing (purple flowers etc)? Thank you,
You might look up Erica Fortgens on Amazon – she has quite a few embroidered greeting card books, with patterns.