


One thing I’ve found as I’ve progressed on this hand embroidered lettering sampler is that, while there are lots and lots of hand embroidery stitches out there, not all of them are wholly suited to lettering. Since lettering demands clarity (after all, you want your reader to be able to read it!), it’s important to select stitches that will produce clear text.
In this tutorial, I’m combining herringbone stitch (for the thick part of the initial letter) with split stitch for the rest of the lettering. For thread, I’m using Stef Francis silk, which is a first for me. I’ve got quite a few skeins of Stef Francis silk, but to tell you the truth, I’ve never used it until now. I wanted a rich purply color, and I wanted a thread with a bit more texture, so this thread suited my needs.
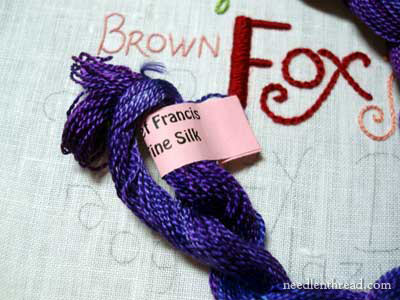
The thread is variegated, and, although it’s silk, it has a bit of fuzziness to it, kind of like a soft wool. I like it a lot!
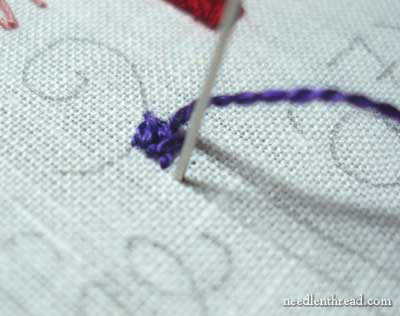
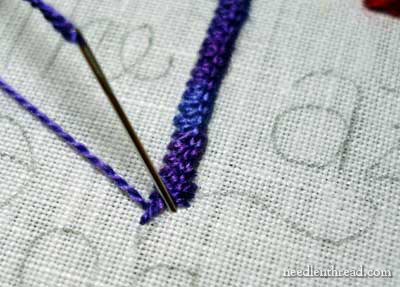
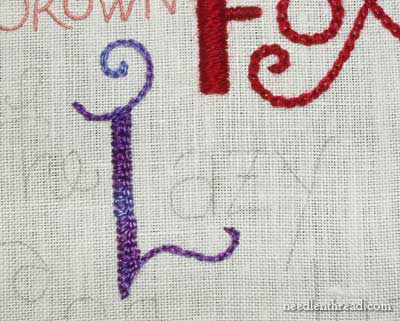
Between the two parallel lines that form the backbone of the L on “Lazy” I’m working a closed herringbone stitch. Basically, this is just herringbone stitch worked close together, so there isn’t any space (or at least, not much!) between the stitches. So, first you go down in your fabric – a bit away from your last stitch in order to give you room to come up right next to your last stitch.
When you come up, you come up right next to your last stitch, to close the gap you left when you took your needle down into the fabric. To understand this clearly, it helps to know the movement of the herringbone stitch – if you’re unfamiliar with it, check out my herringbone stitch video tutorial, which may be somewhat helpful.
When you cross over to the other side of your stitching area (to the opposite parallel line), you’ll take your needle down into the fabric a little bit away from your last stitch. You can see the gap in the photo above. Then you come up inside that gap and cross back over to the other side, working in this manner down between the parallel lines.
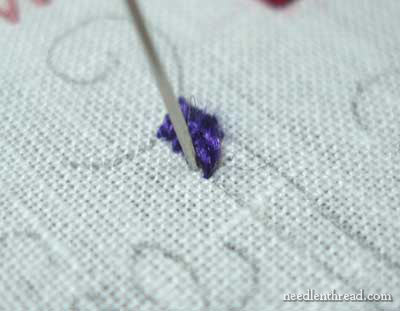
As you get to the base of the spine of the L, where things narrow up a bit, just move your lines closer and closer, filling in as best as you can, keeping your stitch movement the same. It’ll fill right in to a narrow point.
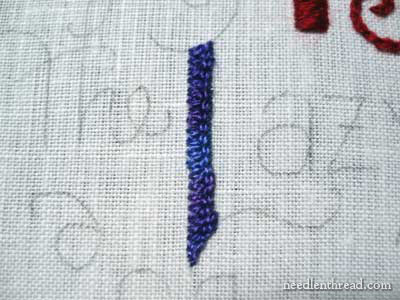
You can see pretty clearly where the variegation kicks in on this thread. After I stitched it, this block of color change was rather disappointing, but I’ve gotten used to it now and I don’t mind it too much. I’m not really keen on variegation, when it happens in such segmented blocks of color. But, still… I liked stitching with this thread!
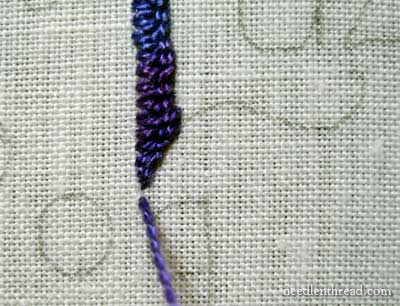
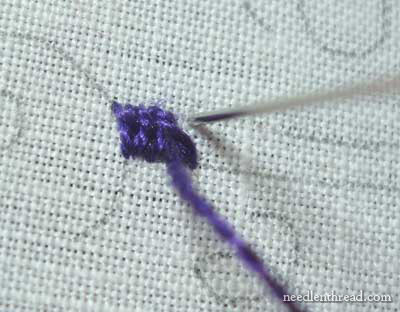
After finishing the spine of the L, I jumped down to embroider the base line of the L, using split stitch. Since I’ve already covered split stitch in a previous lettering tutorial, I won’t bore you with the details – I’ll just show you how the letters progressed from this point!
Here’s the base line of the L. A hint on this thread: After stitching a bit with the same strand, it gets fuzzy just like wool does, so it’s helpful to start a fresh piece, if you want a really nice looking split stitch. I am not quite satisfied with this base line. (But no, I didn’t pick it out!)
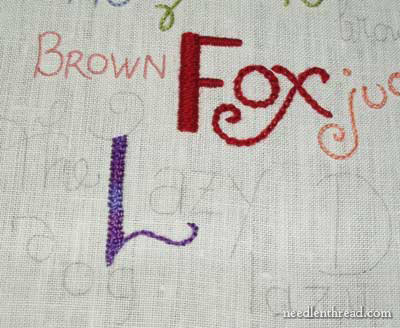
I liked the curl on the top of the L much better. It was stitched with a fresh strand of thread.
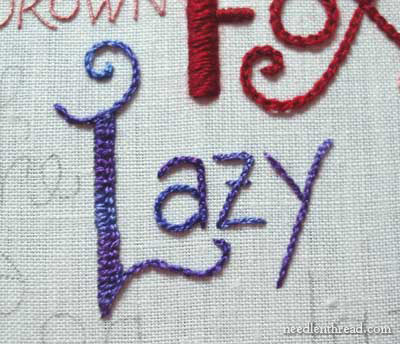
Here are the rest of the letters, all worked in split stitch, too.
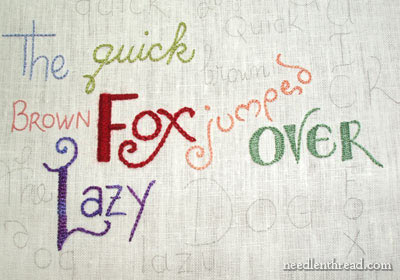
And here’s the sampler so far! It’s growing on me, the more I work on it. I like the variety of colors and stitches, and I think it would be fun to do a much more meaningful phrase (or saying, poem, proverb, etc.) in the same mixed-up manner – it’d make a great little gift for someone, to stitch up something like this, but with something a bit more profound, personal, or pertinent.
If you’re just joining in on these lessons on embroidered writing, I’ve posted all the previous lessons in under the Hand Embroidered Lettering Index. You’re welcome to check them out!
Next up in this series is a really bright and crazy word – with combined stitches and a few added touches to liven the word up a bit.
If you have any suggestions, comments, questions, and the like, don’t hesitate to leave a comment below!
Enjoy the weekend!
It's looking great, Mary! And it looks like a fun-to-do project, not boring. The colors do go well together even though it is multi-colored so the piece is really pleasant to look at. What will you do with this sampler at the end?
Hi, Laura! Thanks – I like the way it's coming together, too. The finished product? It'll just go in my sample binder…. or get lost in a pile of unfinished stuff… or…. I don't know!
MC
I think it's wonderful, Mary!
And I think the idea of doing a poem or some such in a like manner is a great idea… Hmmmm. Time to get my calligraphy background out again, maybe. 😛
If you just add a few 's's to your "dog"s, you'll fix the S issues sweetly… 🙂
There's some good quotes on needlework in here:
http://www.white-works.com/famous_quotations_in_needlework.htm
I kinda like this one:
I cannot count my day complete
'Til needle, thread and fabric meet.
…and this one:
You keep me in stitches.
Hi Mary, still working on my imitation of your lovely sampler and am wondering if a perle cotton (#5?) would be an alright substitution for this lesson. My local craft store had a very poor selection of threads and I was only able to place a small online order so far and that didn’t include any of this beautiful silk thread.
Hi, Rachel – Yes, I think a #5 would work – it’ll be a bit heavier. If they have a #8 perle cotton (they’re usually on balls for tatting and so forth!
Hope that helps!
MC