


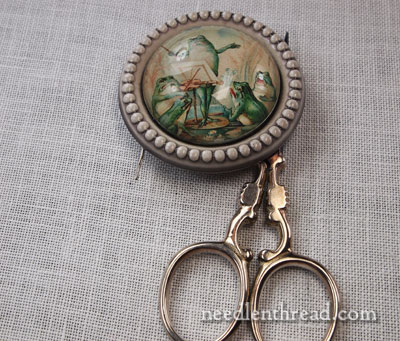
When I purchased this Singing Frog button a while back, the idea of a needle minder seemed like a good use for the fellow. I don’t always follow through with my original ideas for any Spontaneously Bought Thing, but I had a tube of glue out the other day, and I had some blank magnets on hand, and it just seemed like a natural thing to do, to make the button into a needle minder.
It isn’t precisely perfect, as far as needle minders go, but I don’t suppose there’s any Absolutes when it comes to these types of things. And, anyway, it works. And I like it. Must it measure up to any other criteria?
So today, I thought I’d show you how to make a needle minder out of a button. It’s Really Simple, and this is really a casual tutorial. I’m sure there are hundreds of better ways to go about the process, but this is what I did….

First, start with a button you like. I’d go with something that doesn’t have holes in it, personally, but if it does have holes, it’ll still work. You just have to be careful with the glue – you don’t want it seeping through holes, picking up gunk, and ruining the front of the needle minder.
Use newspaper, brown paper, or wax or parchment paper on your table to protect your surface from unwanted glue drips, just in case.
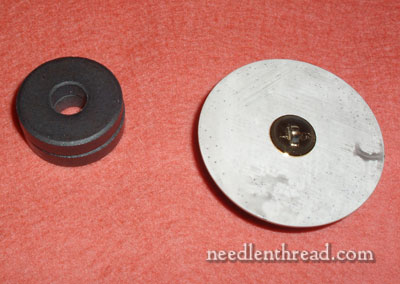
Examine the back of your button. If you have something there that needs removing, you could remove it. A reader suggested a little tiny “diamond blade” saw for carefully removing the back of the button. I don’t have such a tool. And trust me, a screw driver is not a good idea! I did try prying and scraping with a tiny screw driver for a second, but abandoned that thought when I saw that one of two things were going to happen: 1. either the screwdriver was going to break, or 2. the button was going to break. Since I really didn’t want to break either of them, and since the moment didn’t present another solution (though I did briefly consider trying some kind of glue solvent or something of that sort….), I left the metal piece on the back of the button.
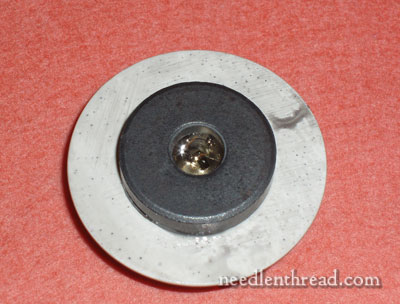
If you have a tool or solution for removing the metal on the back of the button, then feel free to remove the metal piece. I didn’t have a way to get it off, but I did have donut-shaped magnets that made removing the metal superfluous. Alternately, you could use three or four smaller magnets around the metal thing, but that would require you to buy more magnets!
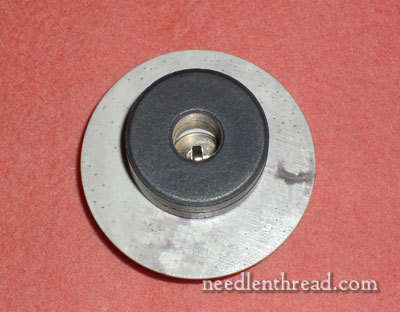
You can see that the donut-shaped magnets fit really well around the metal thing.
A note on magnets: remember that these will be on your fabric. You really don’t want them to leave any residue or marks. Make sure that they are hard magnets, not soft craft magnets that can leave black marks on your work. Test them! Rub them on white fabric, as if you’re drawing with chalk. If they leave a mark, look for other magnets!
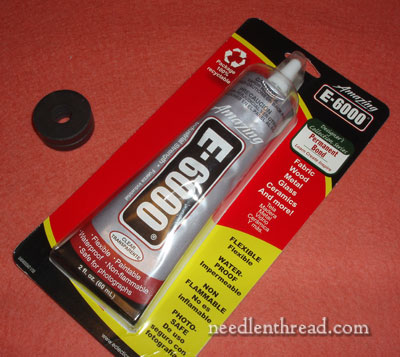
You’ll need some reliable glue. I like E-6000 for this type of work. It is strong, works on wood and glass and plastic and fabric and photos and…., and it dries crystal clear.
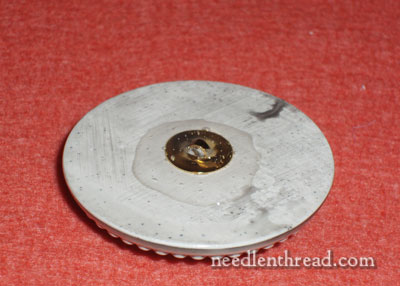
Put glue on the back of the button. I put it around the metal thing, where the magnet would be, but it pooled a bit in the middle and spread about towards the edge. No worries. You can clean up spreadings and poolings.
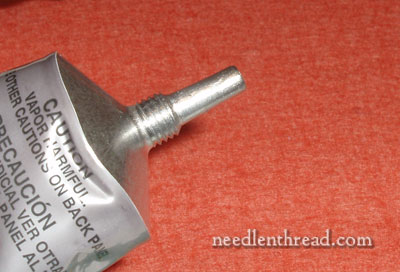
When you finish using the glue, use a damp rag to wipe the tip really clean before putting the cap back on. I tend to ruin multiple tubes of glue per year by skipping this step. Don’t be like me.
Situate the magnet in the center of the button back, and press into the glue. The pooling in the middle of the magnet is fine. It’ll dry. Use a damp cloth to wipe excess glue from the back of the button around the magnet.
Now, leave the thing to dry for 24 hours. After all, you’ve waited this long for your special needle minder. You can wait another 24 hours!
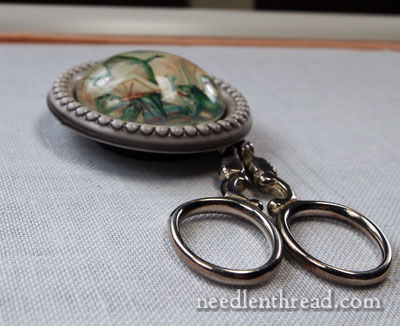
The needle minder rests on the front of your framed-up embroidery fabric, with a magnet on the back of the fabric, holding the front magnet in place. The magnets I used are fairly strong, so even on a slant, they hold my scissors.
I’m not too keen on the size of the button compared to the magnet – there’s quite a hefty overhang on the button there – but, like I said, it works. And I just love the frogs.
Now, whenever I sit down to a framed up project, I can stitch to the accompaniment of my Singing Frogs.
Go look for a button! Make your own needle minder! You’ll be glad you did.
Perfect! I Love It!
Hi Mary, I love your needle minder. I’m sure it will give lots of pleasure while you’re stitching. And, a belated Happy Thanksgiving. If you have any free time this holiday weekend, you might be interested in the informative post on marbled paper at http://bibliodyssey.blogspot.com/ today.
How clever! What a great use of your button too…now you can enjoy it all the time!
I admit I’ve never seen a needle minder much less seen how one is made. My idea of a needle minder is a pin cushion/biscornu or my pants leg. 🙂 Yours turned out very nice and you get to enjoy the frogs every day. Good job.
Hi Mary, a lovely idea. I love the frog, he is so cute.
I envied you for that button when you first posted it and I think I must seek out a wonderful button and do the same. My husband just found a needle on the floor and I usually place them in my clothes or my project. When one is nearsighted that gets dangerous! Getting stabbed adds the wrong kind of excitement to life.
Hi Mary. That turned out really well! As for magnets that might leave a mark on your fabric, you can cover them with thin fabric or paper. It shouldn’t interfere with the magnet’s grip, and it will protect your work.
Beautiful setting for your button. Love it.
It’s beautiful, Mary! I think I WILL have to go find a cool button now. I thought I could resist the siren song of those singing frogs, and stay out of the expensive haberdasheries, but now… well, you are an enabler, aren’t you?! (And it takes one to know one…)
I am so envious of your cute button and the creative genus of making it into a needle minder. I did a search on the web of fancy buttons and found this site of some the most awe inspiring buttons. Granted it might not be cost affective. But you could be assured of having a one of a kind needle minder.
http://www.vintagebuttons.net/
I love your frog button, Mary, and am glad that now you can enjoy it often! Thanks for the wonderful idea of turning such a treasure into a needle minder!
What a wonderful button! And you found a clever way to use it and look at it every moment you wish!
I love this, Mary. What a fun button. Youve given me an idea or two here.
Now your Mom won’t worry again when she sees you buying something that doesn’t appear to have a purpose 🙂
Mary, Thanks for the tutorial. I have used the needle parking with plain magnets and always wanted to make them pretty. Tried gluing small circles of fabric but was not neat looking.
Patricia
Brilliant! You are so generous in taking the time to write and photograph these lovely tutorials.
The large button actually makes the scissors less likely to catch on anything. I like it.
For me, this is definitely one of the best tutorials I’ve seen on making these. Clear, concise and easy to follow. I actually like the fact that the button hangs over the magnet as it allows the scissors to cozy up under the edge and saves stitching room. And….of course, I love the Frogs! Pretty darn adorable.
Thanks for sharing. And I too am guilty of wasting tubes of glue…always in a hurry! 🙂
Robin
Hi I’m trying my best to make my very own needle minder, I was wondering where you find your magnets?
What a wealth of information. Perfect timeing, I’m just getting back into embroidering. Thank you
I love my needle minder made with a fancy button from my Grandmother’s coat, following your idea of the singing frogs. I made each for my 2 sisters also. Now we all have a daily reminder of our Grandmother “Tiny” who was born in 1901.
Good morning, Mary, could you tell me if you used the same size magnet in the back, as you did on the button? I hope I get a reply. Thank you.
Yes – the magnet on the back of the button is the same size as the magnet for the back of the fabric. It’s a pair of magnets, both the same size.
The frogs bring singing to the moment! Cute idea. I knew you’d have a solution for me, who has no needle minder, and really needs one. I bought the silly craft magnets that you said not to use. I shoulda looked here first! I didn’t know about putting the scissors underneath it. Gotta find a cool button!