


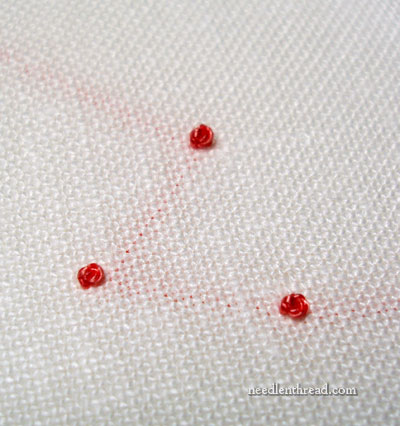
The Dot Dilemma – that harrowing situation of stitchery, when a thread carried between French knots is visible from the front of the work. How do you solve the problem of carried threads between isolated French knots?
Today we’ll look at one way to start and end isolated French knots. I call this the “Tied Off” method.
Isolated French Knots: Tied-Off Pros
1. The tied-off method is easy for beginners to get the hang of and to do right the first time. If you happen to be teaching children to embroider, they pick up on this method really well, because they see it as something familiar to them. Most kids who have learned to tie their shoes, get it. And strangely enough, they see the whole process as part of the stitch, and they enjoy doing it, regardless of the fact that they are ending and beginning their threads quite often.
2. This method works just fine with cotton floss, perle cotton, wool, and stranded (spun) silk, which are among the most commonly used embroidery threads.
Isolated French Knots: The Tied-Off Method
Let’s look at how to stitch isolated French knots using this simple tied-off method. Ready?
Start with a waste knot: knot the end of the thread, and take your needle and thread down into the fabric from the front, about 1″ – 1.5″ from where you want your first French knot to be, and leaving the waste knot on the top of the fabric.
Bring your needle up wherever you want your first French knot to be located.
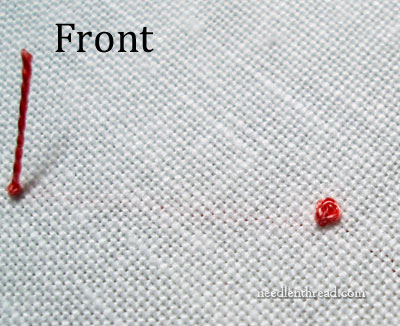
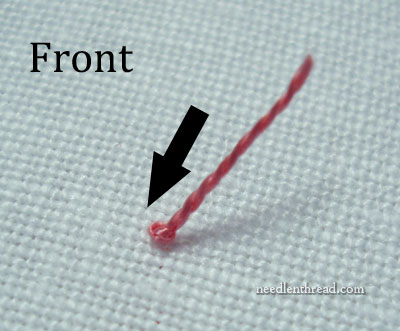
On the front of your fabric, you should now have a French knot and a waste knot, with about 1″ – 1.5″ between them. Your needle and working thread should be to the back of the fabric.
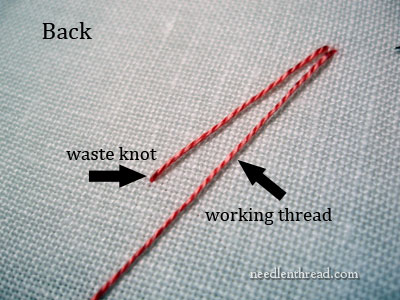
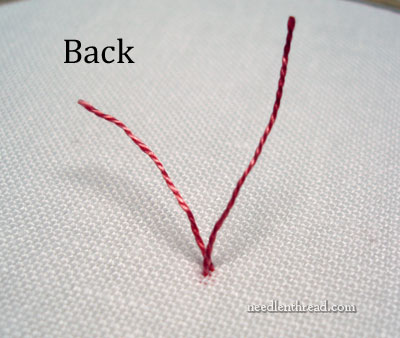
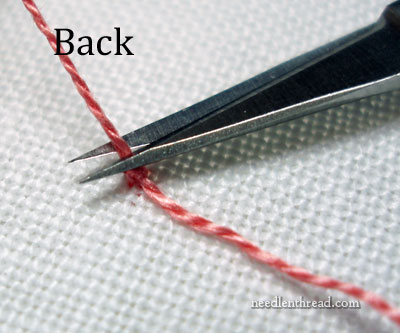
On the back of the fabric, you have two threads now: the thread attached to the waste knot and the working thread that you just used to make the French knot.
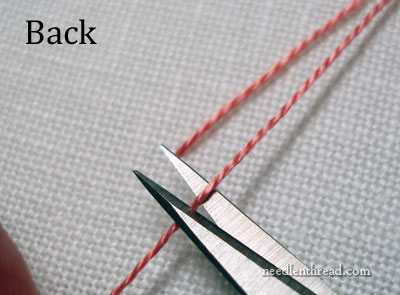
Snip the working thread so that it’s as long as the waste knot thread – about 1″ – 1.5″ long.
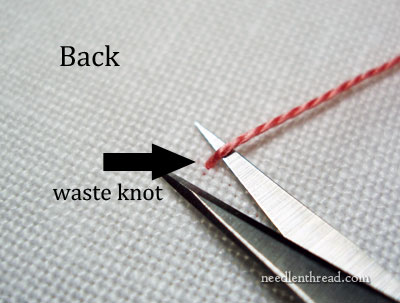
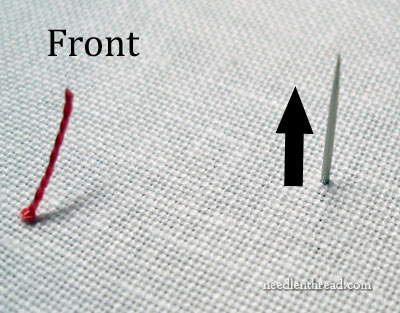
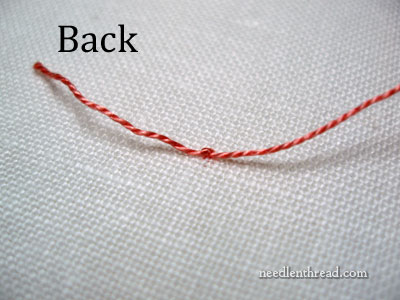
Then snip the waste knot thread, right close to the fabric.
And now you have two nice little loose threads on the back of your fabric. Too bad we can’t just quit here, but at this point, your French knot is quite vulnerable. In fact, if you aren’t satisfied with the French knot and you want to re-work it, you can just pull straight up on it and pull it out of the fabric.
But I know you actually made a perfect French knot, so leave it there, and let’s continue!
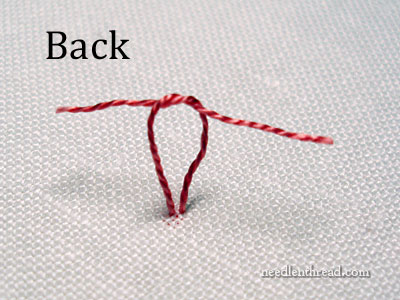
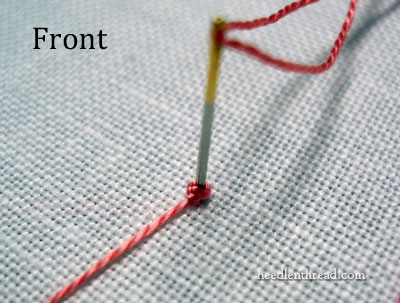
Here comes the shoe-typing part. At this point, you surely know what to do: you’re tying a knot in the back of the thread. Do the over-under thing with the two tails…
… and pull the first half of the knot nice and snuggly down to the fabric.
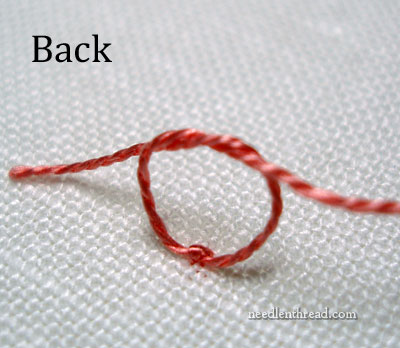
Then do the over-under thing again and tighten it snugly to the first half of the knot.
And now, you just snip the tails off, close to the knot, but not right on top of the knot. You should leave tiny “arms” there – small, but not extending beyond the bulk of the French knot on top.
That’s it! And it was as easy as… well… tying a knot.
You can read Part 2 – another way to work isolated French Knots – here.
Tied-Off Cons
(Of course, there must be cons!)
1. This method leaves a bit of a goodly sized bump on the back of your fabric if you’re using perle cotton or any heavier thread. It isn’t so bad with a couple strands of regular cotton floss, but heavier threads can be rather bulky. On the other hand, just about any method of starting and ending a thread and taking a stitch in this limited amount of space is going to create some bulk, so… you have to decide for yourself if you can live with the bulk.
2. This method does not work well with filament silks (those are the shinier silks), some boingy stranded silks, or with rayons. The threads are too slippery and the tied-off knot on the back doesn’t hold well.
3. It’s a jolly waste of thread. By the time you’ve finished, you’ve used about 3″ of thread for one tiny French knot. There are other methods of starting and ending isolated French knots that use up much less thread. You have to weigh the ease of the method against the waste of thread. With children and with beginners, I’d say it’s worth “wasting” the thread (really, it’s all part of the process, so I’m not sure you can call it waste) until they have the hang of stitching and can use other methods easily and successfully, with minimal frustration.
So that’s one method of working isolated French knots. We’ll look at variations on another approach a bit later in the week!
Any questions, comments, or suggestions? Have your say below! Everyone benefits from exchanging ideas and asking questions, so do feel free to use the comment form below if you’d like to add something to the discussion.
I’ve added this article to the Stitch Glitch series here on Needle ‘n Thread. Stitch Glitch is a series that explores little difficulties that you might run into with individual embroidery stitches – for example, how to end one thread and start a new one in the middle of a line of particular stitches, how to join stitches in a smooth circle, and similar questions. If you have any questions about difficulties with a particular stitch and would like to see a tutorial on how to solve those difficulties, let me know by leaving a comment below or dropping me an e-mail. I’ll see if I can work something up for you!
Those are the sharpest scissors I’ve ever seen, are they your Dovos?!
O.o
Hmmm… Good question! No, I think these are a pair of little scissors that I received as a gift – the rainbow thread cutters by sew mate. The size of the blades is 3.25″, and they are very sharp little scissors. I use them usually for cutting goldwork threads! – MC
Mary,
What about leaving a closer waste knot and working the tieing off knot with the thread still in the needle. Then clipping close to the knot on the back. Still a bit of a waste, but not as much.
Deb
A knottier problem is the result. The mystery continues….start writing ficion stories Mary…the quilters have a few and with all your instruments…woops…tools you could entwine a tail/tale or two..
Neat trick especially for children. I think I know what your other solutions are going to be.
I’m going to copy this one for my granddaughter. When I get her stitching.
it’s all in knowing how and Beautiful in it’s simplicity! i’d have never thought of this….we’ve become too ingrained about NEVER EVER using a knot on the back of surface embroidery that we can’t think outside the box…lol.
Thanks for attacking this dot dilemma!
merci pour ces modèles de broderies bien expliqués vous étes très généreuse
Dear Mary
Since last week I’ve been waiting in anticipation for your solution to the knot dilemma, what a good solution, I can’t wait to see what your solution are to other threads like silk filaments etc. Keep up the good work love these blogs.
Regards Anita Simmance
Love your tips! But I was wondering about silk as knew it wouldn’t stay! Stay tuned!
This is a topic “dear to my heart” as one of the things I love to stitch are parasol girls/dolls and they have zillions of French Knots for decoration, and of course darted all over the pattern. I am most interested in this topic. Thank you.
I had not thought of leaving a waste knot away from the actual work–I’ve put it on the right side under the stitch–worked good sometimes and most times, bulky but worked effectively if I didn’t want a knot on the wrong side either. I do like the “shoe lace” tie especially when it doesn’t matter if a knot is on the inside. Least difficult. Thanks.
I’ve always used the looped tail, but I assume it is one of your other methods. What about a dot of glue on the knot on the back? Getting a SMALL dot of glue has always been my problem. Have you tried a surgeon’s knot as either the first or second knot? I would be inclined to make it the first knot, since it would hold fast to allow you to do the second knot. Any reason for a granny knot instead of a square knot? I’ve found that a square knot tends to hold better, depending on the thread.
Thanks. I’m teaching the 7 year old granddaughters to embroider a bit and like tips about teaching kids. I’d probably have them drag the thread across first before I teach them as you have outlined here but it appears they would have no problem with this method of french knots.
Thank you very much for the explanation!
Celestina
Mary,
The knot tied on the back of the work should probably be a square knot. I think you tied a granny knot!
To make a square knot, loop right over left the first time, and then left over right (or the reverse.). That way the knot will hold.
Hi, Brenda – you’re right, it’s not a square not. But it still works, and it’s much easier to show it to beginners and to children, because it’s something everyone’s familiar with. I’ve never had one come out, even on laundered things. Well, even more so on laundered things, because when an embroidered towel or what-have-you gets washed, there’s a definite tightening up of the threads, due to slight shrinkage. Anyway, this knot works, too, so I think it’ll be ok if people use it. Hopefully, though, beginners will eventually “graduate” to other methods of securing the thread… To be discussed soon! – MC
I have found knots more likely to stay put if you take the first thread over, under, over, under the second one, then just one over, under for the second pass. I hope you understand what I mean. This even tames the ‘silkies’ like rayon so that they sit where you want them.
Hi Mary, What a great idea – and simple too. I do not see the extra thread as wasted, although I’d like to know how to minimize the bulk of the knot. But a great answer to a stitch glitch! Kathy
This used to be the only way I could do french knots! Before I saw your tip on putting the end of the needle on the knot before pulling, I could only make a french knot by pulling and tying at the back.
What comes to mind in reading this series in isolated knots is the difficulty of doing a single stitch in built up work – an eye for tiny a silk thread and goldwork squirrel, for example. Plenty of places to secure the thread on the back, but the placement can affect how the knot/stitch sits if you’re not careful. So I’ll give your suggestions a play next time I have that issue. Thanks 🙂
A trick I have learned in other crafting is to use a dab of clear finger nail polish on knots. It helps to keep the knot tied snugly, and doesn’t leave a mark.
Stephanie
too bad you couldn’t use the traditional method and just put a “white” or matching the fabric colored tube around the thread to disguise it. 🙂
For the slicker stuff, use a surgeon’s knot..instead of wrapping once for the first ‘tie’, wrap twice and tighten. The following TWO ties should be the standard single square knot affair. It’s often used for slick suturing material like nylon which doesn’t want to stay put.
If it just plain won’t stay put, a teeny drop of Fray Check is a cheaters’ permit, too. 🙂
I asked this question of a Danish instructor I had at Danish-American Days years ago. She sugested I leave isolated stitches for last and place a piece of thin non woven-non glue type behind the entire piece to hide the carry overs. It worked very well for me.
I know that it’s a loooong time since you wrote this Mary, but I came across it while trying to clear out my inbox, hm-m. Anyway what I wanted to say is about the finishing off knot: I have found that if you do the over-under thing twice before pulling the threads taut, then over-under once and pull taut again that not only will the knot lay flatter but it is stronger too.
Thank goodness. Been searching online for days and you nailed it! I mastered the french knot and had no clue how to easily tie it off. Your a blessing!
Hi Mary, I find that the knot on the back is stronger (and therefore works better for boingy threads) if when you do the overhand knot you do the overhand thing but don’t pull it tight yet, do it again then pull it tight, then do the overhand thing again. The first knot tends to stay tightened even with the boingies allowing you to pull the second one really tight. They still come undone occasionally but I have found this works pretty well for all but rayons, the thread you love to hate or hate to love. (I hope you can make sense of this – if not let me know and I’ll try to do better.)
My ex who left me came back after the help of Robinson.buckler @ ‘ ‘ yahoo ‘ ‘ . ‘ ‘ com.
This is absolutely wonderful, i cant thank him enough.
He is the best when it comes to relationship or marriage problem.
He also cured my from herpes with his herbal Med.
If anyone here needs some help contact him.
Thank you SO much for this. You have helped me so much!!!!!
Wowwwwwwwwwww
Thank you! This was really helpful for me as a beginner. A really helpful post