One request that’s been coming up on the website and via e-mail lately is whether or not I can provide a pattern for working a sampler of surface embroidery stitches, for practicing all the various embroidery stitches shown in the embroidery videos here on Needle ‘n Thread.
Good news! You don’t need to a pattern to work a sampler for surface embroidery stitches! Let me show you what I mean.
It’s important to understand, though, that I’m not “creating” anything specific here. There’s no finished whole as far as a picture goes, when all is said and done. At the end of the whole sampler process, you won’t see some beautiful needlepainted bird, or a lovely piece of goldwork, or anything like that. Instead, you’ll have a piece of fabric covered with a whole colorful bunch of all kinds of different stitches, worked pretty much according to whim.
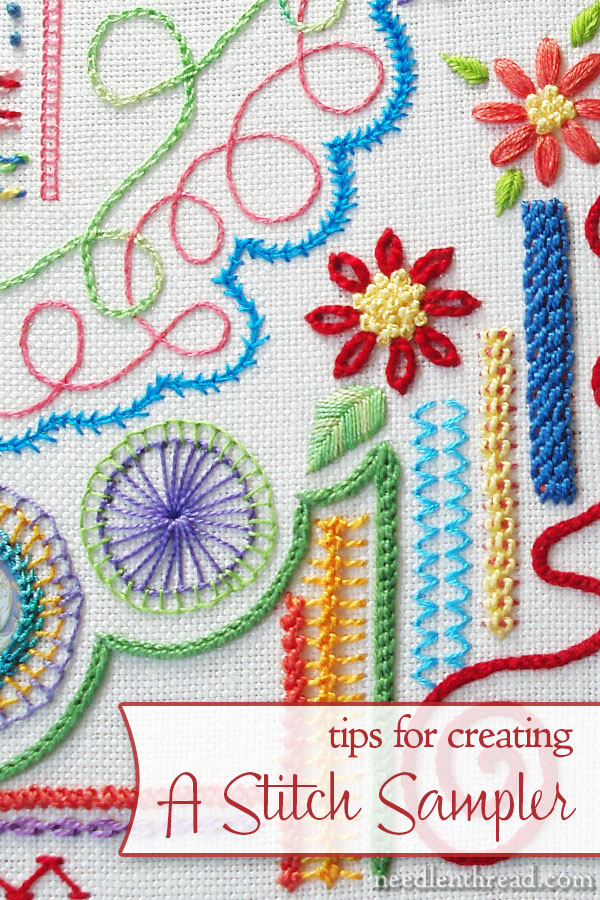
This is the larger of the samplers I’ve been filling with random embroidery stitches in order to have small samples to photograph for the videos or for the Stitch Play series.
On a 9″ x 14″ frame, I mounted a piece of Round Yarn white linen. My intention was not necessarily to create a full sampler, but that’s what it has worked out to be. See, working many samples on one larger piece of fabric is a lot more economical than working many samples on many small pieces of fabric. Having this type of “doodle cloth” set up and ready has saved me time and money – and it has worked into a rather colorful collection of stitch samples.
If you are wanting to learn a plethora of embroidery stitches, just to work them out and get the hang of them, then set up a larger piece of fabric for that purpose. Think of it as a “doodle cloth” where you can doodle your way through various stitches you want to learn. You don’t necessarily need a specific structure or organization to the layout – think “doodling.”
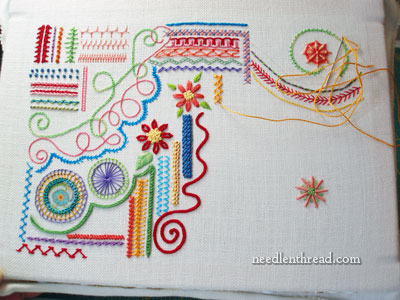
Working randomly on a larger piece of fabric gives you plenty of freedom for working out the stitches, trying out different threads, playing with color, working through tricky techniques – and all with room to “grow” across the fabric. Do what you want to, where you want to, working the stitches until you have them figured out and are comfortable with their movement.
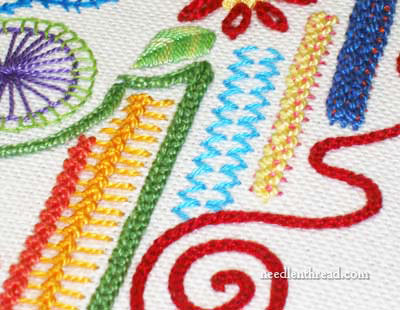
You can see that there’s no real layout here. Some of the stitches are worked in lines and bars, some in scrolls and scoops.
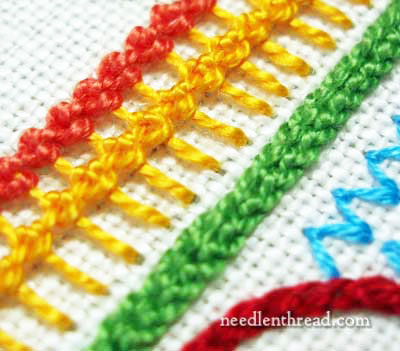
There’s no rule about which stitches go next to which stitches. In fact, in the photo above, I’ve combined two stitches – the gold stitch is a knotted pearl stitch, and on one of the “arms” of that stitch, I worked a raised chain stitch. I just wanted to compare the texture of the two stitches, so it seemed like a good way to get them close to each other.
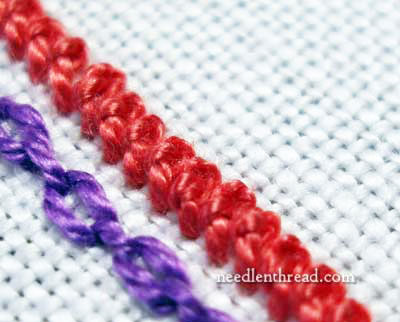
Chinese knots are lined up here next to a cable chain stitch. I don’t know why I put them next to each other – perhaps just because that’s where I had space.
You don’t even have to choose coordinating colors (though you can, if you want). This is a great way to do some “stash busting” while you’re learning. Just use whatever threads you have on hand. (Any excuse to make room for new threads…)
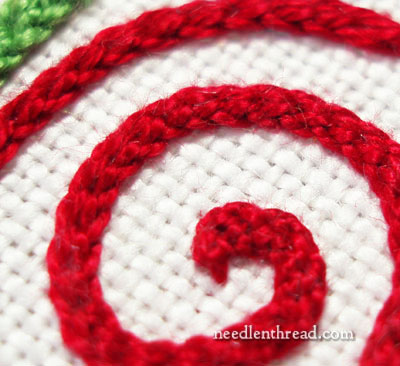
Working randomly like this will help you discover a lot about the whole concept of the stitch, and how we learn to stitch. See, usually we rely solely on a book or a video or someone else’s instructions to learn a stitch. But as you work randomly, you will likely find better ways for you to work the stitch – little tricks that make working the stitch easier for you, but that still give you the same result.
For example, the Hungarian braided chain stitch (pictured above) is always illustrated in books as worked down a line towards the stitcher. But once you work the stitch a bit, you’ll probably discover that it’s a lot easier to work it up the line, away from you. And it doesn’t change the look of the stitch at all.
You can’t necessarily do that with every stitch, it’s true – changing the orientation of the stitch may change the whole resulting stitch, but these are little things you’ll discover and get a feel for, by working stitches randomly on your own, without someone telling you exactly what stitch to work where, in what direction to work it, and so forth.
What you learn from working a sampler of stitches randomly is valuable for future embroidery projects. For beginners especially, this type of stitching familiarizes the embroiderer with technique, materials, color, texture – all the aspects that come together in any embroidery project. This type of stitching helps the stitcher gain a certain ease and confidence with stitches in general, while teaching a very good lesson on how to work things out for yourself – from reading stitch diagrams, to recognizing and correcting mistakes, to choosing colors and threads, and on and on and on.
The random sampler stitched like this works well for someone who wants to learn a variety of stitches, and who isn’t concerned so much about creating a “finished product.” If this description fits you, then throw off the shackles of a “pattern” or “kit” for creating a sampler, and leap into the world of random stitching!


Well Said!!! It isn’t easy for us stitchers to just “go for it” — but really cool stuff can happen accidentally! Thanks Coach!
Dear Mary
Thanks so much for the article, you are so inspirational and yes we should just take a chance and set up a samplar cloth and just stitch away and follow your stitch play series, but oh to have the courage but I will try!
Regards Anita Simmance
I wonder if they aren’t looking for guidance on how to make one that looks good enough to hang up, like yours does? Design tips maybe – balancing color, shapes, textures, etc?
Most of your readers have probably seen another take on stitch samplers – Sharon’s sampler over at Pin Tangle. It’s fascinating how it’s evolved over the years.
Thanks for telling us. I am ready to just “play” with stitches to feel comfortable using the needle and thread to create, without focusing on the outcome of a project.
You’re right, Mary, sometimes it’s better to let your imagination lea you, do something random and unique after all… And it will be curious to look at your very 1st project years later…
But some people do need step by step guidance. It may be that they are timid or unimaginative… they may want to try this kind of thing terribly, but they do need you to tell them what to do :o)
Great post, Mary. Just “doing it” is the best way to learn.
G’day Mary,
Now, could you please just tell me the actual colour of that one between the light and dark blue and also the length of that feathery stitched one. The distance between the daisies. The diameter of the loops of the dark apricot swirly one. Oh, an exact pattern of the red ‘snake’ would be good too. Thanks so much!
Nah, just trickin’! Unless you really wouldn’t mind giving the measurement of the…haha, glad I’m out of kicking range.
This is beaut Mary and very inspiring to encourage all to give it a go and not to get stressed on treating fabric and threads too preciously and thereby stifling creativity.
Seriously, thanks again. Cheers, Kath.
I think a lot of people are still intimidated at the idea of the “blank canvas” and how to fill it. Or lack inspiration for what stitches to try next. I have had issues with this before, where it’s easier to sit back for a while and follow someone else’s steps instead of creating my own. I did find a fun sampler on etsy, though, by dropcloth:
http://www.etsy.com/listing/95726411/original-embroidery-sampler-by-dropcloth?
and a knotted stitch version:
http://www.etsy.com/listing/75480837/diy-knotted-embroidery-stitch-sampler?
Thanks for posting, Feminizzle!
I’ve heard this kind of stitching referred to as “free-range stitching”, which is a lovely image in my opinion, and a lovely way to let one’s creativity grow.
Ha, you make it sound so simple. Just doodle and have fun. Unless I have a pattern giving me directions, I’m like a cat in the pool – splashing around frantically trying to find a way out of the mess. Even your “doodle” is lovely. Makes me think of a fantasy carousel. I think I’ll continue to watch you work and learn from your casual doodles. Always best to learn from the best.
I think you nailed it on that last bit “throwing off the shackles”. I think I wont be alone when I say that I feel like patterns are an anchor, I’m a bit afraid of venturing off on my own. It feels unsteady and awkward like a child letting go of steadying hands to toddle off on their own. I might fall and it fells almost vulnerable. But that’s how we grow isn’t it? It’s okay to make mistakes on a doodle cloth because that is what it’s for right? Growth is such risky stuff LOL but it’s good for us! See that same toddler 3 months later and it’s amazing!
I am a recent visitor and subscriber. I have been amazed at all the resources and have wondered why you would do this freely for anyone to enjoy. You didn’t seem to be selling much. (Your ‘shop’ category has only one book.)And so I wondered about that. Then I found your blog from June 6, 2008, where you wrote about your reasons for starting this blog.
You wrote, “So my brother suggested that I participate in blogging to help supplement those classes. So I did.”
Would you mind explaining how that works? How does a blog generate income and how did it happen for you?
Mary,
You make it sound so simple. I have done random samplers lots of times and they really LOOK like there is no rhyme or reason to the layout. But your “Random” is artistically beautiful, design flows, and the colors well coordinated. Your swirls are perfectly curved and lines straight and smooth. You are just an artist! And I am SO envious, lol. But thank you for the encouragement!
Alice
You have made a very pretty sampler, Mary, and one full of inspiration for us.
Hi Mary, thanks for another informative and inspirational post. I guess I have never tried this kind of sampler because I DON’T have instructions from a kit or pattern about what to do next and how to do it. I think being random will give me more confidence with my stitching.
Here’s a couple of ideas for those who don’t know where to begin – Zentangle books, Dover coloring books, fabrics. I know I’ve seen Zentangle done in freehand machine embroidery, why not hand embroidery? Dover has some great coloring books with geometric and optical illustion drawings. I picked up a few just the other day, my thought was how to translate into quilt blocks. Copy the design from a fabric or embroider right on the fabric. These would give you the lines to follow and then “all” you’d have to do is pick color and stitch for the outlines and filling.
Or…dare I say…copy someone else’s work. BUT no grumping allowed when it’s not exactly like the original. I’d guess that it wouldn’t be too long before you start with changing colors, then stitches, then move this bit over there, etc. This suggestion is for items for personal use only, not for selling!
What a wonderful idea to have large doodle cloth to work the various stitches on! I have tried using small scraps of material and usually run out of fabric before I feel comfortable with the stitch.
I do like your idea of “working the stitches until you have them figured out and are comfortable with their movement.” That’s wonderful and a great idea to keep in the back of one’s mind when learning a new stitch.
This random sampler is very nice and a wonderful idea. I do have one question: What fabric is best or what fabric would you recommend using?
I’m using round yarn linen by Legacy – it works well for these types of stitches, and, since it’s good linen, it’s very forgiving. If you have to take something out, the fabric isn’t going to fall apart! ~MC
this work is beautiful and what a great idea! The colors are great too! My question, I know you’re probably doing photos close up to get detail…is this work done with crewel yarns or embroidery floss? I usually work with 2 strands of floss and this looks much thicker than that?
I love your sampler and the idea of having a piece of cloth ready to go at all times for that new stitch. Great ideas and thank you for sharing all of your videos. You have helped me out alot. Sometimes written instruction just does not work and your videos have fixed that for me Thank you again Elaine
Ok, I’m really embarrassed. After posting on today’s page asking how to use 16 something stitches or 10 basic ones, I later went to your Pinterest page and Jolla, a tutorial. It is mainly a function of trying to find things on phone instead of computer screen. Just grateful to have the opportunity to see your beautiful work.
Thank you so much, Mary Corbet! I’ve been thinking of starting a new sampler using a dark background and wondering if a bunch of small ones would be better. Your advice is right on, as usual!
I love this random sampler, such pretty colours and just ‘doodling’ the pattern can work, thanks for sharing this with us, x
Hi again, Mary–
One more question I should’ve asked in my earlier message. When you mention you mount your cloth on a 9 by 14 inch frame, what sort of frame is it, and how do you hold it while working–on your lap? Your sample above showing so many different stitches is just wonderful. I love it.
Thanks again, and cheers,
Mike
Hi, Mike – I like Evertite frames. You can find them through Needle in a Haystack online. They’re stretcher bars, but they have a little built in screw thing, so that you can further tighten the fabric after you’ve tacked it to the frame. And I usually use a floor stand – the needlework system 4 with the frame clamp works great with stretcher bars – although if you’re sitting at a table, you can prop your frame on the edge of the table, too.
Hi Mary,
Thanks for your very helpful reply regarding the frame you use and how you hold it. I’m so glad to know and to have a much clearer idea of how to proceed in my new adventure.
Cheers,
Mike
Thank you. I’ve been trying to do something to that effect when I stitch. However I am finding out there’s an endless supply of stitches and alot of it is based on creativity. So unless there is a pattern you can really do no wrong. Just remember 2things; 1-what you do to the left do to the right, unless that’s your stitch and the 2-have FUN!
What I love about the samplers is that it allows you to use new stitches ad stitch combinations and how they would look from experts My favorite book is the Stitches to Go book and has a lot of stitches but hard to tell what it looks like.
What fabric are you using looks a lot like cross stitch.
This is linen, which is an excellent ground fabric for free-style embroidery or, when it’s even-weave, for counted work.