


Deconstructing the leaves on this goldwork piece was really fun – probably because it was so simple! Unlike the goldwork grapes, lily, and rose, the leaves are not layered with various elements worked onto foundations, all tightly fitting together. The leaves are not fiddly at all to take apart!
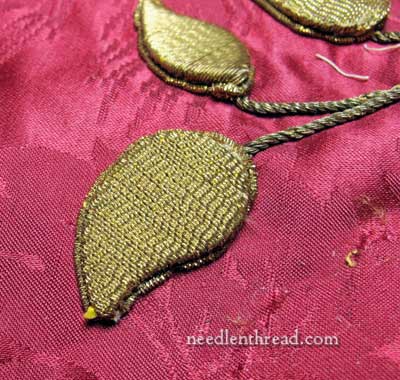
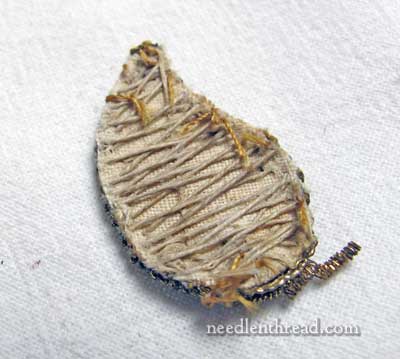
Here’s a leaf close up. It’s about 1.5″ long, and a little more than 3/4″ at its widest. There are several types of leaves on this piece, as you can see below, but most of them are these single little flat leaves covered with a very fine rococco goldwork thread.
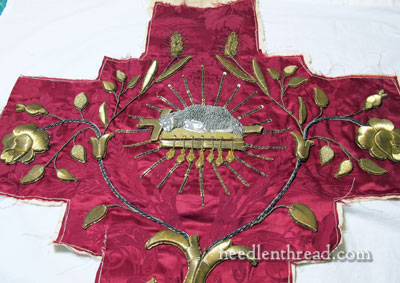
If you look at the top of the piece here (which is where most of the leaves are found), you can see that the majority are these small leaves, but there are some longer, slender leaves, too. They’re all worked the same way, and they all have the same type of foundation.
On the back of the embroidered piece, the leaves are attached just like all the other pieces were. There are two threads going around the leaf perimeter – one is the appliqué thread and the other is the thread that holds on the check purl that surrounds the leaf.
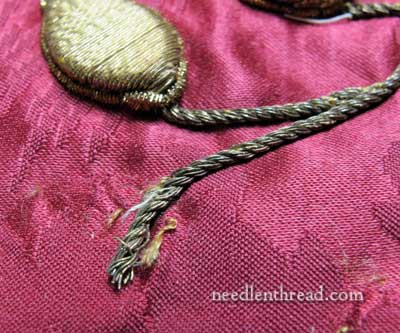
When I picked off the first leaf, the twist underneath that forms the stem was attached to the fabric underneath the leaf. I didn’t cut the stem at all – this is exactly how it was attached.
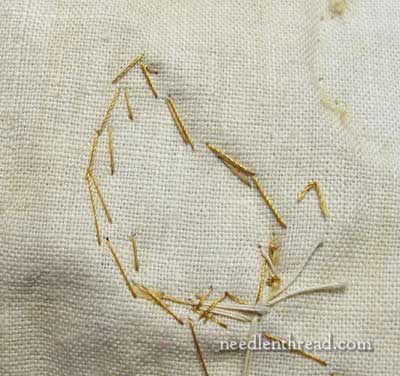
This is the back of the leaf. It looks pretty much like the backside of the previous pieces. Because the shape is so simple, you get a clear idea here of the process used to attach the gold thread. The thread that couches the gold onto the form passes back and forth from one side of the shape to the other.
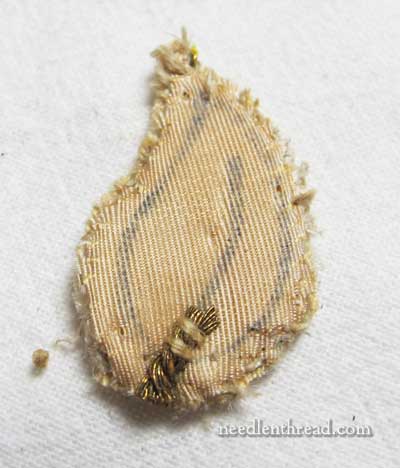
Once I got the gold and the foundation off the ground fabric, there was once again this stub of twist sewn onto the ground fabric. It’s very similar to the twist used for the vine in the photo farther above, but it’s not the same twist. Remember, I didn’t cut the twist! So again, I have a feeling that these pieces were all cut from an older vestment and applied to the “new” ground (which is rather old in itself, judging by the shape of it and the style.)
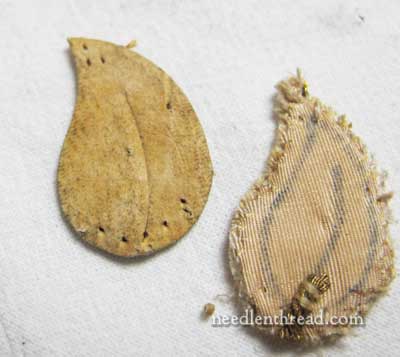
Here’s the card foundation. There is no felt – just the card.
I’m not certain yet, but I’m thinking the top of the card may be painted yellow.
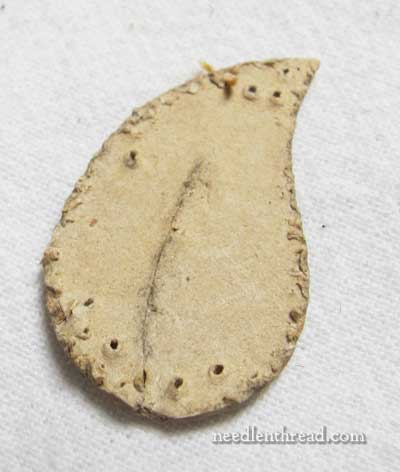
This is the back of the card, which is significantly lighter in color. The difference in color could be age, or maybe the contact with the gold, but I’ve got this sniggling suspicion the card foundation might actually be painted yellow.
I’ll explore that and let you know if I come up with anything to verify it. I have read that card or board foundations were preferably yellow in color when used underneath gold. But I know it isn’t always the case, because I’ve taken apart and repaired goldwork like this, where the foundation was any manner of color – from grey carpet felt to regular balsa wood to newsprint. Well, it’s something new to explore!
So, those are the leaves – very simple when compared to the other pieces. And speaking of not-quite-so-simple, next up, we’re going to look at the wheat ears… and then we’ll take apart the lamb! Can’t wait to get to that!
Questions? Comments? Curiosities? Have your say below!
You can find the backstory on this piece and see other examples of deconstructed goldwork elements from the piece listed under the Deconstructing Goldwork Index, if you want to read more about this whole process. Deconstructing this piece allows us to learn a lot about the processes, materials, and techniques used in this type of goldwork, so if you’re curious, feel free to check out the previous articles!
Hi Mary with a y,
you may think that this is an irrelevant question, but it is prompted by your involvement in all manners of embroidery….
TV transmission of the Vatican proceedings show the gorgeous, glamorous wardrobe of all those princes of the church. Do you think there is a way to find out 1) what exactly constitutes the complete wardrobe for those folks, and 2) who fabricates them? They are such a feast for the eyes…
Hanny with a y
I think your idea that these pieces were reconstructions is very accurate. Perhaps the original ground fabric was was damaged in some way and the elements were carefully salvaged and reused. I’m sure the gold was too valuable to toss.
I’m always buying old needlework items at yard sales. I think I will do something with them Some day, LOL.Have a couple of books for inspiration. New Uses for Old Laces, Jean Ray Laury, 1974 and Reader’s Digest Crafting with Flea Market Fabrics, Deborah Harding, 1998. So you know I’ve been thinking about this a long time 🙂 Pat in SNJ
Very interesting, my question today is is the card foundation is hard.
the holes in it are to attach the fabric?
Thanks
The card foundation has hardened quite a bit over time, but originally, it would have been no harder than a thick piece of cardstock or very heavy watercolor paper. ~MC
Dear Mary
Thanks for the review the leaf was a lot easier to de construct then the other pieces, 1.5″ is tiny but there are a lot of them. I notice that the card foundation of the leaf is similar to the other pieces with a drawing of the leaf on the linen, so the linen was attached to the card foundation and cut out from the attached linen, interesting. I really look forward to the de construction of the lamb.
Regards Anita Simmance
I have a question:
I noticed that the cardboard foundation gives a very hard sharp edge even after the gold-work is applied and edged with a purl check – then fastened down. It makes the motif look as if it is just “stuck on’ instead of growing from the ground fabric. I realise that the purl check or whatever used to edge the motif would soften that edge up a bit to the eye but, still it looks hard and “stuck on” to me. Is this a trick the camera is playing or does it look that way in person? Is there any reason, other than time consumption, that would make it impractical to bevel the edge of the cardboard for a more realistic look?
Hi, Paula – thanks for the question! I suppose the high relief stuff isn’t to everyone’s taste. There are different ways to go about it, and different foundations that can be used to create a different look. For this particular look, you’re right – there’s that sense of “disconnect” with the surface, that makes it look attached (which it is!). But different materials can be used to pad goldwork. Felt by itself would give a rounder, smoother slope to the ground fabric. A very thin paper would raise the goldwork only ever-so-slightly. So it all depends on how one goes about it. ~MC
Dear Mary,
I very much enjoy reading this series on the goldwork. I can’t remember if I told you this before, but in Bavaria they call the gold coloured cardboard they use in their Klosterarbeiten the Seele or soul in English. Isn’t that cute?
Have a nice day, Jessica
This is a very interesting series, Mary, I am enjoying it immensely. Thank you.
Perhaps you could take a cotton bud (Q-tip?) with a little water and dab at the ‘painted’ cardboard – if it were painted with a water based paint the damp cotton will lift it a little. If you think it may have been painted with oil-based paint (which would probably be unusual since it was going to have all that gold stuff over it), you can test it with a little turpentine on a similar cotton bud.
If you do decided to test, would you let us know please? I am very interested in what it could be.
Ahhhhh. Here ’tis – yes, I will definitely let you know! The wet q-tip is a good idea.. I’d guess if it is painted, it’s not an oil base, too. But more on that later!
MC
I was looking at a Victorian or Edwardian embroidery book online two days ago, on Project Gutenberg – I can’t remember which book, though. I was looking for information on another embroidery topic at the time, but I came to a page on goldwork over card – and thought of you! The author mentioned using either stout watercolour paper or card and said that the card should first be painted yellow for gold thread embroidery. I suspect that thinned oil paint would be used in preference to watercolour.
Hi Mary,
Just read the posts about deconstructing the vestment goldwork and think it’s amazing to be able to see the detail and effort that went into creating the pieces. I have not worked with gold yet, but now understand that what you see may or may not give you a true picture of how the item was created. I am curious about the weight of the individual items (e.g., lily, rose, lamb on book). Thanks for sharing your efforts and expanding my education.
I have already commented on this, and would love an answer to my question (if and when you have time), but now I have found another thing that really puzzles me: if, as you say and as is quite obvious, the pieces were removed from another to be placed on this one, why were those ‘stubs’ not removed? They look as if they would come off fairly easily so why were they left behind? They must make a little bulge on the top, surely?
Hi, Christina – no, the goldwork is so padded, with the foundations and everything, that no bulge shows. Removing a piece like any of these is much easier if you just slice off the stem there, rather than unpicking the back, which could get messy. Hmmmm….now I’ll go look for your other question! -MC
Your website is an amazing! I am truly grateful that you have shared your knowledge. Great respect, Jo-Ann