


Yesterday, we continued in our study of this goldwork piece by examining up-close the very dimensional Agnus Dei (lamb) that adorns the embroidered vestment that we’re taking apart.
At the end of yesterday’s article, we ended up with the Agnus Dei removed from the ground fabric, and today, we’re going to “unlayer” the lamb on this piece.
By doing this, we’ll see how the foundations of a dimensional piece of embroidery are built up and eventually embroidered. Mostly, we’ll learn through photos – there’s not a lot of explanation required here (though that doesn’t usually keep me from talking, does it?!).
Given the symbolism of this piece and what I’m doing with it, I figured this would make an appropriate Good Friday topic!
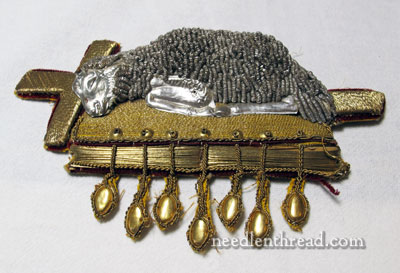
So here’s the goldwork piece as we left it yesterday, removed from the ground fabric.
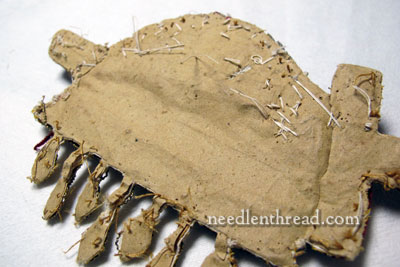
Turning the whole piece over, we notice that it is backed with paper.
The paper is thin, and unfortunately, it is fairly solidly glued to the whole back of the appliqué.
I began picking it off with tweezers, to try to get a good image of all the threads on the back of the project, but after a while of meticulously picking, I gave it up. Easier to work from the front side!
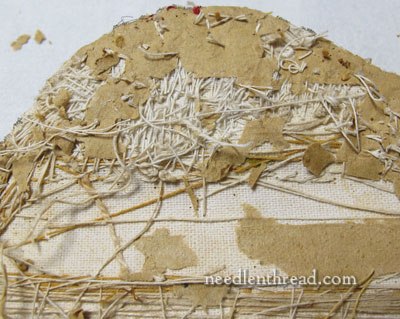
Still, you can get an idea by looking at the rounded part at the top of the photo above just how much stitching went into embroidering the lamb.
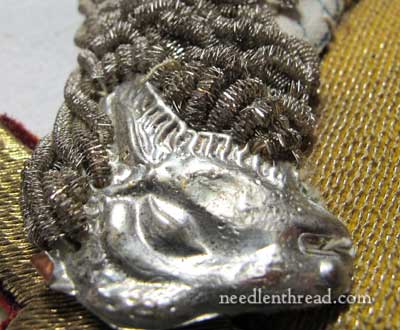
Turning the piece over, the first elements to tackle for removal were the molded tin-like forms of the head and legs, and then the silver bullion.

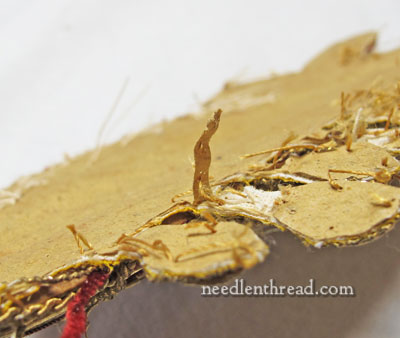
Looking closely here, you can see that the forms are punctured along the edge, so that the embroiderer can stitch through them. This way, the bullion can be stitched right over the edge of the form, to create a more natural look to the area where the wool and the face meet.
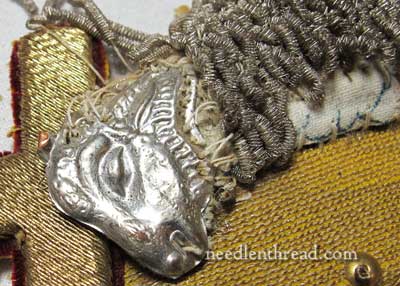
To remove the forms, I had to remove the bullion around them first. Notice that the bullion wraps up around the top of the head as well, to keep the look more realistic.
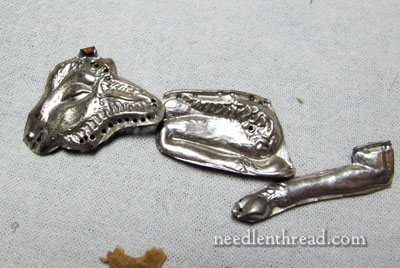
The forms, removed.
That’s a bit creepy, isn’t it?
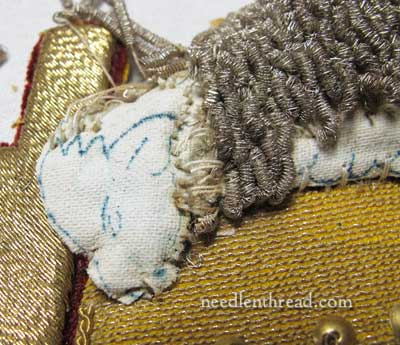
Underneath the forms and the bullion is a layer of white linen with the design printed on it in blue. The design doesn’t really look much like the actual finished thing!
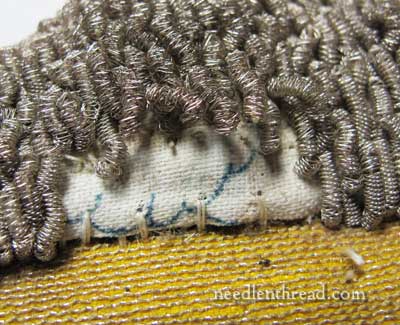
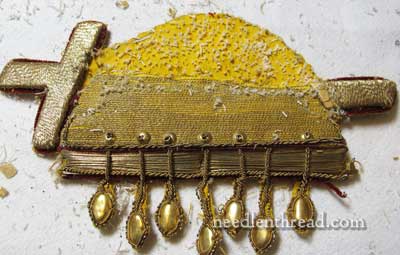
You can see that the white linen is sewn onto the top of the “book” here. So – next job – taking off all the silver bullion.

The bullion is arranged so that it was stitched from bottom to top, from the front base of the lamb upwards, and then, across the top, you can see that there are some longer pieces of bullion stitched almost perpendicular to the lamb. This extra layer of bullion worked in a different direction covered the embroidery form and filled in the shape a bit. It strikes me as a bit of a shortcut for filling quickly across the top, from the head to the tail.
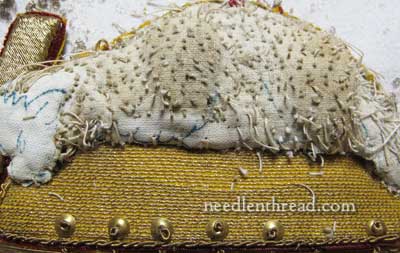
Here, all the bullion is removed and we have the not-so-white layer of fabric left. You can see the definite shape of the shoulder and the haunch of the lamb in the darker spots on the white fabric. This is where most of the rubbing and wear would have happened, since these are the thickest points of the design.
The linen is sewn through or tacked here and there to give shape to the whole foundation.
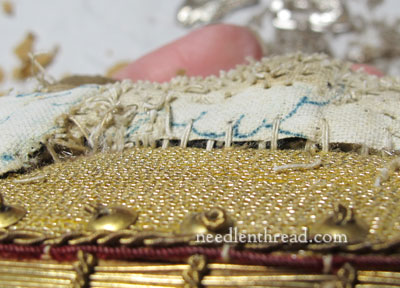
The white linen is sewn onto the foundation, overlapping the edge of the book, with simple tacking stitches. These I sliced, and then removed the linen to reveal…
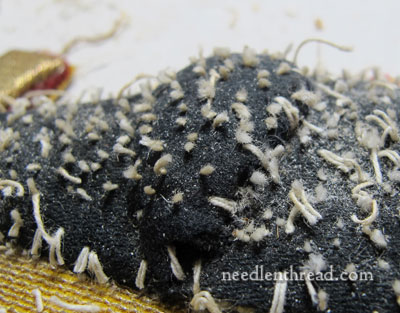
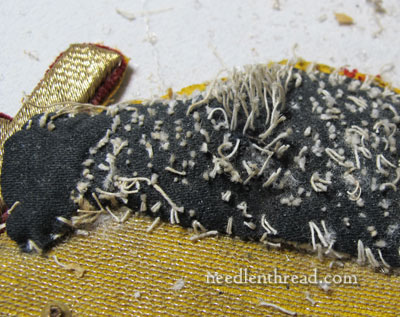
…black felt. This is a strange felt. It has a foamy feel to it. But it is felt, nonetheless.
You can see the bulging “blob” of black felt in the photo above – that’s the build up of the shoulder padding.
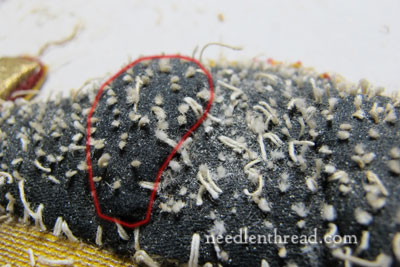
Here’s the shape of it, outlined.
So now we need to remove this shoulder padding, which is tacked on top of the whole form of the lamb.
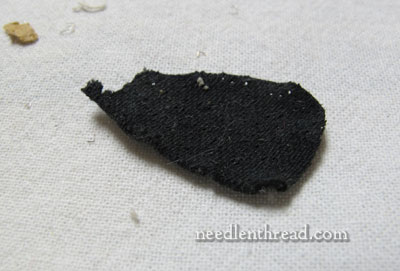
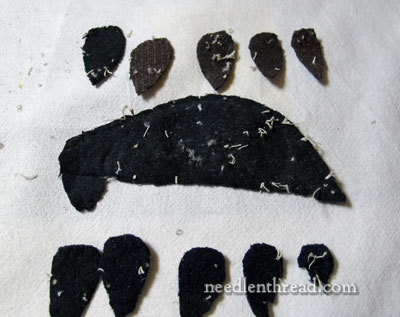
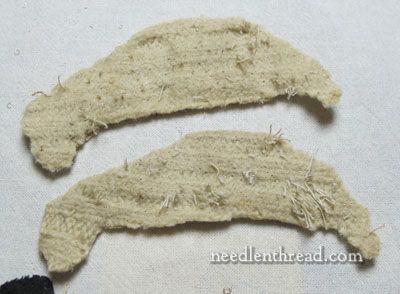
The whole shoulder doesn’t come off in one piece – the padding is build up in layers. So, it’s one layer at a time!
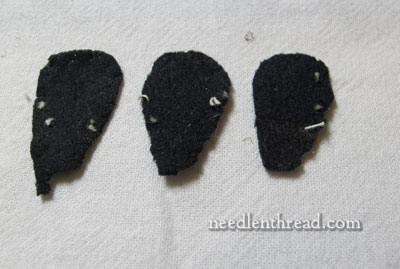
As we move from the top layer (left) to the lower layers, notice that each layer is progressively smaller.
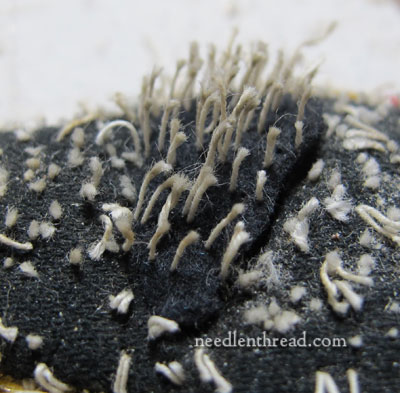
Removing the thick layers leaves the long strands of thread, so you can see how much padding the embroiderer had to stitch through!
But we’re not done yet – there’s more to the shoulder padding yet!
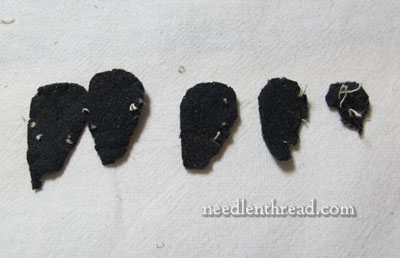
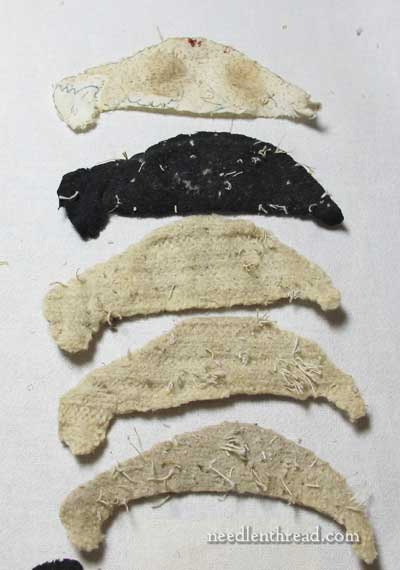
Five layers were used altogether, each layer smaller and smaller, to build up the shape of the shoulder.
I should say five layers larger and larger were used, because the embroiderer would have sewn the smallest layer first, positioned the next larger over it and tacked it down, then the next larger, etc., until satisfied with the shape.
There’s the hole left where the shoulder padding was, and you can see again those long threads, indicating just how much padding was there!
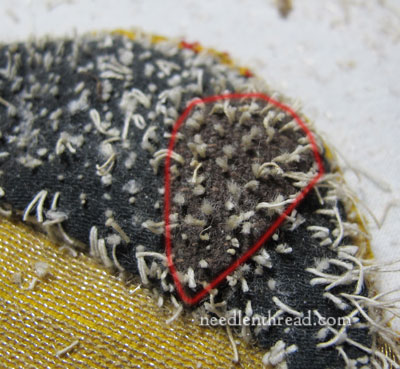
And then onto the rear haunch, which is outlined above. In this photo, one layer was already removed, revealing a layer of brown felt.
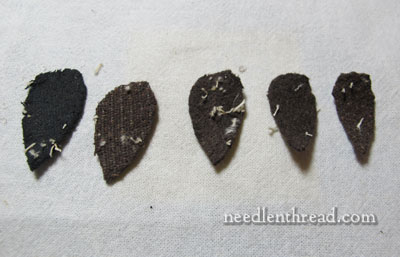
The rear haunch was padded with five layers of felt as well.
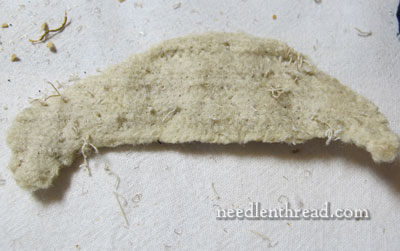
Once the shoulder and haunch were removed, the whole layer of black felt covering the body shape could be removed. Notice how simplistic the shape is now!
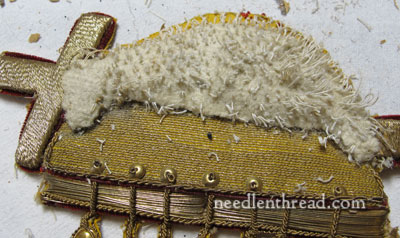
With the black felt removed, we come to a layer of creamy thick woven felt.
This stuff is what’s called “Scottish Felt” – new and fresh, it is a nice, thick woven felt that makes beautiful inserts for the insides of needlebooks and the like. It takes embroidery well. You can see a little piece of it used in The Nesting Place project here as the needlebook insert. Lovely stuff!
So we’ll remove that layer of Scottish felt….
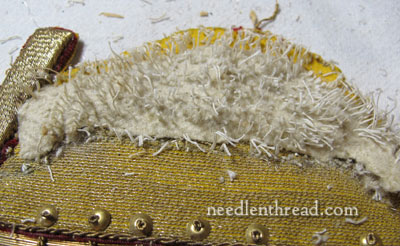
…in order to get to the next layer of Scottish felt!
And we’ll remove that layer of felt…

…to get to the next layer of felt!
Now, remember all that silver bullion used to cover the lamb? The embroiderer was stitching through all of these layers to attach the stuff!
What jolly fun, eh?
And finally we have all the layers that comprise the body structure of the lamb, except for the shoulder and haunches, which were stitched on top of all the felt layers, but underneath the final white linen layer.
The embroiderer would have sewn each of these layers down, from bottom to top – three layers of very thick (but soft) Scottish felt, one layer of thinner black wool felt – and then the haunch and shoulder – and then the white linen.
Once the lamb is removed, this is what remains of the design, and we’ll look at the rest of the construction of this on down the road.
What’s interesting is that the book is dimensional, too. At first glance, you might think that the way the design was drawn and the way the embroidery was done make it look as if it is sitting up off the fabric – almost like an optical illusion. But it actually is standing off the fabric like a real book, and we’ll see how that was done next.
Questions? Comments? Suggestions? Feel free to have your say below!
If you’d like to read the backstory of this piece and see the other goldwork elements that were taken apart and studied, feel free to visit the Deconstructing Goldwork Index, where you’ll find all the articles relating to this project listed.
One thing is certain 🙂 If I would have disassemble the lamb I wouldn’t be able to put it back 🙂 It looks very complicated!
Dear Mary
I don’t mind you talking Mary because you are always so interesting! Wow! after all those layers of paper, felt, Scottish felt(yes I agree the Scottish felt from the Nesting Place is lovely) and moulded tin, that is some layers to stitch through, their hands must have ached. After all the autopsy and deconstruction and with the forms and bullion removed the dimensional lamb looks like a skeleton. Your hands must be aching thanks for the interesting look into vintage embroidery.
Regards Anita Simmance
All I can say is oh my oh my…
I love seeing you deconstruct embroidery–you make it human and contemporary, no matter when it was originally done.
Thank you!
I am so thankful for your deconstruction. I am learning alot and realizing how to add some dimension to my own stitching. Until you showed us some of this padding and other padded stitches I just thought that it was all done with thread. Adding padding with small pieces of fabric will be much faster and give better shape than trying to do it with threads and yarns alone. Now I must find some time to stitch instead of just waste my day with television and food.
Thanks for these deconstruction posts, Mary. It is wonderful to peek into the thought processes from long ago and also to see the different parts used. So informative!
Hah! purely by accident, I found another garment using this applique on Pinterest — http://media-cache-ec5.pinterest.com/originals/d3/c5/62/d3c562f8920810eeb502c66ac16a90dd.jpg
Yours is in better shape, though — this version doesn’t bring the “wool” up over the neck, and the seals on the book are in far rougher condition. Still, it’s interesting to see this lamb on other pieces. I just wish I had a source for it.
Just wanted you to know how fascinating your website is! I love reading this series on deconstruction. Loved the egg series as well. As yet I am not an embroiderer. I have used your wonderful videos to do a little embroidery with yarn on some hearts that I knitted & felted. You are truly talented and so wonderful to share your knowledge. Thank you!
Oh…thank you so much for the raised embroidery lesson in reverse! It really does teach us a lot about how to create the final shapes…
What a fantastic Easter gift; thank you Mary.
I don’t mind how much ‘talking’ you do either as it always is interesting and informative. I, like millions of people, have used felt layers to build up shapes in stumpwork but never this many. It is mind boggling indeed, and I can’t wait to see the deconstructed book.
Dear Mary I very much enjoyed this post, as I have had to remove a lamb from and old vestment on to a new one. While working on it I greatly desired to know what was inside. Did you ever finish deconstructing the book? Would love to see how it went. Thank you for the interesting information, my curiosity has been satisfied!
Hi, Megan – This is as far as it went, I’m afraid. I took pictures of the rest of the deconstruction (I’m pretty sure!) but somehow, I lost them. And so, the series ends here. 🙁
Dear Mary,
congratulation! it’s very interessing. Do you still plan to explain the book construction, and the cross as well ?
Thanks for your reply.
King regards
Did you ever finish writing articles on the deconstruction? Or that on the “ugly” silk and goldwork piece?