


I’m popping in today to advocate for project organization.
I’ll explain what has prompted this article, and how a couple easy solutions have simplified my stitching process and made it much more efficient – and precise!
Never underestimate the value of taking time to organize your project and work space.
The maniturgium project that I’m working on morphed from design to testing to actual stitching pretty quickly, and I admit, I didn’t tidy my work place and organize threads ahead of time.
Keep in mind that the project is a 40″ long piece of linen (about 9″ deep at this point, to accommodate hooping easily), and it is hooped in the center where I’m working on the text. You can see it in this last article about the embroidery.
I sit at a table when I stitch, because I do most of my embroidery – and especially projects like this – at my studio rather than at home.
The long strip of linen moves about on the table surface as I work. You can probably picture the hoop clamped in a table stand, with a long bit of linen on each side of the table, flowing from the hoop.
Now, imagine the threads: I’m working with six shades of blue silk, and here I am, haphazardly grabbing my next needed color of thread, stripping one strand, putting the remainder back on the table in the vicinity of the linen and everything else – scissors, lamp base, pin cushion, pencil, paper – and in general, everything is building.
Threads are here and there and everywhere – partially used strands of new thread, small bits and orts (leftovers) – sticking to the length of linen, and becoming a general nuisance.
And then it happened.
I picked up the wrong shade of blue (two of the blues are very close in shade, and it was a cloudy day, and I wasn’t really being attentive), and I stitched with the wrong shade of blue.
Grrrrrrrr.
Time to organize and get the workspace cleaned up!
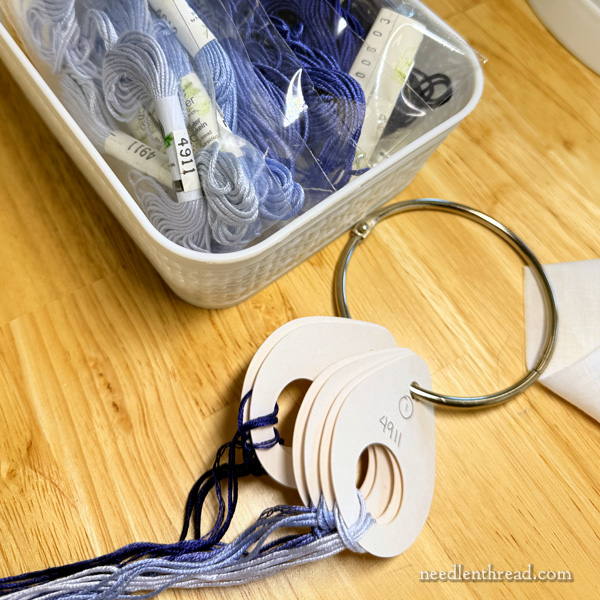
First thing I did was fetch some thread drops. These are great for thread organization for any type of project! You can find thread drops listed here in my shop, but you can even make your own, if you’re inclined towards paper crafts and the like. Sometimes, I make my own. Sometimes, I use the ready-made ones (which are generally sturdier, anyway).
I just needed six thread drops and a jump ring.
I took all my unused cut threads that were lying about, sorted them by correct shades, and looped them into thread drops.
Then, I grabbed the skeins of all the shades I was using, grouped them by shade, and put each shade in its own zipper bag. I put all the zipper bags into a little tray that can sit out on the table, where I can access it when I need to replenish a thread drop.
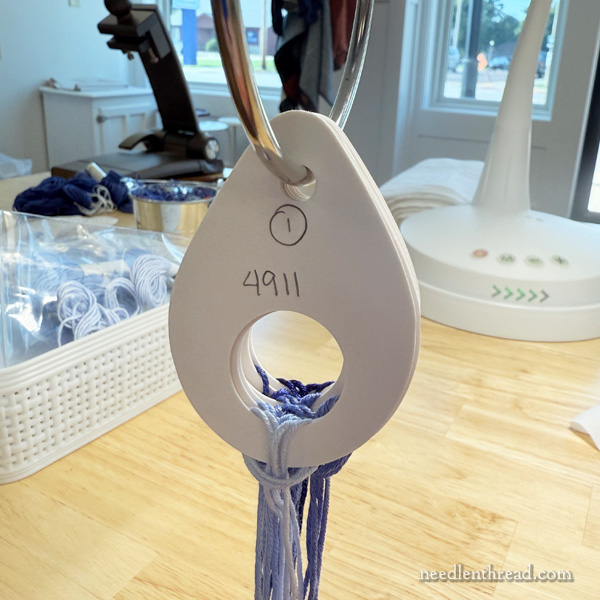
I labeled the bags and the thread drops with the color numbers, but also with the sequence of shades, light to dark, from 1 through 6. This ensures that I can quickly see which shade is up next.
I can hang the jump ring anywhere. I stuck it on the arm of my magnifier for a bit…
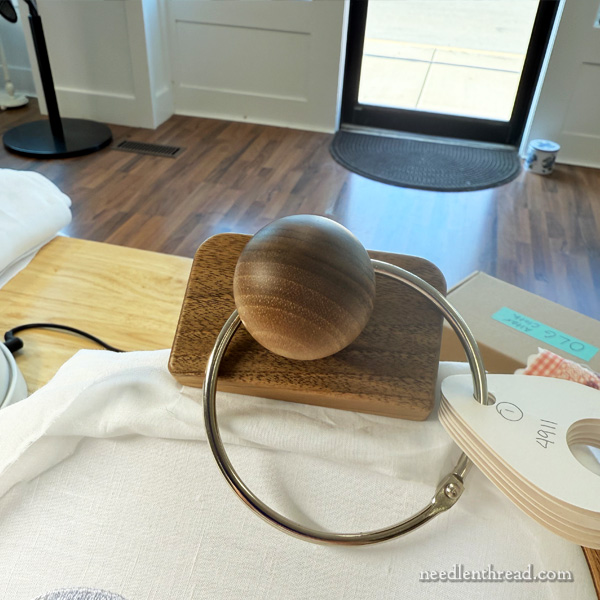
…and I even hung it over the knob on my Potoky stand.
Ideally, I think I would like to put a very small Command Strip hook on the edge of the table, and hang it from that.
In any case, the thread drops can conveniently be hung pretty much anywhere, so that they are easy to reach.
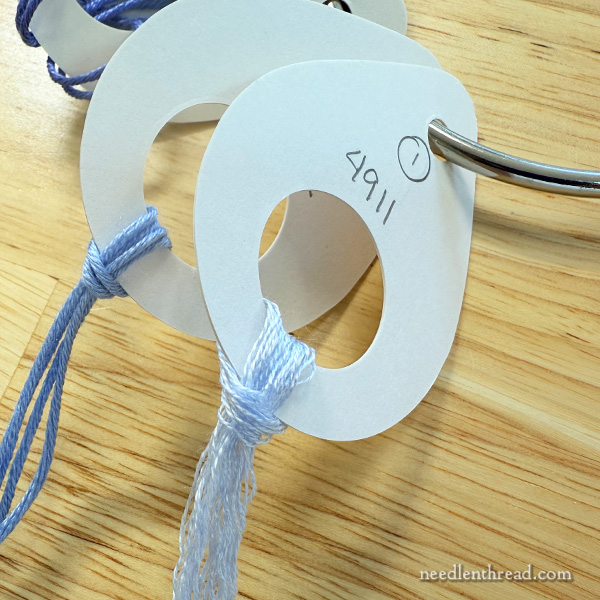
You can see a difference in the prepared threads here on these thread drops.
Notice that the light thread in the foreground is “stripped.” Stripping is simply separating each of the individual strands from the main thread that you cut from the skein. This is something you do with stranded floss like DMC cotton or stranded silk (in this case).
You can find a tutorial for stripping embroidery floss here.
Stripping your threads is important! Obviously, if you’re only using one strand of thread, you have to do it anyway. But even if you’re stitching with two or three strands in the needle, stripping one strand at a time from the bulk and then putting back together the number you’re stitching with helps ensure better, consistent, and smoother coverage of your thread when you stitch.
Here, I’m using only one strand at a time, so it makes sense for me to pre-strip all the thread and loop the silk, already stripped, into the thread drop.

Why go to the trouble to pre-strip my floss before loading it on the thread drop? Why not just load the whole strand onto the thread drop, and strip the single strands out as I go.
Well, once the threads are all stripped and put together into the thread drop, I can easily retrieve one strand of silk at a time by just sliding the eye of my needle under the strand in the thread drop and gently pulling the one strand out.
If the thread is not pre-stripped, I have to remove the full thread, strip out a single strand, and replace the full thread onto the thread drop.
Pre-stripping a batch of thread keeps everything much more organized
It helps reduce waste.
It keeps shades from getting mixed up.
It allows for much more efficiency when it comes to switching out threads.
And the whole prepared workspace helps keep me sane.
Which is a good thing.
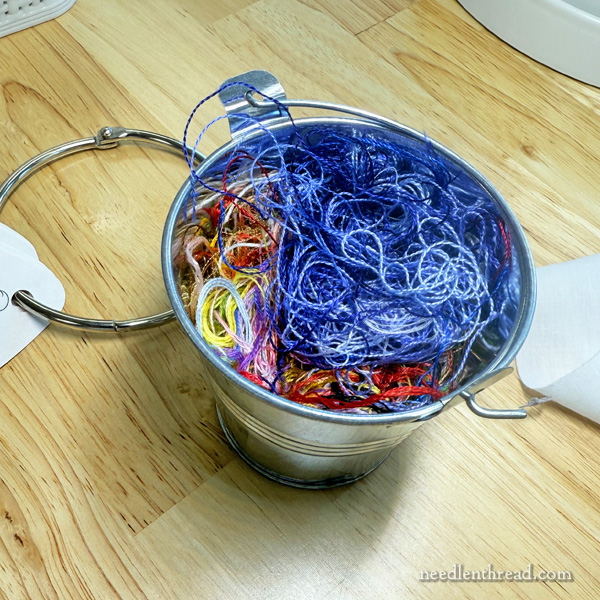
The final addition to the tidied-up workspace is an orts container.
Arts are those scraps of thread that materialize during any stitching project. You can read about orts here.
Having a place to deposit orts goes a long way to keeping a workspace neat and tidy.
I use a variety of containers for orts – from this little tin bucket, to average jars, to pretty jars, to decorative tins, and even little cloth or crocheted “ort bins.” Right now, the tin bucket does the job adequately.
Worth the Time
It’s always worth the time to tidy and organize your workspace.
Often, it doesn’t take me long to get a bit messy with projects, but I always reach a point where I know I’m going to pull out my hair – or just get short-tempered and aggravated – if things are too unorganized. I don’t like to hunt for tools, threads, and the like. And I certainly don’t like to make mistakes in color or shade choice, simply because I was disorganized!
Once I got everything tidied up on this project, the whole thing has gone a lot faster. At the end of each work session, I take just a couple minutes to tidy up again, so that the next time I’m able to stitch a bit, I can get into it quickly and make better progress.
Do you have favorite organizational methods for your work station? I’d love to hear about them! Feel free to leave a comment below!

A thread stand for sewing machines might be good to hold your floss ring. I’ve found mine at garage/estate and EGA or quilt guild shows in their sales section. You could bling it up with a tray on the bottom to hold tools.
Hi Mary, I loved your organization post. It is something I like to do and plan ahead, however I find myself catching up with that often.
I use a divided plastic box when I am using thread painting using several colors at once. I put each skeins and bits and pieces in one compartment and that keeps all in one place. I do like the floss rings as well but the box makes it easier for me.
Thanks again for your wonderful posts!
I love how organized you are. You have inspired me to do the Same. I’m making dresses and cute outfits for my only grand daughter. Her Christmas dress is smocked and has an embroidered collar so i am scouring your website for ideas and revitalizing my embroidery skills. Thank you. I wish i could find a web site like yours that specializes in smocking and sewing.
For all my DMC, I use Floss-Away bags. Each bag has an acid-free index card with the color number in the upper right corner. The currently-in-use skein and any large orts go in front of the card, any extra unused skeins go behind the card. When I pull colors for a project, they are looped together with cable wire rings. When I’m home, the wire rings are looped on a hook on my floor stand. When I take the project traveling, the wire ring with the DMC goes into my project bag.
The Floss-Away bags of DMC are stored in a library card catalog, although the new DMC threads don’t fit – it’s a 12 drawer cabinet and holds DMC up through the 3000 series.
If I have non-DMC threads, when I pull them for a project, they can also go into Floss-Away bags, but I don’t store them there.
Hello.
I love this article on Thread Drops. I have 1 question. Do you thread up each color on different needles and keep the threaded needles with their Thread Drops, (ready to use when needed)? OR… Do you use just 1 needle and go between colors when needed?
Sincerely,
Gayla, in Central Texas
Hi, Gayla – That really depends on the project. If my project has a gazillion colors going, I might pre-thread needles before a stitching session, or at the end of a session in preparation for the next session. But I don’t have a lot of projects like that, and normally, I’ll just keep one needle going, park the thread that I’m coming back to eventually, and switch the needle to the new color or shade.
I love vintage and decorative things, so a few years ago, I was moving a dresser set inherited from a relative. It had a porcelain tray, a small trinket bowl with a cover, and a small bowl with a cover that had a hole in the middle. I learned that this latter bowl was a ‘hair receiver,’ and it seemed perfect for orts. And so it has been. I placed one in each of my stitching areas, and I love being able to re-purpose them (since I won’t use them as originally intended!). The only drawback is that they are fragile, so you have to place them carefully so as not to knock them off a tabletop. You can find many single hair receivers, often imported and hand-painted, available on eBay or other sites.
Thank you for article! It came just at the right time. Our family lives in a small space, so I have, what I’ll call, a flexible workspace (ie, a bin on a side table in our living room area). I’ve noticed I have a hard time picking up projects that have more than 6-8 colours. After reading your article I sat here tonight and made some of my own thread drops, replacing a box of around 30 DMC bobbins in a box I have for a thread painting project. I can see how this is going to help me pick more colour-instense projects again! Less space, less managing bobbins and a much easier way for keeping the partial lengths organized. Thank you!
Love the bucket!! Is it just me being miserly or are those pets exceptionally long? Honestly I often like I’m a bit neurotic on using to the absolute last millimeter of floss. LOL
I rarely use a thread down to the very end. Many folks like to be thrifty in that regard, but I suppose I am not one of them. I end my thread before it gets close to the needle’s eye (because that’s where the bulk of wear and tear happens), and I usually change my threads when I notice that they are getting fuzzier of “fuller” than usual, especially with more delicate threads like silk or softer threads, like floche. This helps keep the stitching consistent. I also check my threads before I use them, to make sure there are no stray breaks, slubs, or anything like that within the plies, because those types of imperfections lead to frustration while stitching. If I can cut those out and use a shorter piece, I will, but sometimes, I’ll end up trashing a whole strand because of a slub or a break in a ply – it’s just not worth my time to try to work around it or work with a very short thread. I prefer stitching with a clean thread that behaves like a new thread, and I especially don’t like to fight with a thread to end it. Perhaps not thrifty, but it makes for a smoother working experience that’s frustration-free.
I keep project embroidery thread colors organized by making an envelope out of a piece of printer paper and masking tape. THEN I can write in pencil the colors, numbers and stitches to use. I can also erase this info and reuse the envelope for another project. A cheap wire napkin holder will let me have two or three envelopes ready to use when I change projects.
I do a lot of projects and for each one I use sheet of computer paper,folded, small side to small side. Then I tape the sides with masking tape. NOW you have an envelope to keep thread in. I can write my project name on it in pencil, and list the thread colors or numbers for reference. I also use a couple of dollar store wire napkins holders to hold my envelopes. Cheap and fast for each new stitching.