


Here’s a wee update on the Mission Rose project! I’m still satin stitching the outside petal turnovers with Great Hope of finishing them this very day.
Great hope.
Hope springs eternal…
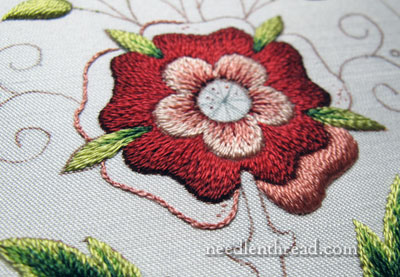
When last we visited the Mission Rose, I had just started the satin stitch on the one outer petal that you see above.
Once it this petal was finished, I moved forward on the rest, first with split stitching around all the outer petals in the medium pink and then with filling that split stitched outlined area with the padding for the satin stitch.
Here, you can see padding on three of the other petals. The petals on the right and top are ready for the satin stitch. The petal on the left has one more layer of padding – the long straight stitches – to work. You can see the kind of criss-crossed stitches there that make up the second layer of padding.
The first layer of padding (discussed in the previous article) is split stitch. This second layer is kind of a figure 8 / herringbone combination worked over the split stitch without picking up any fabric.
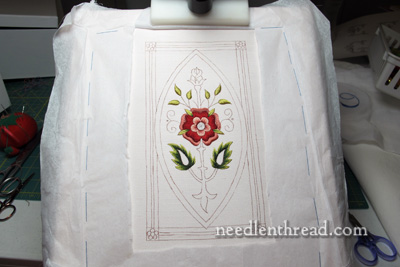
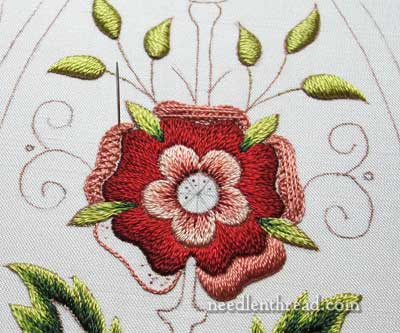
Sometimes, it’s difficult to get a good idea of the size of the piece when all the photos are close-ups. Here, I’ve stepped back a bit. All the padding is finished, and I’ve started satin stitching the other petals.
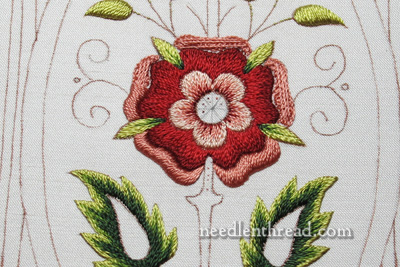
The lower right petal turn-over is slightly thicker than the other petals. Right now, this doesn’t bother me too much. We’ll see how I feel once the other petals are finished. Worst case scenario: I can take it out and work it a little thinner, relying on the gold outline to cover the design line.
There’s also a slight jiggle in the satin stitched edge on the lower right petal. Normally, that would bother me. But remember that there is going to be a gold thread outlining the rose – sooooooooo…. I’m not bothered by the jiggle!
For me, satin stitching like this is slower than most other stitching. Once I start the satin stitch layer, I really slow down. Satin stitch takes more precision than many other stitches. Rushing it can lead to sloppy results. And it’s such a beautiful stitch that I think it’s worth slowing down to do it well.
Next time, you’ll see the finished satin stitch – and then it’s time to start the stem! I’ve been musing about the stem a lot!
If you’d like to catch up on the Mission Rose project and follow it from start to finish, you’ll find all the articles about the progress of this project in the Mission Rose Project Index. You’ll also find the pattern for the project there as well.
Your work is truly amazing. You paint with thread. Thanks for sharing
Dear Mary
It looks lovely I can’t see the jiggle in the right satin stitch and thickness of the right satin stitch doesn’t really notice. I like the photo of the rose from a distance you can get a better idea of the size of the project. Is that a system 4 table stand you are using?
I’m off to the RSN tomorrow for a tour of Worship and Glory exhibition I will let you know how it goes, getting really excited!!!
Regards Anita Simmance
Hi Mary
It’s very lovely.
Mary,
This is coming along beautifully. I wondered why you are using an expensive thread to pad the petals when you could use felt or even another thread underneath. Is there a reason that I can’t think of?
Well, I could have used a cotton thread of the same color to pad, but unbelievably, I didn’t have one that was right. So I went ahead with the silk. Padding with felt underneath silk like this, especially when working satin stitch, is not a favorite technique of mine. If it were long and short stitch, I might, but with satin stitch, there’s always the risk of the “hairs” of the felt peeking through the stitches or interfering with getting a really smooth, parallel-stitch finish. In any case, each petal only took (for padding) about 12-14 inches of one strand of silk. I was able to work the padding of one and a part of another petal with one single strand. So it’s not really a lot of thread. If I were working something larger, or working many more shapes than these five, I probably would have made an effort to track down a cotton of the same color. Good question! Thanks! ~MC
Aloha Mary,
It’s looking great. Good luck with the stem.
ji
The colors look great from distance…
Mary? What are you going to do with this when it’s finished (did I miss it somewhere?)
I’ll most likely frame it, Heather…
Mary,
I just marvel at your stitching. Your hand stitching is smoother than the machine work that I have seen lately. While machine is faster, you always remind us what can be accomplished with practice and patience. Just beautiful!
Hello Mary,
can one work good satin stich with stranded floss ?
Yes, absolutely! But it works best with only one strand of floss…