Remember the tiniest bit of stitching that I managed over the weekend?
Well, it’s now another finish to cross off The List.
I just love crossing things off The List, don’t you?
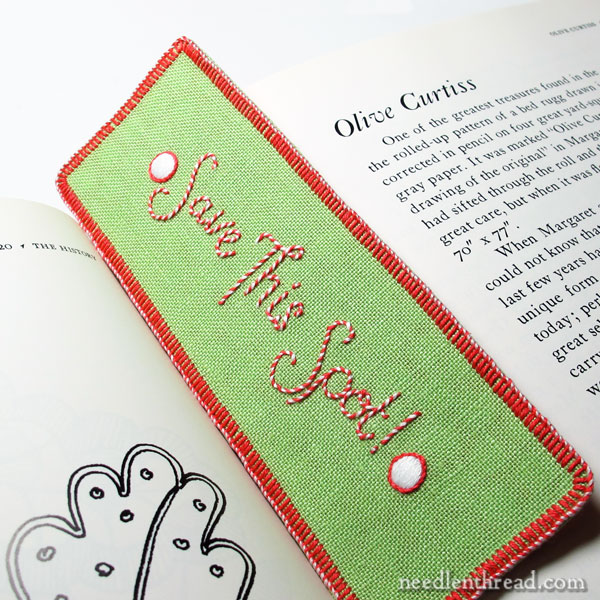
The particular thingamajig I showed you that began with “save this” was a bookmark, and here it is:

In a week or so, over where I blog on Craftsy, the step-by-step tutorial for making this particular style of hand embroidered bookmark will be available. I’ll let you know when it’s there, but in the meantime, I thought I’d share some short notes on this short project with you.
I’ve had a fondness for books all of my life. I like to read, and I use bookmarks. You know – the torn corner of a piece of scrap paper, the gum wrapper, the stray index card, the envelope from last month’s bank statement – those are the kinds of bookmarks I normally use.
I’ve not embroidered a whole lot of bookmarks in my life time – three total come to mind. These felt bookmarks were a great project to work up with a bunch of kids one summer, and other than that, I made an embroidery-on-paper bookmark once upon a time, and a little folded paper and ribbon bookmark at one point. But that’s it!
So I’m not really a bookmark-making fiend or anything…or at least, I haven’t been, up to this point!
But the thing is, handmade bookmarks are really fun to make, they work up quickly, they make great little gifts (this time of year, graduating scholars come to mind), and they can be made from scraps, literally!
There are all kinds of styles of bookmarks to choose from, too – a quick search online will turn up quite a few tutorials.
This typical narrow and long bookmark shape (like the one above) is great for embroidering a note on – think: favorite literary quotes, pithy humorous statements, words of encouragement or inspiration.

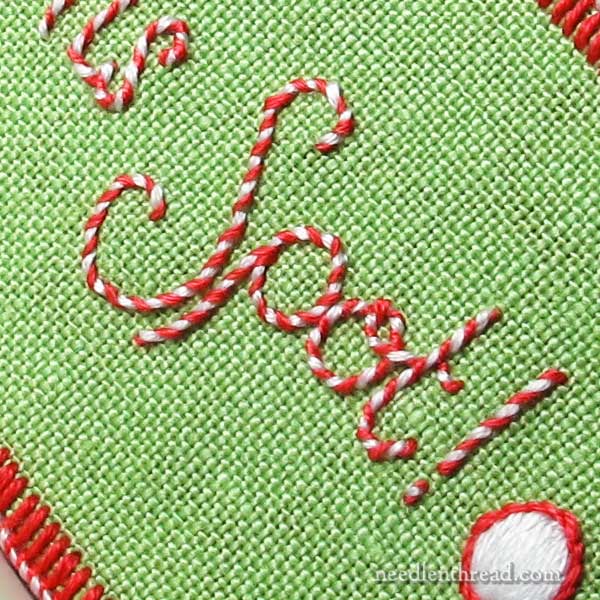
Embroidery stitches that produce narrow, fine lines work well in the smaller space a bookmark affords – so, in this case, I used whipped backstitch for the lettering.
Depending on how you design the layout of the text, you can use decorative lettering as well. If you check out this series of articles I wrote quite a while ago on hand embroidered lettering and text, you’ll find some good ideas for bringing lettering to life with embroidery.

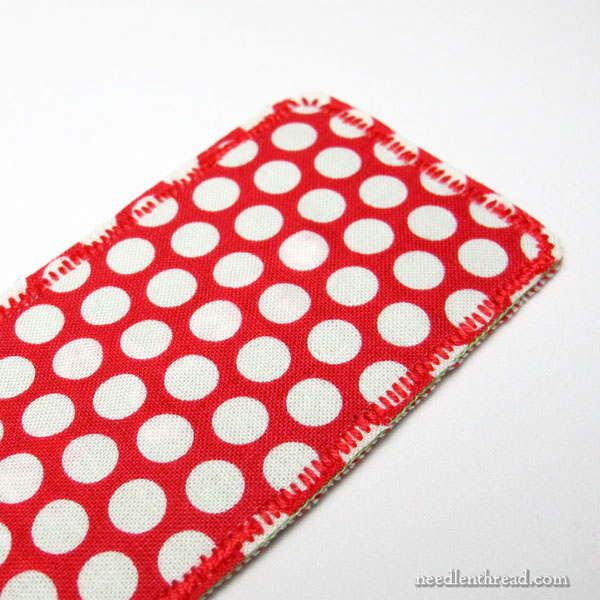
All you really need to make the bookmark is the ground fabric for the embroidery and some thread, but if you want the back to look finished, a coordinating backing fabric can be adhered to the back of the embroidery fabric.
I used a very light fusible, paperless interfacing called Mistyfuse to adhere the two fabrics together (after the embroidery was done) and to provide a little stiffness to the bookmark, without adding thickness. I like Mistyfuse because it adds just that slight stiffness, it adheres nicely, but it’s so super light that it’s easy to stitch through by hand and it doesn’t gum up the needle.
To keep things neat, I finished the edge of this one with a buttonhole stitch, whipped along the outside twisted line, and then I cut away the excess fabric. But there are certainly quicker ways to finish the edge – a zig zag or an overlock stitch on the sewing machine would do it.
So, if you’re looking for a quick gift for a graduate or for a favorite reader in your life, why not whip up a hand embroidered bookmark? Dig through your stash and use up some scraps of fabric and those fragments of floss.
And then, if you find yourself addicted to the fun of making them (because they really are fun to make!), you can always make a whole bunch of them and donate them to a local library or school. They’d make great prizes for summer reading programs and the like.
Ok, that’s one more item off The List. Today, I eliminate the duckies…
Enjoy your Tuesday!


That’s cute!
I like making bookmarks as gifts. The shape is such a nice way to use counted-thread border patterns. If you make them no longer than will fit into a standard office envelope, you can mount them on a folded piece of toning card with a few tacking stitches, and you have gift and greeting card in one.
I love doing bookmarks. So easy to customize & have fun with. I like to edge mine in nun’s stitch — gives it a bit of light, decorative edge. (And yes, I even do it on Aida fabric!)
Poor duckies! Eliminate them…? You might get a visit from your local wildlife trust!
Curious-where do you get MistyFuse?
You can buy in online through their website: http://mistyfuse.com but I think you can find it through other stores, too.
Dear Mary
Oh that’s lovely I love the green linen the dotted fabric and the candy whipped backstitch and as you say they would make lovely presents for bookworm people. I will certainly look on Craftsy for your tutorial my mind is already full of ideas for embroidering these for presents, there are so many motifs you could use for example a personalised monogram from your alaphbet stitch sampler comes to mind which would look really pretty on a bookmark. Thanks for sharing the bookmark with us and I look forward to seeing the tutorial on Craftsy.
Regards Anita Simmance
I have already used the letter H from your wonderful ebook.
https://flic.kr/p/tern33
Ooooooooh, I love it!
I love bookmarks!! Will look forward to your Craftsy piece.
My favorite bookmark I ever embroidered was a cross-stitch Tardis with the tagline “This book is bigger on the inside.” It was awesome.
That’s pretty! I like a firmer less floppy bookmark, so I usually decorate the front, then fuse it to two-sided fusible Timtex. Then find a coordinating backing and fuse it too the back. Trim it alleven, and zig-zag the edges on my sewing machine (I’m not an embroidery purist), then add a ribbon or tassel to one end – or both! I just have to not get too carried away with embellishments, as I’ve found that when I use beads, the bookmark does not stay in the book.
Really nice little item. I always chastise myself for not having something cute to use as a bookmark, instead of using the at-hand scrap paper. This is an inspiring post. Thank you.
I have a friend whose hobby is making bookmarks, she would love to see this, nice stitching.
Thanks, Janie!
Love you website, I look at something nearly every day. I am a cross stitcher teaching myself the embroidery stitches, I was so excited when I found you!
Thanks, Diana! glad you enjoy it!