


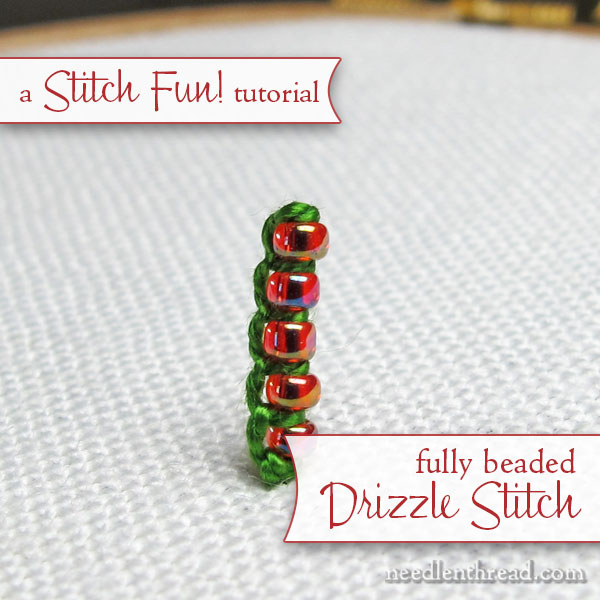
Here’s a little follow-up on last week’s Stitch Fun! tutorial, where we learned how to bead the cast-on stitch.
We’re going to apply the same principles in that tutorial to the drizzle stitch, which is a fun dimensional stitch that sits up right off the fabric.
I’ve already shown you one way to bead the drizzle stitch, which involves placing a decorative bead just at the end of the stitch. What I like about that method is that the stitch really retains its curliness and the added bead on the end contributes a certain amount of weight to the stitch that makes it sort of floppy. I like that! It’s fun!
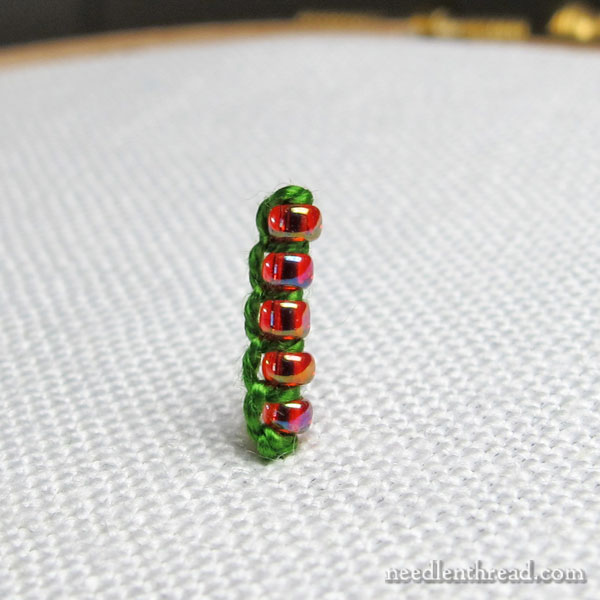
In this particular tutorial, with the stitch fully beaded up its whole length, you’ll see that the stitch, as I’ve worked it here, results in a rather stiff column of beads standing right up off the fabric.
Don’t be put off! You can make adjustments to this, which I’ll discuss below, to incorporate the twist that makes drizzle stitch so fun, and you can also add variety to the stitch by mixing things up a bit. I’ll talk about that at the end of the tutorial.
For now, here’s a quick little tutorial for a fully beaded drizzle stitch!
I’m using the exact same supplies I used in last week’s tutorial for beaded cast-on stitch. They include linen as the ground fabric, #8 DMC pearl cotton for the thread, size 11/0 round seed beads, and a milliner (or straw) needle that is a size 7 or 8. Either size will work.
If you’re not sure why I’m using a milliner needle, you might enjoy reading this article on which needle to choose for hand embroidery. It covers various types of needles commonly used in hand embroidery, along with tips on how to choose the right sized needle.
In this case, for this stitch, you want to make sure that your threaded needle can pass easily through the beads. So, test it – thread your milliner needle with whatever embroidery thread you want to use, and then pass the fully threaded needle through your beads.
If you want to go with a much smaller bead and a much finer thread, you could use a very fine beading needle for this stitch. Just make sure you don’t cast the stitches on too tightly so that the eye of the needle can’t pass through them easily.
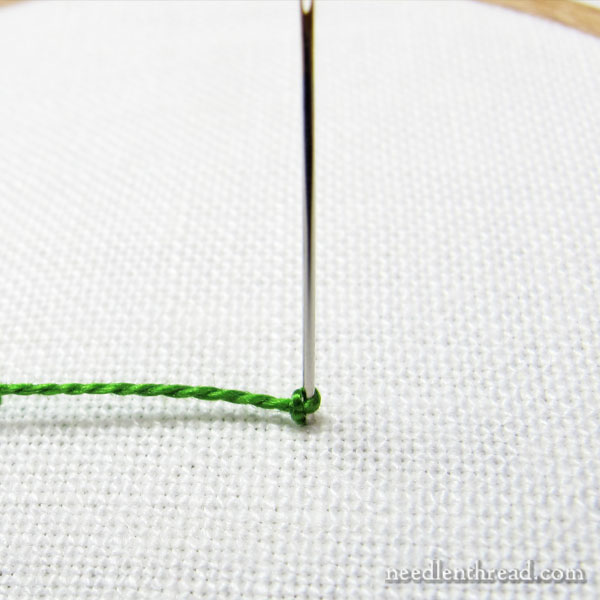
With drizzle stitch, you start with your needle unthreaded, standing straight up in the surface of your fabric. It helps to have something behind the fabric that you can stick the tip of the needle into to hold it in place, but it’s not 100% necessary.
If you’re not already familiar with how to work the drizzle stitch, check out this tutorial for the drizzle stitch with a bead on the tip of it, and this video for cast-on stitch. The method of casting on the stitches for drizzle stitch is exactly the same as it is for cast-on stitch.
I have an old video for drizzle stitch here, but not only is the video very old (made “way back” in the days when online video was just starting), but I don’t make my drizzle stitches like that anymore, so it might just confuse you. Sticking the needle straight up in the fabric is much easier. That video is on the list for an update soon!
Ok, so, you cast your first stitch onto the needle, and then…
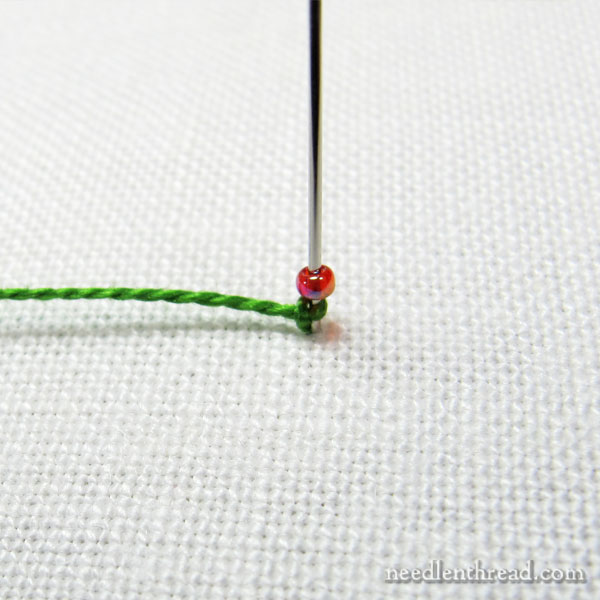
…you add a bead! Surprising, isn’t it?
You can see where this is going, can’t you? If you saw the beaded cast-on stitch tutorial, there’s really nothing new here. The two stitches are exactly alike, except that the drizzle stitch is only attached to the fabric on one end.
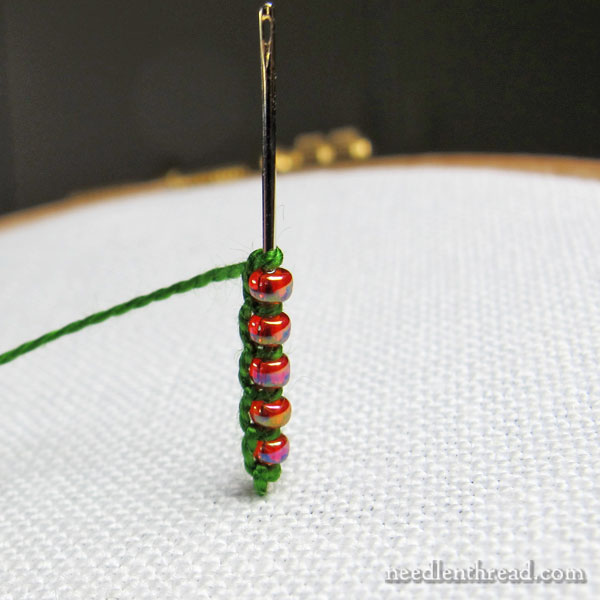
Alternate the cast on stitches with the beads, until you’ve reached the desired length of the stitch.
I love that little stack!
Thread your needle, and pull the needle and thread through the stack! Anchor your thread on the back of the fabric or tie it off in a knot, and that is the stitch. Simple!
Twisting it up and adding variety to the stitch
If you want the stitch to twist, you’ll need to make it longer in relation to the thickness of the beads and thread you’re using. I’m using fairly plump beads here and a heavier thread, so if I want any good twist in my drizzle stitch, it would have to be significantly longer than the sample I stitched above. As I cast-on my stitches, I would pull the working thread so that it turned the stitches on the needle.
With a finer thread and smaller beads, the stitch wouldn’t need to be as long to twist nicely.
For variety, you can also mix up how you alternate the beads and stitches. For example, you might cast on two stitches, place a bead, cast on three stitches, place a bead, cast on two stitches, place a bead, and so forth. Again, the size of your beads and thickness and thread will determine a lot with the finished stitch.
The idea is to experiment. That’s what Stitch Fun! is all about – the fun of playing and experimenting with stitches.
So, if you want to add a bit of dimension and texture to your stitching, go forth and experiment with the fully beaded drizzle stitch!
Have fun with it!
You can find more tutorials about embroidery with beads in the Embroidery with Beads Index here. If you’re looking for embroidery stitch tutorials, you’ll find over 75 how-to videos for embroidery here on Needle ‘n Thread, along with even more step-by-step photo tutorials in the Stitch Fun! Index. Feel free to explore!
Like what you see?
If you enjoyed this article and you’re looking for more inspiration, information, and instruction on hand embroidery, why not sign up for my daily newsletter?
There are all kinds of reasons to have Needle ’n Thread delivered to your inbox – check them out and sign up today!
Such wonderful possibilities with these stitches.
Dear Mary
Oh lovely stitch fun again. This is really a lovely fun dimenional stitch and I can see it being used in stumpwork or similar 3D embroidery and great to use in a funky design. I also like the way you have used beads in the stitch. Thanks for sharing this fun drizzle stitch with us and by adding the beads it makes the stitch much more interesting, I love the way you think up these different stitch fun styles, how do you do it, more please.
Regards Anita Simmance
Oh the possibilities 🙂 I love stitching with beads, so thank you for sharing so many different ways to add them to so many stitches!
Que belleza
me encanta esta estilo de bordado
You have the most amazing site.
thanks for all the tips.
Muy bonita puntada y fácil de hacer. Gracias.
Tutorial is very nice. And also the photos. I will definitely try it.
Thanks for sharing.
Love this idea. Checked out your beaded embroidery posts and may try a few of them. Love the tiny bead one. I use tiny beads all the time and have a small collection of them.