


So, being the lazy bum “highly efficient person” that I am, there are times when I opt for certain quick modes of embroidery design transfer, despite the fact that I have misgivings that they’ll work as I need them to.
The Thing is, there is Nothing quite so appealing as a design transfer method that takes a mere 30 seconds. And this is precisely what an iron-on embroidery transfer promises.
Don’t get me wrong – I have nothing against iron-on transfers, in the right circumstances. But there are times when an iron-on might not be the best solution, despite the promise of a quick transfer. For example, if your lines will not be completely covered with stitching, don’t opt for an iron-on. They usually don’t wash out. Opt for a transfer method that you are sure will leave no trace of a pattern.
And then there are times when the iron-on itself might be problematic. All iron-ons are not created equal. Let me show you what I mean.
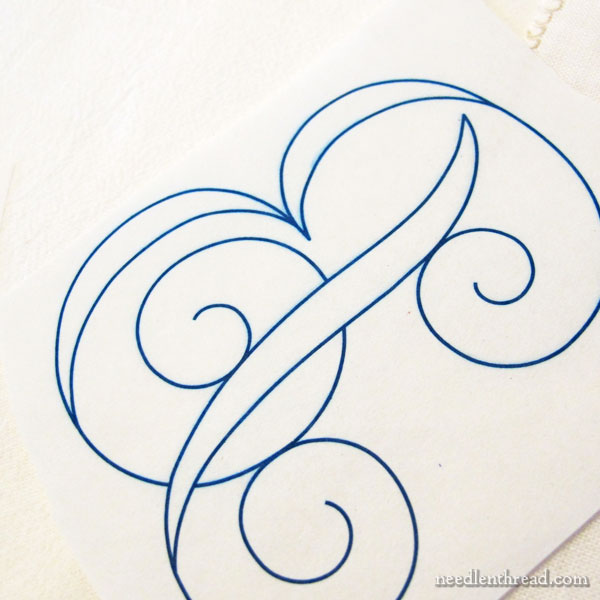
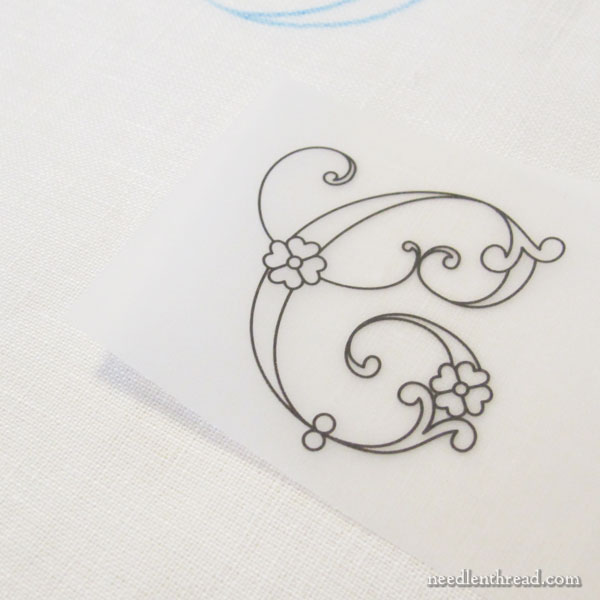
Above is an iron-on transfer of a monogram. The letter is about 3″ high.
Notice that the line on the transfer is quite bold and quite blue, and that there’s even a hint of blue shadow around the line.
This is the front of the iron-on. Notice that the blue ink seems almost blotchy and somewhat intense, looking at it even from the front, through the paper.
The paper on this iron-on, incidentally, is thin and feels slightly waxy, but slick. It’s not regular paper, and it’s not vellum.
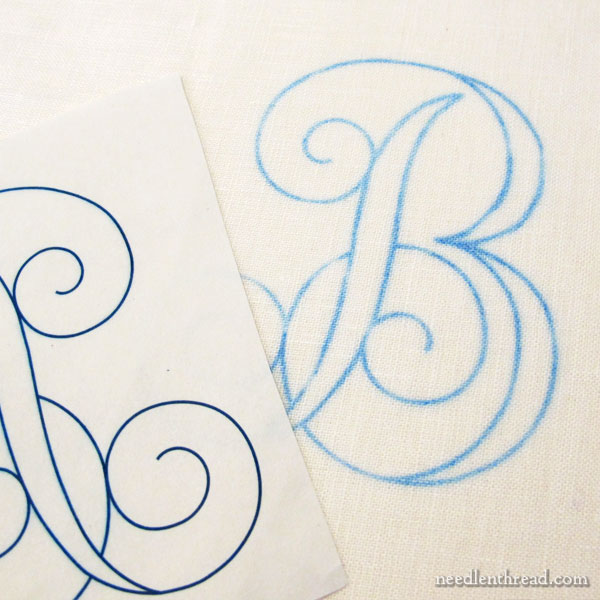
And this is the iron-on, ironed on, on the right. The line on the cloth is heavy and thick. It’s as if the ink “bloomed” when it hit the cloth – it spread itself out.
If your plan was to cover this line with a delicate or fine thread, you’d be out of luck.
In this particular case, I was hoping for a finer line for this transfer. I would have been better off tracing the pattern with a pencil.

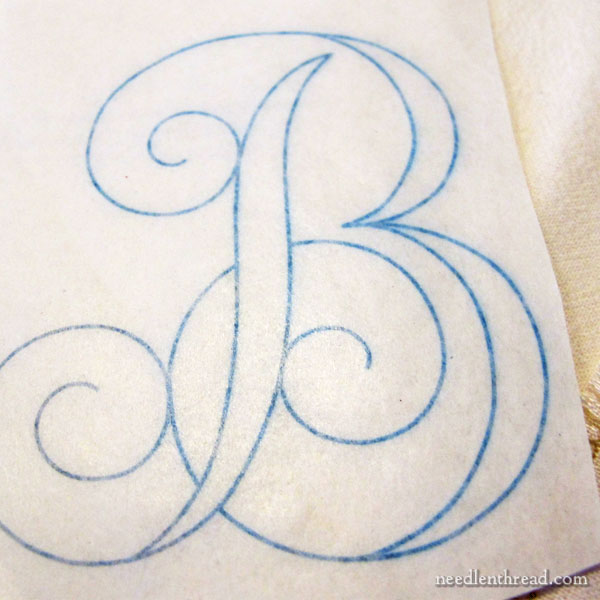
For contrast, this is a fantastic little French book of iron-on transfers. It’s out of print now, but you can find “new” used copies online. There aren’t a lot of alphabets in it, but several that are there are quite good and make the book worth having.
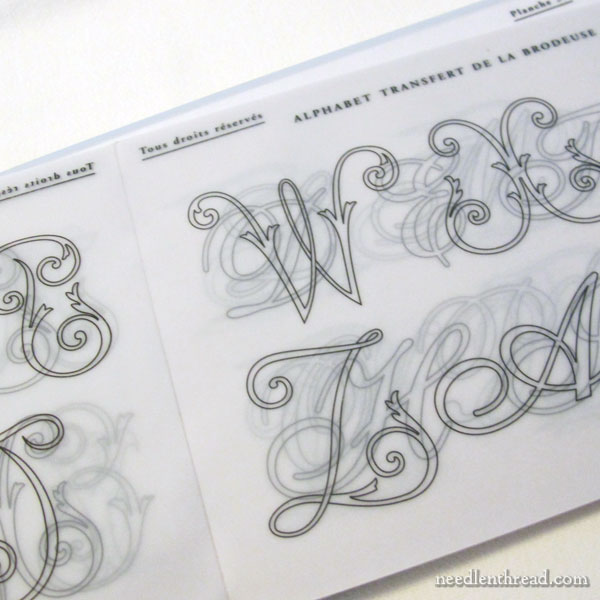
The transfers are printed on a thick vellum, in a fine black line.
The only disadvantage to the transfers in this book is that they are printed close together, which doesn’t leave a lot of room for cutting the transfer out and securing the transfer to the fabric.

The outcome of this transfer is definitely better than the outcome of the previous blue transfer. The lines are finer and although the transfer isn’t perfectly even, it is clear, and the lines, for the most part, are pretty crisp.
Some Tips for Transfers
1. When selecting iron-on transfers, note the type of paper that they’re printed on. Is the paper flimsy? Does it feel a little waxy on one side, and is it shiny? It seems to me that these types of transfers tend to “bloom” a bit more.
2. Note how much space is provided around the transfer, for cutting and securing to the fabric. Iron-ons work best and most reliably if you can pin them to your fabric so that they don’t shift, and so that you can lift a corner to check the progress of the transfer without the pattern shifting.
3. When you iron on the design, warm your fabric first with the iron, then place the iron-on transfer in place and pin it with glass-head pins. Press the iron straight down onto the design and hold for the recommended amount of seconds (usually 20 seconds or thereabouts). Lift the iron straight up and move it to the next section, if the transfer is a large one. Don’t iron back and forth – this will create ghosting, or double lines or shadows around the design line.
4. Periodically, lift a corner and check your transfer progress. Just unpin one corner and peek under it. Re-pin after you’ve checked it.
5. Try to use the center of the iron over the transfer, rather than the edges where the steam vents are.
6. Use a dry iron! Empty the water reserve and pre-test the iron to make certain it’s not going to release any steam.
7. The iron should be set on the setting suitable for the fabric. With synthetics or delicate fabrics that require a low setting, it will take much longer under the iron for the transfer to work.
8. Test! Most iron-on transfer sheets or books will have some little clip somewhere that you can use for a test. Use it! See how the iron-on behaves on the ground fabric you’ve chosen.
Iron-on Pencils & Pens
The only iron-on pencil or pen that I can really get behind and say, “This is a great little product!” is the Sublime Stitching fine-tip iron-on pen that I reviewed a while ago. I’ve used it off and on ever since the review, and it hasn’t disappointed me at all. It works great!
I’ve had iffy success with just about any other iron-on pencil or pen. The ubiquitous red iron-on pencil barely works, even on the lightest and whitest fabric, and Sulky’s iron-on pens transfer too heavily for most embroidery.
To Use or Not to Use?
As I mentioned at the beginning of the article, I think iron-ons definitely have their place in the embroiderer’s arsenal. For small and quick projects, samples and the like, I think they’re terrific!
For larger projects, though, the whole iron-on process presents its own difficulties, especially with the risk of wasting a good piece of fabric if the transfer doesn’t work the way you want it to or somehow ends up a mess, with ghosting and the like. If you’re not super confident in your iron-on transfer skills, it might not be the best way to go. You can’t undo an iron-on.
Iron-ons don’t guarantee a fine line, either, so if you want a very fine transfer line, opt for a different method.
Iron-on Transfer Resources
If you’re looking for fun and funky “today” iron-ons, companies like Sublime Stitching have plenty to offer.
If you like vintage-style iron-ons, Aunt Martha transfers from Colonial Patterns might be the way to go.
If you’re looking for iron-ons for more traditional forms of embroidery, you’ll have to do a little exploring. The best source in the States for traditional iron-ons is Lacis (search “transfer” in their catalog). They carry many of the European (especially Italian) publications that feature iron-on transfers.
Dover publications also puts out some iron-ons. And if you like floral embroidery, French Needle carries DMC’s Fleurs et Transferts, which I reviewed here.
Those are all really good tips, Mary. I’ve had many years of great success with iron-on transfers. For me, they have worked terrific. Except when they don’t. I guess you could say that about most transfer methods, hmm?
Exactly!
I sometimes iron them onto the back of the fabric, then, if for some reason it does not get covered and does not wash out (I have never had that problem for some reason) I do not have to worry too much.
Hi Mary, thanks for this great post about iron-on resources! I’d love to let you and my fellow stitchers know that I offer custom iron-on transfers in my shop!
Send me any line image and I’ll send it back to you as a professional quality reusable iron-on transfer (I use the same transfer ink as the big companies do!). If your image is fine lines, the transfer will be fine lines, too. And – the ink washes out of cotton and bonds permanently to polyester.
You can find them here: https://www.etsy.com/listing/242301814/custom-iron-on-embroidery-pattern
I’d be over the moon to send you a sample, Mary! 🙂 Thanks for all the great work you do for our community.
Hi, Jenn! I’ll drop you a line!
Dear Mary
Oops Mary what did you say Lazy ………… Oh ‘very efficient’ I see ha, ha. I know what you mean it would be great if there was a way to transfer within a very short space of time, personnally I’ve not used iron-on transfers as I think it’s just as easy to use my lightbox which I love especially for monograms and it doesn’t take long to draw onto the fabric I tape the design and the fabric on the lightbox and it works really well. But I do see that there could be a place for iron-on transfers if you don’t own a lightbox or other similar equipment. Thanks for sharing your thoughts on iron-on transfers and for the tips on how to best use them.
Regards Anita Simmance
Mary, funny this topic should come up because I am working on an iron-on from Mani di Fata bought at Lacis some time ago. I am using floche in outline stitch so the stitching is very fine. The iron-on line is fine enough that even the fine floche is covering it with no problem. But the transfer pens or pencils I have tried have all been abysmal failures. I have not tried the one you mentioned today, however, that’s next on the agenda.
So can any one please tell me who stocks Sublime Stitching fine-tip iron-on pen in the U.K ? : (
Mary, I am currently working on an iron-on from Mani di Fata which I bought from Lacis. I am using floche in outline stitch and the line is fine enough that it is covered. I have tried every transfer pen — except the one you discussed today — and they are all abysmal failures. I just ordered the Subline Stitching one to try. Thanks for your column.
Sorry for the double message, Mary, my laptop has a mind of its own this morning and I thought my first one didn’t go through.
When I need a break from my regular stitching I love using Aunt Martha transfers to embroider dish towels and pillowcases that look like the ones my gramma had. It’s no-brain stitching I can do anywhere–no checking charts, counting threads or being super precise. Just stem stitching a mile a minute! Dishtowels especially get used hard around here and have to stand up to getting chucked in the washer every week, I couldn’t bear to do that to something I spent more than a couple of evenings working on!
Will iron on transfers work with heavy material like the linen twill fabric used for Crewel embroidery?
Thanks!
Dave
Sure! I’ve used them on twill before. Always test, but there’s no reason why it wouldn’t!
Has anyone had success using a lightbox with an iron-on pattern. There are some cute patterns I’d love to try but I’m not a fan of risking a permanent mark on the fabric.
Oh, yes – I’ve used a light box to trace iron-on patterns. It’s just like tracing anything. Just make sure you have the pattern oriented the way you want it, and it’ll be fine!