


Last week, we explored two simple ways of stitching with variegated hand embroidery threads.
Today, we’re going to study two more methods of handling variegated threads, this time exerting a little control on color layout and adding a solid color into the mix.
These two methods take a little more thought and planning ahead of time, but in reality, they’re both very simple and the results are worth the little bit of extra effort.
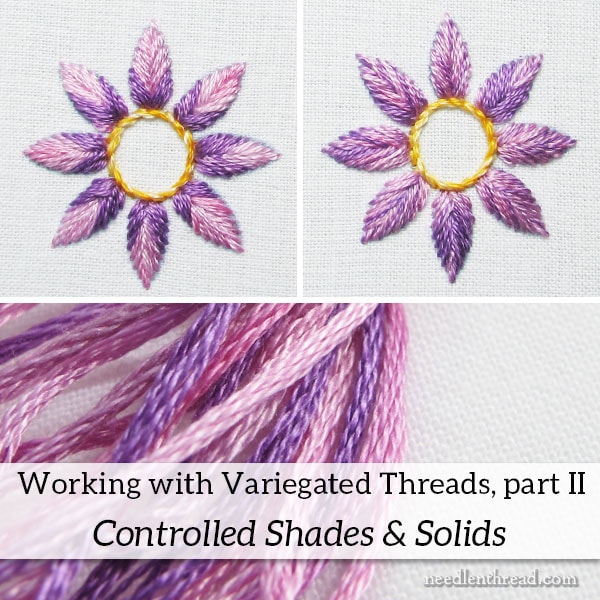
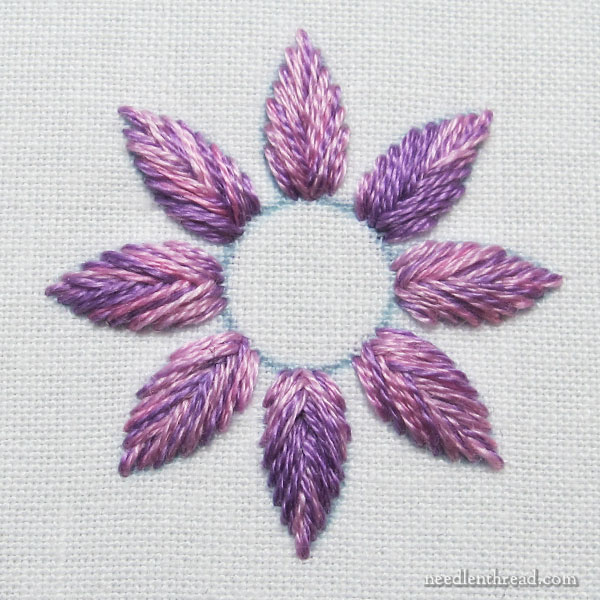
In the photo above, you can see the two flowers that will result from today’s efforts while working with variegated embroidery floss.
If you’re just joining in, please check out the first part of this series on how to use variegated threads in surface embroidery. There, you’ll find all the information on the supplies, threads, and stitches that I’m using in the samples.

For the third sample, I’m going to embroider the same floral element using fishbone stitch in exactly the same way I stitched the two samples in Part I of this series.
The only difference in this sample is that I’m going to be mindful of how the colors unfold on each petal, controlling the shading by the way I cut the thread and thread my needle. I want this dark purple on the variegated thread to always (and only) fall at the base of each petal.
To achieve this, I have cut my thread a certain way, thread a certain end into the needle, and I might even have to end my threads in the middle of a petal and start a new thread, so that the purple will end up where I want it.
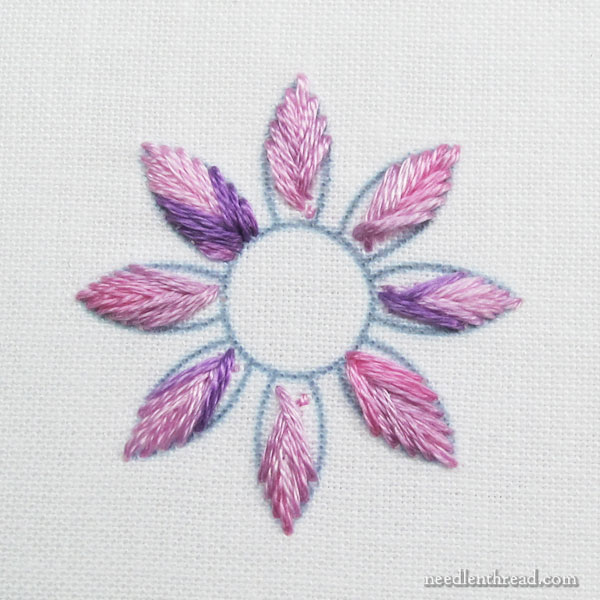
As it worked out, because the stretches of color are relatively long on DMC Variations for the size of the petals I was stitching, I had to embroider the petals part way down all the way around the flower, so that the lighter shades would always fall in the top two-thirds of each petal. If the darker purple began to develop, that was ok – but if not, I had to switch to the next petal to keep using the light shades on the upper petals.
To control the shade, I had to cut the threads so that one end had distinctly lighter shades on it, and the other, darker.
I had to make sure that, when I threaded the needle to start at the tip of a petal, I threaded it so that the darker shades were towards the needle and the lighter shades were towards the knot end of the thread. That way, the lighter shades ended up where I started the fishbone stitch (at the tip of the petal).
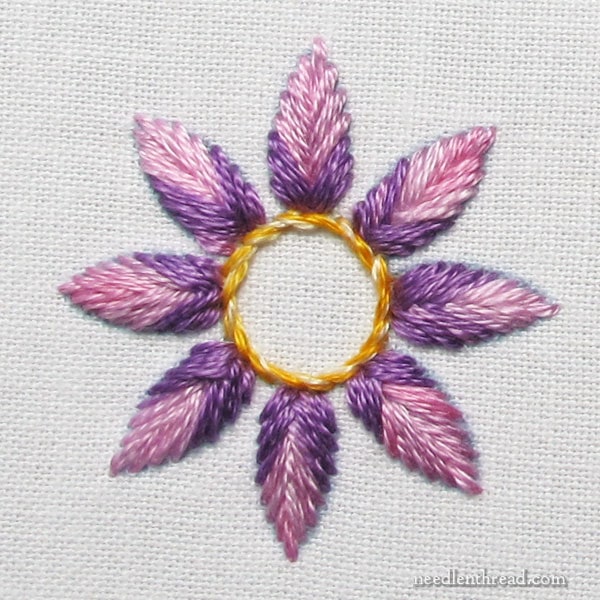
Then, I took the cut threads that had the purple at the knot end of the thread (as opposed to the needle end) and stitched the base of all the petals around the flower.
I could have trimmed the threads differently, to ensure that I had more of the transitional areas between the pink and purple showing up in the stitches. This is something you can gauge more carefully, depending on the look you want.
I was happy with the dark bases on these petals. I like the way the dark part of the petals seems to wrap around the light part. It’s nice to be able to achieve that look using the same skein of thread for the whole flower.
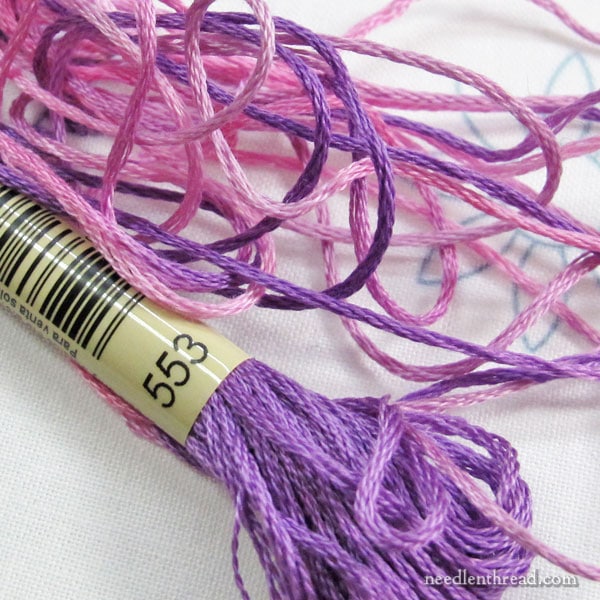
For the fourth sample demonstrating how to use variegated floss, I picked out a corresponding solid color of purple to stitch the sample.
With DMC Variations, you can actually color match the variegated colors in the thread with their line of solid embroidery floss. The printable PDF color chart linked to below can help you do that with many of the Variations colors, but it is missing their newer colors. I’ll update it when I can do the color matching! Here’s the partial chart for now, though:
DMC Variations & Corresponding Solids color chart
Without the chart, you can take the skein and color match it against solids that you might have in your stash. Or, if you have the DMC real thread color chart, you can use that to color match.
For this fourth sample, I used one strand of solid purple with two strands of variegated floss, one of which I reversed. So, the variegated floss strands are in opposite directions (which offsets their color sequences slightly), and there’s one consistent strand of purple running through every stitch.
This approach – which is a combination of sample 2 and a solid color – resulted in a nice, heathered effect, creating an overall purple impression with slight differences in depth of color and occasional flecks of lighter colors mixed in.
If you wanted to control the shading on this, you could combine the approach for sample 3 and sample 4. If you wanted it to look less heathered and a little more patchy, but with a consistent purple still running through it, you could combine the approach for sample 1 and sample 4.
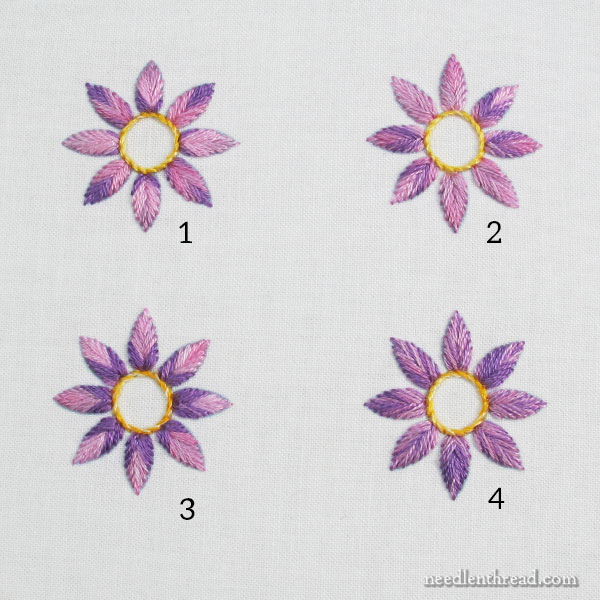
And here are the four samples together to give you an idea of how they differ.
To recap:
1 – Straight off the skein
2 – One strand of the three reversed
3 – Controlled color placement
4 – One strand of solid, two strands variegated arranged in opposite directions
I hope you enjoyed this series and that it gives you some ideas about how to play with variegated threads to achieve different results with your stitching!
If you have any questions, comments, or suggestions, feel free to join the conversation below.
In Other News…
For those who are stitching the tapestry smalls from A Thousand Flowers and who would like to add the deer featured in Monday’s article to your collection, the chart is now available in my shop.
Please read the description carefully – it is the chart only with no extra information. All the extra information, including stitching key, materials lists, and tips for stitching and finishing are found in the original e-book, A Thousand Flowers: Four Tapestry Smalls.
There are still a few more kits for A Thousand Flowers available, but they are diminishing pretty quickly! Grab yours today if you want one!
This has been fascinating! There may be one more variation to try – shifting each thread down by number of threads used. What I mean is – if you are using 3 strands, shift the color alignment by 1/3 of the color pattern, if using 2 strands shift by 1/2 the color pattern, etc. Or would this end up the same as reversing 1 thread?? Maybe this would be useful only if using a floss with 3 colors?
It depends on the thread, but shifting and switching will often yield interesting results. If I’m stitching with two or three threads, I’ll often pull each thread about an inch or so further out than the others, then snip the ends and start with them off-set like that. It creates that heathered look, too, but the colors can also fall into chunks along the way. So many possibilities!
glad to have these samples explained.
Mary, you’ve done it again! I love samples 3 and 4, and I’m already thinking about how to use the ideas in a sampler that’s rolling around in my head. Sample 3 is so simple, but definitely striking. And Sample 4? It reminds me of tie-dyed t-shirts I wore as a teenager, for which I still have a soft spot. And, yes, I’m that old. 🙂
And I love that you showed us the end result first. I felt like we’re sitting side by side, and you handed me the samples.
Mary, your tutorials are so, SO good. You are just the BEST!! Thank you for continuing to share your knowledge with the stitching world! Lauranne
Thanks for doing all the heavy lifting for us, Mary!
Linda
Thanks for this wonderful post. I’ve avoided variegated threads because they were usually too random for my preference. The idea of incorporating a solid color strand with two of the variegated thread is brilliant – it gives some consistency of color but takes advantage of the variation in the other thread. Plus your tips on controlling where a variation occurs is most helpful.
Dear Mary
Great tutorial on and very nicely explained on how to achieve different effects using the variegated threads and lovely stitching. It’s interesting how you can obtain various looks by mixing the threads, I will have to experiment with them. I ordered the deer chart but I will have to order the full instructions as well when I am ready to stitch the project. Thanks for sharing part II of how to use variegated threads and for the deer charts and thousand flower kits. Happy Wednesday.
Regards Anita Simmance
Another way to use the variegated threads to achieve some unity petal to petal, but still go with the way the thread is variegated, is to cut similar lengths at the same place in the thread and start in the same place on each petal (the bottom) with the thread but not insist on a color change in the middle which makes for an abrupt switch to the pink. So, for instance, start with the darkest purple part of the thread each time and just stitch your petal until you reach the tip. New thread or strand cut in the same place for the next petal, and on. All the petals will look the same with the darkest part in the bottoms, but the variegation in the threads and the size of the petals will control how far you get in to the pink. In this case, it would be fun to vary the size of the petals every other one so that every other one would be pinker.
Secondly, you can vary where you cut the thread in the variegation sequence and use a strand of the same cut opposite each other on the flower petals. So opposite petals will be the same, but the flower petals will vary in a sequence. Those threads are so much fun to play with!
Maybe an odd question about stitching with variegated threads: do I strip the strand and recombine the number of threads? How does that affect the desired look?
Hi, Barbara – Yes, you’d strip the strand and put the threads back together, like you would with regular stranded cotton. It doesn’t really affect the color layout at all, unless you switch up the direction of the threads, but it always gives you better coverage with your stitches.
Mary…thank you so much for the 4 samples and your great directions. While I was afraid to use variegated thread before, I feel that I can now incorporate variegated thread into my stitches! Yipeeeeeeee!
Mary, thank you for your instruction on variegated thread! You answered all my questions & then some!
Mary, This has given me confidence to try variegated thread in Sample 4. Thank you, thank you for your great blog
Most of my stitching is cross stitch. I tend to use the threads as they come and just let the colors develop. Sometimes, I will move around within the area I am stitching to work the colors so that they do not look like a line when I don’t want a line.
I do have a question about the small deer. I am interested in that and only that. I really have no interest in stitching the other versions. Would you consider making a color chart available?
Mary, Thank you so much for these tutorials. I have loved variegated threads for a good 50 years but never could quite figure out how to get the effect of #4 which to me is the ultimate look when doing flowers with those types of threads. Of course, some red tulips have black at the bottom and I don’t recall seeing that combo in the variations threads, LOL! And some flowers couldn’t be made like this until the thread was developed. But if we look at realistic pictures and photos of flowers we can see where they may need a more solid look at the bottom and then a bit more of a mixture higher up. I am delighted to know how to finally get the look I wanted to for years! Thank you!
Just had to say, “how is it that you make EVERY project look so luscious! Love variegated yarn, thread, fabric but you make the use of thread look they way we all want our embroidery to look with such ease. Thanks for sharing your abundant knowledge of Needlework.
Hi Mary, I loved the look of variegated threads but was hesitant BUT not now. Variegated thread is now on my current shopping list. Thank you.
Great article, interesting and informative, thanks!
This is wonderfully helpful, Mary! Thank you so much for taking the time to play with variegated threads. I usually avoid them but number 3 and 4 give me hope!
-C
I really enjoyed this. I need to play around with variagated more.
Thank you! Visuals of how the different options work in real patterns are always so helpful!
Mary, thank you so much for these two posts. I’m often drawn to variegated threads in the store, but less than delighted with the results. I thought controlling the placement would be much fussier than you’ve shown it to be. It doesn’t appear difficult at all. Now I can’t wait to try it, but I no longer have any variegated threads… Yay, I have an excuse to go buy more threads!!
Excellent explanation on how to use these threads for different effects. Thanks for such clear instructions!
This has been fascinating, thank you Mary. It is curious that in the first example opposite petals are very similar. Is that simply the way it panned out because of how you cut and used the thread or was it deliberate?
In the first flower, nothing was deliberate, so it’s just the way it worked out. It may have been that that’s when I changed threads? But with the first flower, the whole idea was just to stitch with the threads as they were cut from the skein and not to manipulate or plan anything.
Your posts on stitching with variegated threads are so useful to me. I am picking up various kinds of stitching again after about 50 years of not going near a needle and thread. (This was not a conscious decision; I let life lead me somewhere else and those hormones that kicked in during my adolescence were an incredible distraction.) I was looking into repairing my jeans and discovered Sashiko. That was the opening of a door to ….everything sewing. Your posts are so helpful to me. You write clearly, you are specific in expressing your techniques and you never seem to get in your own way. What I mean is, you seem to stay focused on giving good information, not making yourself into a celebrity.
I love variegated threads and mostly I don’t even know for sure what I’m going to do with them. Did you know that there are almost no posts in the English language on using variegated threads? (That I’ve been able to find, anyway.) I’ve found one that is specific to using them in cross stitch but yours is the only one I’ve found that expresses what can be done in decorative hand stitching and shows clearly how to do it. I thank you for this post and so many others, for sharing your knowledge, your skills and your time.
With great appreciation,
April Corsiva
Thanks, April! I’m so glad you find Needle ‘n Thread helpful!! Yay!
I only have stiched with 2 strands how can I adjust the feeling is it ony to turn on stich aroun d I’m getting old eyes so what do I do with just two strand is that effort worth it please reply
Hi, Loretta, I’m not quite sure what your question is. If you only stitch with two strands, then that’s fine. It still works to turn one strand around, to achieve a better blended effect.