


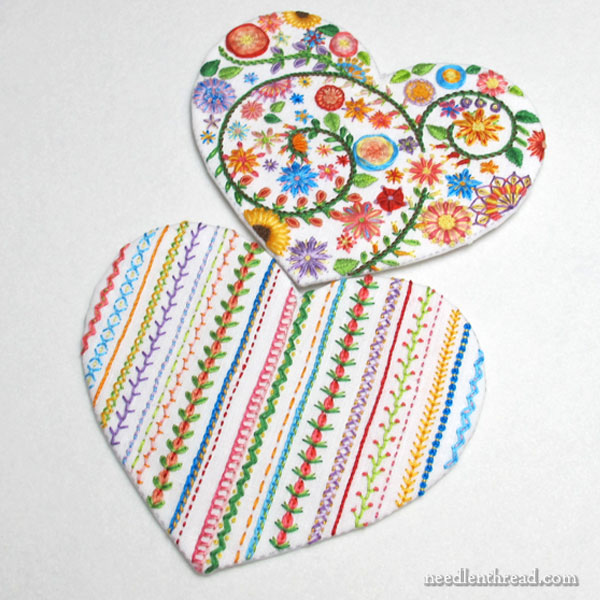
Remember my floral heart project that goes with the voided monogram set I’ve been working on? It’s that colorful, cheerful, fun thing I wrote about a couple weeks ago?
Well, the finish work on that provides a pretty good teaching moment – a good lesson for all of us. The lesson centers around an adage that you may have heard if you sew a lot, but it applies to embroiderers as well:
Measure twice (for me it should be “measure twice x 10”); cut once.
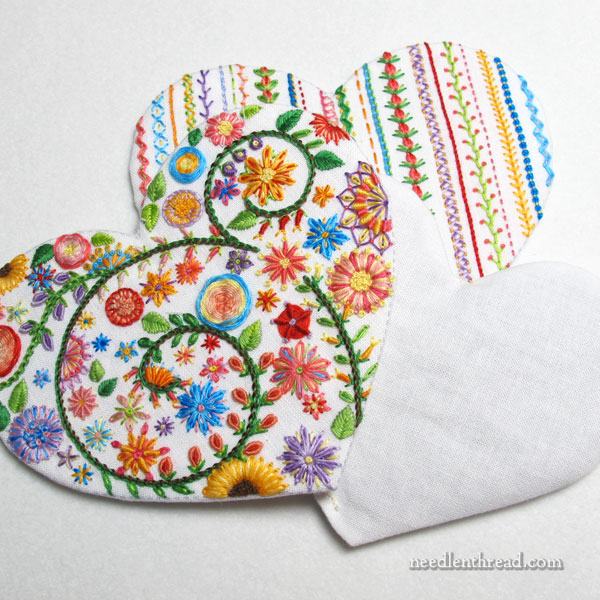
Of course, showing the photo above ruins the suspense, but you might as well know that everything worked out ok.
But this what happened:
It was time to do the finishing on the heart project.
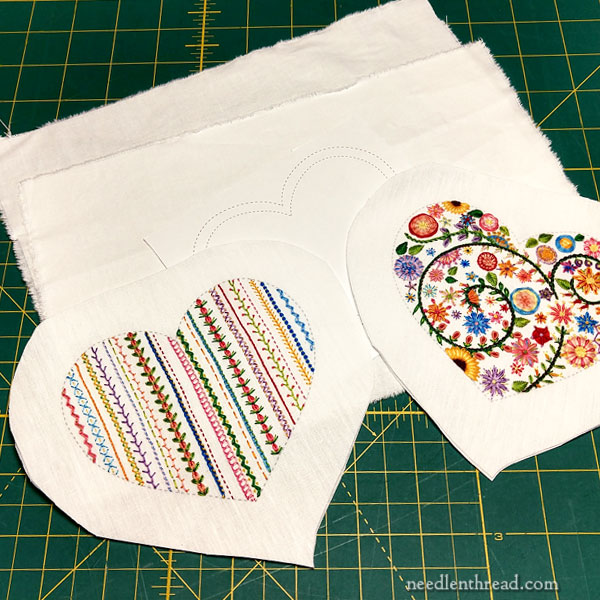
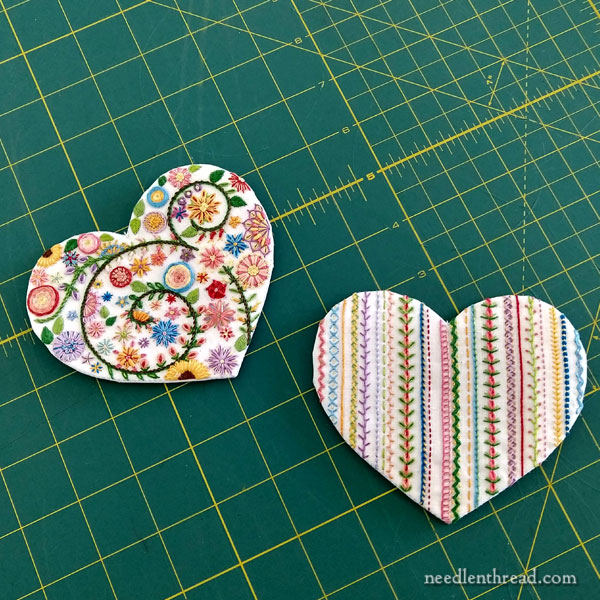
After it was damp stretched and blocked, the next step was cutting out the embroidery.
Mentally speaking, this is probably the hardest part of the whole finishing process. I always quake a bit before cutting.
I start with a rough cut, cutting the shape out but leaving an excessive margin of fabric all around. From there, I trim it down.
It’s always a good idea, in the trimming-down stage, to measure (rather than eye-ball or estimate) the distance from the embroidery. And it’s always a good idea to never cut less than 1/2″ around the embroidery. Depending on the type of finishing, you might even need to leave more of a margin around the embroidery.
Another good idea? Never start this type of work at the end of the day, when you’re perhaps weary, or maybe over-eager to get it done. Start it when you’re relaxed, when you have a good block of time to work, and when you’ve got your full quota of wits about you.
The full quota wasn’t available, obviously. And of course, I wasn’t quick enough on my toes to think to take a photo from the front at this point.
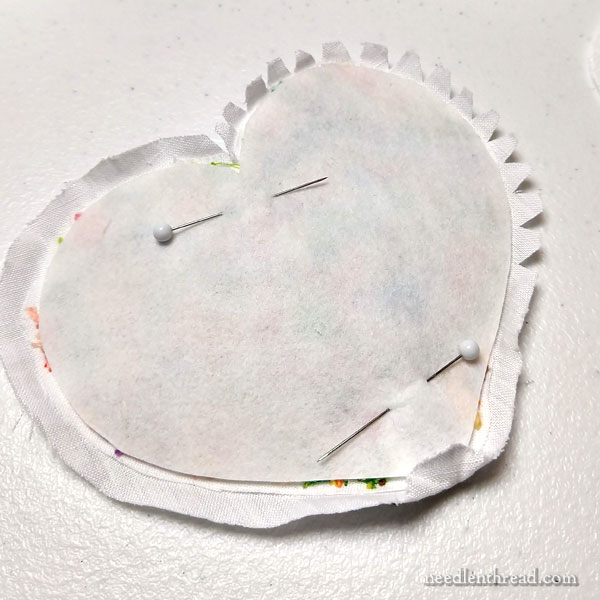
As you can see, the cut margin around the finished embroidery is narrow. It isn’t, in short, 1/2″ – not by a long shot. It’s just over 1/4″.
There’s a piece of thin and somewhat stiff woven interfacing pinned to the back of the embroidery in the photo above.
My first plan for finishing did not include a piece of thin and somewhat stiff interfacing behind the heart. But, due to cutting first and then measuring, I had to change my tactics. There wasn’t enough edge left around the embroidery to finish it according to the first plan.
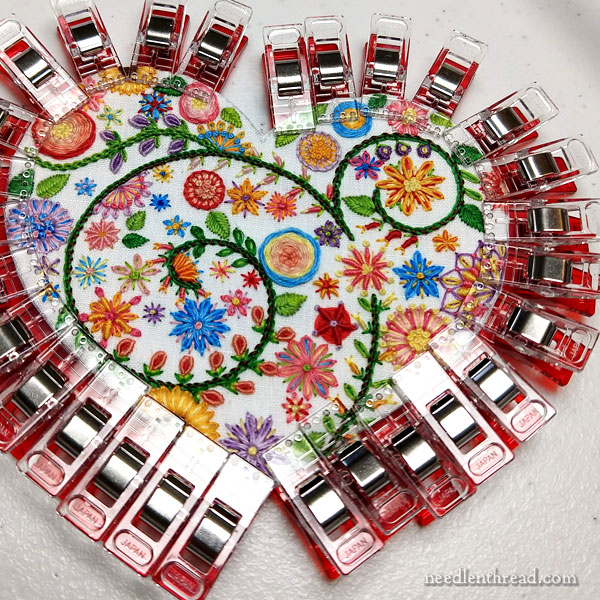
Fortunately, the thin interfacing worked ok. With the help of some PVA glue and a whole lot of clips, the narrow turned edge held around the interfacing.
In fact, both the front and the back of the heart worked out really well, despite a few hair-raising, curse-inducing, moaning moments when the realization struck that the cut margin for the front of the design was way too narrow.
Measure twice; cut once. And actually measure, don’t estimate. And only do finish work when you are fresh in the head and can concentrate!
There they are, ready to assemble. I’m going to insert a small cotton heart filled with a thin layer of dried lavender between them.
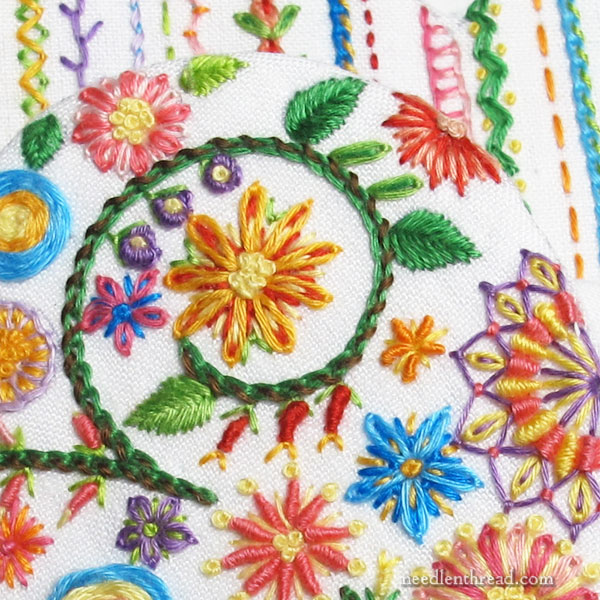
(There’s a part of me that prefers close-ups.)
I’ll finish this today, and over the weekend, I’ll finish one more item in the samples for this collection. Then I’ll be ready to put it all together in a handy little package!
I’m looking forward to the weekend – how about you? Aside from cleaning house, looks like I’m free to design and stitch all weekend. Not complaining!
Hope you’re doing great! Hang in there!
I love this heart project – thank you for the progress shares! I needlepoint and the backing idea would be fun to do for one of my projects! I was reminded of getting hurt when skiing “just one more run” when you wrote about starting this kind of work at the end of the day! Stay safe!
It is beautiful, maybe you could do an article on how to choose colors, this amazed me!
Thank you for sharing your work
Those hearts looks so beautiful!!
Great advice! Been there, done that…..live and learn. Love the colors, Love Love the close ups. I really appreciate the detail revealed in the close ups. Thanks again for all you share. You’re always my first stop with my morning coffee. :} Suzie in Idaho
I hope you know that your messing up makes the rest of us feel better. I’m so glad you were able to save your finishing. It really is lovely.
Also, I hope you know how much pleasure your blog brings me every time I receive the email. It is so full of information and lovely stitching. You are such a resource for stitchers and stitching and I really appreciate you. Thanks.
Very pretty hearts.
What exactly is PVA glue? Brand names, please?
There are loads of brand names of PVA glue. They don’t yellow over time, they remain flexible, they dry clear, they’re acid-free, etc. You can probably google it and come up with exact, scientific definitions and various brands.
Mary, I always admire your perfect stitches and how beautiful your projects look when completed. So, that being said, I giggled through out your article mainly because I have to measure three and four times! I can’t tell you how many times I’ve made a cut in my fabric just to realize I made a major mistake! Hence my giggling at your humor!
I’m excited that your almost ready to make these into kits! I can’t wait. I am still very much a beginner but I’ll want the sampler no doubt. I also received my latest set of towels from you yesterday, thank you!!!!
Stay happy and healthy and don’t go stir crazy!
Mary, good advice! Thanks for reminding us to measure more than once before cutting…and the best advice of not working when tired! Some evenings, my brain often says I can do just one more stitch…and in the morning I say, “What happened to that!” Thanks for the reminders!
You know there was a mistake and now we all know. But looking at it, no one else would ever know. They are so sweet, beautiful to look at.
A question: what type of glue are you using around the edges? I get horrified remarks when I admit I use some glue in making greeting cards with a stitched design. To me, the cards are not works of art or meant to be kept for 100 years. 🙂 Still, I just wonder which glue you would recommend. The double sided tape on fabric never works for me. Good for about 24 hours and then I find things popping off. 🙂
It’s a PVA glue – there are many many brands on the market. The one that I use most is listed under “Tools & Accessories” on my Amazon Recommendations page, here: https://www.amazon.com/shop/marycorbet
It’s right towards the top of the page, with the clips. Hope that helps!
Oh, Mary, they are lovely, but what an awful (and I’m sorry, a bit funny on this end) thing to happen. So glad it wasn’t me! That would be one of those moments when I say “It’s enough to make a Christian cuss!” So glad it all turned out in the end. And we know it was all planned don’t we? Yes, it was done “on purpose” so you could teach us what to do. :D.
I’m glad you recovered from this. For me, some things are just no-go when tired, peeved, crabby, or simply not in the mood – trying to force it will most likely result in disaster. If not out and out disaster like cutting wrong, I’m often simply disappointed in the result due to choices made in materials or technique.
Oh Mary, I totally understand your comments. I love your humour. The heart is gorgeous, and the work-around perfect. Thanks for your efforts. ☺
Simply love your work. I am a newbie… Can you please name the stitch right at the centre (in green) in the back of the cheerful heart. Thanks in advance.
I’m french and I follow your blog with great pleasure !
I also love this heart project and the monograms.
What is the size of the heart ?
Thanks
It’s about 3.5″ high, and a little wider than that. 🙂
I would love to have this Key to my heart done for Valentine’s day. Do you think this will be out for purchase soon enough?