


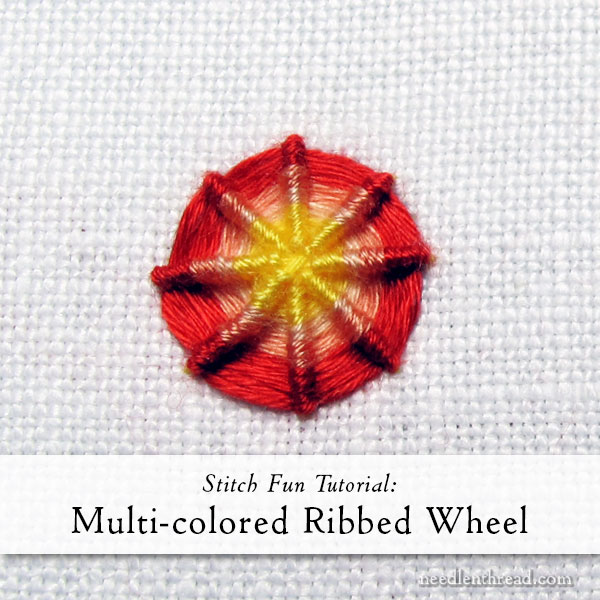
How about a quick tutorial on how to stitch multi-colored ribbed wheels?
I’m a huge fan of ribbed stitches. We’ll actually talk about them a little bit later this month, as we compare two types of stitches and discuss how the direction of a stitch can change everything!
For now, this little Stitch Fun! tutorial is pretty basic, but it will help you create uniform color changes on ribbed wheels and other similar stitches.
I’ve already written tutorials on how to do the ribbed wheel stitch, also known as the ribbed spider web stitch. If you’re not familiar with the basic ribbed spider web or ribbed wheel stitch, check out the tutorial in that link! That’s where you’ll see the basic movement of the stitch.
We’ve also chatted about ribbed wheels worked with variegated threads.
Today, we’re going to look at making ribbed wheels with layers of solid colors, invisibly switching from color to color.
You can apply the concepts to any similar type of raised wheel-type stitch – for example, woven wheel stitches.
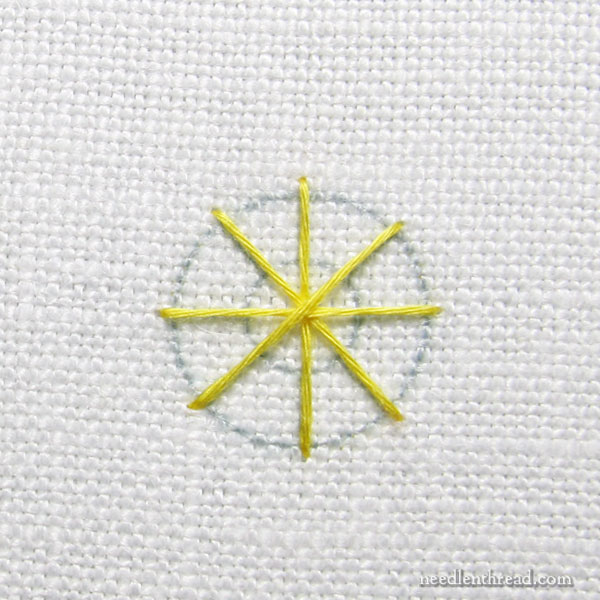
In this tutorial, I’m working on linen, and I’m using cotton floche as the thread. I’ve used two needles: a #7 crewel (embroidery) needle while working the foundation stitches, and for the ribbed part of the stitch, a #24 or #26 tapestry needle works great.
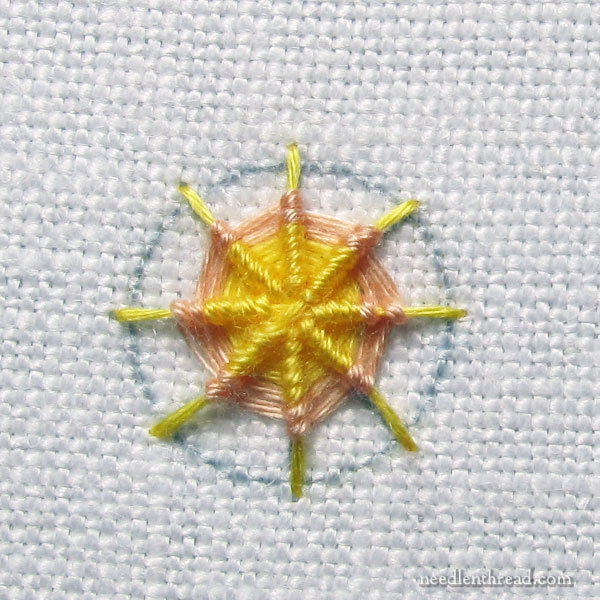
When working multi-color wheels like this, my foundation stitches are usually the same color as the first layer of color on the wheel, so that the exposed center of crossed foundations stitches blends with the first layer of color.
There are other ways to work foundation stitches – they don’t have to cross. They can all converge at a center point in the fabric. And with these ribbed stitches, the number of foundation stitches doesn’t matter. If you were working a woven wheel stitch, the number would matter – you’d have to have an odd number of spokes in the foundation for the weaving to work.
But with this stitch, pick your number of spokes! I use eight quite frequently because it’s easy to divide evenly.
When you work your foundation stitches, take them slightly over the design’s outline. So, if you have a circle drawn on your fabric, you want your foundation stitches to begin and end just slightly on the outside of that circle. This insures that the drawn circle gets covered completely.

Work your first layer of color as “thick” as you want that layer of color to be. That is, work your way around the foundation, wrapping them to make the ribs (as shown in the ribbed spider web tutorial), until the center color has covered as much of the wheel area as you want.
You might just want a tiny bit of the first color in the center, so you might just work one round. You might want the center to be the predominant color, in which case, you’d work many rounds.
Once it’s as thick as you want, you’re going to end that color by passing your needle to the back of the fabric behind the first spoke that you wrapped when you first began the ribbed stitch.
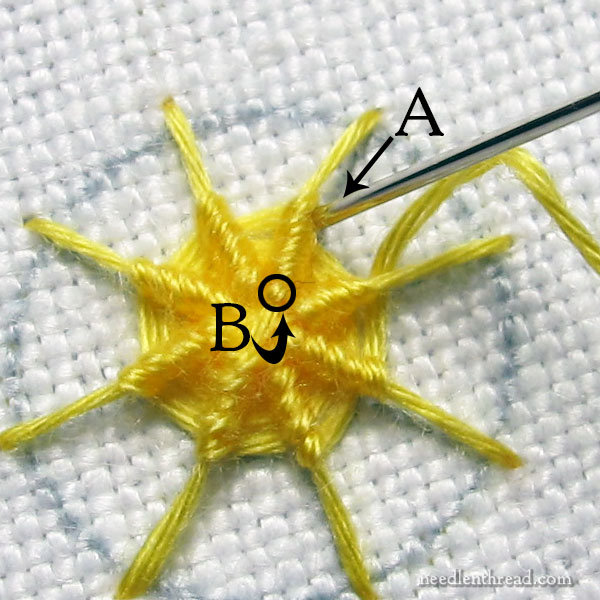
This means that, if A is where you are ending the thread (tucking the needle behind that spoke and taking the thread to the back), then B (circled) was the very first wrap when you started the first round.
This keeps the number of wrapped layers consistent, so that the colored layers are visually “even” on the whole ribbed wheel.
This also means that C is where you’re going to bring up your new color of thread. You’ll start that thread by bringing it up underneath the same spoke where you ended the previous color.
Then you’ll move forward (counter-clockwise, in this case) around the circle and the first wrap of the new color will go around the spoke to the left of where you emerged with the new thread color.
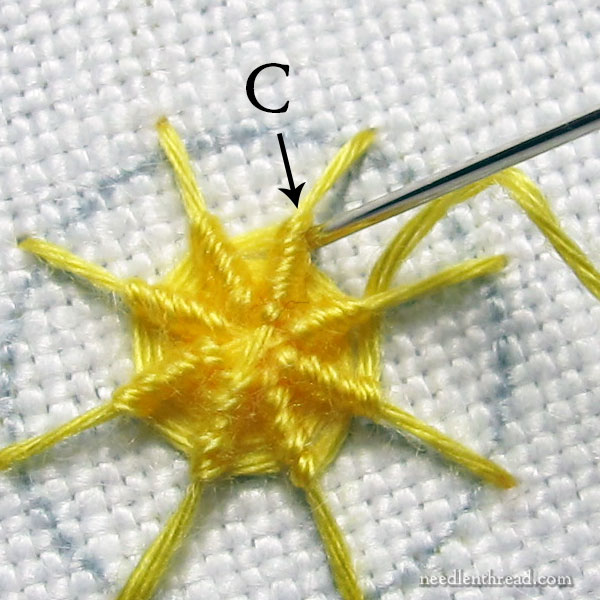
Work the next layer of color in the same manner, working as much of that color as you want on your wheel around the whole wheel. When you’re ready to end that color, you’ll end it by wrapping the spoke you first emerged from underneath (at C) and going down into the fabric underneath the spoke.
You’ll bring up the new color on the other side of that spoke you just wrapped, and continue with the next layer of color.
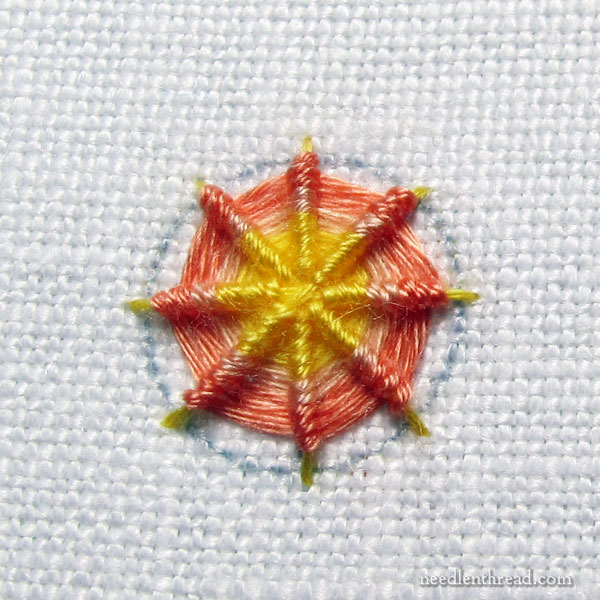
Here’s the next layer of color.
The idea is to end and begin new threads by taking the needle down under the spokes, keeping track of which spoke was your first wrapped spoke.
You pretty much want the same number of wraps on all the spokes, if you want an even distribution of color in layers.
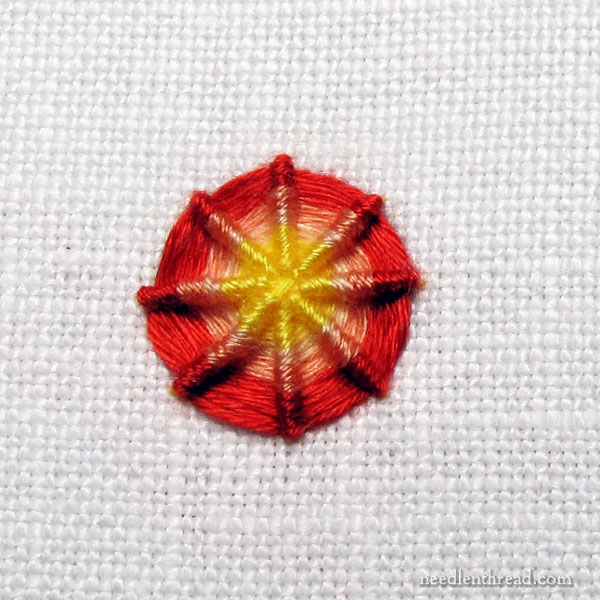
And here’s the last layer of color.
Things got a little tight as I was wrapping some of the last spokes, so some of the stitches are a little more squished together than others.
With the last layer, getting on a perfectly consistent number of wraps around each spoke is not as important as it is inside the colored wheel. As long as the inside looks relatively balanced all around, the outer layer will look fine, even if you have to add an extra layer around part of the wheel to make sure your design line is covered.
And that, my friends, is how to layer color evening when working multi-colored ribbed wheels!
They’re a lot of fun! They’re a great way to work stylized little floral elements, or just to add spots of textured color on your embroidery projects.
You should try them!
Looking for More Stitch Fun Tutorials?
Did you know you can find a whole series of Stitch Fun! articles right here on Needle ‘n Thread? In these articles, we go beyond basic stitches and explore different types of combinations or composite stitches, just for the fun of it. Check them out!
One of my favourite stitches – I love the colour blends and texture that these stitches can provide.
About how big should the circles be?
You can make them as large or as small as you want. For the sample, mine’s a little over 1/2″.
Dear Mary
A great tutorial and I love the different colours threads you have used. It’s interesting to learn how to keep the spikes and colour threads evenly stitched. I like the ribbed wheel there is so many variants on it that make it an interesting and attractive stitch. I also enjoy the fun stitch series it has so many composite and interesting elements of different stitches. Thank you for sharing with us and setting up the fun stitch series and for showing us all the different tips and techniques on the series.
Regards Anita Simmance