


Rainy Wednesdays are a perfect day for embroidering daisies, and today, we’re going to finish up the series on How to Embroider Daisies with this final installment!
If you’re just joining in, you’ll find all the previous tutorials in this series here.
Scroll down for the Daisies, which were are the third project in the series. Earlier this year, we looked at How to Embroider Wheat and How to Embroider Strawberries. And there are a few more to come in 2021!
If you’re a member over on Patreon, you’ll already find the printable PDF for this installment available for download. I put parts 4 & 5 together in the same PDF.
In Part 5, we’re going to look at a relatively simple final daisy. It’s worked in satin stitch with French knots for the center. There are two key tips, though, that will help you create a great satin stitched daisy.

In today’s installment, we’re using white (3865) stranded cotton for the petals and all three colors of golden yellow for the French knot center.
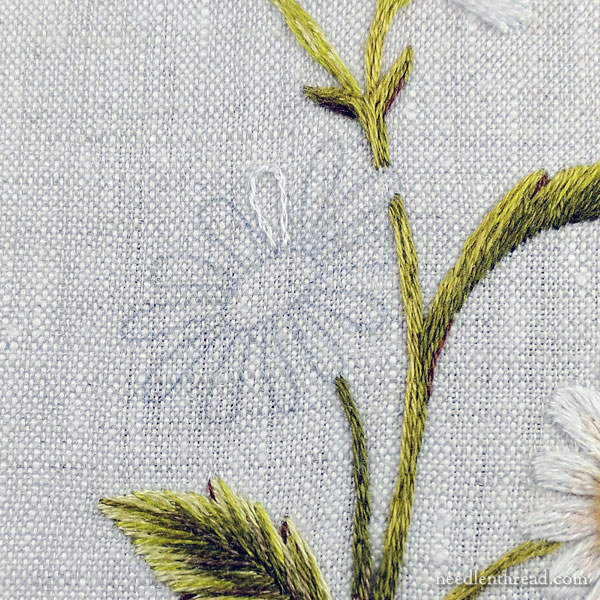
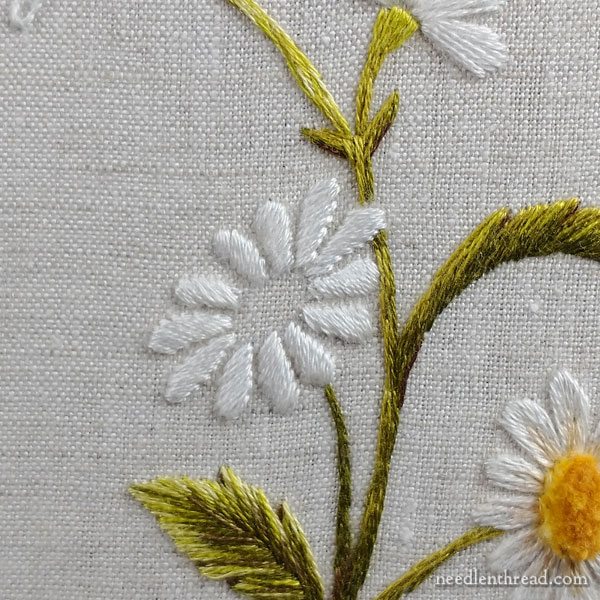
Begin by split stitching around each petal with one strand of white.
I use the regular split stitch (tutorial here), splitting each stitch by coming up into the stitch from the back.
If you find regular split stitch difficult, you can use split backstitch (you can read about the difference between split stitch and split backstitch here), or, in a pinch, you can even use backstitch – although you normally won’t get as smooth an edge. But it’s better than no edge! You can read about the difference between split stitch and backstitch for outlining here.
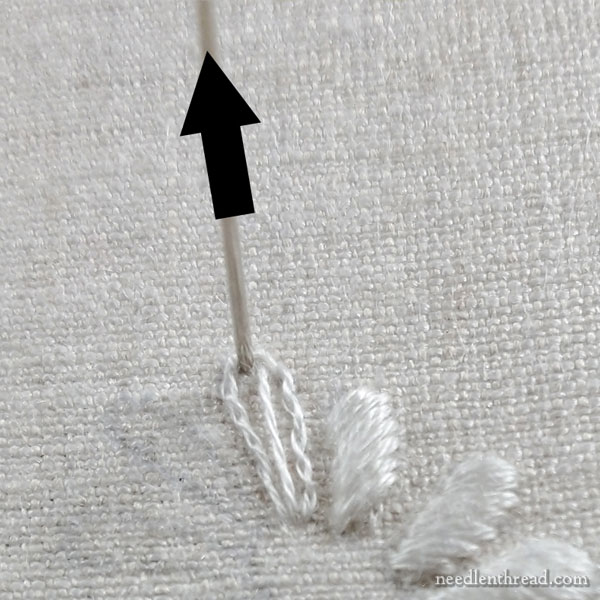
Switch to two strands of floss in the needle and work three long straight stitches inside each petal, running vertically down the petal.
Then, switch to new thread – two strands of white – and grab a laying tool or a large tapestry needle to help you work perfectly parallel, untwisted satin stitch.
You can see how to use a laying tool here. It really is essential to use some sort of tool when you are satin stitching with two strands, if you want to keep your threads parallel to each other and untwisted.
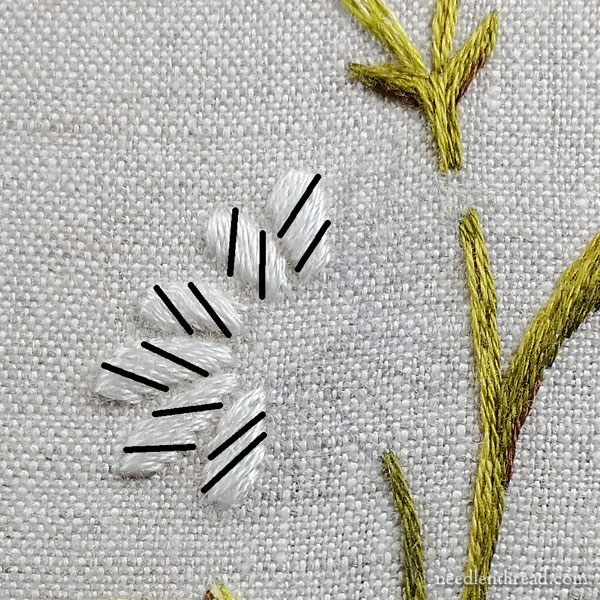
When you work the satin stitch over the petals, you want to work it in the same direction on each petal.
As you can see by the lines in the photo above, the satin stitch slants from upper right to lower left on each petal.
You might have to turn your hoop or frame as you go, to help you maintain a consistent stitch direction on each petal.
Another way to help you maintain that stitch direction is to start the satin stitch about where the first black lines are towards the outside tips of the petals. If you make your first satin stitch there, then fill above, and then fill below, you’ll be setting in the angle of the stitch and it will act as a guideline.
For some very thorough satin stitching tips, you can take a look at this article and the many tips that are included in it.
When it boils down to it, two points are going to determine how well the finished flower looks:
1. That your satin stitches lie parallel to each other, smooth and untwisted; and
2. That your stitch direction on each individual petal is consistent around the flower.
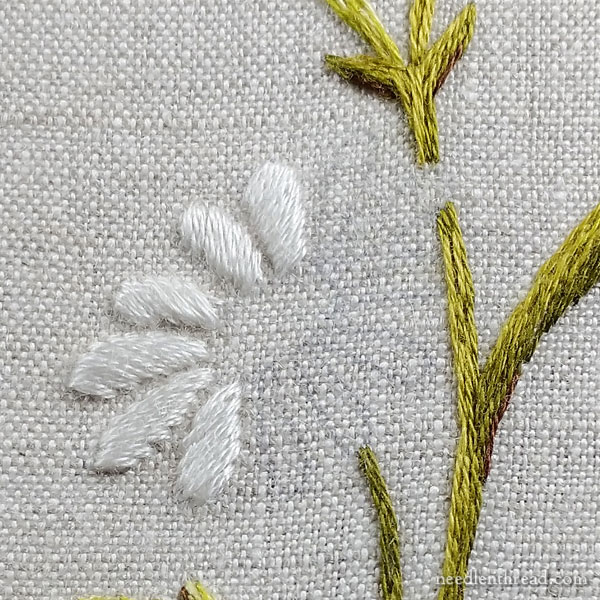
And here are the finished petals!
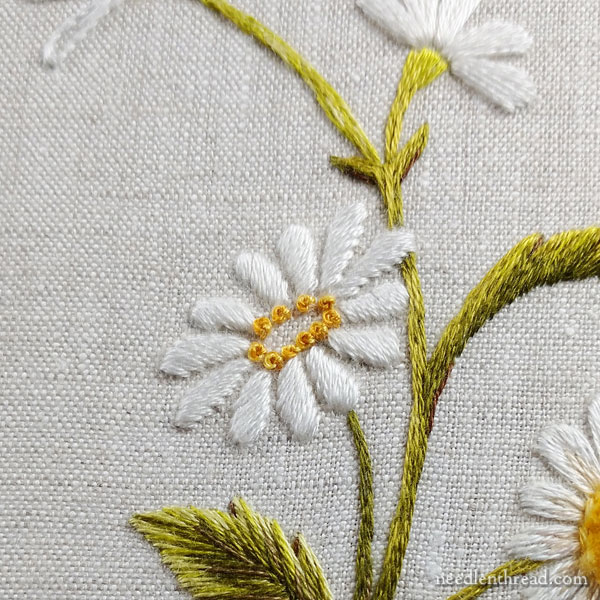
The next step: the French knot center.
Use three strands of yellow in the needle. We used a mix of the yellows in the needle at the same time. You can use one of each, or, if you want a darker center, use two dark, one medium. If you want a lighter center, use two lights, one medium, and so forth.
Work around the outer outline of the center oval first, and then fill the remaining space in the center with French knots.
You can find a tutorial for French knots here.
If French knots elude you, you can always try the colonial knot. Some stitchers find it easier to work.
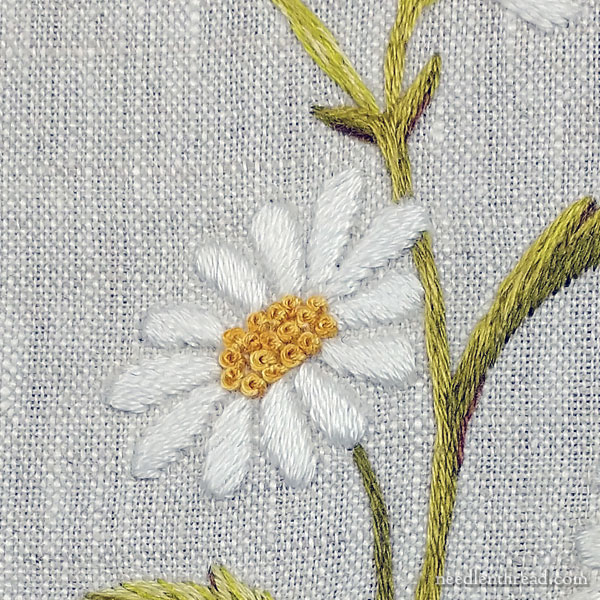
The finished daisy!

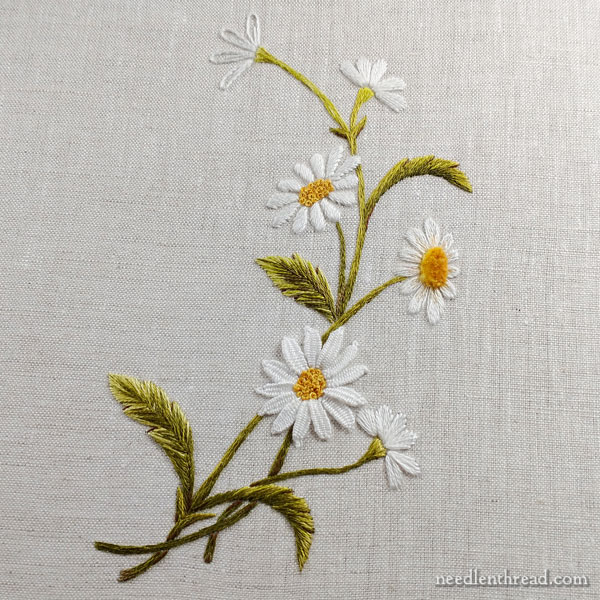
This is the finished design, with the lower right daisy stitched in feather stitch.
We changed that to the same approach as Daisy #2, and this is the final result:
And that, my friends, is the end of the Daisies!
I’m sad to see this project over. But never fear! The next tutorial collection is in the works and will begin in June. Anna and I are stitching it now – we’re taking two different approaches on it – and I can’t wait to share it with you!
In the meantime, there are lots of developments going on in the studio – from a simple summer project that I’ll be showing you a little later, to ordering lots of little pieces to restock some kits, to cutting fabric, to prepping ready-to-stitch towel sets (several spring and summer designs are available in the shop!) to computer work (which is killing my eyes!), to out-and-out sewing. (Yes, on a machine.)
It is an incredibly busy time of year – we’re making hay while the rain falls!
If you enjoyed the daisies, feel free to tell your stitching friends about it! The more the merrier!
Have a wonderful rest-of-the-week!
Lovely daisies and plenty of wet Wednesdays, though it was dry (or drier) yesterday.
If you have time for a question …. How did you decide on the angle for the satin stitch? That is, I get the consistency bit, but why that angle for all of them rather than some other angle for all of them? Usually, I think you do the padding stitches perpendicular to the satin, so I’m curious about your choice of angles here.
Because for me, it’s the most natural stitch direction to stitch, for the daisy petal I started on. It wouldn’t matter if you switch the direction. It just needs to be at an angle across the petal in either direction.
Hi Mary.
I wanted to take this chance to tell you how interesting and informative your blog has been. It has rekindled my interest in embroidery and given me a chance to expand the number of stitches I can use. Your tutorials are very clear and well presented.
I have just one question. I know you do not ship to Europe or Britain but can you ship to Canada? I would love to order from you but am not sure you can send to me here.
Hi, Helen – Thanks so much for your comment! Under certain circumstances and on a case-by-case basis, I do ship to Canada, but we have to do that manually, so you’d need to contact me directly by email to let me know what you are interested in. I’d have to put the package together, weigh and measure it, and then search for the most reliable and economic shipping solution (sometimes a hard combination to achieve!).
Dear Mary
The daisy looks lovely and so beautifully stitched. My favourite daisy is the picot stitch and the feather stitched daisy, lovely. I’m really looking forward to the next project on how to embroider series and I am really enjoying the learning experience from these various projects. Thank you for sharing with us the daisy project and for all your tips and techniques on the How to Embroider series.
Regards Anita Simmance
Hello: Please tell me what kind of fabric do I use to do hand embroidery . I noticed the different fabric in the two versions of daisies. Would it depend on the floss or crewel I’m using ?