


It’s time to get back to embroidered daisies! Yay!
Our last installment of these tutorials on how to embroider daisies covered a lot! Today’s tutorial doesn’t cover quite as much.
Today, we’re going to look at Daisy #4, which is embroidered in long and short stitch, with a turkey work center.
This is my favorite daisy in this series of tutorials.
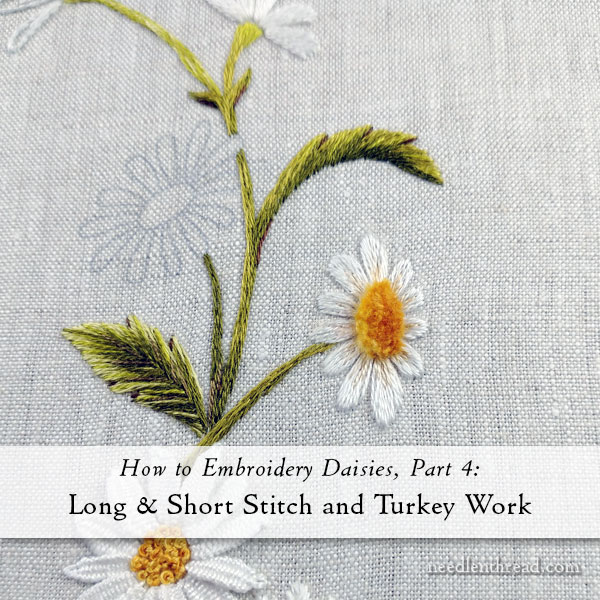
Daisy #4 is the side-facing daisy on the right side of the design.
We used white (3865 in DMC) and a variegated thread (DMC 4150) for the flower petals. All the stitching on the petals is worked with one strand of floss in the needle. We’ll talk a bit about manipulating the variegated thread to get what you want out of it.
For the center, we used all three shades of gold, mixing them up a little as needed. We’ll talk about how to blend the shades of gold to give the turkey work center some extra depth.
For those who don’t want to tackle turkey work for the center – or perhaps it just might not be your taste – we’ll chat about alternatives.
Ready?
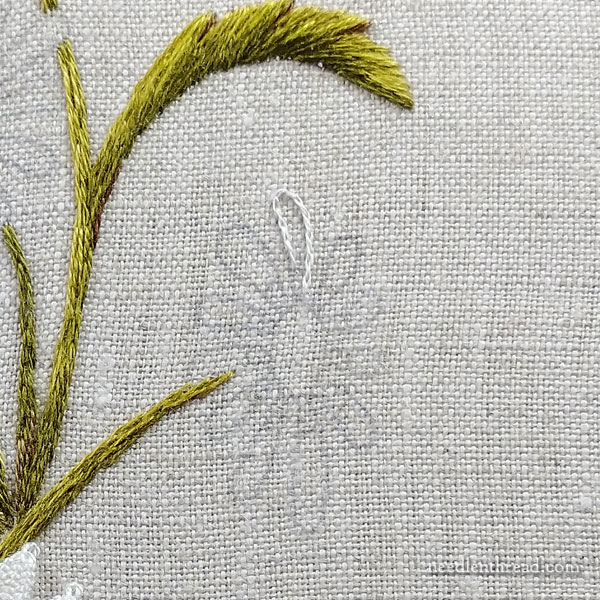
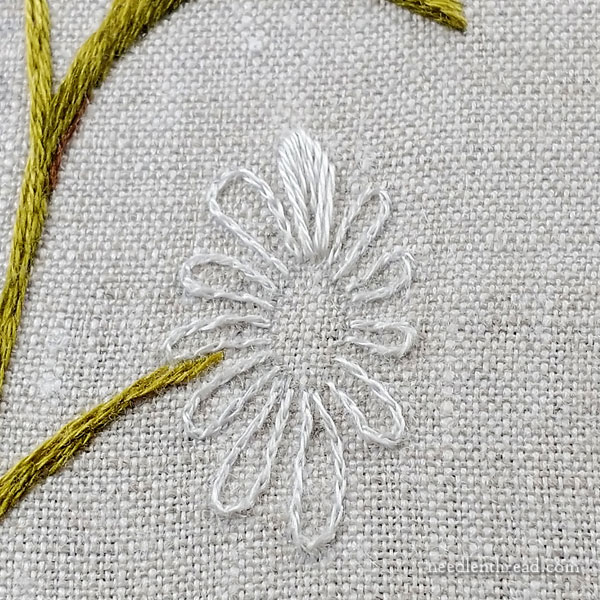
Begin by split stitching around every petal with one strand of floss, using white. You can find a tutorial for split stitch here.
This provides a little lift at the edge of the petals and it helps keep the edge of your long & short stitch nice and smooth. It also helps keep the shape of the petal accurate while you’re stitching. Don’t skip this step!
If you can’t quite get the split stitch – especially if it is hard to see for you, when working with one strand – you could substitute split backstitch, although it isn’t quite the same. Still, in the long run, on this project for this purpose, it won’t make a difference!
You can read about the difference between split stitch and split backstitch here.
If split backstitch won’t work for you, you can also substitute backstitch, but just a warning: backstitch doesn’t provide the safeguard for a smooth outline. The stitch itself tends to be blocky (it doesn’t flow around curves as gracefully), and it can be a bit bumpy. Still, it will work in a pinch. It’s better than no outline!
You can read about the differences between using backstitch and split stitch for this type of outlining here.

One thing we did on this particular daisy, just as a guide, was draw a very light oval inside the petals, a short distance outside the oval outline of the center. You can barely see it on the fabric, but the red line above indicates where it is.
This acts as a guide when it comes to working in the shading on the petals. It helps to make sure your petal shading stays more or less under control, so that you don’t end up with irregular shading in the wrong place.
The line is only drawn inside the petals, though. If you want a guide there, just sketch in segments of that oval, inside the petals, just a short distance from the outline of the center oval.
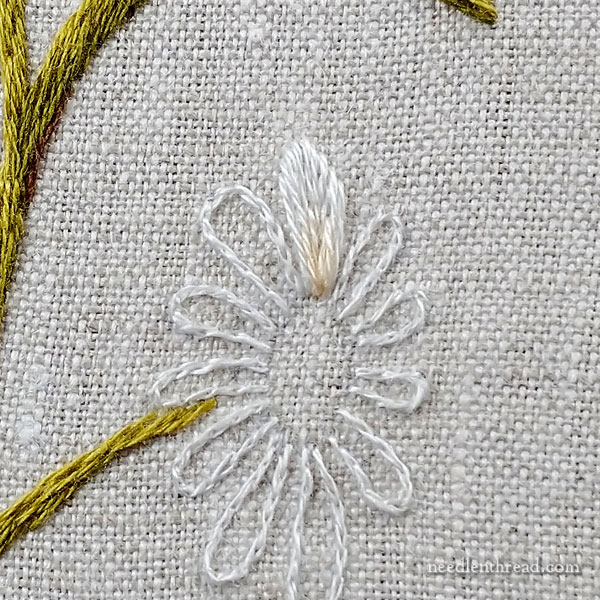
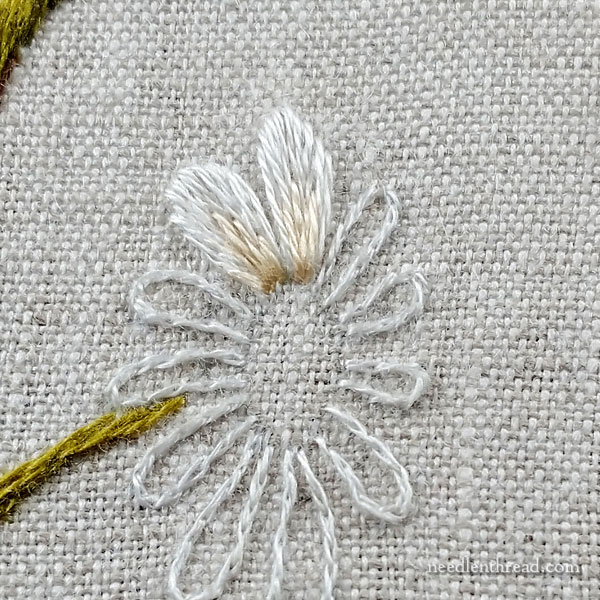
Begin the long & short stitch by bringing your needle & thread up into the fabric inside the petal and going down into the fabric over the split stitch outline.
Work these stitches so that there’s just a small gap of blank area inside the petal, around where the above-mentioned guidelines were drawn, and in the shape of the petal. Notice how the white extends to the base of the petal on the side edges of the petal, but the stitches are shorter around the arch of the petal.
That’s the filling shape you want to aim for.
When you fill the petal the rest of the way, use a segment of the variegated thread in the shade you want.
Bring the needle and thread up into the white long and short stitches, splitting them. You’ll only be filling the center area where you left a gap. It may only take three or so stitches.
You want the center shaded stitch to be longer than the side shaded stitch, to conform to that “petal” shape of the gap.
Work all the petals this way, around the flower.
You might wish to work all the white on all the petals first, and then go back and do all the shaded areas. It makes sense to do that, but if you’re manipulating the variegated colors on the thread used for shading, you might have to start new variegated cuts as you fill in the petals.
Read on to see what I mean.
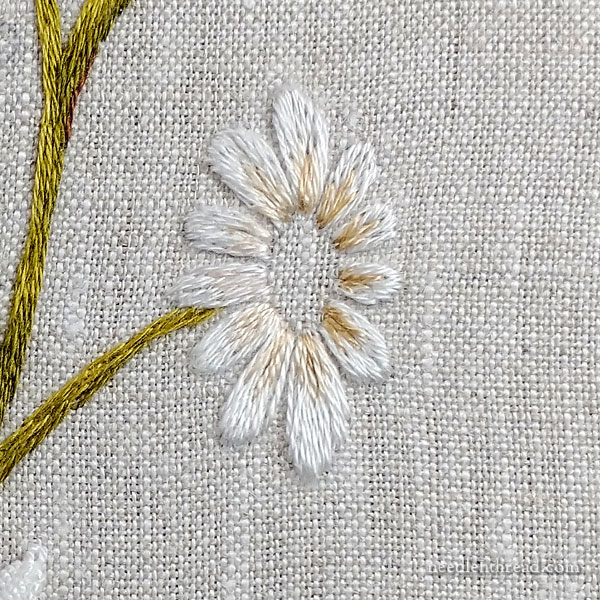
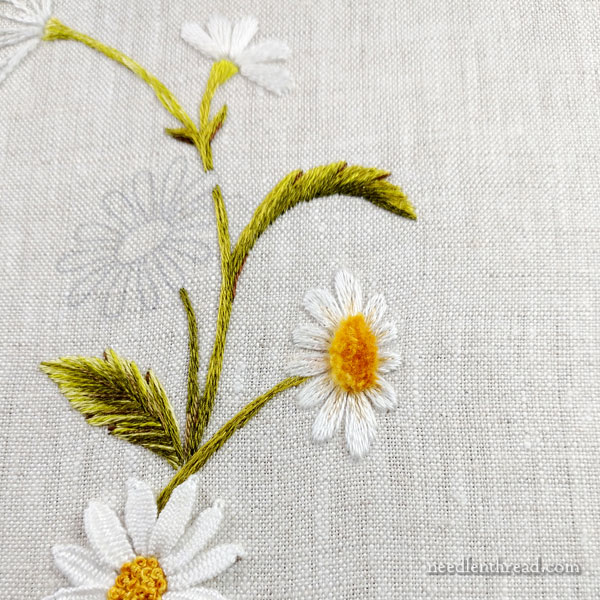
Notice how the right side of the daisy has darker shading. This is on purpose.
To achieve this, we examined the variegated thread we were using (DMC 4150) and we made sure that we threaded cuts of the variegated thread in the needle in a way that the darker areas of the thread would be available for these filling stitches. This meant that we couldn’t use the same cut of variegated thread as we filled all the stitches on the right.
Instead, we had to start a new thread that had a darker end on it (at the tail end, away from the needle) for each petal, to maintain that dark shade on those petals.
It’s seems fiddly. It’s not! Just cut one piece of variegated thread that has a darker shade at one end, and then separate that into individual strands.
For each petal on the right, use a new strand when filling each inside area, making sure to thread the lighter end into the needle so the darker end creates the first stitches.
Of course, if you the darker variegated area carries on for a while, you might be able to get more than one petal filled with it.
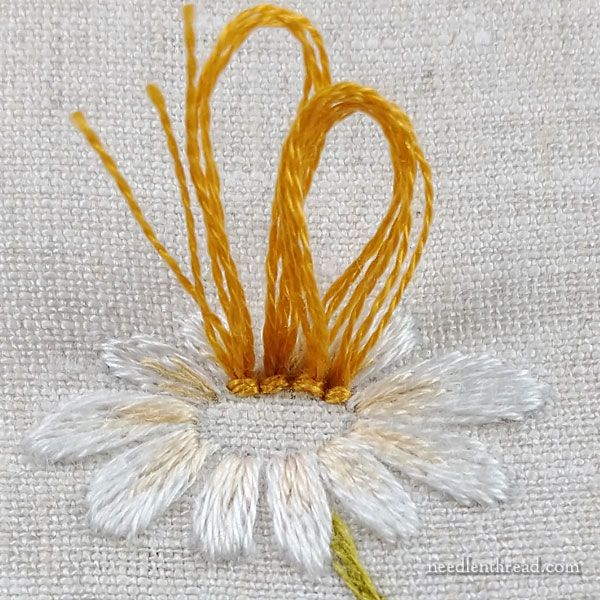
To fill the center with turkey work (also called ghiordes knot), use three strands of floss in the needle.
You can find a tutorial for turkey work here.
The shade changes go from right to left (darkest to lightest) across the center of the daisy, but the lines of turkey work are worked vertically, if the design is upright.
Start with the darkest gold on the far right side of the oval, and work the first line of turkey work along the right side of the center oval using the darkest gold. We’ve turned the frame in the photo above, but that’s actually the right side of the daisy, along the petals that have the darker shading.
For the next line, use one strand of dark gold and two strands of medium in the needle.
For the next line, use three strands of medium.
For the next line, mix in a strand or two of light with the medium.
For the last line, use three strands of light.
If you can’t fit five rows across the center oval, that’s ok. Just stop when the oval is full.
You want to work each line as close to the previous as possible.
When you finish, it will look something like this.
I have this “policy” about turkey work. I know the loops look ridiculously long, but I always figure it’s better to have too much loop than too little loop. These loops are probably about 3/4″ long.
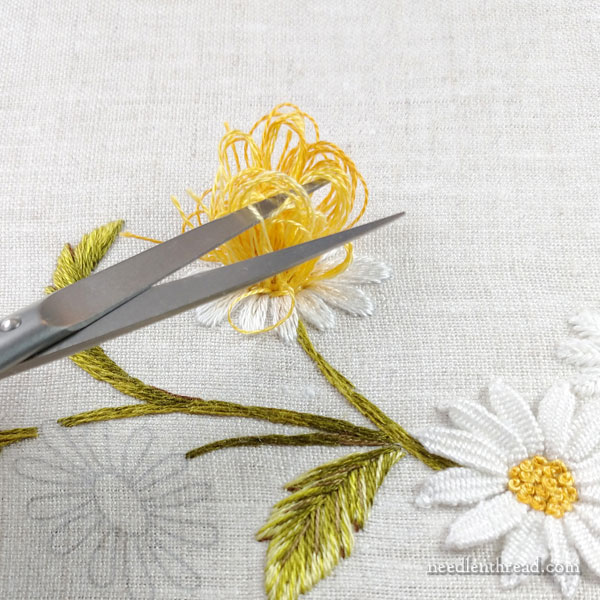
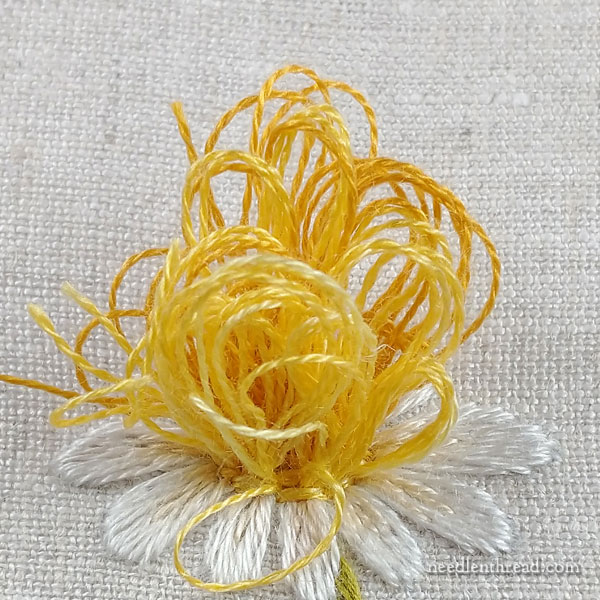
Then the fun part begins! The haircut!
Using a sharp pair of small scissors, cut the loops open.
Trim the loops a little bit short, cut by cut. Don’t grab the bunch and cut it all short!!!!
Start by trimming off the top of the loops. Then trim a little more. Then a tiny bit more.
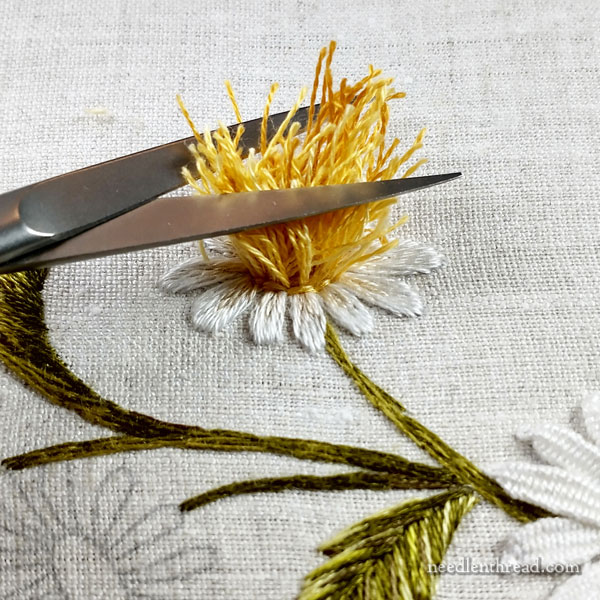
Then, fluff the threads (as shown in the tutorial linked to above). While I have a special tool just for this, on an area this small, with surrounding embroidery, I prefer to fluff with the eye of a needle. You can be very accurate, but it does take a little more time.
Then, trim the fluff!
Then fluff a little more!
Then trim a little more! You’ll be able to “sculpt” the trimming as it gets closer to where you want it. You might trim a tiny bit closer to the fabric on the outside edge, and the let the inside of the center be slightly longer, so you get a mounded effect.
Whatever you do, trim bit by tiny bit. Don’t trim big chunks! You can always trim more off – but you can’t add more on!
If turkey work is not your thing, you can fill that center with French knots, shading in the same way by mixing your threads. Feel free to use three strands of floss to make the knots a bit rounder and fuller. Maybe work them loosely, rather than tightly.
You can also just satin stitch the center or chain stitch the center or work the center in stem stitch in an ever shrinking spiral. Up to you!
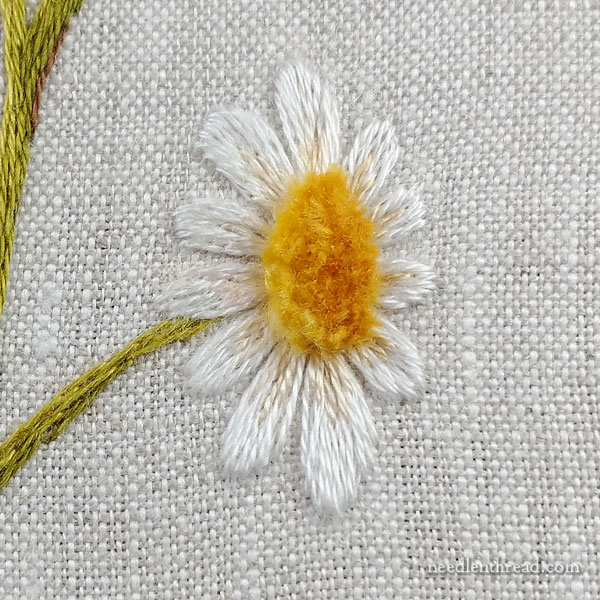
I like the velvety turkey work here, though. It … works!
And that is Daisy #4!
Previous Installments
If you’re looking for the previous installments in this series, you’ll find them all listed under “Tips & Techniques” in the main menu of the website, in the first section on hand embroidery lessons and step-by-step projects. The daisies are part of a series called How to Embroider (Blank). So far, we’ve covered wheat, strawberries, and daisies. We have a few more items coming up in the series this year!
If you’re a member of my Needle ‘n Thread community over on Patreon, you’ll be able to download the PDF of this tutorial a little later today, so that you can save it on your computer and print it as you need it. Keep an eye out for it!
Talking about trimming the Turkey work immediately brought to my mind little girls and boys that are to be flower girls or ring bearers in a wedding, and just before the big day decides that THEY need a haircut too. They grab all their bangs and hack them right off! No way to glue those hairs back on. Back in the days that I could help in Children’s church and Sunday school classes, anytime I saw a kid with this unique ‘haircut’ it was for the same reason!
I have been so busy lately that I haven’t had time to read your blog. I was going through my email and feel asleep. Woke up to this post. Glad I did. Things like daisies always seem to be presented as so easy to do, especially is you use daisy stitches for the petals! My daisy stitches are never good enough!
Hi Mary,
I like this one a lot and I will give it a try for sure! Thank you for all the different ways to embroider daisies, wheat, strawberries… It is a very good idea, we learn a lot.