


Good morning!
I’m going to launch right into today’s topic, which is the third installment of this tutorial series on how to embroider daisies.
Today, we’re going to look at embroidering the stems and the leaves, plus we’ll talk about some corrections (or just changes of mind) and we’ll embroider the large central daisy on the motif in approach #3.
This is a rather long tutorial, and for those who are following along, it will probably keep you busy for a while!
And, as usual, members on my Patreon page will be able to download the PDF for printing later today. Keep an eye out for it!
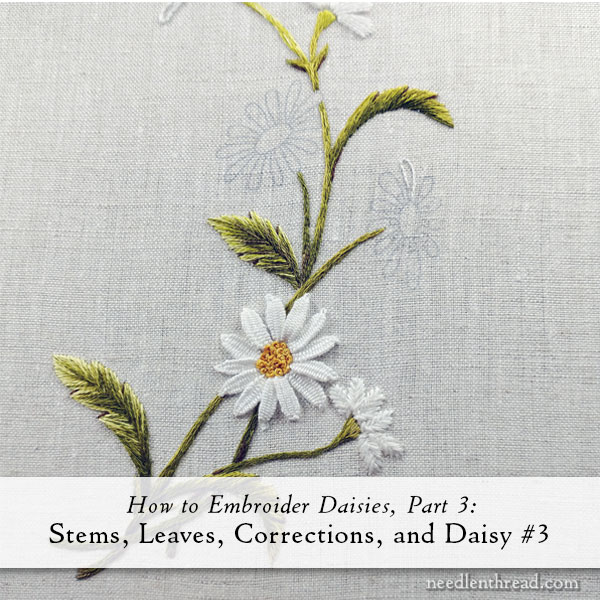
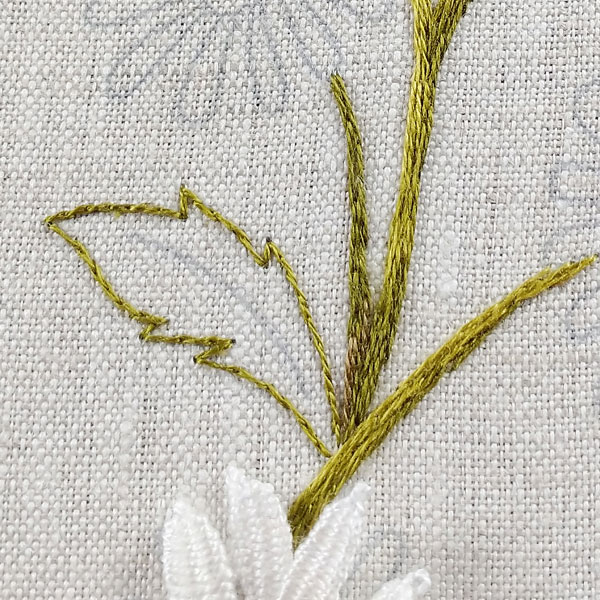
So, we’re going to embroider pretty much everything in the photo above. One element, we’ll embroider two or three times!
But don’t worry – you don’t have to embroider it three times! I’ll just tell you why the shift in thinking and approach that lead to the final decision on one of the elements.
Please remember that the purpose of these tutorials is just to walk you (casually) through the process of stitching different motifs, to help you build confidence in making decisions and trying different approaches to embroidery.
There are changes of mind along the way, reflections after the fact on what I might do differently and why, and some troubleshooting.
It’s all part of the process.
So let’s go!
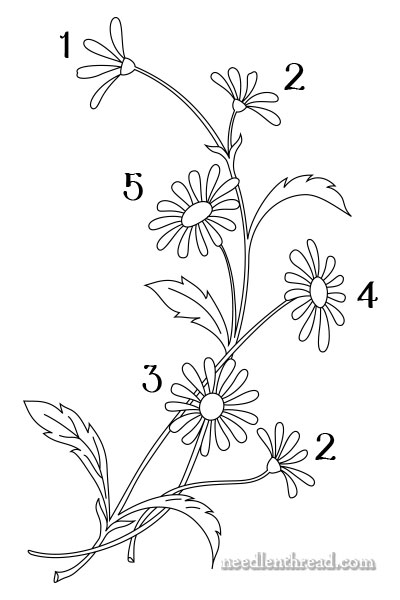
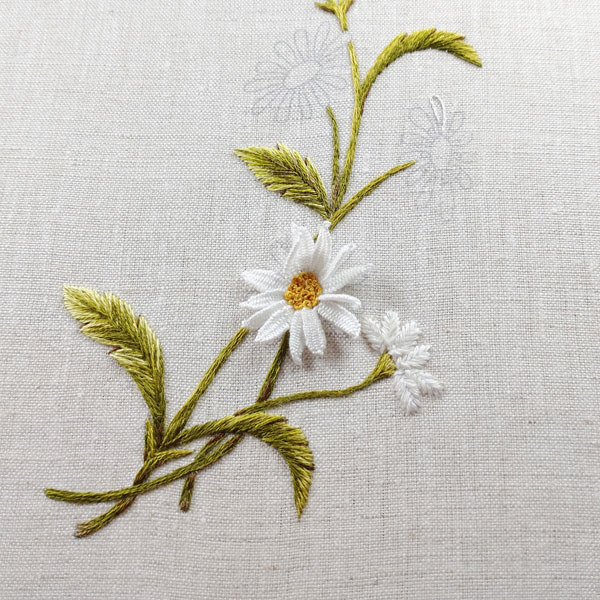
Today, we’re looking at the daisy marked “2” on the lower right, as well as Daisy 3, in the center.
We’ll also be doing the stems and leaves.
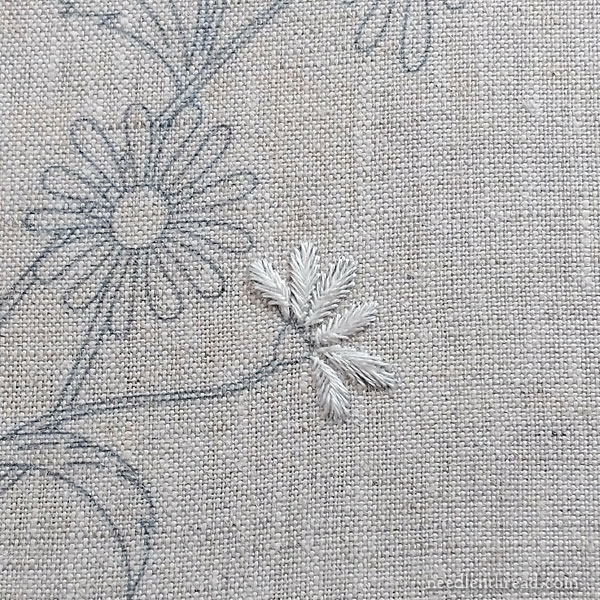
This daisy (“2” on the lower right) went through three revisions. You might like some of the earlier approaches – or you might just want to use one for variety’s sake. That’s up to you!
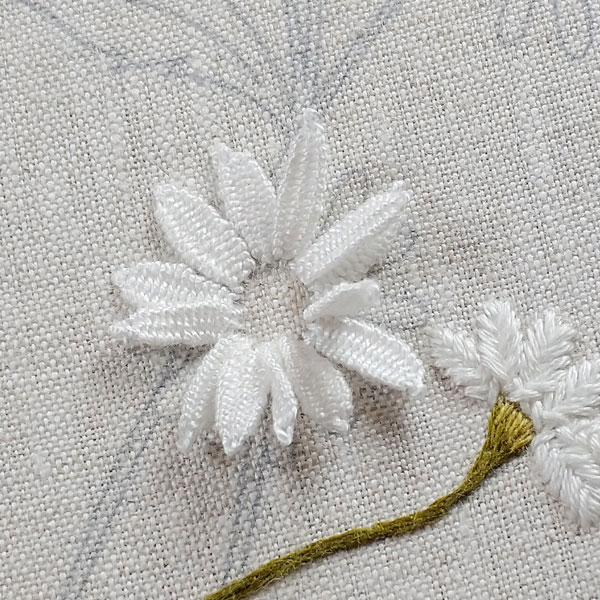
In the interest of trying to add variation, we started with a fishbone stitch for the petals, using one strand of floss in white.
I was unsure of this. It didn’t look bad, but to me, it’s more reminiscent of feathers than flower petals.
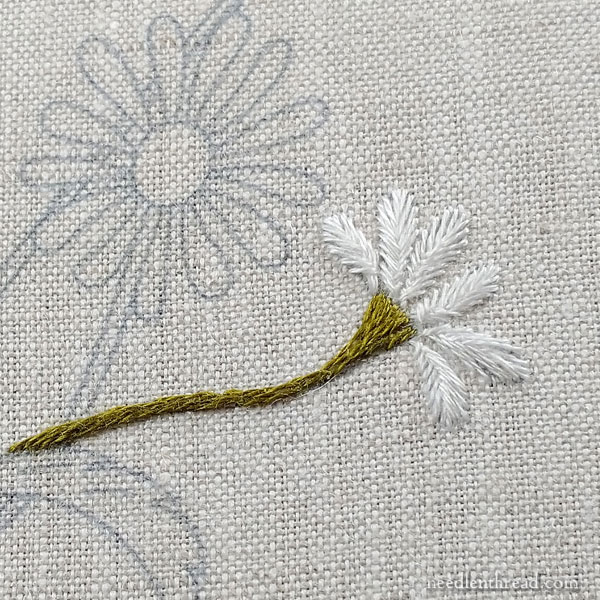
Before deciding absolutely whether or not to try again, the stem went in, using the 730-733 range of greens (dark to medium on this), in the same manner that the first stems were stitched in the previous installment.
So, the stem is embroidered in long & short stitch, using one strand of floss and essentially just long split stitches, mixing up the greens to give it a sketchy effect.
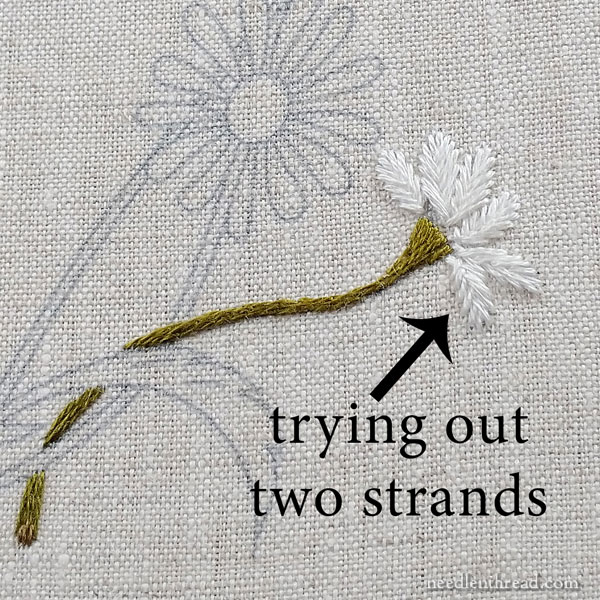
But I did think it was so light and feathery that I wanted to try something else.
So in an attempt to make it less light and feathery, we tried two strands in fishbone stitch.
Argh. I liked it less.
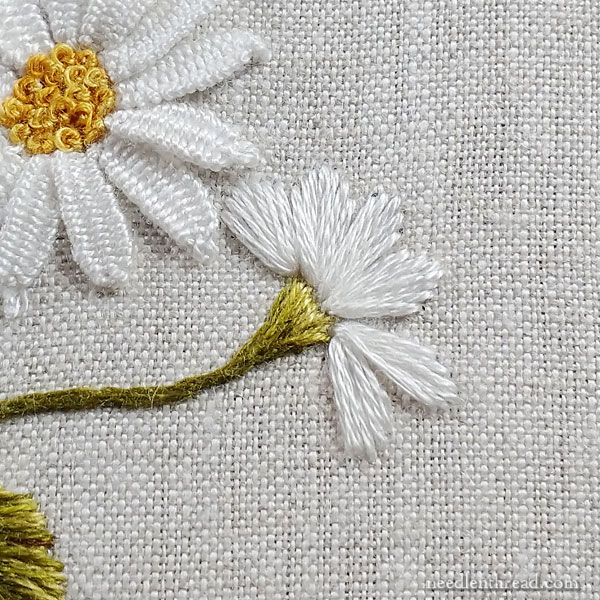
Eventually, which you don’t see in the rest of these photos because we didn’t take care of it until later, we went back to that flower and reverted to the long, fanned straight stitches that we used in Daisy #2 in part 2 of this collection.
You’ll see this in the finished piece at the end of the tutorials, but for now, you’ll see the very fluffy fishbone stitch daisy in the rest of these photos.
Just so you know where we’re going…!
At this point, there was a little glitch in the order of work.
Now, go ahead and read through this whole tutorial, and you can make up your own mind about your order of work, but this is my advice:
Do all the stems and leaves before you work Daisy 3 or any other daisies.
When it comes to order of work, it makes more sense to do the farther-back elements in the design before doing the elements that are in the forefront. This daisy is very much in the forefront, and the petals end up somewhat in the way while stitching the stems and leaves.
It would be easier to do it after you’ve finished at least the stems in its vicinity.
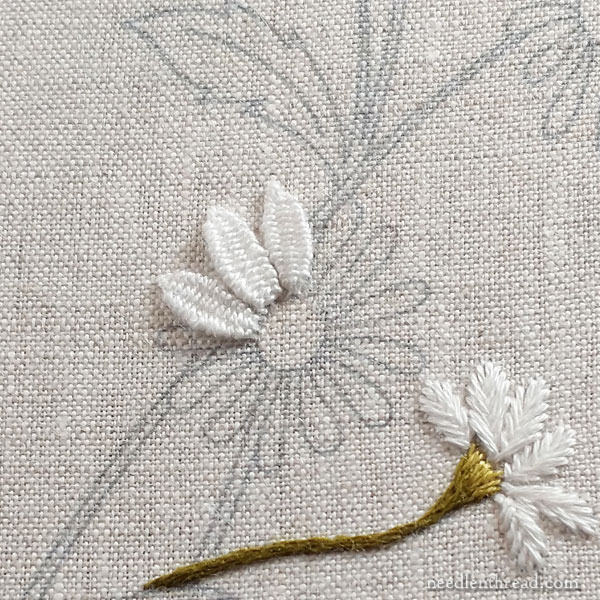
This daisy is embroidered using woven picots. Here’s a tutorial for the woven picot.
Use the white #12 perle cotton for the woven picot, if you have it. If not, use two or three strands of regular floss.
If you’ve done the strawberries, you’re already familiar with them. We worked them in this installment of the strawberry tutorial series and on subsequent strawberries.
If you have worked through some of the Little Things projects in my Lavender Honey & Other Little Things project book, you will have come across some thorough tutorials on how to embroider daisies and sunflowers with woven picot. It’s really an effective approach for a dimensional flower!
Here’s the order that we worked the petals, so that you don’t run into a frustrating crowding situation:
Imagine the daisy face as a clock. Start at noon anywhere (you decide what noon is on your daisy) and work two or three woven picots next to each other. Then hop to six o’clock (opposite your determined “noon”) and work a couple next to each other.
Then, move to three o’clock and work one or two, and then to nine o’clock and work one or two. Then, go fill in all around, overlapping the base of the petals near the center as necessary, for them to fit around the face of the daisy.
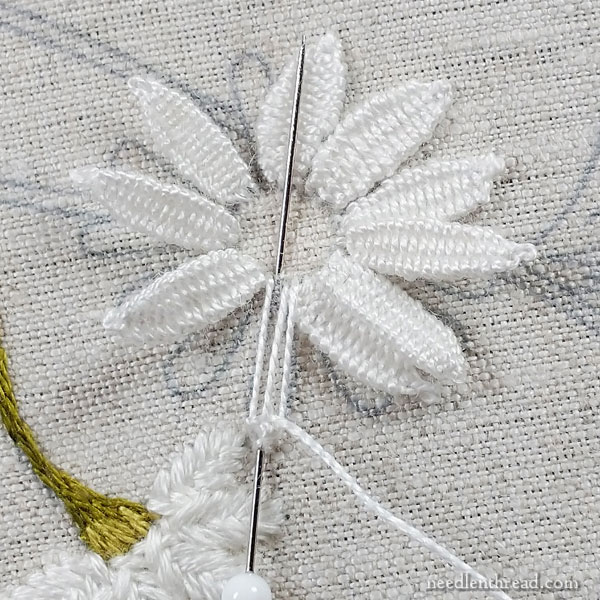
You can see in the photo above how one or both sides of the base of some of the petals overlap the other petals.
Use the petals of the design as your layout guide.
At first you’ll be able to see the design petals behind the picots, because the picots stick up. But don’t worry – we’ll take care of that a little further on.
Don’t anchor the picots just yet, if you haven’t stitched your stems!
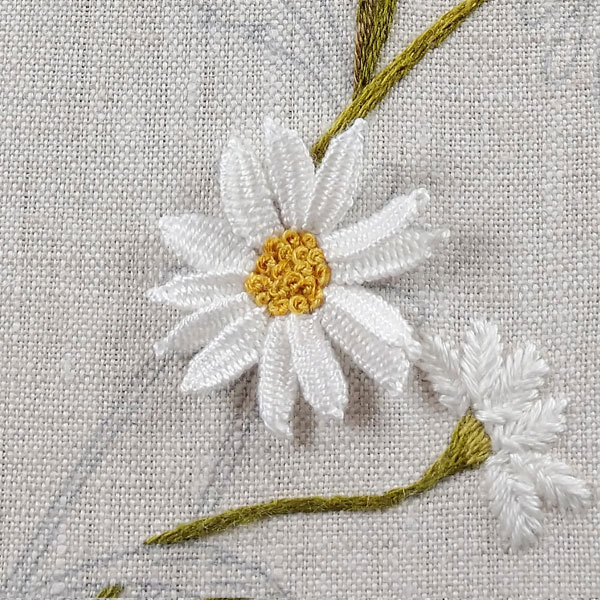
Fill the center with French knots worked close together. We mixed up the yellows, using the medium and dark golds in the needle at one time. Use two strands for the French knots.
Here’s a tutorial for French knots.
If French knots aren’t your thing, maybe you could try colonial knots. Some people find them easier, and the results are essential the same.
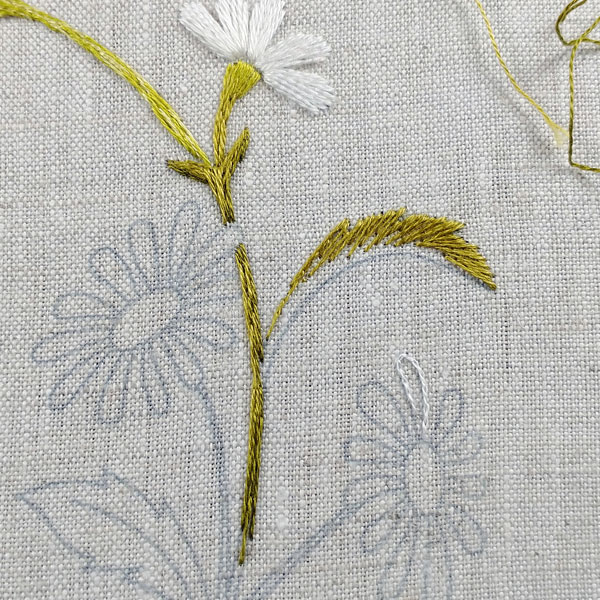
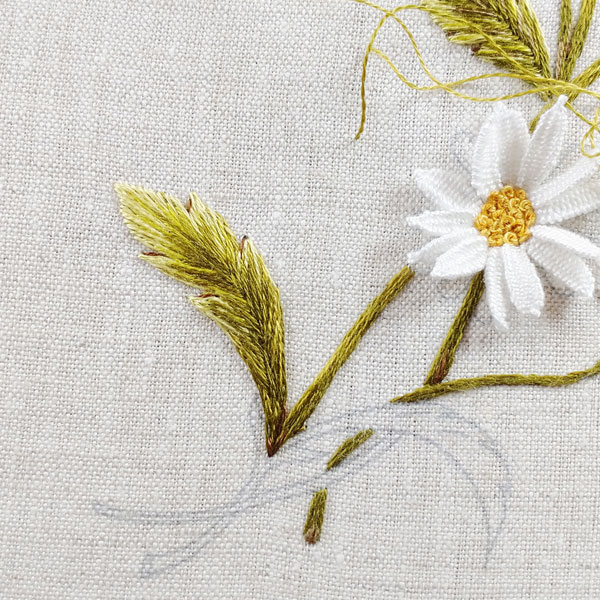
Onto the stems and leaves!
We brought all the greens into play on the leaves and the stems. Most of the stems are in the medium to dark greens, while highlights on the leaves feature the two lightest greens. (You’ll find the DMC color list in the first installment of this tutorial series. I’m going to refer to the colors in general terms, light, medium, etc.)
For the stems and leaves, you’ll want to be familiar with long & short stitch. This series of tutorials on long & short stitch will be helpful, if you’re not familiar with the technique. You’ll find videos for long & short stitch here.
Work long and short stitch – or just long, off-set split stitch – in medium to dark green, using one strand of floss, for the stems, filling the space of the stems. You’ll end up with about 3 split stitches abreast of each other.
Make your stitches long, keep them sketchy, and make sure that the begins and ends are staggered on adjacent stitches. Just follow the “flow” of the stem.
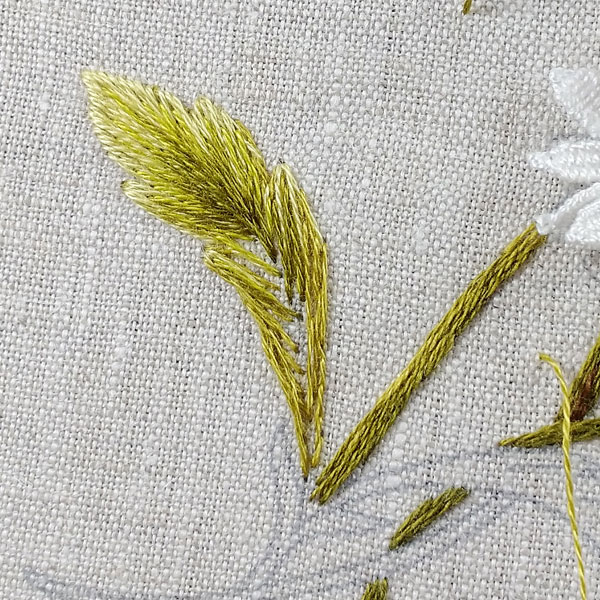
On the half petals like the one above, start with a split stitch outline in light green on the top of that leaf. It’s not necessary on the underside or base – but if you want to, then split stitch the outline there in a dark green.
Work the first layer of long & short stitch filling in a medium green (we used 731 and 733), angling the stitches as shown. They’re going towards what would be considered the “growth point” of the leaf.
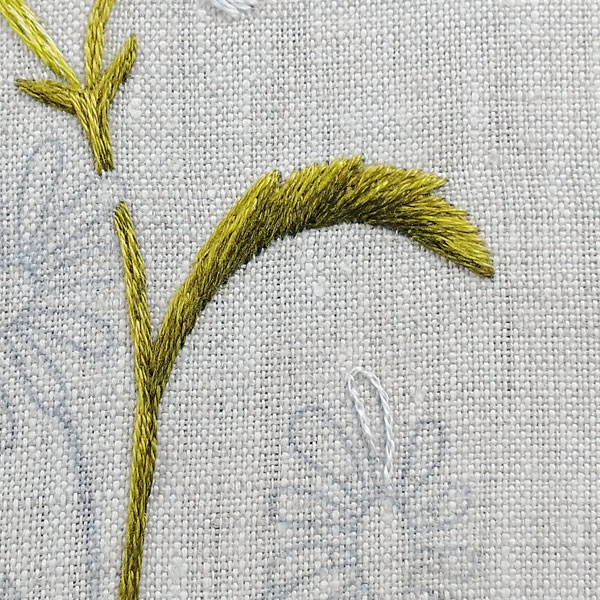
Then, fill the lower part of that half leaf with the darkest greens (730 and 731).
A little later, we went back and added a tiny dark brown stitch at the tip of each “notch” on the top part of that leaf, to give it definition. You can see this in subsequent photos of the whole piece. We’ll talk about it on other leaves, too.

Continue working down the stems, filling them with split stitch and alternating your greens to give it a sketchy, variegated look.
Outline the leaf in split stitch, in medium green, using one strand of floss.
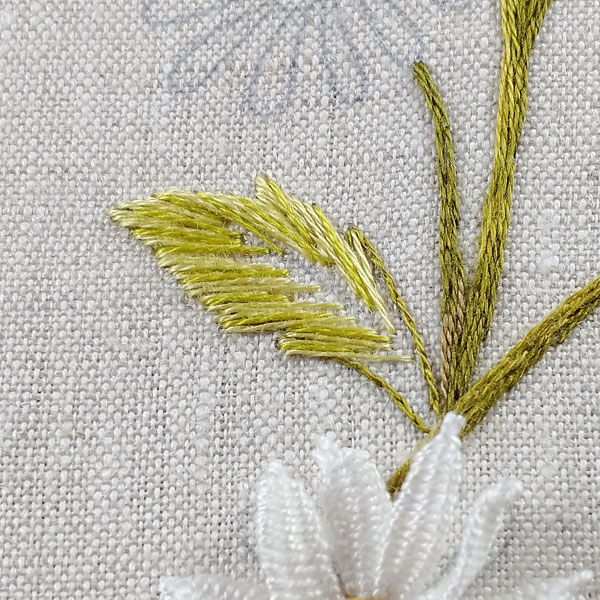
Thread up two needles, one with the lightest green and one with the next lightest green. Using those two greens, begin the outer layer of the leaf, alternating very randomly where you fill with light or lighter green.
Remember to angle your stitches towards the growth point of the leaf. If you need to, add directional lines with a pencil. It doesn’t hurt, and no one will ever see them!
Then, switch off to medium greens as you move towards the base.
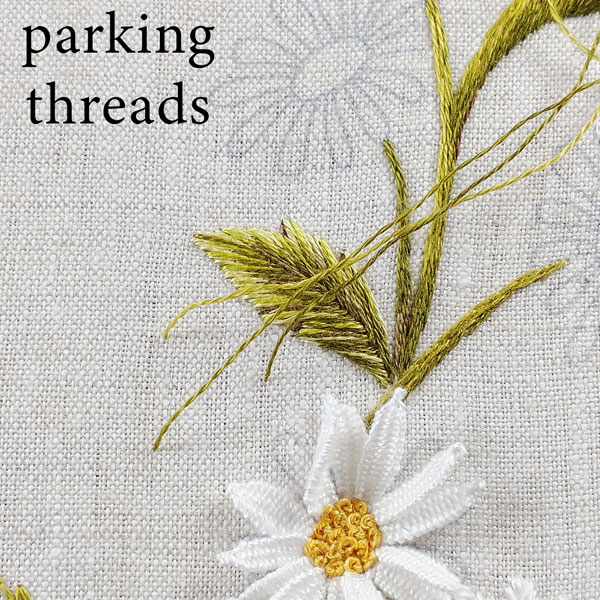
When stitching with multiple shades at the same time using different shades in different needles, you’ll want to “park” your threads as you work.
I’ve written a couple articles on parking embroidery threads, if you’ve never experienced parking your threads. Here’s one article that might be helpful, and here’s the other one.
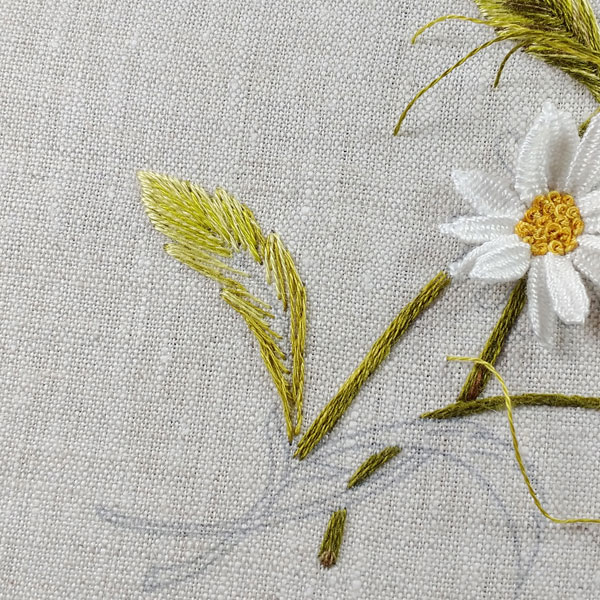
Begin filling with medium and darker greens inside the leaf, following the direction of the previous stitches towards the center vein and downwards, to the growth point.
When you finish filling the leaf, work tiny dark brown straight stitches above the notches on the leaf. This will give them a little pointed definition.
Work the half leaf on the right in the same manner as the first half leaf, and finish filling the stems.
As you work towards the base, use more of the darker greens than the lighter greens.
And voilá! You have completed the stems and daisy #3… and maybe daisy #2 on the lower right. Again, in future installments, you’ll notice that the lower right daisy shifts the fanned satin stitch petals.
It’s a long tutorial today. I hope it tides you over for a while on the daisies! We will visit them again towards the end of next week, with the next daisy.
You can find the tutorial index for this series of tutorials here. It includes other projects in the How to Embroider (Blank) series, too.
Dear Mary
Another great tutorial I really like both daisies and the stems/leaves so pretty, but the picot daisy is my favourite. I really like the thread colours of the stems they blend in lovely and look so nice, the fluffy daisy on the right is also nice and a lovely contrast to the picot daisy. Thank you so much for the tutorial on the daisy series and for sharing it with us, it’s delightful and really interesting how you decide on the order of the stitching. I hope you have a great weekend.
Regards Anita Simmance