


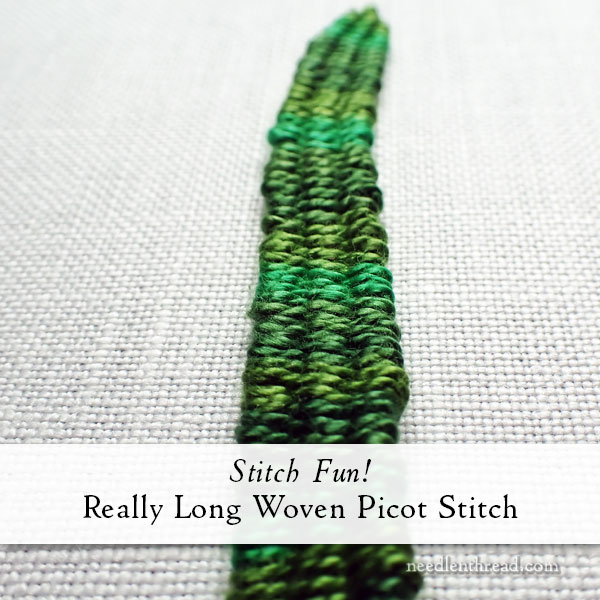
I like woven picots! You can do a lot with them!
A woven picot is a dimensional stitch that looks like the petals on this sunflower and this daisy. They can be flower petals. They can be leaves. They can be seaweed. They can be grass. They could be teeth on your favorite monster. They could be shark fins. Duck feet. Bird wings. They can be thick and long and luscious. They can be narrow, fine, and spindly. They can be attached or not attached.
They can be a lot of things.
We have two tutorials (more like stitch explorations) coming up that involve woven picots, but before we delve into those, I thought I’d show you a simple little trick for making woven picots – especially long woven picots – especially Really Long woven picots – when you don’t have a Really Long pin or needle to help you out.
It’s simple, really!
Let me show you what I mean.
Normally, when making a woven picot, the picot is built around a pin or needle stuck in the fabric.
If you’re not familiar with the woven picot, take a look at this video for making them – you’ll see how it’s done, and how the pin in the fabric plays a central role.
But sometimes – sometimes you want am extra-long, never-ending (so it seems) woven picot, and a regular pin won’t do.
There are different ways to achieve long woven picots. You might be able to finagle a long-ish picot on longer quilting pins. Or you might manage a yet-even-longer woven picot by using a very long doll maker’s needle. You can even work a very long picot by extending the foundation threads beyond the anchored pin – but this drags in the annoying problem of thread snagging while you’re working.
Here’s an easy solution for extra-long woven picots.
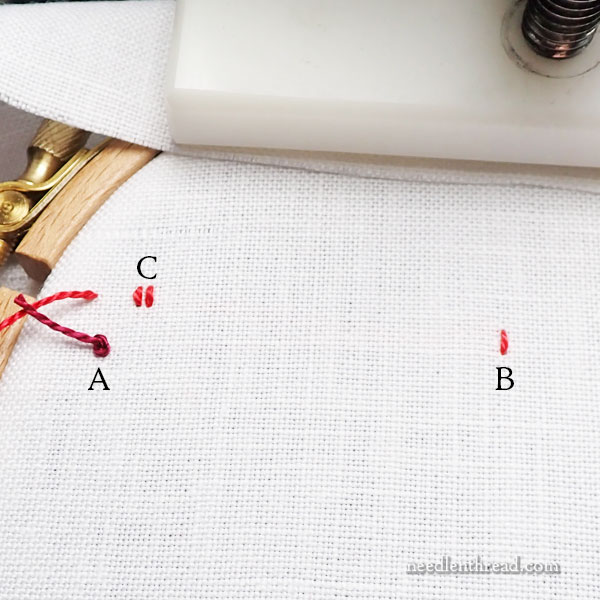
It’s starts with a waste knot (A) in a piece of scrap thread. That is, a knot on the end of the thread that holds on the front of the fabric, and that you intend to cut off eventually when you’re finished with it.
Next, it involves a short anchor stitch on the front of the fabric where you want the tip of your picot to be (B).
And finally, it involves some small holding stitches (C) to secure the small anchor stitch.
Nothing too dramatic here. Essentially, we’ve just made a place to anchor our picot at the very tip of the picot, with a thread that we can easily remove when the picot is finished.
Now, let’s make a Really Long woven picot using that small anchor stitch.
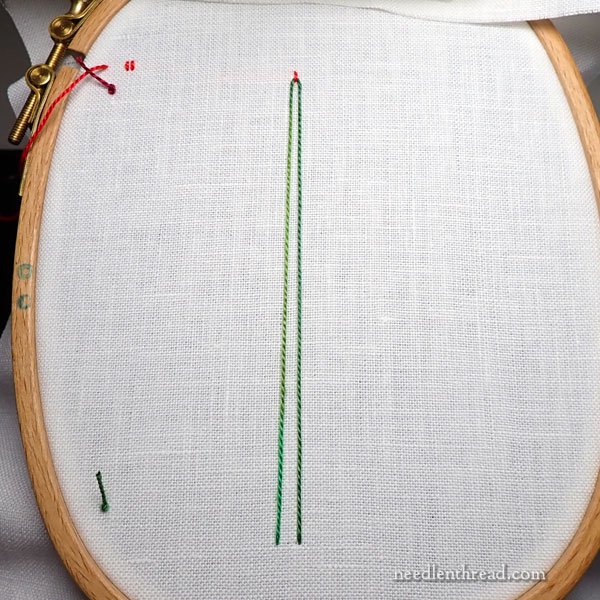
I’m using the Square-Round hoop that I wrote about here, turned so that the orientation is vertical and long. I’ve got the anchor stitch at the top, and I started my woven picot towards the opposite side of the hoop, well below the anchor stitch.
To achieve a super long woven picot like this, it’s essential that you cut a Very Long piece of thread for the picot.
I’ve unwound about 40 inches of thread from the twist of DMC perle cotton #5 that I’m using. Retrospectively, it should have been about 60″ long. That’s a long piece of thread, and it requires a lot of patience to work with it. It’s very helpful if you have a stand to hold your hoop, rather than working in hand.
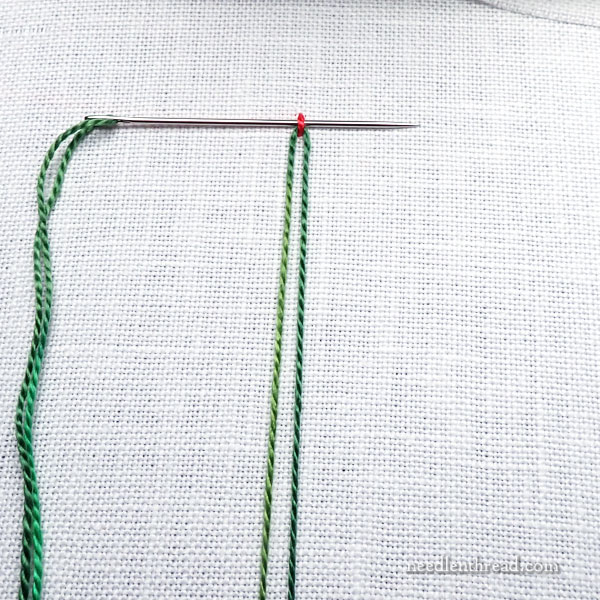
The whole foundation for the woven picot is configured exactly the same way here as it is when you use a pin or needle to make the stitch, but instead of passing behind the head of the pin, I’m passing through the anchor stitch.

Once the third foundation thread passes through the small anchor stitch, it’s time to start weaving – just like you do with the regular woven picot worked over a pin.
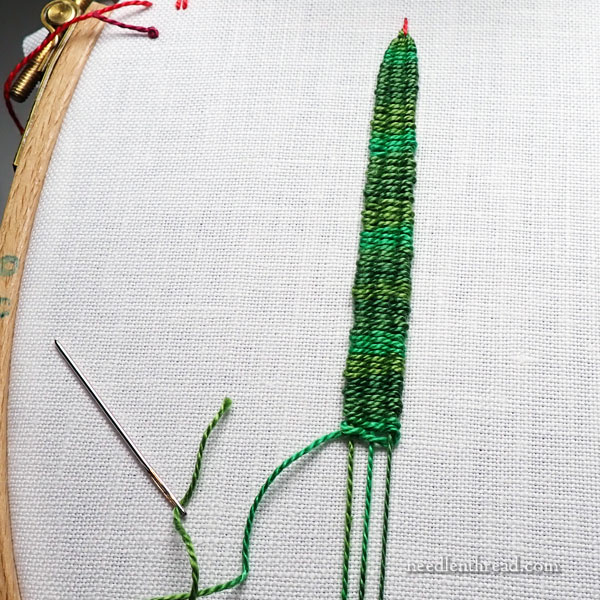
Weave, weave, weave, weave, weave!
It takes a while to weave the woven picot. And as it turns out, 40″ of thread was not nearly enough thread – as you can see – to work an entire 5″ long woven picot.
So I had to shorten this one!
Next time, when I’m shooting for a 5″ woven picot, I’ll go with 60″ of thread or more.
When you’re working with lengths of thread this long, it’s a good idea to work slowly and be very careful with the working thread. You want to avoid annoying knots!

You’ll eventually finish your picot, and you’ll then be able to cut the anchor stitch at the top and remove it.

The resulting very long woven picot can be bent and twisted, anchored wherever you want to, in order to get the affect you want. I like to twist long woven picots and anchor the edge of the stitch onto the fabric at the folds. It’s a great way to make long, narrow leaves.
So there you have a very long woven picot, achieved by using a simple little anchor stitch instead of a pin.
A little later this week, I’m going to show you something you can do with long woven picots. It’s super fun, so keep an eye out for the next tutorial!
Looking for More?
If you’d like to find more stitch tutorials for exploratory stitching, feel free to drop by my Stitch Fun index!
Ooooh! How Fun! And perfect timing for some elements on my current fly-by-the-seat-of-my-pants project. Thanks, Mary!
Linda
Thank you for this great idea. I had been contemplating how to create some demension to a wall hanging project this week. This will go be me a place to start with some folded fabric flowers. Now to get my idea turned into something worthy of sharing. Happy Stitching!
Hi Mary,
This is wonderful! I recently tried to help a friend do this technique. She loves written directions and I’ve referred her to this AWESOME instructional! The is so clear and wonderful. Thank you!
This is extremely helpful – I’ve been wondering how it might be possible to make these longer without trying to find super-long pins. I’ve also been wondering if there’s any way to make the picots wider – is there any way to add strands (I guess more warp threads) that you weave through so that you can create broader woven picots? I made some sunflower petals recently that were awfully scrawny but I couldn’t figure out how to fix that…
Mary
Adorei essa dica!!!! Excelente e bem fácil de realizar!1
Obrigada por suas informações e dicas que só facilitam a vida de quem ama bordar!!!
Beijos, Angela do Rio de Janeiro, Brasil
It sounds like you’ve hit on an easy formula for estimating how much floss you’ll need for this. If a 5 inch picot requires 60 inches of floss, then a good rule of thumb would be that for each inch of length you’ll need 12 inches of floss.
Dear Mary
That is a very long woven picot but a great tutorial on the long woven picot. It looks really great and I wonder what you could do with it. I look forward to Wednesdays blog on what to do with long woven picots, I’m sure it will be really fun. Thank you for sharing with us the long woven picot and for the tutorial. I hope you are having a good break.
Regards Anita Simmance
In case you do want some long, very long, needles, try this Etsy seller. Note – lei needles frequently/usually have hook. These have an eye.
Whoa! That IS a long needle. Thanks, Cathy!
I really like this, Mary, and I was just thinking what a fabulous texture it would add to a fine whitework design. I love how you’ve thought ‘outside the box’ with this stitch!
I can’t take all the credit for it, that’s for sure! Someone sent me a picture of a similar approach on a needlepoint piece and wanted to know how it was done. It looked like woven picot to me (but I couldn’t tell for sure, not having the piece in front of me), so I started playing with it. Unfortunately, I can’t find the original email of the stitcher who asked!
You know, I’m thinking a little bit of math would help here.
Number of rows per unit length … inch or whatever … times total length times width of the base. That should overestimate the length of thread needed because the leaf tapers.
There’s probably a way to take that taper into account, but I’m a Botanist, not a Mathematician! I bet I can find folks to ask …..
Bellissima idea, complimenti! Se io volessi modellarlo o ripiegarlo, secondo te assieme al secondo e terzo filo d’inizio potrei fargli passare anche un sottile filo di metallo? Grazie, Annarosa
Sì! Penso che sarebbe un’ottima idea. Se provi a farlo, mi farai sapere com’è andata? Buona Fortuna!