


Today, we’re going to tackle the most challenging part of finishing Cotton Quartet: we’re going to measure, cut, trim, and prepare the two parts of the project (the outside sampler cover and the inside gingham lining) for assembly.
Whenever you’re doing finish work on something you’ve put hours and hours of embroidery into, it’s a good idea to operate with this old adage in mind: measure twice, cut once.
My version goes more like measure ten times, cut once. Better to overdo it on the measuring than to make a mistake that you can’t undo.
The other tip to keep in mind: you can always trim more off, but you can’t add more on. So when you cut, it’s ok to give yourself excess fabric. It’s not ok to short yourself.
Final tips before we launch in: read through all the instructions before you start this part, gather all the supplies you will need before you start, and give yourself a good bit of quiet, uninterrupted time to work in.
First, gather together your supplies.
Below is a list of all the supplies you’ll need to completely finish the project. Today, we won’t get to all of them, but this is what you want to gather for the finish work.
- The front sampler cover, blocked and damp stretched
- The gingham lining, blocked and damp stretched if necessary
- Interfacing (I used Pellon 926)
- Natural colored sewing thread that matches the ground fabric of the cover
- White sewing thread
- (Optional: blue sewing thread that matches the ribbon)
- Sewing pins
- Clips (like Clover Wonder Clips or clothespins if you have them)
- Needles
- Scissors
- Ribbon
- Candle, matches, or a lighter
- White Felt
- Perle Cotton #5 in white
- Blue beads (I used 6/0 beads in Sapphire from Mill Hill – they are listed as Pony beads, and the number is 16168)
Trim Fabric, Cut Interfacing
We’re going to start by trimming both the gingham and the sampler cover and cutting the interfacing.
I trimmed the sampler about 3/4″ to 1″ out from the design line, even though I marked the initial trim line at 1/2″. Later, I trimmed a little more down, but to start, I left a larger seam allowance at this point. Later, we will trim the rest and cut some notches into the sides.
With the gingham, I took it down to 1/2″ from the design line, because it doesn’t shed the same way that the even-weave fabric sheds.
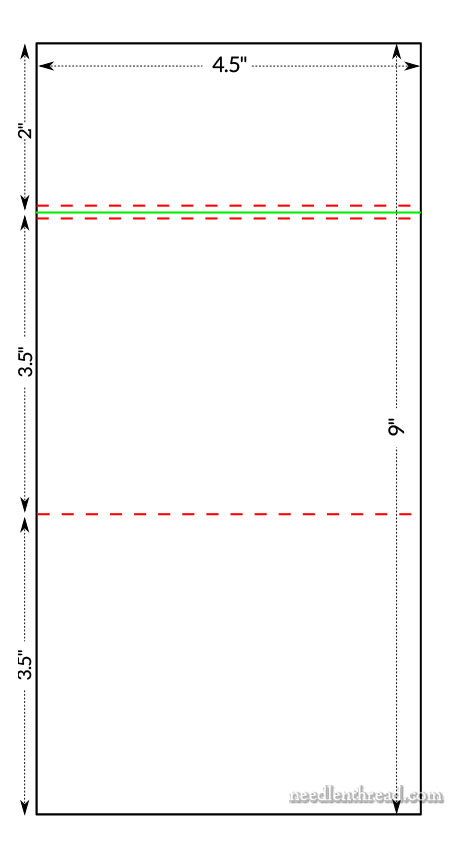
Cut the interfacing according to the diagram below. The red dotted lines indicate the cutting lines. The lower red dotted line corresponds with the fold line on the clover layout. The green line corresponds with the fold line on the cover layout (at the 2″ flap fold), but you’re going to trim those pieces of interfacing a little bit (represented by the red dotted lines). You’ll trim about a scant 1/8″ off each piece, so that there’s about a 3/16″ – 1/4″ space between those two sections of interfacing, when they are in place behind the cover.
Miter the Corners
Now we’re going to miter the corners on both the cover and the gingham.
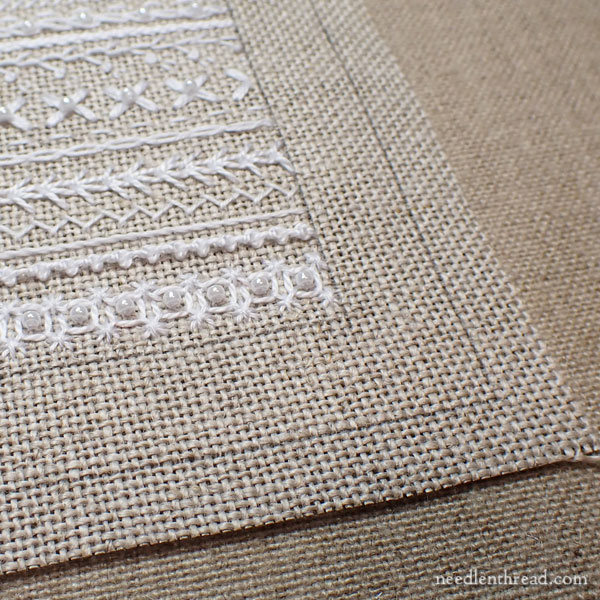
You’ll start with the cover, which you can see I’ve trimmed down so that it’s about 3/4″ out from the embroidery design line area. I cut about 1/4″ or so past the original line that I drew for the seam allowance. This extra space made it a lot easier to miter the corners, and if you’re working with the kit fabric, you have plenty of room for this extra space.
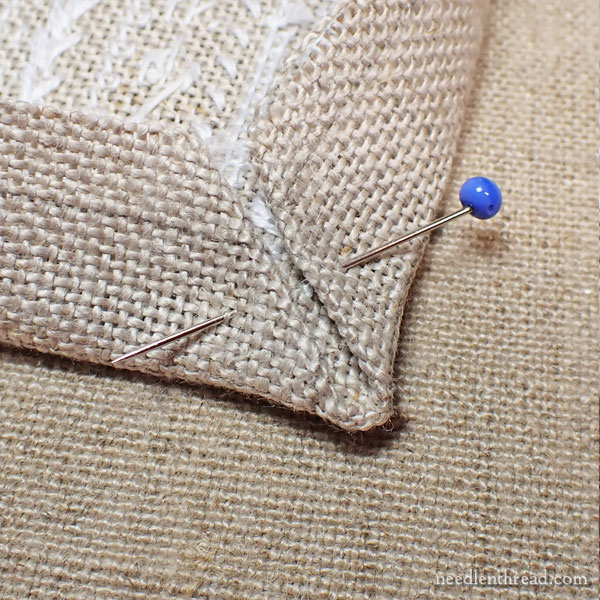
To a miter a corner, first fold all along the edge design lines, finger pressing as you go, so that you have some creases to work with. These creases will mark out where to fold and cut for the miters.
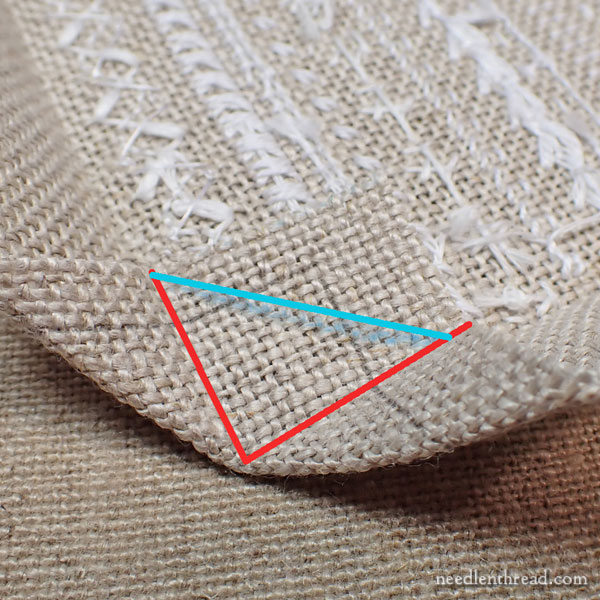
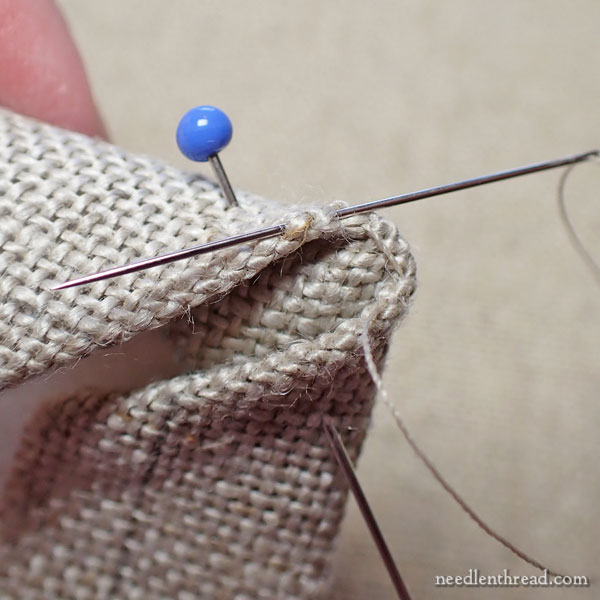
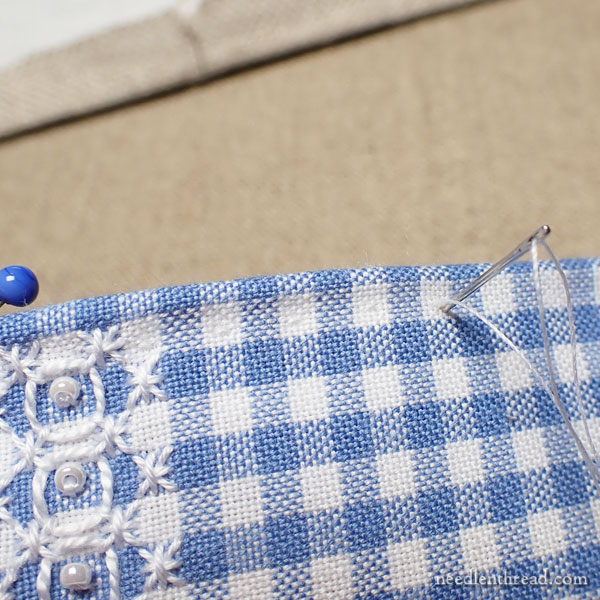
Then fold the corner over the back of the work, diagonally, right up against the corner of the design (represented by the red lines). Trim the fabric halfway across that resulting square (diagonally) formed by the creases, at the blue line in the photo above.
Fold in the corner, then fold the sides over the folded-in corner, until they meet as in the photo above. Pin the corner.
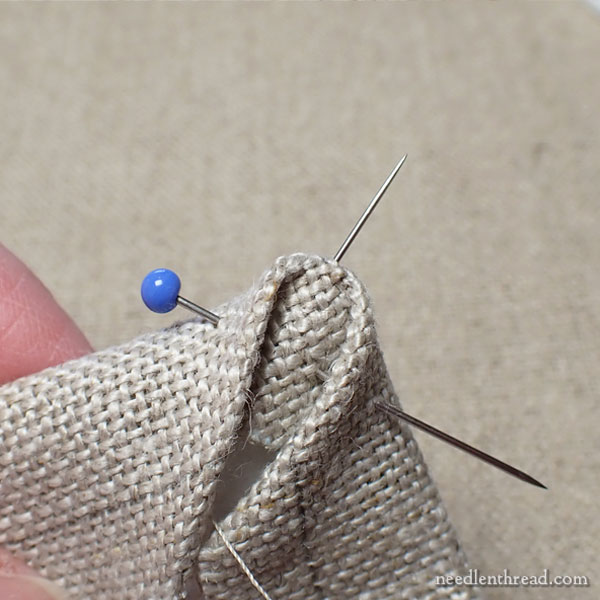
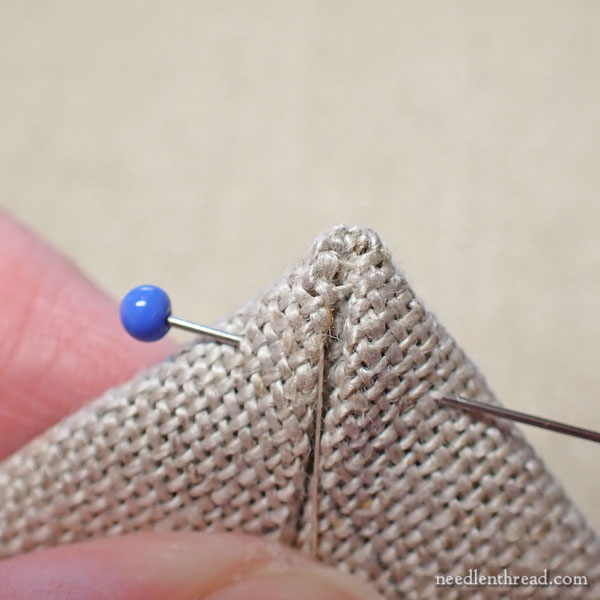
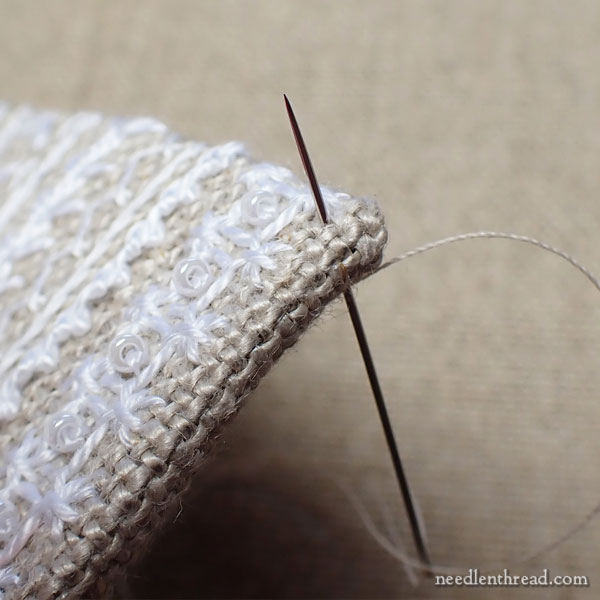
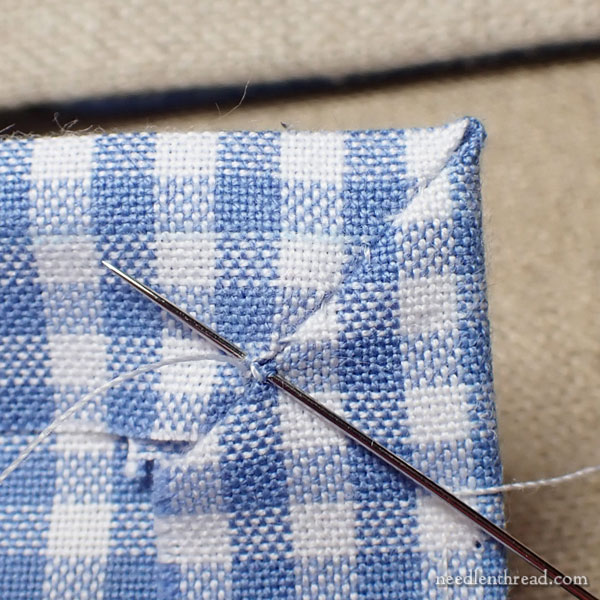
Using a sewing thread that matches the ground fabric, knot the sewing thread well and come up inside the folds of the fabric, straight out into the corner.
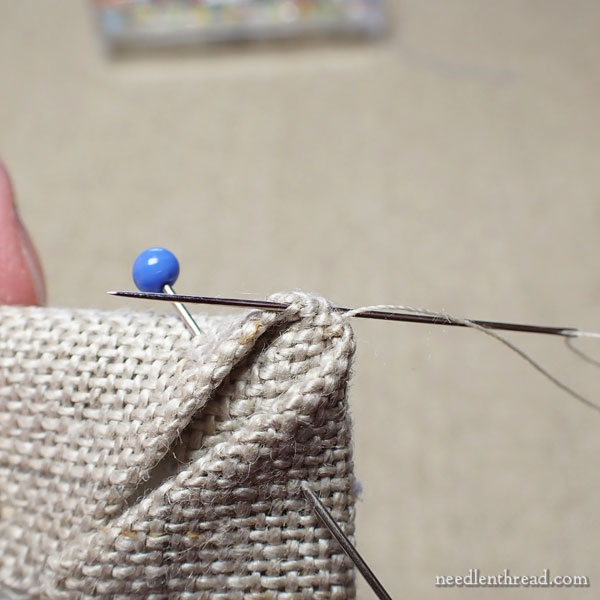
Slide the needle and thread under a little bit of fabric down one folded side of the corner (in the crease of the fold) as shown above.
Then, take the needle across to the other side and slide it into the crease of the fold to pick up a little fabric, and pull the needle and thread through.
At this point, you don’t have to tighten the stitch too much – you can pull the stitches tight every couple stitches.
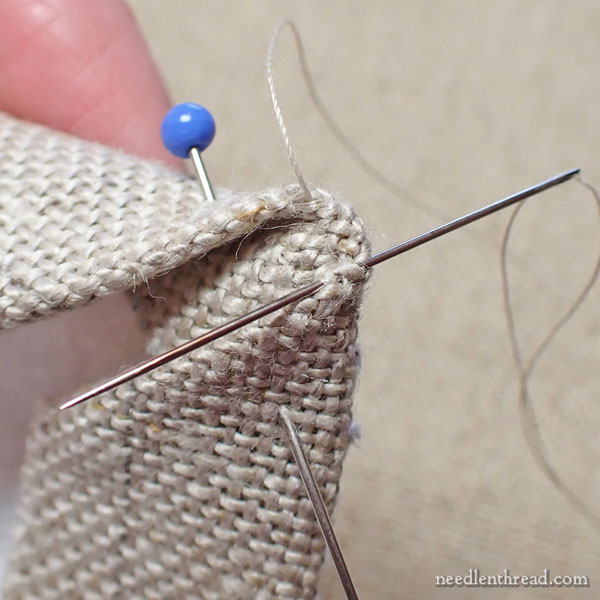
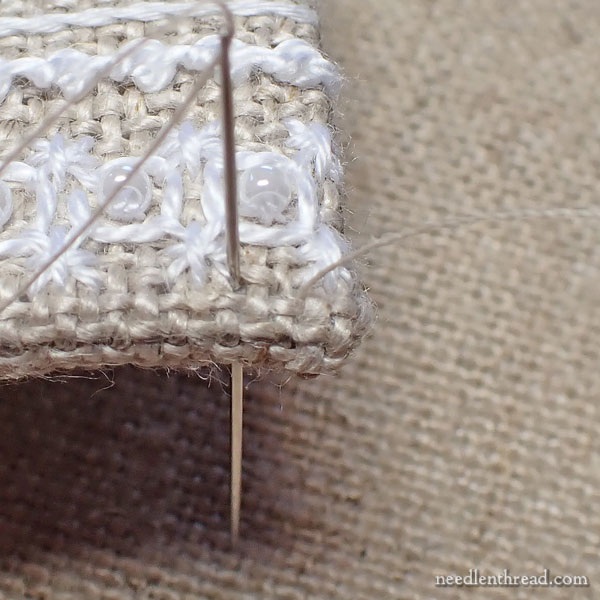
Progress back and forth across the gap between the sides, working down the seam and picking up a little fabric in each opposite crease.
As you stitch further down the seam, pull the thread taut to tighten up the miter on the corner and bring the two folds together.
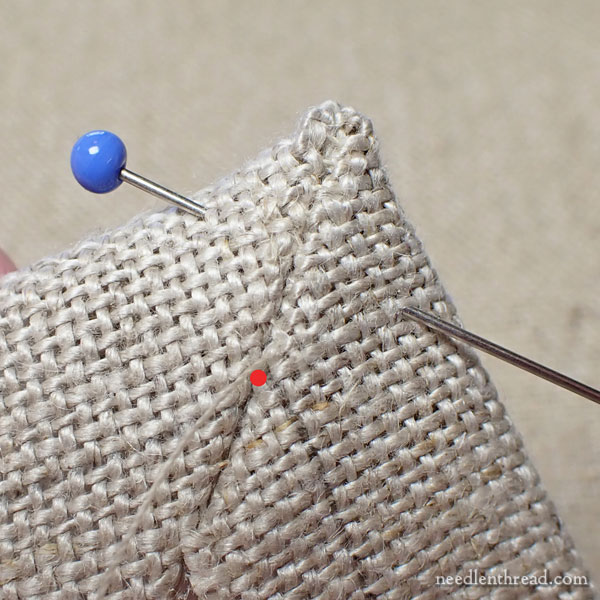
Sew only up to the 1/2″ seam allowance marked line, represented by the red dot in the photo above. Then knot off the thread securely and cut it.
Miter all four corners this way.
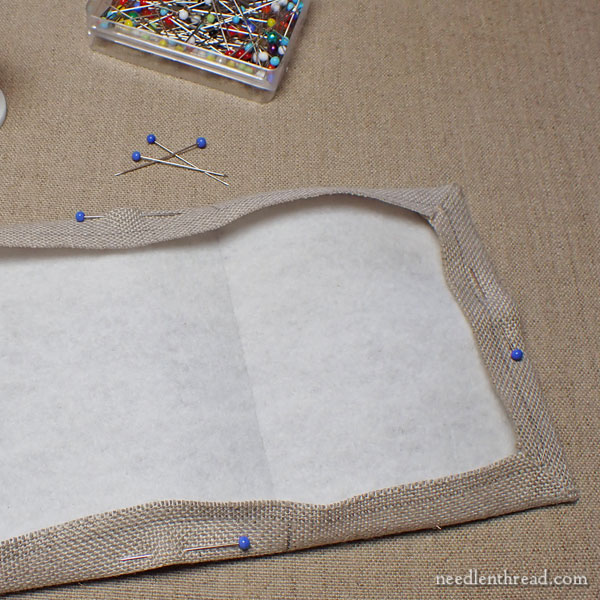
Now, tuck the interfacing pieces into the mitered corners and under the seam allowance, matching up the cut interfacing pieces with the area of the sampler cover they are meant to back (according to the layout).
Pin the interfacing all around the sampler cover, pinning through the seam allowance, through the interfacing, and through the front of the sampler cover. When you pin, make sure you aren’t disturbing the embroidered areas on the front of the cover.
Now, with the pieces of interfacing all pinned in place, use the natural sewing thread and work a running stitch just inside the design line around the whole cover, but not interfering with the embroidery.
Pass through the back seam allowance, the interfacing, and the very front edge of the design area.
This invisible running stitch will be no more than two fabric threads inside your design line.
Pull the thread firmly, but not firmly enough to cause puckers. Work from the FRONT of the fabric, covering no more than two threads of fabric with each running stitch.
As you work the short sides, sneak the running stitches in between the embroidery.
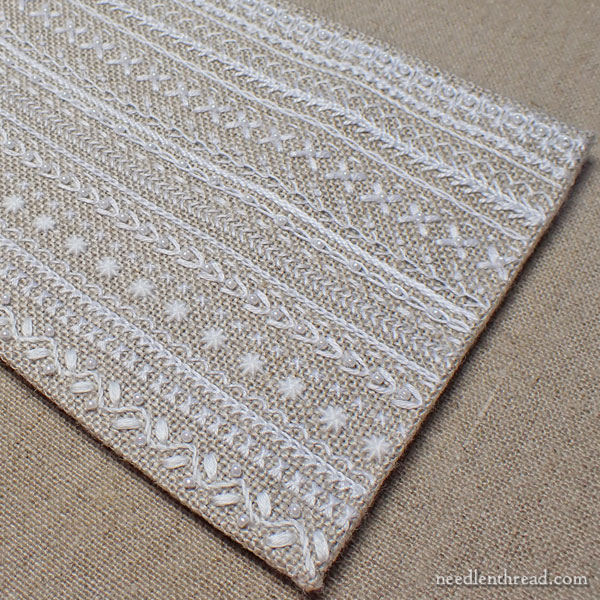
After you’ve worked this invisible running stitch all around the edges, the cover will be much firmer, with sharp edges, and the interfacing will be held firmly in place.
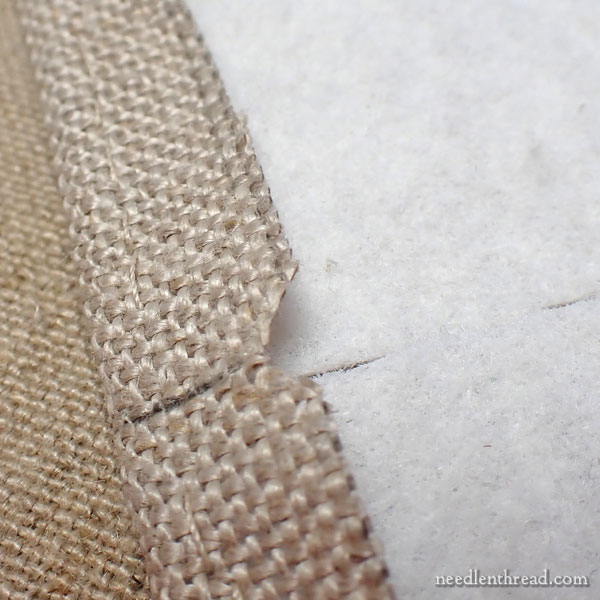
At this point, with the edges sewing in place and the interfacing secure, go ahead and carefully trim the rest of the fabric down to the 1/2″ design line. At each each fold mark (corresponding to the cuts in the interfacing), cut a small notch into the fabric as shown above. The notch should only occupy about half the seam allowance width.
Add the Ribbon
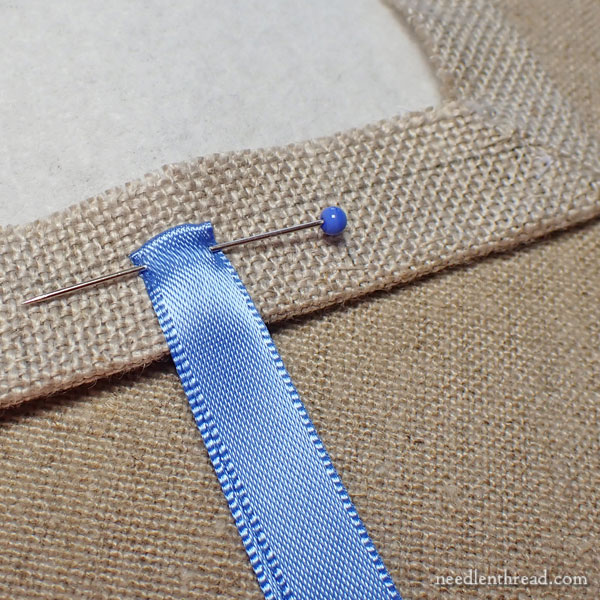
On the “flap” short edge of the cover, center the 1/2″ wide ribbon on the short edge, with the ribbon folded in half as shown above. Pin it in place.
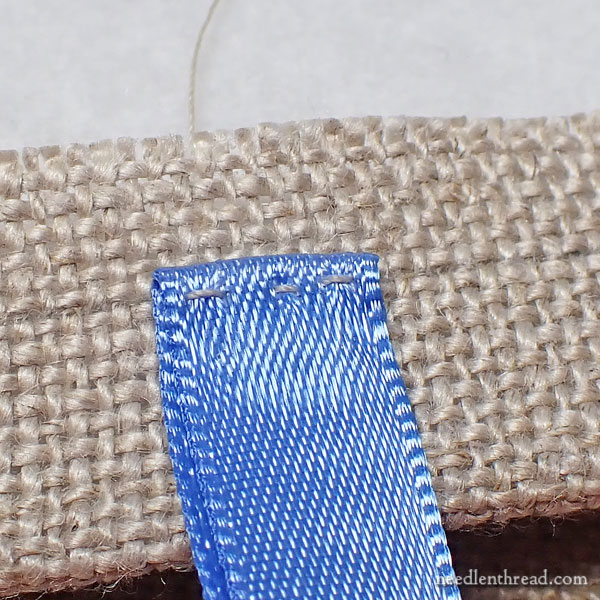
Using the natural colored sewing thread with a decent knot at the end of the thread, work some tacking stitches over the edge of the folded ribbon, as shown below:
Prepare the Gingham
Now, you’ll miter the gingham the same way you mitered the cover fabric. It will be slightly easier because it is a finer fabric.
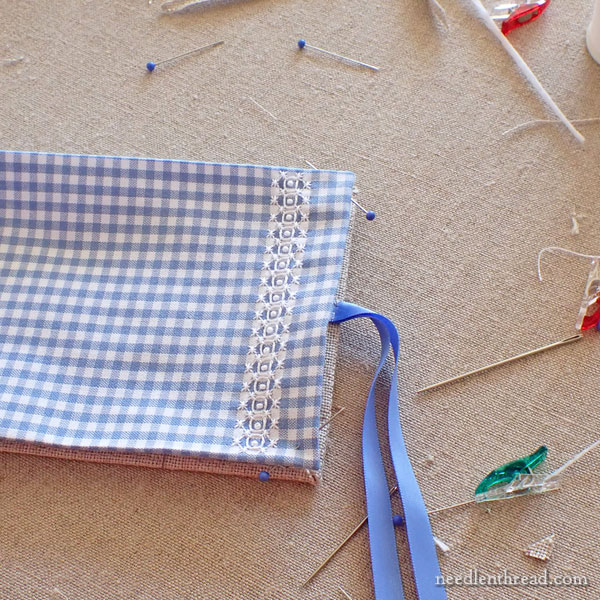
Start by folding and finger-pressing all four sides. Make sure that the lining fits within the perimeter of the cover. It doesn’t have to fit exactly to the edge, but it should be within at least 1/8″ of the edge all around. Or, if everything works out really well, it can fit right up to the edge. You just don’t want it to extend beyond the edge of the cover.
Lay the gingham down on top of the cover to double check everything before you start sewing.
Miter all the corners the same way you mitered the corners on the sampler cover.
Then, using a white sewing thread, sew tiny tacking stitches around the entire design, in the white squares of gingham that are closest to the edge.
These tacking stitches should should be practically invisible on the front, and they should pass through the front of the gingham and the seam allowance folded beneath.
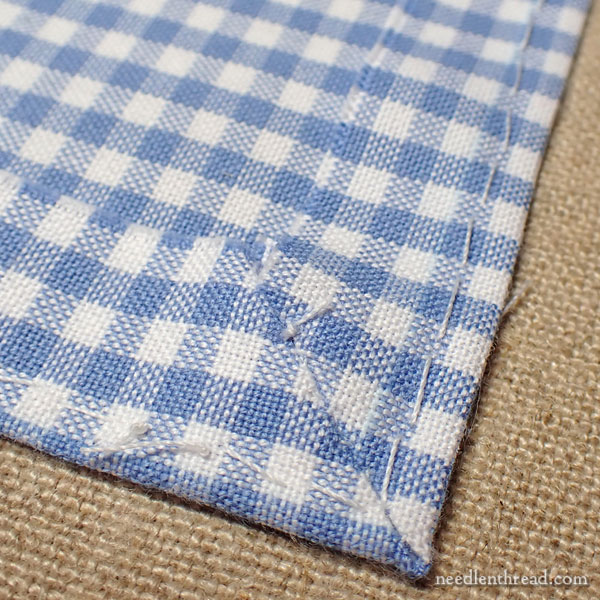
From the back of the gingham, this is what the stitches look like. On the front, they’re tiny and hidden in the white boxes.
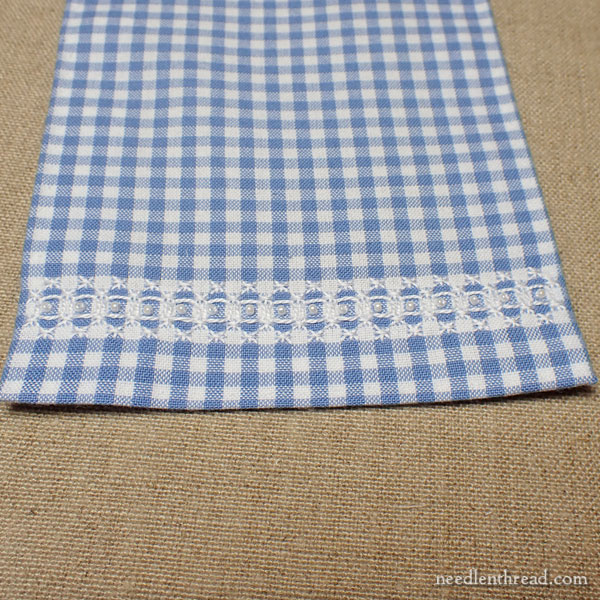
This sewn edge will keep the lining sharp and flat.
Now you’re ready to assemble! We’ll do the assembly steps next week and finish the inside. The last step will be embellishing the edge with beads.
Looking for More?
If you need to access earlier articles for this project, you will find them all listed chronologically in this index.
For members of the Needle ‘n Thread Community on Patreon, today I’ll post the last PDF that includes all the finishing steps for the project! It will take you through to the very end, with trimming the edge with the beads and tying your tool wallet closed, ready for use! Yay!
Here in the States, it’s a holiday weekend, so next week, I’ll see you on Tuesday! Have a lovely weekend!
I like the way you finished the edges. My inclination would be to sew them together on the machine, right sides together, leaving a small opening then trim the seams and turn it right side out. I think your way will leave a much nicer and crisper finish.
Do you iron the edges under? I come to this as a quilter so ironing may be a vice I need to control.
Thanks for teaching an old dog new tricks!
You can iron it. I often iron as I finish – it never hurts – but I didn’t need to do a lot of ironing with this. I did iron on the initial folding of the gingham edges, to make sure they stayed put on a sharp crease.
Mary, I’m a little confused (probably trying to make this harder than it actually is). My question / clarification: on the interfacing behind the top linen fabric, between the 3.5″ and 3.5″sections. The instructions are asking us to cut the interfacing? Between the 3.5″ and 3/5″ sections? Right? I understood the cut at the 2.0 inch part of the interfacing.
Hope this question makes sense.
Mary S.
Austin, TX
It just requires cutting at that line. You don’t have to trim it, but you can if it makes it easier to fold the wallet. You won’t need to trim much, just a tiny bit. The cut at the 2″ line is trimmed more, because there is a deep fold there for the flap.
Dear Mary
Such perfect sewn corners lovely. The instructions are really clear and precise just how I like them, it makes me wish I had followed this project. Maybe in the future. I look forward to next Friday on the assembly steps next week. I do hope you have a lovely 4 July holiday. Thank you for sharing the cotton quartet with us the instructions on how to cut and sew corners and add interlacing. great instructions. Enjoy your break.
Regards Anita Simmance