


Embroidery hoops – they’re one of those tools that are pretty essential to the embroiderer. No matter what approach you take to surface embroidery, eventually, you’ll run into the need for a hoop.
So whether you’re a stretcher-bar fiend, a slate frame fanatic, or a Q-snap connoisseur, some day, at least for a project or two, you’ll have to be a hoopist. Or a hoopie. Or a hooper? Yes, a hooper!
And if you’re going to be a hooper, you should also be a wrapper.
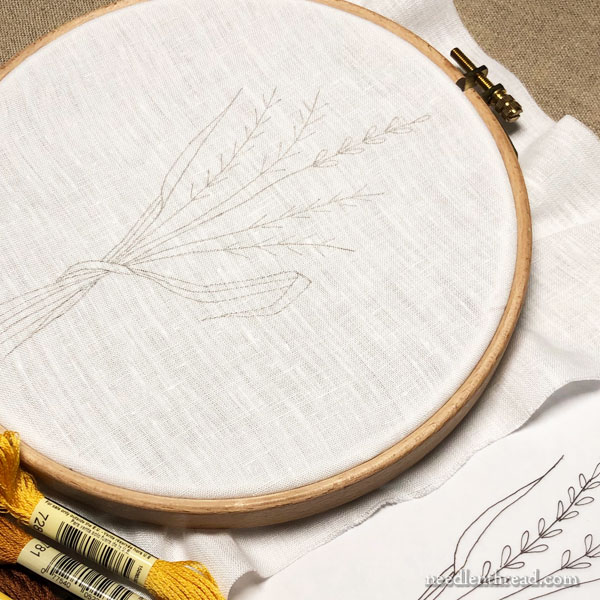
I bring this up now – and I’ve brought it up before – because, as we launch into Little Blooms on Friday, many of you will be hooping up the project to get it ready for stitching. I want you to have a really good experience using an embroidery hoop on this project. And at the end, I want you to have an equally good experience with the finish work. Your hoop and how you use it can have a lot to do with that!
Many moons ago, way back near the beginning of Needle ‘n Thread, I wrote this article on binding the inner ring of an embroidery hoop. That’s an older article, and the pictures are a bit dim. As the years progressed, I adjusted my method of binding a little bit, and I also revised my outlook on the binding material.
In 2021, I wrote this article on wrapping the inner ring of a hoop, to update the information and the pictures. The photos are clearer.
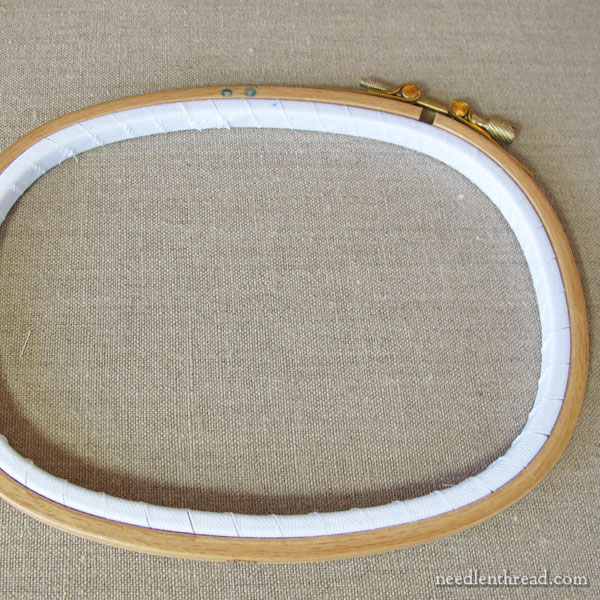
Since the earlier article, I’ve changed a couple things. First, I always (no exception) bind a hoop with cotton twill tape only. Polyester or blends simply don’t do the same job. They’re slippery and they don’t provide enough friction. So I use cotton twill tape only. (This is why I include cotton twill tape with all the embroidery hoops available in my shop – so that you don’t have to search for good cotton twill tape or settle for something that won’t quite do the trick.)
Second, I’ve changed one major aspect of my method. Now, I tack every wrap of the twill tape to the wrap before it, using small stitches along the inside of the inner ring.
This might seem like overkill, but I’ve found over time that the wrapping of a hoop lasts longer and remains all around neater if each wrap is tacked to the wrap before. It keeps the wraps aligned and prevents them from shifting.
When you bind the inner ring of an embroidery hoop in this manner, it’s unlikely that you’ll ever have to re-bind the hoop again.
Why Do It?
It would seem like binding the inner ring of an embroidery hoop is superfluous. Why should we have to improve upon the tool that we bought? Shouldn’t it work the way it’s intended, in the state it comes to us?
Yes… and no. A hoop will work without binding the inner ring. But there are certain advantages to binding the ring, that will make your embroidery life more pleasant.
1. You will achieve better tension on your fabric with a bound hoop, and the tension will maintain itself longer.
2. Your fabric and embroidery will be more protected with a bound hoop – the binding gives a bit of cushion to the hoop, which benefits the embroidery that is encased within the hoop rings when you have to move the hoop. We’ll explore this point a little more below, with one more tip.
3. Binding the hoop seems to minimize somewhat the appearance and the tenacity of “hoop rings” on the fabric. It doesn’t necessarily eliminate hoop rings altogether, but it seems to make them less severe.
Other Measures
There are a couple other tips that can help you minimize the hoop marks or rings that can develop on your fabric and embroidery when you’re using a hoop.
It’s not only the crease resulting from the hoop that you have to worry about when you remove your fabric from the hoop.
Because the hoop is usually hand-held, oil from the skin can transfer to the fabric around the hoop area. This area becomes a dust and dirt magnet and can result in a soiled ring around your embroidered area. That’s the kind of ring you definitely want to avoid!
So, if the protection of your fabric and embroidery is of primary concern (say, if you don’t plan to have to launder the piece of embroidery), then it helps to add another layer of protection over your fabric.
Using a bound hoop, hoop up your ground fabric with another piece of scrap fabric (thin cotton muslin or calico works well) laid over it. Once you have both fabrics in the hoop securely, cut away a circle from the scrap fabric to expose the stitching area inside your hoop.
The scrap fabric will act as a buffer for your ground fabric, and it will also keep the edges around the ring of the hoop clean.
Some people use plastic wrap to achieve the same results. I prefer scrap fabric because I can reuse it every time I have to reposition my hoop.
Relax!
Another tip is to let your fabric relax between stitching session. Loosen up your hoop if it’s going to be a while before you take up your stitching again. If you only stitch once a day – say, in the evenings – when you finish your stitching session, unscrew the hoop a little bit and let the fabric relax.
This will help minimize hoop marks.
Hoop Care
You’ll get the most life out of your embroidery hoops if you treat them well.
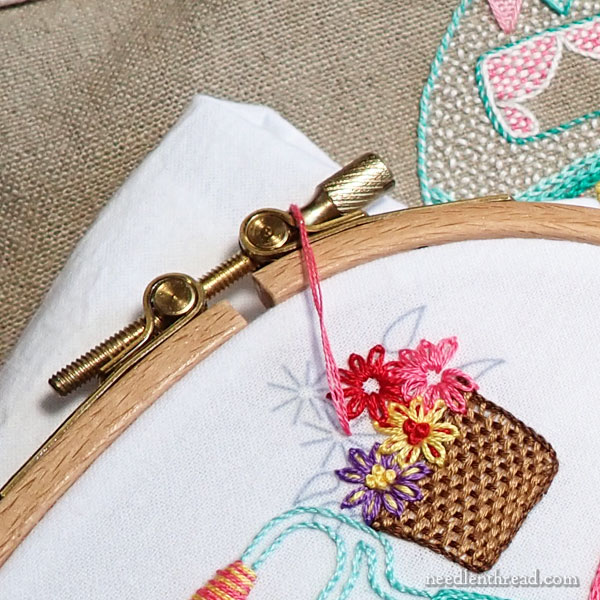
First of all, while a screw driver is great for tightening up the hoop screw, just because you can do that with a screw driver doesn’t mean that you should tighten the screw to the death. Tighten the screw just until it’s tight, but don’t keep tightening it further. It’s kind of like overwinding a music box. You wind it until it’s wound. But if you wind it further, you’ll break it!
Same with a hoop screw. Tighten it until it’s doing its job – holding the fabric – but don’t tighten the absolute heck out of it, because you’ll end up stripping the screw.
Of course, the above assumes you’re using a decent hoop with brass hardware, not the bamboo craft hoops with the chintzy bendable hardware.
When you’re finished using the hoop, put the inner ring inside the outer ring, tighten the screw enough to hold the two together, and then store. It’s always a good idea to keep both rings situated together – it keeps the hoop in better shape and it contributes to the strength of the hoop, should anything untoward happen to it in storage. A single ring that’s smashed against a wall would be more likely to lose its shape or even break than both rings together would be.
So those are a few hoop tips for you!
On Friday, we’ll start the Little Blooms stitch-along! I can’t wait!
Mary, one problem I have … and Ive been searching for weeks …
I have some nice hardwood “legacy” hoops (way better than the cheap stuff that Those Stores sell), but I can’t bind them. The screw is way too short!
Where can I buy replacement screws? You can find all sorts of dibs and drabs for sewing … want to get zipper pulls? No problem! But hoop screws? Nada.
Do you know of any place where you can get them?
Suz
Needle in a Haystack sells them! You can find extra screws here on their website – just scroll down the page a little.
Oh, Ms Mary Corbet! I thought about you several times last week! I bound a 12″ x 1″ hoop for a special piece for my daughter and son-in-law – and it took HOURS! You are such an inspiration for those of us who find your work nothing but excellence personified. My wrap was a scant 1/4″ too short, then I found it difficult to get the joined spot (thank goodness I ordered 2 packages of twill tape!) on the inside of the hoop (had to wrap & rewrap a couple of times for proper placement of that lump). I’m wondering if a curved needle would have been better as well?
Thank you so much for your wonderful tutorials (and the videos, too).
laura
Hi, Laura – I usually use a straight needle these days, and I make the tacking stitch right up along the inside of the ring on the very edge, so it’s easy to get the needle in and out again. I’m trying to figure out a 12″ x 1″ hoop… I’m guessing you mean it’s 12″ round and 1″ thick, correct?! LOL! I was picturing a very unique narrow hoop with an elongated ring of 12″ long and 1″ high for a second, but I realize that couldn’t possibly be the case. There’s nothing worse than running out of twill tape right at the end of the job. 🙂
Tres interessant vos conseils au sujet des cerceaux; ca nous permet de revoir nos habitudes et de s’ajuster de bonnes facon. Vous etes un ange Mary, je vous remercie pour tout ce que vous transmettez.
Vous etes un guide pour moi.
Au plaisir de vous lire.
Micheline
Does the wrapping absolutely have to be on the bottom hoop? The first time I used a wrapped hoop, I accidentally sewed through the twill tape, and had to rip out a lot of embroidery to fix it. So I now wrap the top hoop, so I don’t have to worry about sewing through the tape. Is there anything wrong with that?
I don’t see why it would be a problem! One ring or the other – the concept is the same! 🙂
Hi Mary, it is a long time since l have written a comment here on your blog. I have followed your suggestion of binding the inner hoop ever since l read your first article that many years ago. The results were always good. Instead of joining the cotton twill tape with tiny stitches, l always wind the tape so that it overlaps and it stays put that way without any gaps appearing later. Now a question, will it make any sense to bind the top hoop as well? I was just wondering. Enjoy your weekend. Love, Elza Bester from Cape Town.
Hi, Elza! I’ve bound both rings on a hoop before. The difficulty is that you’re adding so much bulk with both rings bound that it can change the alignment of the screw in the hardware. I generally only bind the inner ring now, and if I want the extra protection on my ground fabric, I use a scrap cloth as mentioned in the article. I don’t overlap my twill tape because I like a smooth, even surface on the hoop, but I know that there are many stitchers who do overlap the tape. Just personal preference!
I just bound my smaller square-round hoop. It took hours, but it has definitely made a difference! Thank you for the recommendation. I am all ready for the Little Blooms project now!
Hi, Mary!
Quick question, to make sure I understand correctly: I have my twill tape positioned and clipped around my hoop, ready to stitch. Should I tack the entire edge of the tape, or just a few stitches here and there?
I tack inside the hoop on each wrap, so that the wraps never separate. I like it that way. Some people don’t tack them at all – they just sew them together when the wrap meets the beginning again.
Mary, is there a trick to this that I’m missing? I’m having a rough go with it, especially getting the needle from one wrap to the next. The corners (“square” hoop) are the hardest. Should I wrap as I stitch or wrap the whole thing and *then* stitch?
I wrap the whole thing and clip it as I go, and then I stitch a holding stitch or two on the inside of the (inside) ring, picking up the adjoining edges of two wraps.
I finally got it done! Whew! What a job! But I’m pleased with the result (and hope I never have to do it again! Haha!).
A few things that I found helpful:
– Shorter needle. I switched to the shortest, finest one I had (a #8 sharp, I think).
– Making the tacking stitches nearly perpendicular to the edges of the cotton tape. It was probably overkill, but I made 5-6 stitches along each joint of the tape.
– When moving to the next wrap joint, taking the needle diagonally across the inside of the hoop instead of along the edge of the hoop. For some reason, straight needles don’t go around curves very well.
On one of your photos of hoops, you have coloured clips to take up the excess fabric. Do they have a name? I’m in the UK so may struggle to source them.
Those are called “spool huggers” over here. They’re sold to wrap around sewing spools to keep the threads from unwinding. They work pretty well to hold excess fabric off hoops!
Mary, do you have any tips/suggestions/words of advice or caution for binding the inner hoop for a hoop stand? do i merely skip the bit that’s attached to the part that holds the rod?
Many thanks, as always, for your thorough explanations and your experience. For me, you are the Cooks Illustrated of Embroidery !!! <3
Carrie
xx
Hi, Carrie, I would go ahead and wrap the hoop and just cross the tape over or across the connection area where the rod holder is stuck to the hoop (I’m assuming it’s the kind that’s stuck to the inner ring of the hoop). It shouldn’t interfere, and as long as there’s good tension and you’ve tacked the wraps together before and after the connection area, I think it would stay in place.
Cooks Illustrated… that’s funny! I like Cook’s Illustrated and ATK!