


Last week, we embroidered the top and the base of the covered tape measure in our Purple Posy Stitch Snippet stitch-along.
If you are just coming into the project and you want to catch up, you can find all the previous articles for Purple Posy listed here in the Project Index.
If you are a member of the Needle ‘n Thread Community on Patreon, you have already received these instructions in a downloadable and printable PDF format.
If you haven’t acquired a materials kit yet for this project, you can find the full materials kit for Purple Posy available here.
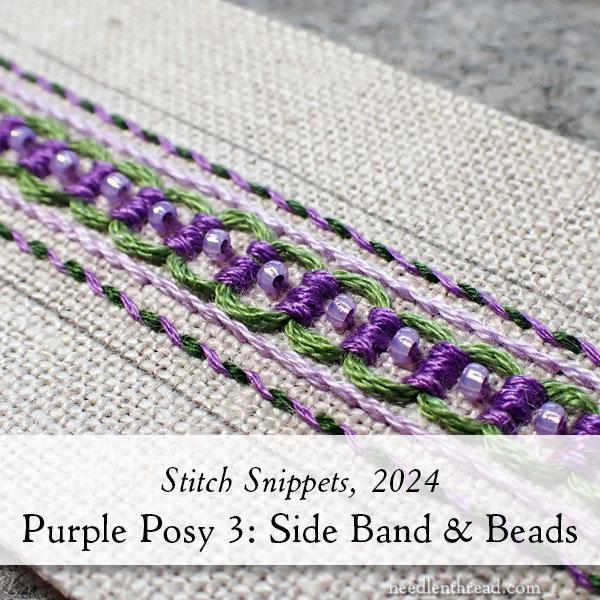
Today, we’re going to stitch the side band of the tape measure cover and then we’re going to add the beads. We’ll also see how to manage the beads when working with a hoop.
Please read through all the directions before you begin stitching!
For the decorative band, the dark purple stacks of three straight stitches are worked in DMC 208, using all six strands as they come off the skein. There is no need to “strip” or separate the floss and put it back together.
The stacks are laced with the light green (DMC 3347), all 6 strands straight off the skein, without stripping.
Use a #24 or #26 tapestry needle (long eye) to work both the stacks and the lacing.
Below, the overall layout of the band is explained, followed by step-by-step photos.
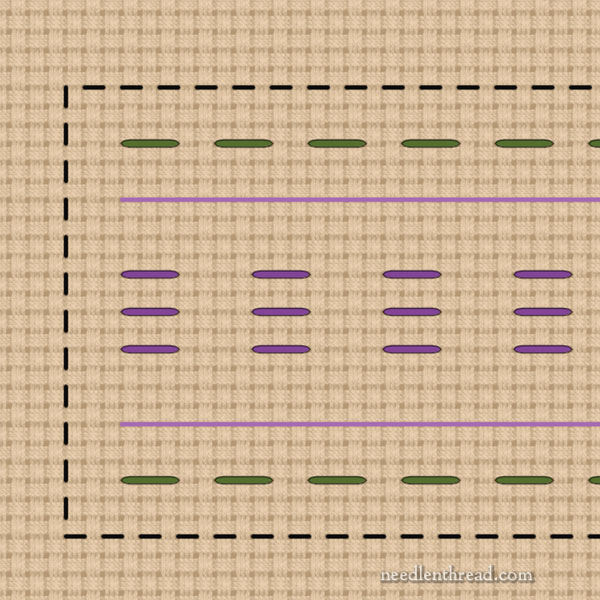
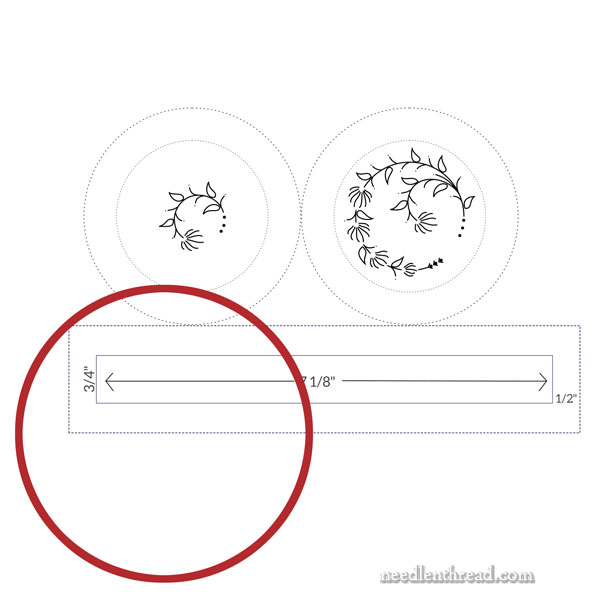
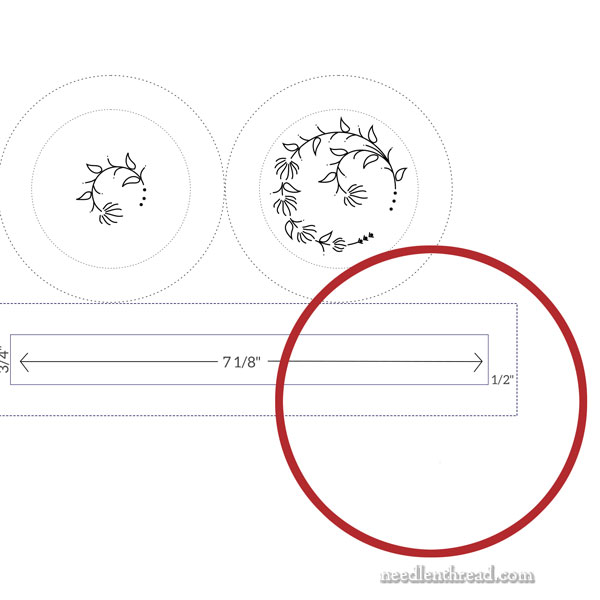
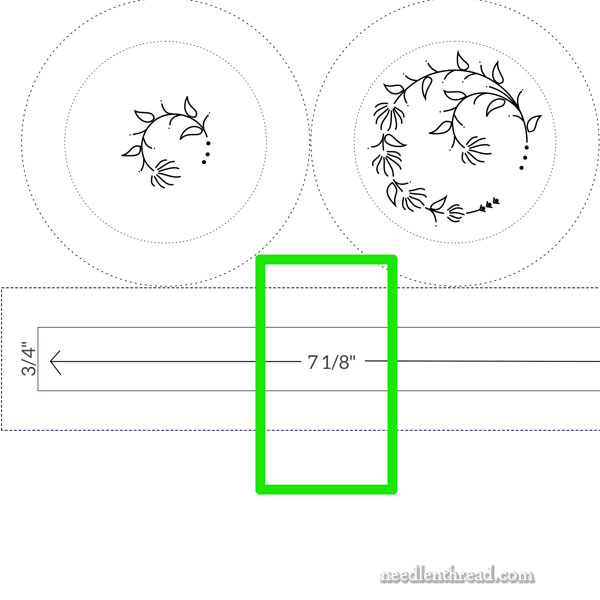
The diagram above shows the layout for the decorative band. The “count” of the fabric is not necessarily perfectly accurate, except where the stitches are actually indicated.
You’ll start in the middle of the band, working the stacks first, and then everything counted outward – if you choose to use the weave of the fabric to help you with placement – is accurate on that chart above.
If you’re working on a different fabric or a plain weave, the outside lines of stem stitch and whipped running stitch are spaced at about 1/8″ intervals from the center laced stacks.
Because the Strathaven fabric included in the kit is practically even-weave, it is easy to achieve an accurate spacing on the band.
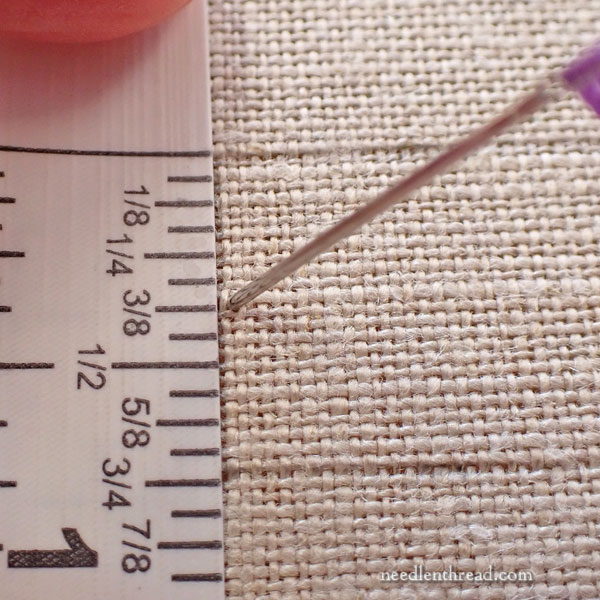
Start by using a ruler or the tape measure to find the center of the band, at 3/8” (see photo below left). Pick the “groove” in the linen nearest the 3/8” mark.
This will be your center line. All the middle stitches in the stacks of purple stitches will be along this center line.
I started the stacks of three purple stitches about three fabric threads in from the edge of the marked design area (indicated by the black dashed line). I started the first stack with the center stitch, because it is exactly in the center of the band.
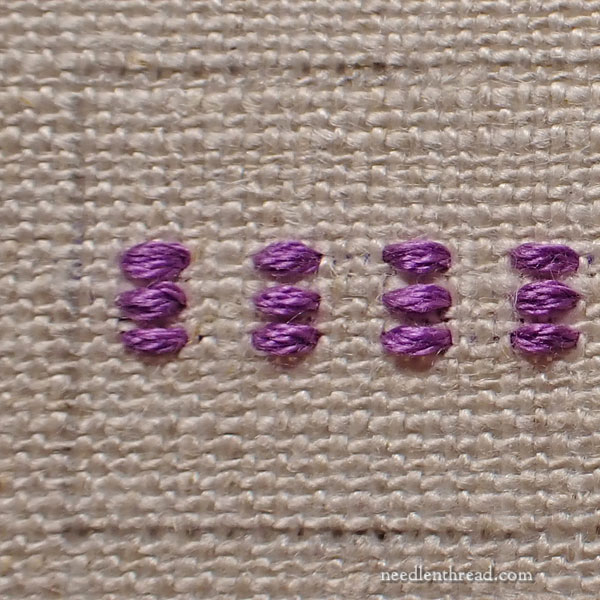
Each straight stitch in the stack is stitched over three threads in the linen, and there are two threads between each stitch, vertically.
Each stack is separated by four threads of linen fabric.
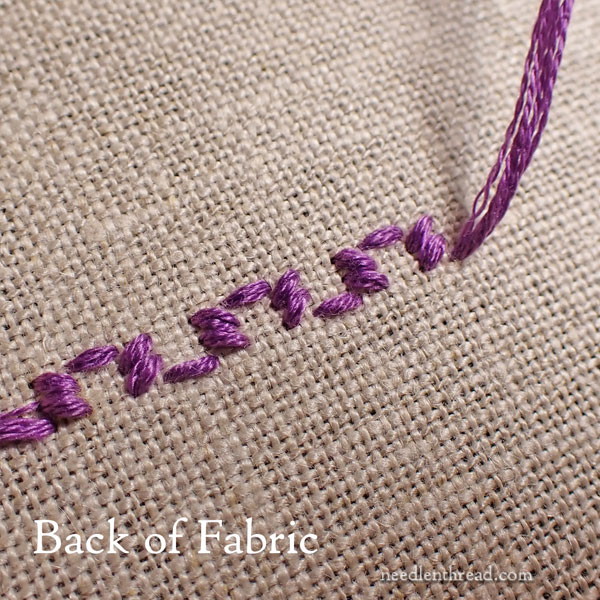
Work the stacks as a complete stack before moving on to the next. You can see above the pattern that develops in the back of the fabric by stitching the stacks one at a time.
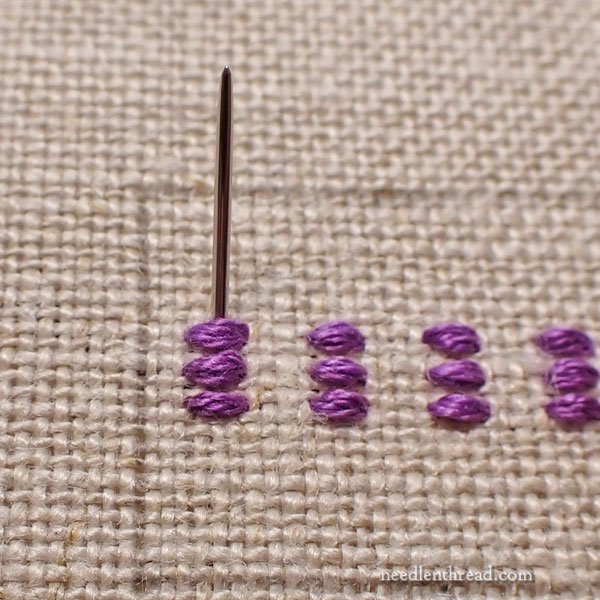
Stitch all the stacks first, then lace the stacks.
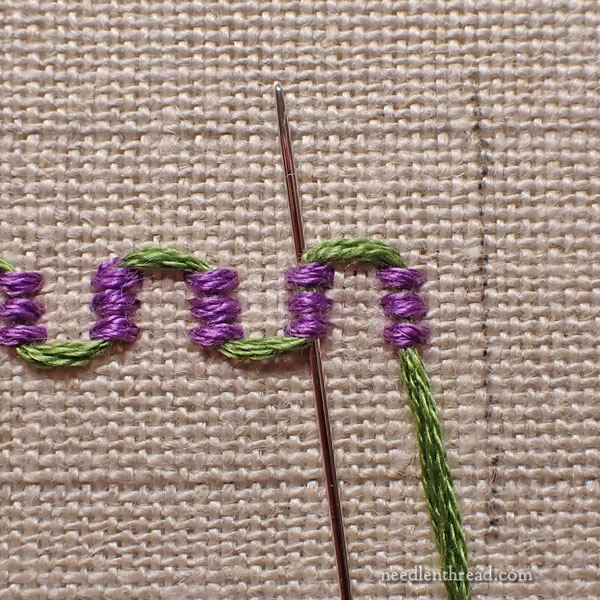
To lace the stacks, switch to the light green – all six strands. Start behind the top stitch in the first stack and bring the needle and thread to the front, so that the start is hidden behind that stitch.
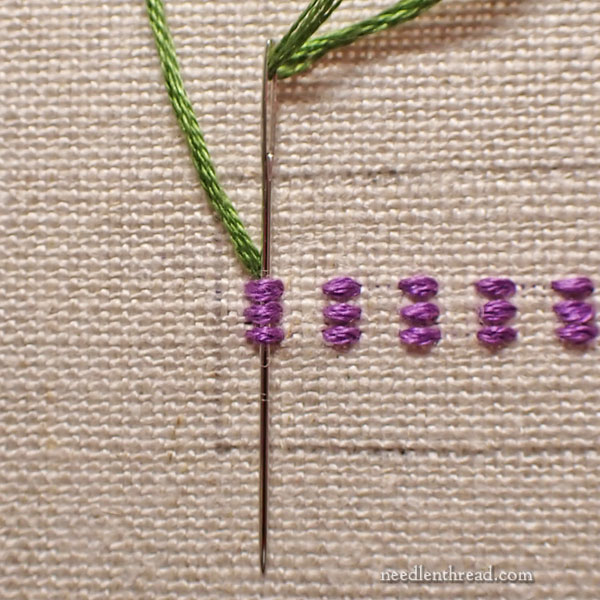
Without picking up any fabric, pass the needle down behind that first stack, to begin the lacing.
Then, pass the needle and thread UP behind the next stack.
Continue down the line, alternating up and down behind each stack, until the band is laced in one direction and looks like an undulating line.
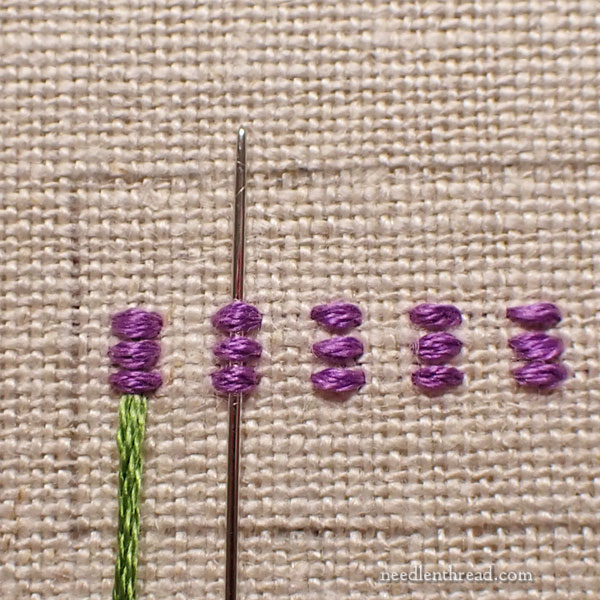
When you get to the end of the first pass, turn around and lace in the opposite directions, so that a ring of green thread forms between each stack.
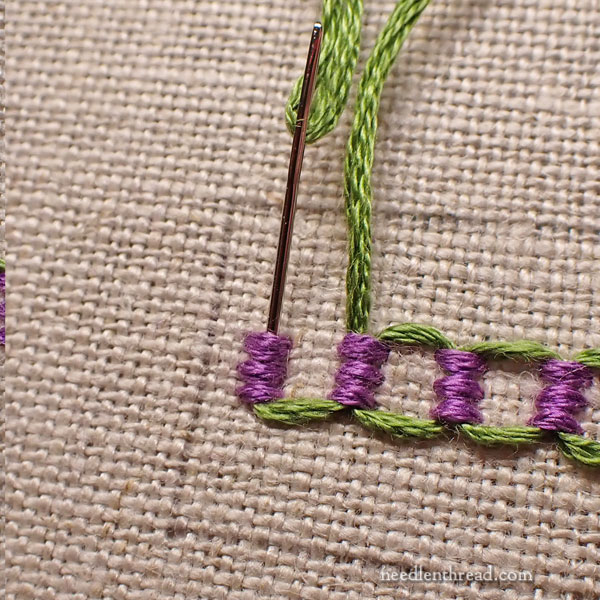
Finally, when you reach the first stack again, take the needle and thread to the back behind the stitches in the first stack.
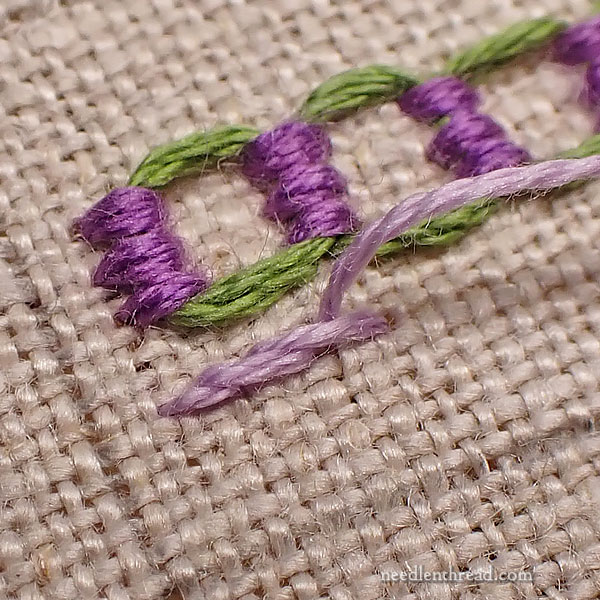
Now, work the next set of lines out on the decorative band (indicated by the light purple straight line above and below the stacks in the diagram at the top of the post).
These next two lines are worked in stem stitch, using two strands of the lightest purple.

Finally, work the outer most two lines on the decorative band in whipped running stitch.
Use three strands of the dark green for the foundation stitches, over three fabric threads, with two threads between each stitch.
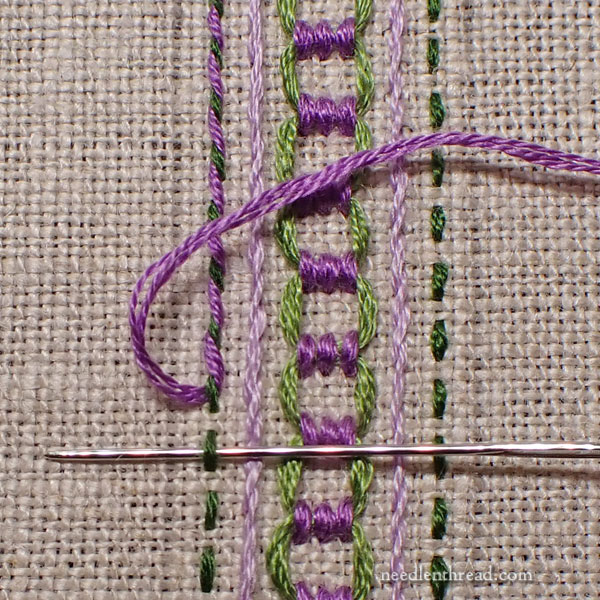
Whip the running stitch with three strands of dark purple, always passing your needle under the running stitches in the same direction as you work down the line.
I find it easier to turn the fabric so that the band is vertical in front of me, to work the whipped stitches. Make sure as you whip the stitches that you are pointing your needle away from the inside of the band that’s already embroidered.
It doesn’t matter if you whip up the line or down the line – do whatever is comfortable, depending on whether you are right or left handed.
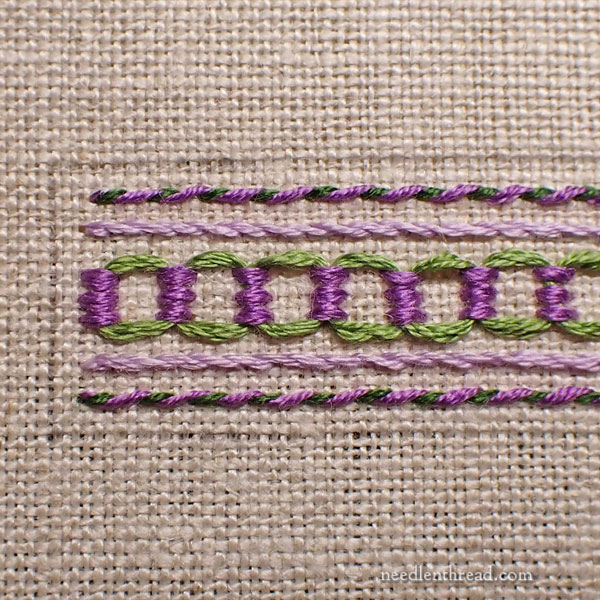
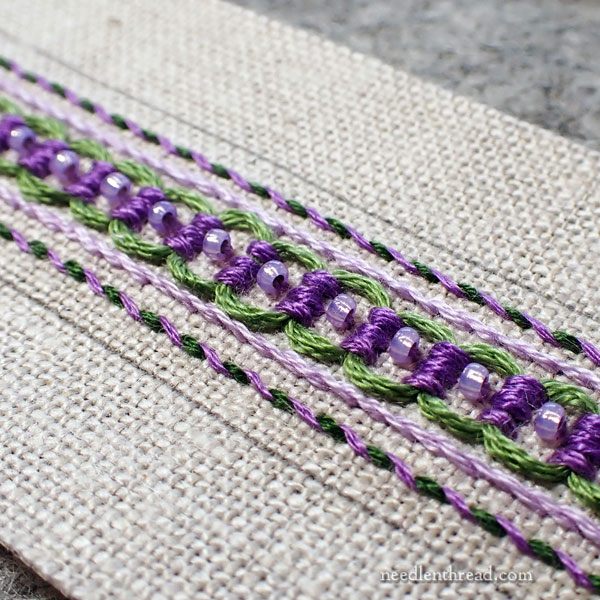
This is the finished embroidery on the decorative band.
Working the Band with a Hoop
If you are working with a hoop, it is likely the whole side strip will not fit within the hoop. In this case, you will need to move the hoop around on your fabric as you work the embroidery.
Because of this, it makes sense to work as much embroidery within the ring of the hoop as possible, before moving it.
For example, you might work the stacks, the stem stitch, and the running stitch before moving your hoop to a new area along the strip. Then, when you’ve finished all the stacks, stem stitch, and running stitch, lace the stacks and whip the running stitch while the hoop is in one position before moving it to the next to finishing the lacing and whipping of those stitches.
Beads!
Now that the embroidery is finished, it’s time to add a little sparkle with beads.
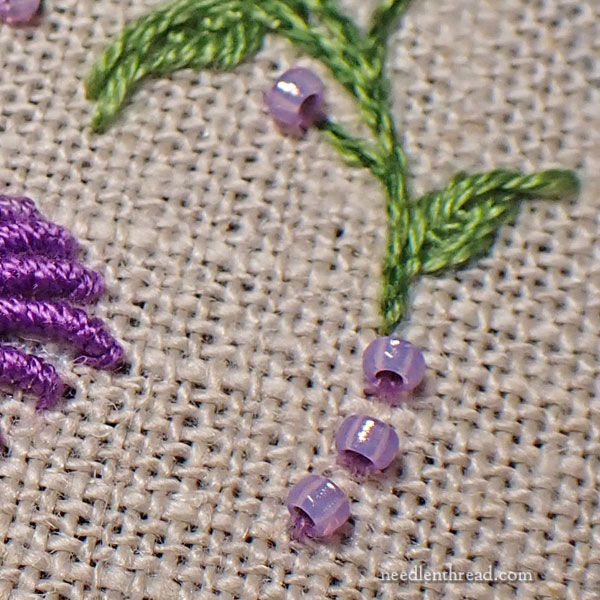
The little dots on the pattern (top and base) indicate where to sew the beads.
Use one strand of light or medium purple floss and the embroidery needle (medium eye, sharp tip) to sew the beads on.
Pass through each bead twice. If you can pass through in a cross stitch (x) formation, that’s great! But if you can’t, at least pass through the beads twice.
The beads should sit up on the design like a tire.
Use the 15/0 (smallest beads) on the top, base, and side.
The side strip is beaded in the center of each green ring formed by the lacing in the center of the band.
Beads and Hoop
If you are working in a hoop, the bead embroidery may pose problems, because you can’t place a hoop over already-sewn-on beads.
Sew the beads in place on the top and base parts of the design first.
Then, fit your hoop as best as you can on one side of the band, so that the hoop does not overlap any of the top or base beads.
Then move the hoop to the other side of the band, making sure you don’t overlap any beads with the hoop.
When you’re finished with the two sides, chances are you will have a small area in the middle of your band that has no beads.
Sew these on without the hoop. Just be mindful of your tension – you don’t want to pucker the fabric by sewing the beads too tightly, but you also don’t want to sew them too loosely, so that they don’t stand up on the fabric as they should.
And there you have it! The decorative band is beaded, the top and base are beaded, and in the next installment, we will begin the finishing process.
You will find all the articles for this project listed here in the Project Index for Purple Posy, which is listed under “Tips & Techniques” in the main menu of the website.
If you would like a full materials kit for Purple Posy, you will find it available here in the shop. So far, the materials haven’t been too complicated, but as we move into finishing, there are lots of little pieces necessary to build our tape measure cover. All those pieces are available for you in the kit!
Have a terrific weekend!
It is beautiful. Thanks for sharing