


Following the arrival and distribution of Elisabetta Sforza’s new book on padded satin stitched monograms earlier this year, I’ve received lots of little questions here and there lately about satin stitch techniques.
Today seems like as good a day as any – especially because I’m pushing a deadline on another project! – to highlight a few previous articles that are jam-packed with tips on satin stitching.
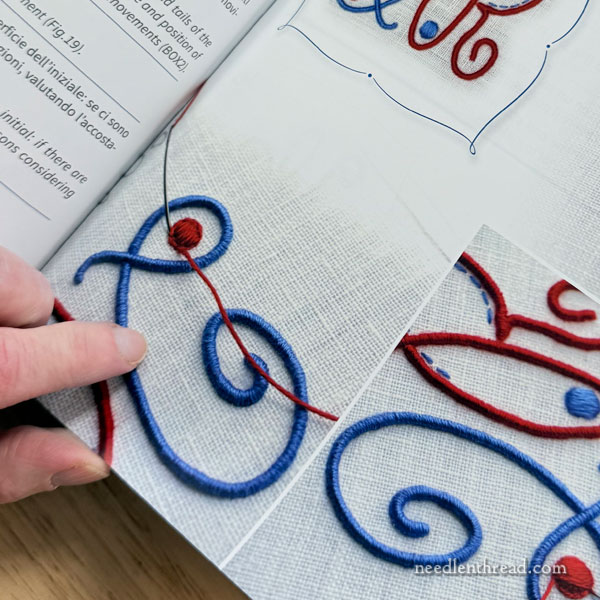
For those who haven’t seen it, you can find my detailed review of The ABC of Padded Stitch here, and the book is also in stock in the shop, if you don’t have your own copy yet.
Keep in mind that Elisabetta’s book deals with the art of monogramming, using padded satin stitch. But the stitching principles in the book apply to padded satin stitch in other applications as well.
Today’s Key Point: the Size of the Element
The key point that I want to highlight today, before directing you to other articles on satin stitch, is this:
Satin stitch is not a full-ground-covering stitch for large elements on embroidery projects.
If you try to satin stitch an element that is really just too large for satin stitch, it doesn’t work out well.
The larger the element – the longer the satin stitches have to be – the more unstable the stitches become and the more difficult it is to achieve the smooth, solid finish that satin stitch can achieve on small elements.
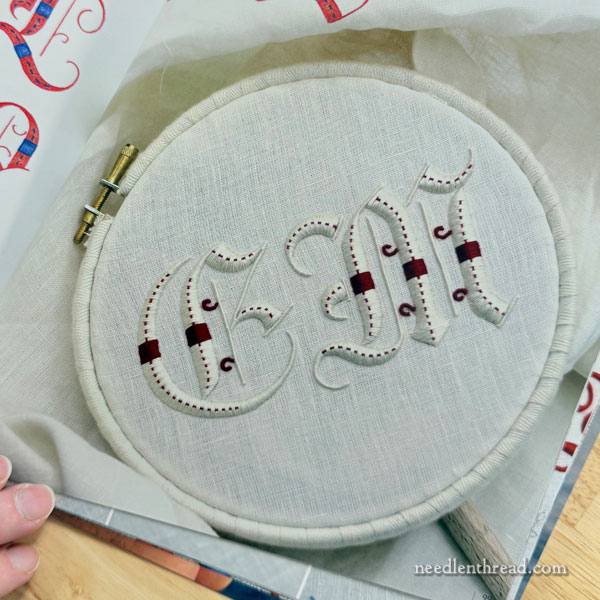
Satin stitch works great on small elements, where the satin stitches are usually less than an inch long.
In some cases, the area for satin stitch might be larger, but it’s approached differently. You might be working with much heavier thread, with padding underneath the whole area (to provide friction under the stitches to help hold them in place), or you might be working some kind of other stitches over the satin stitch – like lattice or linear holding stitches – to secure them in place (such as this type of lattice work or this notion of “Italian stitch” used often in ecclesiastical embroidery, or even this idea of vermicelli).
In short, satin stitch isn’t really meant to cover huge spaces.
Satin Stitching Tips & Practice Makes Perfect
Monograms make a perfect springboard for practicing satin stitch, but you can also practice on small elements – like petal shapes, circles, curving lines that might vary in width (but not too wide), small squares, rectangles, and the like.
The old adage that “practice makes perfect” is true here. As much as our quick-video-demo world would make you believe otherwise, the fact is that it takes practice to achieve good results with stitching. Most how-to videos today are presented at rapid speed, making everything look very easy, with perfection achievable at the first attempt. This can lead to discouragement if your first attempt might fall a bit short!
But it’s ok to make mistakes; it’s ok for your stitching on your first attempt to look not as great as you want them to!
Don’t Be Discouraged!
Just because a thing isn’t perfect the first time you try it, doesn’t mean you won’t improve. Do it again. Practice! The more you do something, the better you’ll get at doing it. Slow down, relax, and try again.
If you’re struggling with satin stitch, Twelve Tips for Sensational Satin Stitch provides a collection of stitch tips for satin stitch that will help you master satin stitching techniques. (I know the title says “ten tips” but the article actually has twelve tips in it!)
In that collection of tips, you’ll find solid points for improving your satin stitch, whether you’re working on monograms or any other (small) design element.
Have a great weekend!

Leave A Comment