
Welcome back to our current stitch-along here on Needle ‘n Thread, where we are on Lesson 3: The Blossoms.
If you’re just joining you, you can find all the previous installments of this stitch-along available in the Blackberry Brambles & Blossoms project index, here. As the stitch-along progresses, each lesson is added in chronological order so that you can easily follow along.
If you are a member of the Needle ‘n Thread Community on Patreon, you have already received this lesson in a very handy PDF format, easy for downloading and printing.
Remember: the stitch-alongs are meant to progress at your own pace. Even though I’m putting these instructions out once a week, it doesn’t mean you have to stitch the whole lesson before the next one is posted. It’s not unusual for Life to get in the way of our projects, so just go at your own pace!
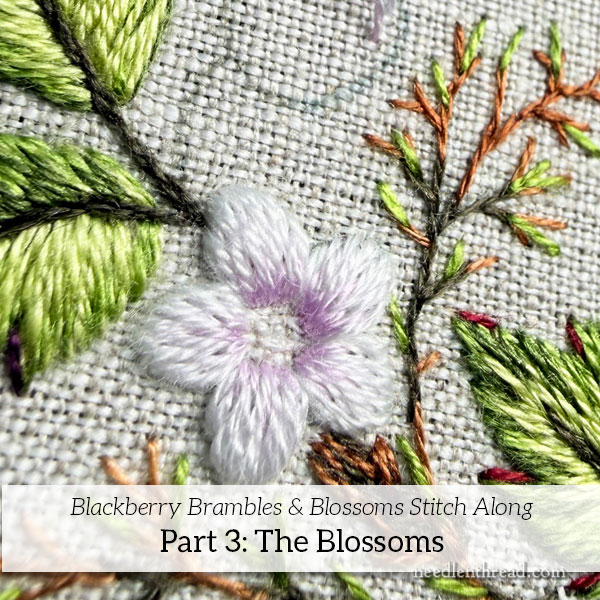
The blossoms on Blackberry Brambles & Blossoms are embroidered using a padded satin stitch shaded with straight stitches. Because the flowers are small, they work up pretty quickly.
For the petals, I used one strand of blanc, light violet (DMC #24) and medium violet (DMC #153).
For the centers, I used the green 15/0 Miyuki seed beads (see the materials list here) and green floss. You can use either green, depending on how much green you want. I used both on different blossoms and either looks fine.
A little pat of beeswax comes in handy as well. If you have the kit, you are supplied with all of the above.
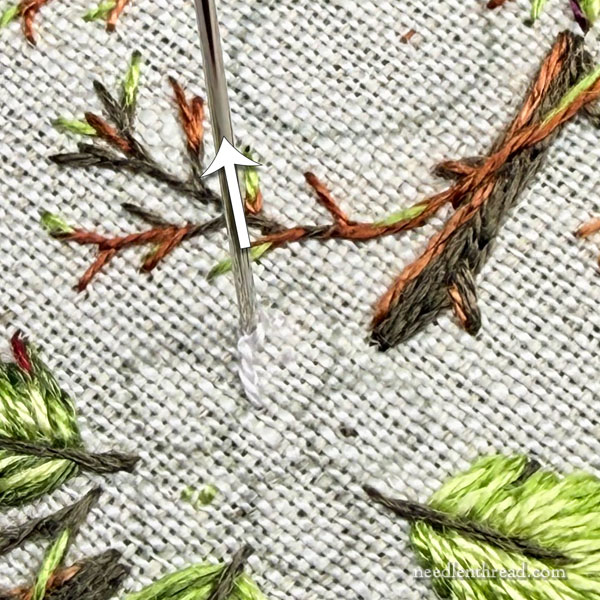
Begin with one strand of blanc and split stitch the design outline of all the petals on a blossom.
Because these elements are very small, keep the split stitches quite small. It is helpful to maintain tension on the working thread from the back to hold each stitch flat on the fabric while you bring the needle up from behind to split the stitch.
If you find split stitch too persnickety, you can use split backstitch (splitting DOWN into each previous stitch instead of up), or even just plain backstitch. Just be aware that it is sometimes difficult to get a smooth outline on a curved shape with backstitch.
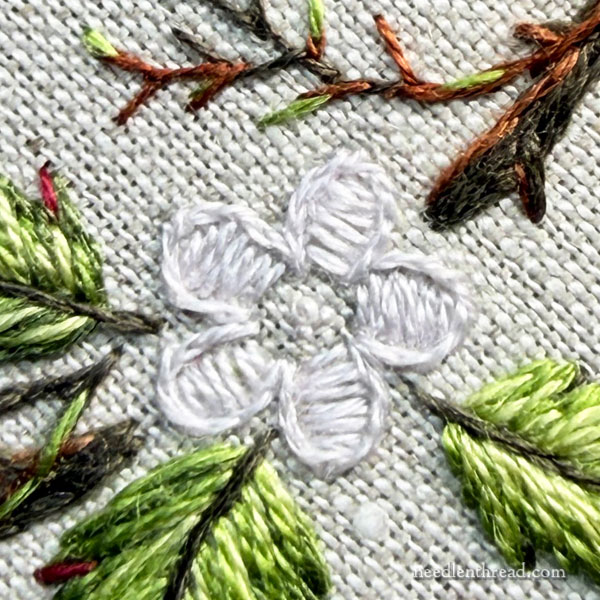
After split stitching around all the petals, work horizontal straight stitches inside the petals as shown above. When working these straight stitches, start each subsequent stitch right next to where you ended the previous stitch, so that you aren’t carrying the thread the whole stitch length on the back. This is a surface satin stitch, rather than a typical satin stitch, and it helps to avoid building up padding on the back of the fabric, too.
You can read more about this approach to “surface satin stitch” for padding here, in this tutorial on building up padding for satin stitched dots, if you are not quite sure how to do it.
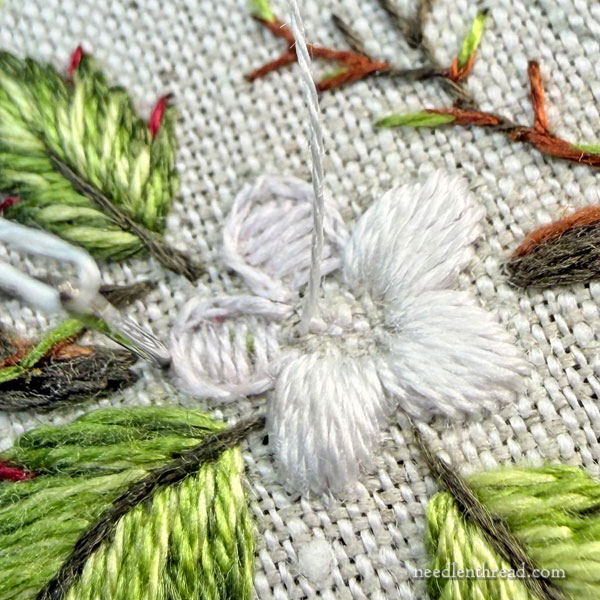
Now you’ll work the satin stitch over the petals, vertically. The satin stitch extends from the center inside base of the petal and up over the top of the petal, over the split stitch outline.
Start with a satin stitch in the center of the petal. Then, work satin stitch out to the edge of the petal on one side of that center satin stitch. Then, go back to the center and work out to the opposite outside edge.
On some petals, the stitches will be more or less absolutely parallel and they’ll cover the petal completely. On other petals, you may find that you have to “fan” the stitches a little to get good coverage.
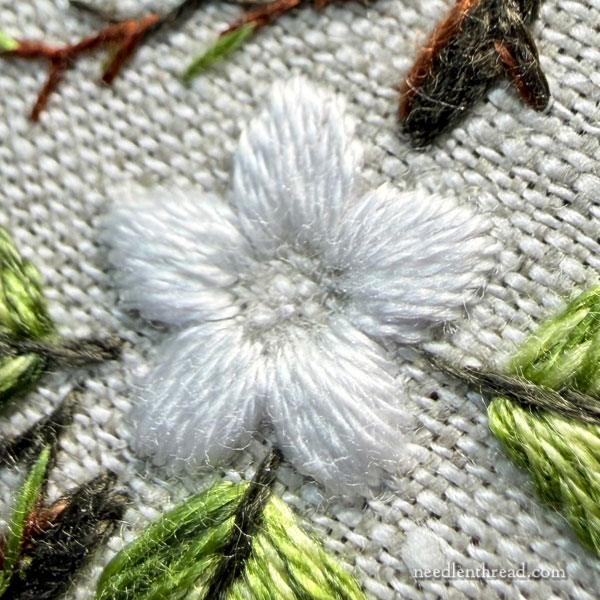
Here, you can see the completed satin stitched petals around the whole blossom.
On the upper right petal, you can see that I had to sort of “fan” the stitches out, to get good coverage on that petal. If I used perfectly parallel stitches on that petal, it would have gotten too crowded and it would have looked a bit weird.
The difference between the fanned and un-fanned satin stitch won’t be noticed at all in the final product.
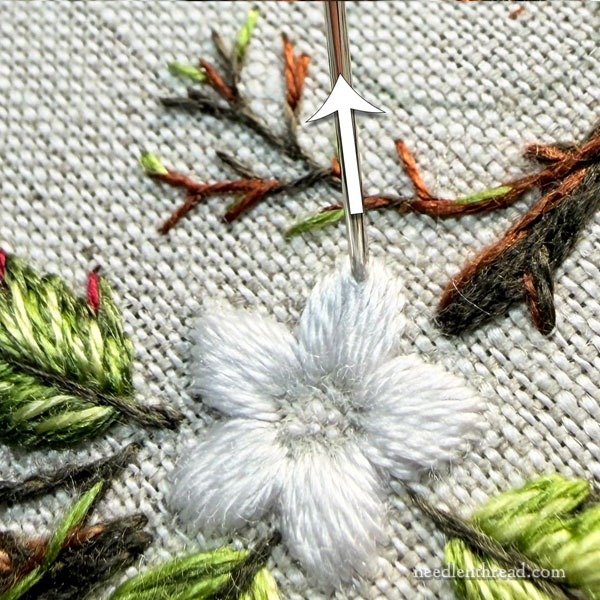
Switch to one strand of the lightest violet (24). Bringing the needle up into the satin stitch layer by the outer edge of the petal in the center, splitting the satin stitch, and work a straight stitch down the middle of the petal to the base of the petal.
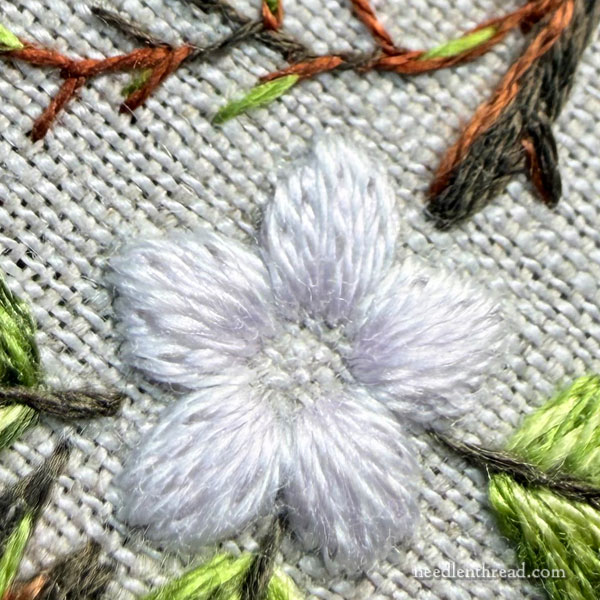
Work two stitches to each side of that center stitch, coming up into the white layer and splitting the stitches and going down at the base.
These stitches will all be “fanned” towards the growth point, which is the center base of the petal. You want these stitches to be fanned out across the petal, so that there is white space between the stitches near the outer edge of the petal, but the stitches will be very close (possible touching) at the base of the petal.
There should be five of the light violet stitches fanned out in each petal.
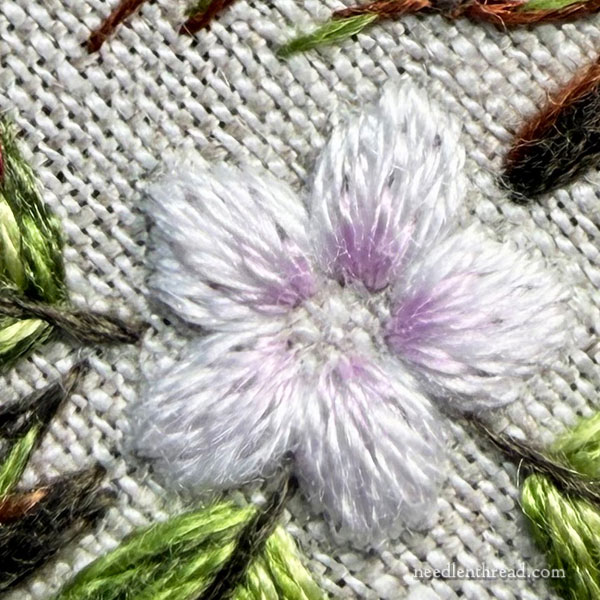
Now, you’ll do the same with the medium violet (153), only you’ll start these stitches in the lower third of each petal, and you’ll only work three stitches in the medium violet.
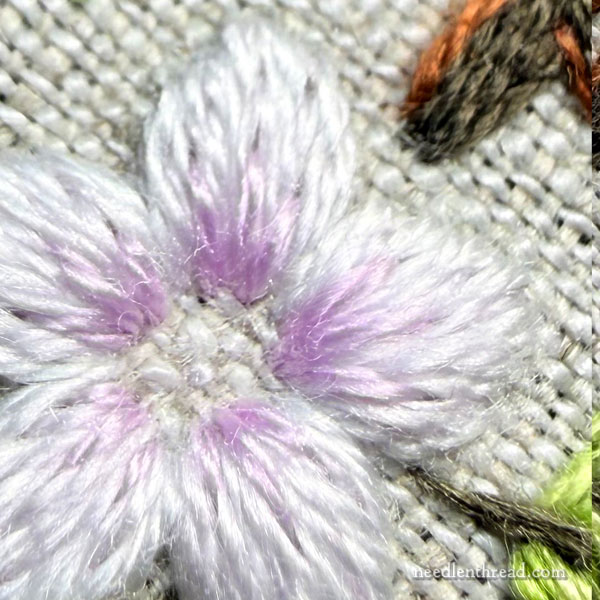
You can see a close up here of the different layers: satin stitched white petals, split with five long light violet stitches originating near the outer edge of the petals and fanned across the petal, and then split with three medium violet stitches originating in the lower third of the petals.
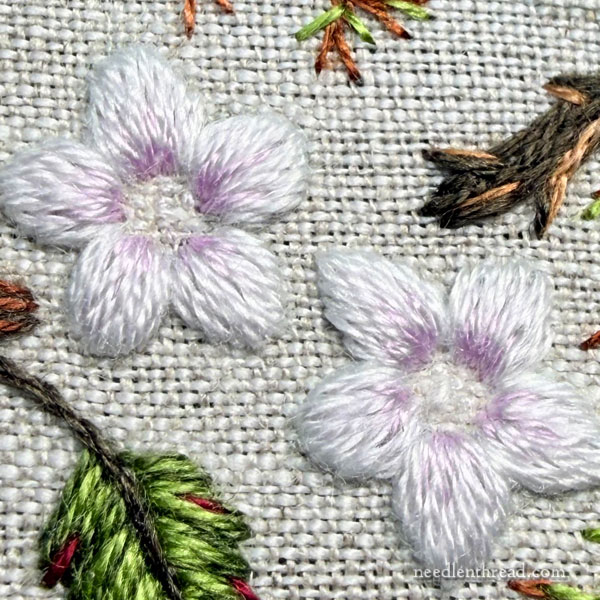
Now we’ll fill the centers of the blossoms.
The centers can be filled with 15/0 seed beads, or with a mixture of seed beads and French knots, or with all French knots.
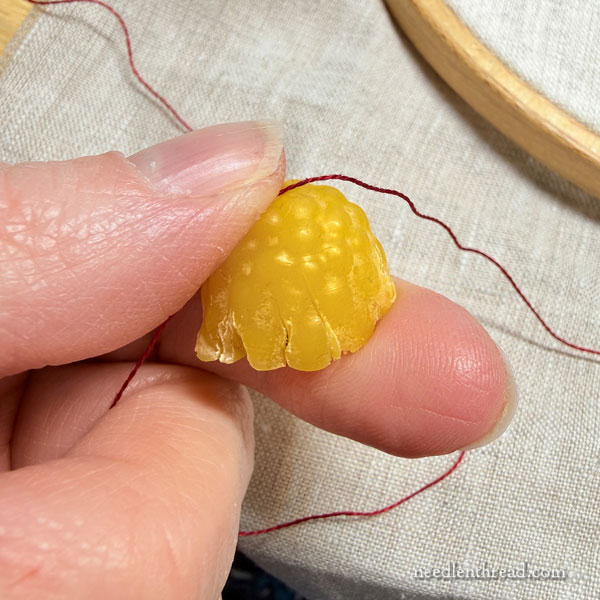
When working with beads, it is helpful to wax the embroidery thread. This adds a little extra strength and protection to the thread.
I use Miyuki round seed beads which are the highest quality glass beads you can find today. They are quite smooth and they don’t generally pose a problem when stitched on in place with embroidery floss.
Still, a light application of beeswax helps to strengthen the embroidery thread for the beading process, especially for those who are uncertain of the smoothness of the beads they are using.
Please note that beeswax is used here as a thread protector and strengthener. It is not intended (nor should it be used) as a “thread conditioner” (to smooth cranky threads) for regular embroidering. Beeswax can darken embroidery threads, especially noticeable over time, and therefore, it isn’t intended for the visible, decorative stitching in embroidery.
To wax thread, I use 100% beeswax. I use my own beeswax “petites” that I make, and one little berry-shaped petite is included in the kit. The wax is quadruple filtered, soft cap wax (not brood / comb wax), without any additives. It is not prone to becoming brittle like the beeswax cakes you’ll find in the sewing notions aisle. This is the same wax I use for my beeswax petites that are available here.
If your beeswax seems hard or brittle, hold it in your hands for a few moments to slightly warm it, or sit it in a sunny window. Normally, the process of working with it will make it softer.
Holding the thread gently against the wax, lightly draw your thread against the surface. It may cut into the wax slightly (typical of a good, softer wax), which is ok. You just don’t want it sticking in the wax so that that the thread breaks when you pull it. Draw the thread over the wax two or three times lightly, and then draw the waxed thread through your fingers a few times to work the wax into it and remove any crumbs or flakes.
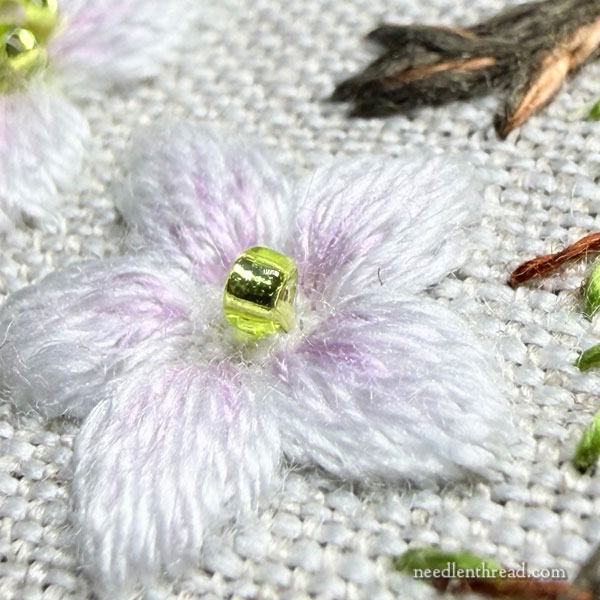
Sew a bead directly in the center of the flower by passing a straight stitch through the bead.
You’ll bring the needle up in the fabric, string on the bead, and then pass the needle down into the fabric a bead-width away from where the needle first emerged.
The bead should sit up on the fabric like a tire.
Now, work another stitch through the center, so that there are two stitches passing through the center of the bead.
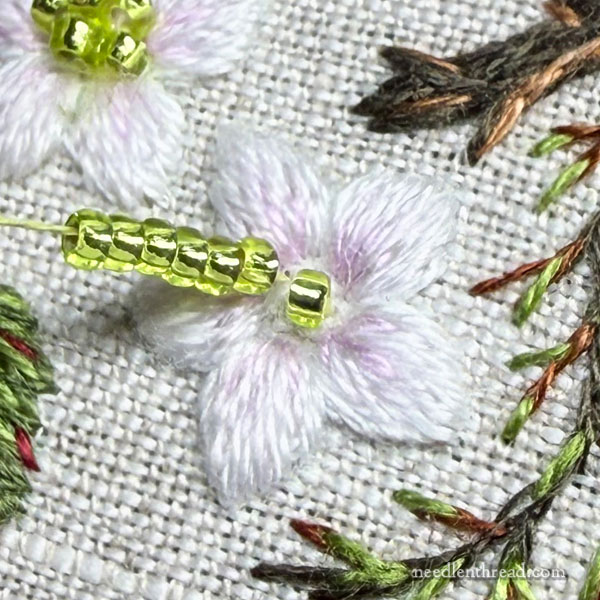
Bring your needle and thread to the front of the fabric next to the center bead (anywhere next to it) and still inside the center area of the blossom.
Pick up six seed beads and string them down onto the thread as shown above.
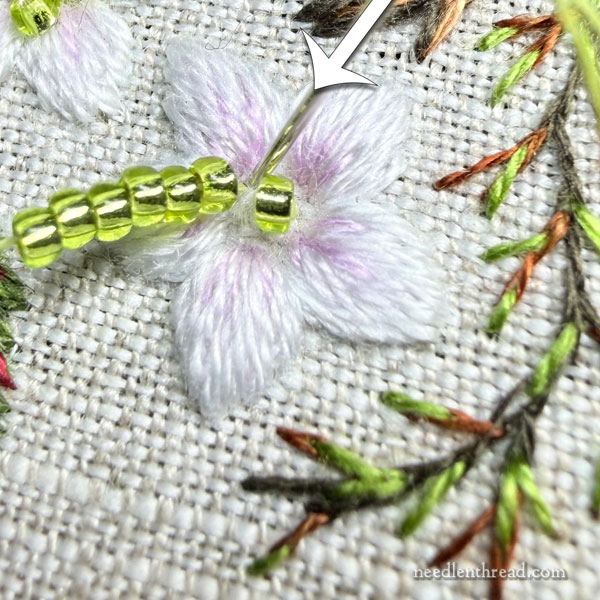
Take the needle and thread to the back of the fabric right next to where you emerged, and pull through slowly.
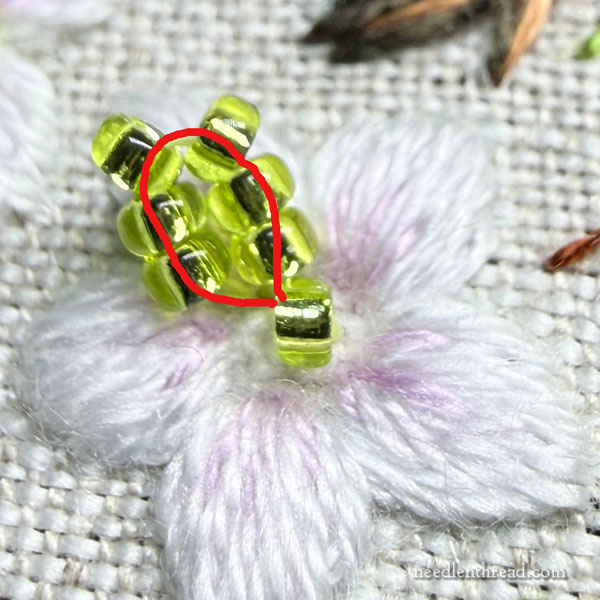
As you pull through, the beads will form a kind of loop. It might not be a perfectly round loop, but that’s ok!
Above, the red line indicates the path of the thread through the beads.
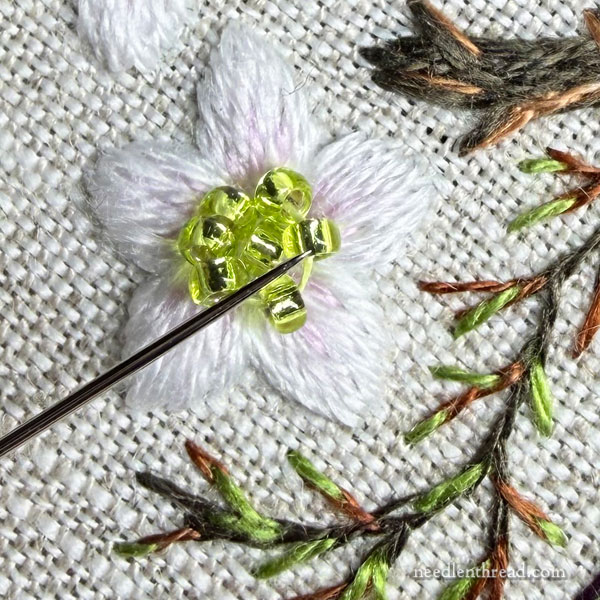
Use your needle or your finger to manipulate that loop of beads around the center bead, so that the loop of beads encircles the center bead, as shown above.
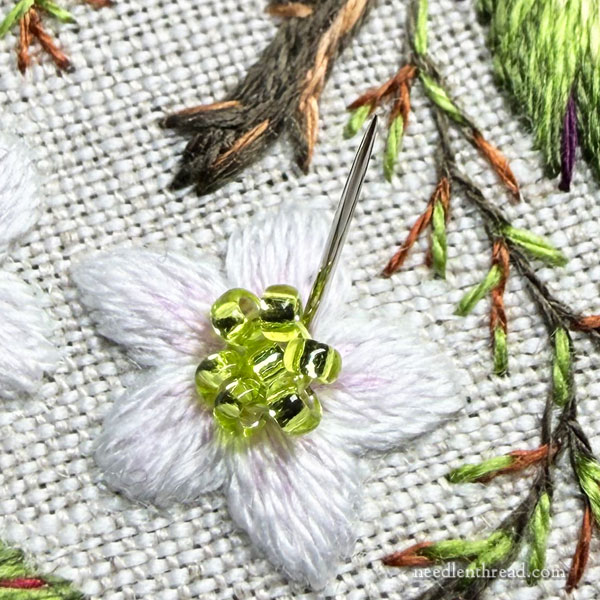
Now, work your way around the loop and stitch a tiny holding stitch over the thread between the beads, to keep the loop in place around the beads. You don’t have to stitch between every bead. Three stitches around the circle will work fine.
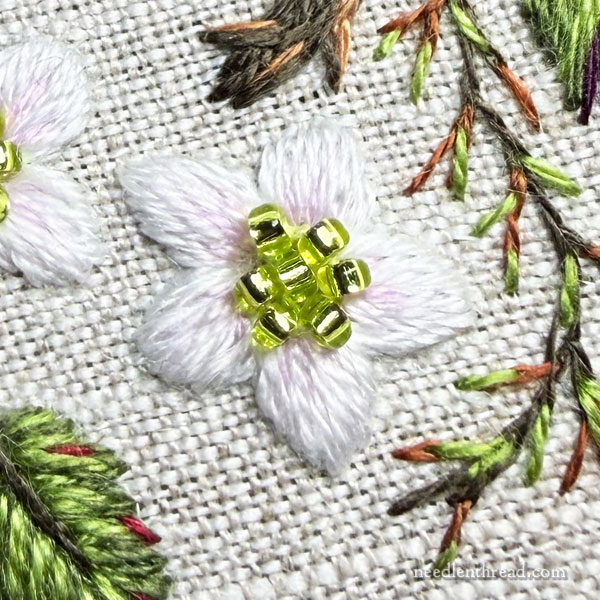
This will give you a typical beaded “flower” for the center of your blossoms.
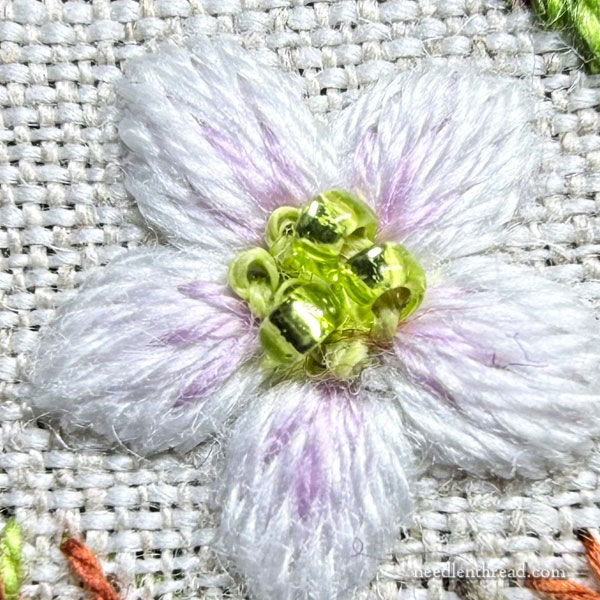
If you find the beaded “flower” center too large, you can always stitch down about three beads, and fill in around them with French knots.
Alternatively, if you don’t want to use beads at all, you can fill the center entirely with French knots.
And that brings us to the end of Lesson 3!
I know it’s a lot of information in one article, but be assured that the blossoms work up quite quickly! You’ll stitch them faster than it took me to write the instructions, I’m sure!
In next week’s Lesson 4, we will stitch the berries. Woohoo!

Leave A Comment