

Hello, my friends, and welcome to the first installment of Blackberry Brambles & Blossoms, which is officially the introduction to the project.
In this introduction, I’ll share the materials and tools I used and the design. We’ll discuss preparing your project for stitching, and I’ll also summarize what you can expect from the stitch-along and a general outline of the timing.
If you are a member of the Needle ‘n Thread Community of Patreon, you have already received this information in PDF format for downloading and easy printing. It was published last night. Additionally, you have received the first stitching lesson (the branch and brambles), which was published earlier this morning.
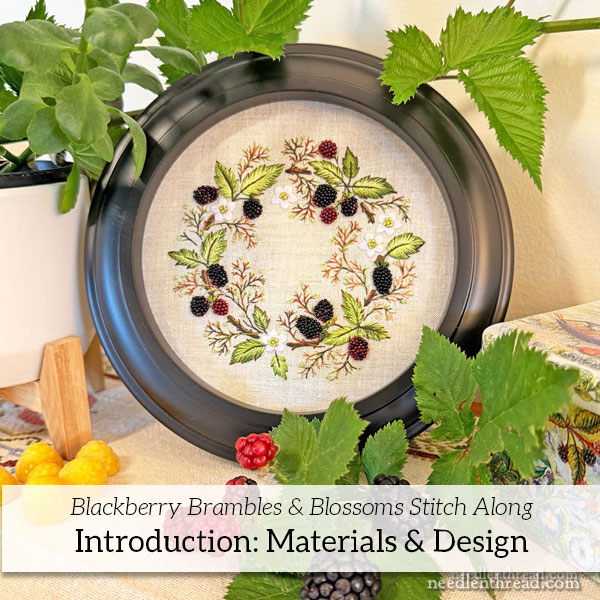
Before beginning any project, it’s important to gather all the supplies so that you have on hand everything you need to complete the project successfully.
Supply List
Fabric:
I used a 9″ square piece of fine, high count linen ground fabric in a natural color. In the US, this linen was imported by Access Commodities as part of their “Legacy Linen” line. They call it “Manuscript Vellum.” I have used it on numerous projects on Needle ‘n Thread, and it was always one of my preferred ground fabrics when I wanted to work with natural linen. It is Graziano’s 6262 linen, in “Melange.” I do not know if they are still producing it – it is harder to come by than previously, and I have been told that Access Commodities is not importing it any longer.
It is somewhere between a “lightweight” and a “medium weight” linen. It has a high thread count, a close, fine weave, and a very smooth hand. It is light enough to see through when using a lightbox for tracing the design. You can substitute any natural colored linen that is lighter in weight and has a close weave to support the embroidery stitches.
I did not use a backing fabric behind the linen. It does not need one.
Thread:
I used DMC stranded cotton in the following colors:
Blanc, 24, 105, 153, 154, 470, 472, 498, 936, 3021
Beads:
I used Miyuki 15/0 seed beads (rocailles – round, not delicas) in the following colors:
0014 lime green transparent silver-lined
0315 garnet gold luster
0401 black opaque
Other Tools:
Needles – crewel #8 and #10. I used John James.
Beeswax – a small bit for strengthening the thread for the beads
Hoop – I used a 6″ hoop (I have plenty of high quality 6″ hoops in stock, here)
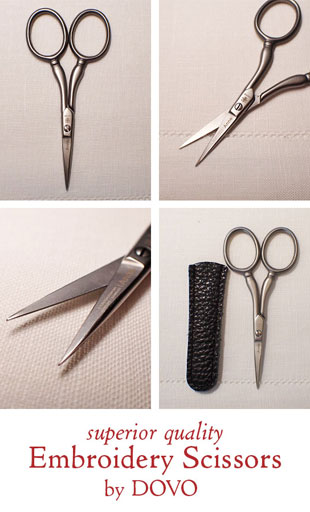
Scissors – small and sharp! These Rainbow Cutters are excellent little affordable scissors. If you want to “graduate” to high quality, life-long embroidery scissors, I carry Dovo scissors here. And for those who like color and a little bling on their fine scissors, I carry Golden Forge Scissors here.
I used a laying tool while I worked on the leaves (you’ll see why when we get to that point). It’s not absolutely necessary to use a laying tool, but it does help. We carry small, affordable laying tools in the shop, here. You can also use a very large tapestry needle or something similar as a laying tool.
Transfer tools – if you do not have the kit, you’ll need your favorite transfer tools for getting the design onto the fabric with your favorite transfer method.
The Design
The design for Blackberry Brambles & Blossoms prints at just a hair over 4.5″ in diameter. Please make sure that your printer settings are set to print at actual size on US “Letter” sized paper.
Here is the PDF for the design:
Blackberry Brambles & Blossoms embroidery design
Please note that when you transfer your design, you don’t need to transfer the “branch” line – which is very thick – as a solid line. It is represented as a thick, solid line so that it’s easy to distinguish. On the design transfer with the kits, it is a thick solid line, because the entire line is covered. It’s up to you how to you transfer that line, thick or thin!
Set Up
For this project, if you don’t have the kit, you’ll need to transfer your design to your ground fabric.
When this is complete, mount your fabric either in a hoop that holds the entire design (6″ is ideal) or on a frame (stretcher bars, slate frames, or similar). This type of embroidery requires that your fabric is drum-taut while stitching.
Stitch Along Timing
Next week, we will begin with Lesson One, where we will stitch the branches and brambles.
Each subsequent week will follow with one lesson for the next elements: leaves, then blossoms, then berries.
Finally, we will address how to prepare the piece for framing and how to frame it.
There will be a lesson once a week, unless something odd surfaces in Life. Right now, the lessons are planned out once a week.
However, you do not have to stitch at that pace. If your life is too busy to keep up with the publication pace, it’s not a problem. You can access the lessons as you need them and work at your own pace! Please do not feel rushed or stressed to “keep up”!
I will also create a Project Index and publish it on the blog, so that you can access the project index to find all the lessons listed chronologically as we progress.
That’s it! We’re ready to start stitching, which we will do next week with Lesson One!
See you then!

Leave A Comment