
You may remember that earlier this year, I finished a maniturgium with the text “Duc in Altum” and some fish embroidered on it.
If you’re not sure what this strip of linen is and what it’s used for, you can read about its liturgical use – and what becomes of it after its liturgical use – in this article.
Many, many years ago, I embroidered a maniturgium (you can see it here) with the Latin text “O Clemens, O Pia, O Dulcis Virgo Maria” on it, which comes from a prayer called the “Salve Regina” (or, in English, the “Hail, Holy Queen”).
These were all bespoke (commissioned) pieces.
I’ve taken on another one. After all, being stuck at home a lot lately, it gives me something to do there. I might as well be doing something productive!
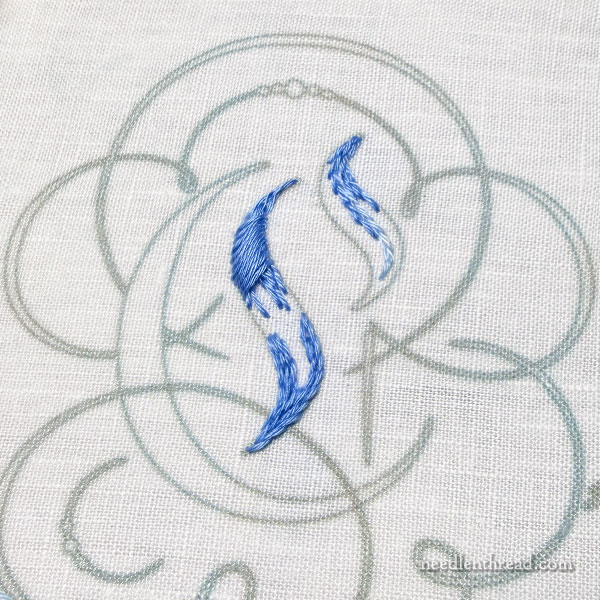
This embroidered maniturgium is, in a way, a repeat. It is similar to the “O Clemens” one I worked years ago.
But I plan to approach it differently in a few ways.
For one thing, I’m testing floche as an option for the embroidery.
I’m not 100% certain I’m going to go with floche, but I’d like to. I enjoy embroidering with floche. It’s a pretty thread and it’s affordable. It holds up nicely when a thing is washed. I don’t have to worry about temperamental thread for pressing or anything like. It’s just a good cotton.
Instead of just outlining the letters (which is what I did last time, when I was working in a hurry against a shortdeadline), I plan to fill them.
But I’m not sure how I want to fill them.
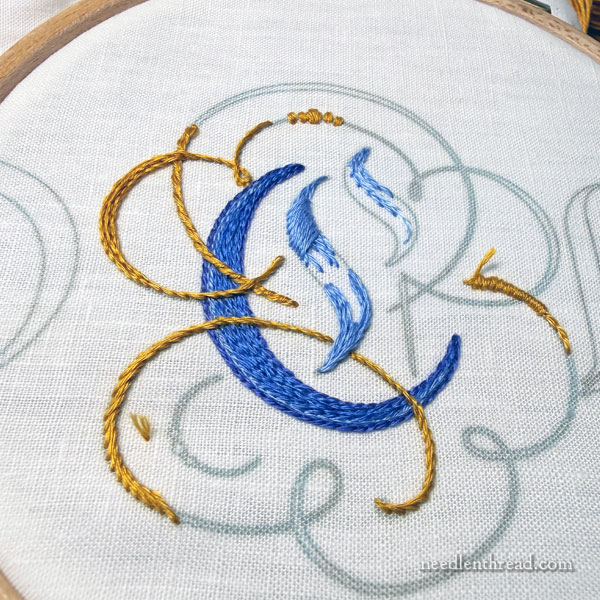
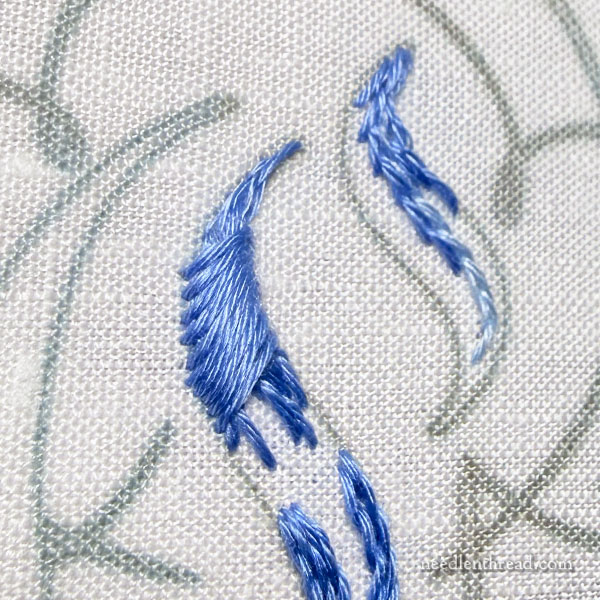
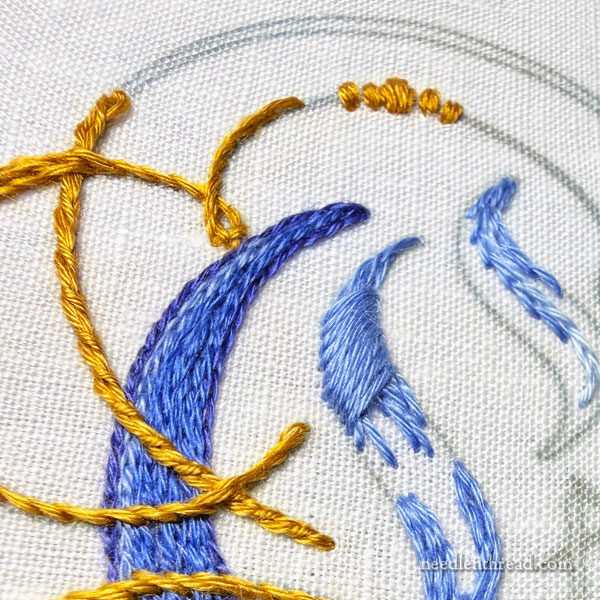
Here, I tested the letter with split stitch filling. It’s hard to tell, but the bulk of the C is outlined with a darker blue, then filled with a slightly lighter shade, and I worked just a tiny streak of light blue along the inside outer edge.
I think I prefer to split stitch filling to satin stitching. I can do more with the split stitch.
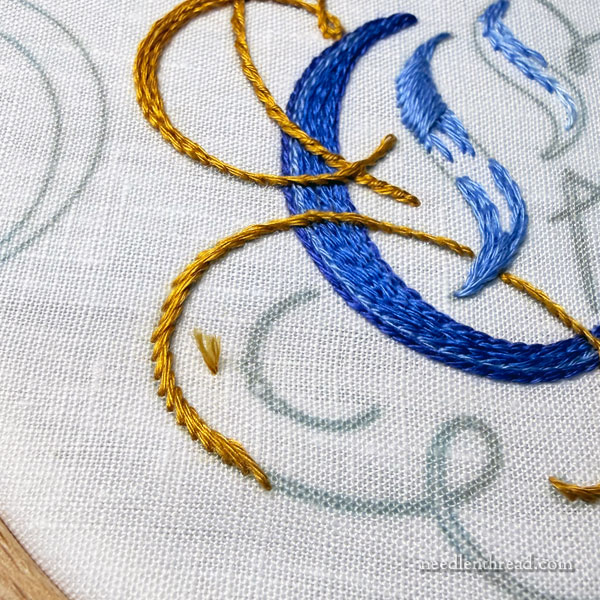
For the gold filigree, I’m playing with different stitches.
Stem stitch was my natural first choice. With stem stitch, you can broaden and narrow up a line by changing the angle of the stitches. You have to be careful, though, with this approach. If your stitches become uneven, or if you don’t concentrate on keeping the angle consistent, it can end up looking wonky.
I’m not sure I want a method that’s going to take too much concentration. LOL! (I’m a lazy stitcher, when I’m stitching at home!)
Still, I do like this method with stem stitch a lot! I like how you can move it into practically a satin stitch and then right out again into stem stitch. It’s smooth. It’s pretty. It’s efficient.
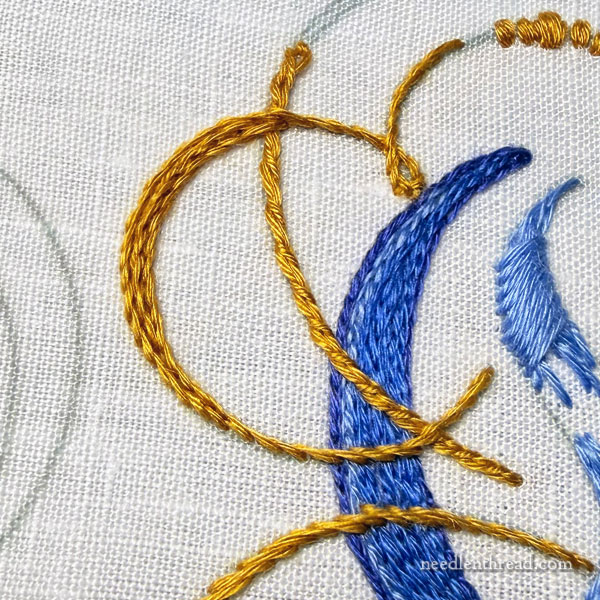
Still, it’s not the only way.
I also played with stem stitch worked in rows, to fill heavier parts of the filigree.
I like this approach because you can precisely control the thickness of the filigree line. It seems easier to be consistent when thickening and thinning the lines. It’s not as smooth as adjusting the slant on the stem stitch, though, so I’m not sure I like the finished look as well.
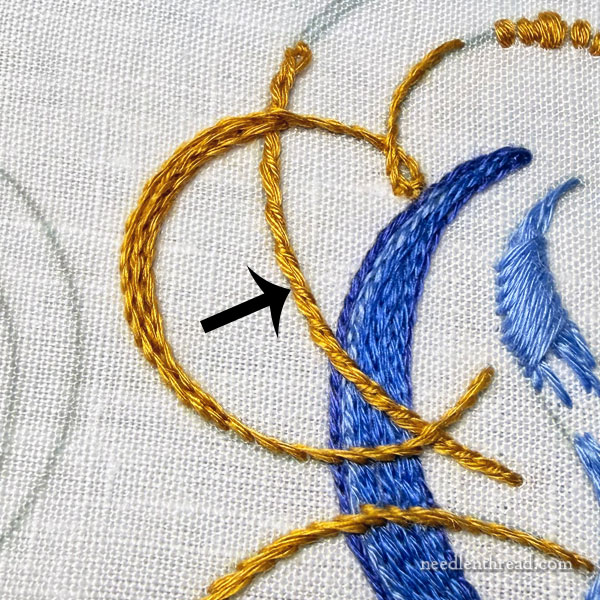
I thought about mixing up the kinds of stitches I use on the filigree, to add a little more texture and interest to it.
To this end, I played with a whipped chain stitch for some of the filigree paths. The arrow points to it in the photo above.
I’m not really sure I want to mix up the stitches on the filigree. I like variety, but this isn’t necessarily the type of project that benefits from variety.
Besides, stem stitch – with either approach: slanting or in rows – provides its own texture!
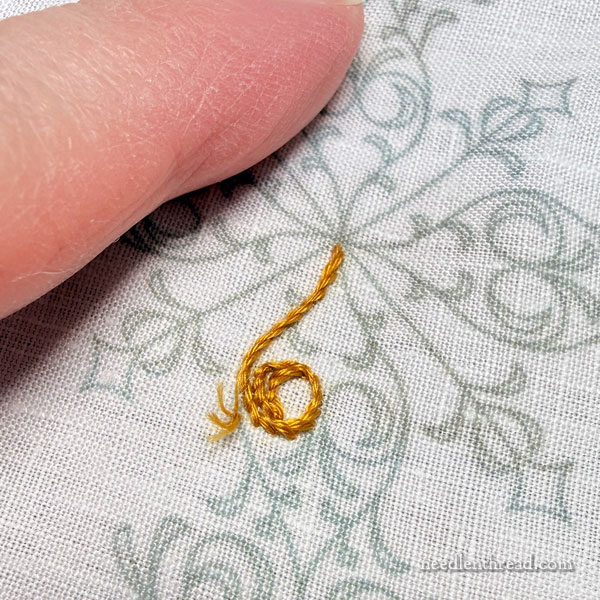
Besides the text on the maniturgium, there will be an ornamental cross or other symbol on each end of the text. I really like this cross, but it might be too ornamental.
It’s only about 2.5″ high, and that 2.5″ inches are packed a lot of little scrolly bits. The floche might be too heavy for this, but if I’m doing the lettering in floche, I want to keep the ornamentation consistent in weight with the lettering.
If I switched to a lighter weight (like a single strand of floss), the ornamentation would get lost.
I might switch the design element to something else. We’ll see.
These are the aspects I’m testing out on this project, then. I’ll share progress on it as I go. I’m looking forward to getting it underway so that I have something engrossing to work on from the home front!
Coming Up
Later this week, we’ll start with the preliminaries for Blackberry Brambles & Blossoms, the current stitch-along that’s starting up here on Needle ‘n Thread. The kits are presently sold out, but we may be able to stock a few more. I’m working on it!
Don’t worry, though – you can stitch follow along without the kit. As with all stitch-alongs on Needle ‘n Thread (at this point, anyway), I’ll provide the materials list and the design so that you can work from your own supplies.
And even if you don’t stitch the project, you can still glean a lot of embroidery tips to add to your own repertoire and use on your own projects!
The kickoff, then, is Friday, with the preliminary information – materials, tools, design, etc. The first stitching lesson will be next week. That way, those who have ordered kits are more likely to have them in hand by the time we start.
See you Friday!
I find your work on commissioned ecclesiastical pieces fascinating. When you’re designing these pieces, how much do you consult with the client on these questions of color, stitch, etc during the process? It seems like the nuances you’re talking about would be completely lost to a non-embroiderer. I find that even when I’m describing something I’m working on. People tend to think it’s a lot easier than it is!
Normally, it’s left up to me for this type of project.
How did you do the pattern transfer onto the linen in these pictures? It looks very neat/precise!
May I ask how you transferred the design to the fabric?