

Welcome to the first stitching lesson on our current stitch-along!
Today, we’ll be stitching the branch and the brambly bits on Blackberry Bramble & Blossoms. If you’re just joining in, this article will give you information about the stitch-along and what you can expect as we work through the project. And last week’s Introduction article will provide you with the materials & tools list, as well as the design.
If you are a member of the Needle ‘n Thread community on Patreon, you’ve already received this lesson in PDF format for easy downloading and printing.
Note: Always read through the instructions completely at least once before you begin stitching, so that you know where you’re going and what to expect along the way!
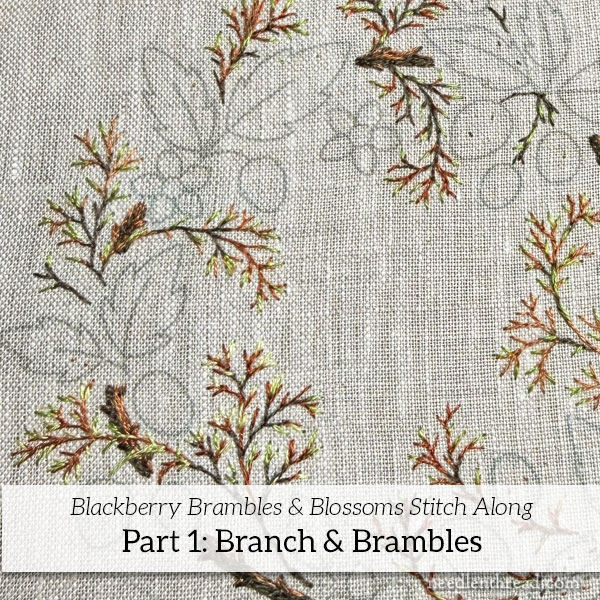
In the order of stitching, we’ll be working the thick branch around the design first, and then, section by section, the twiggy branches that fill out the design.
I’ll be working these parts with the two browns, dark and variegated, and with two greens, light and medium.
The thick branch is worked with two strands of floss in the needle. All the other stitching is worked with one strand of floss.
Predominantly, all of this is worked in what I call a “sketchy” split stitch. Occasionally, you will use simple straight stitches, and you might use “split backstitch” (where you split down into a previous stitch instead of up) here and there on the twigs. The entire process of stitching the lighter twigs is very loose and open to interpretation, as you will see. You’ll be stitching “free style” for much of the twigs, embroidering on the provided design lines but then filling with all the detailed smaller bits that are not part of the printed design.
That’s the overview. Let’s start!
You can begin your embroidery however you wish. Some stitchers use knots on the back. Some don’t. It really won’t change the outcome of this, as long as you’re not using gargantuan knots that would show through as a big bump on the front.
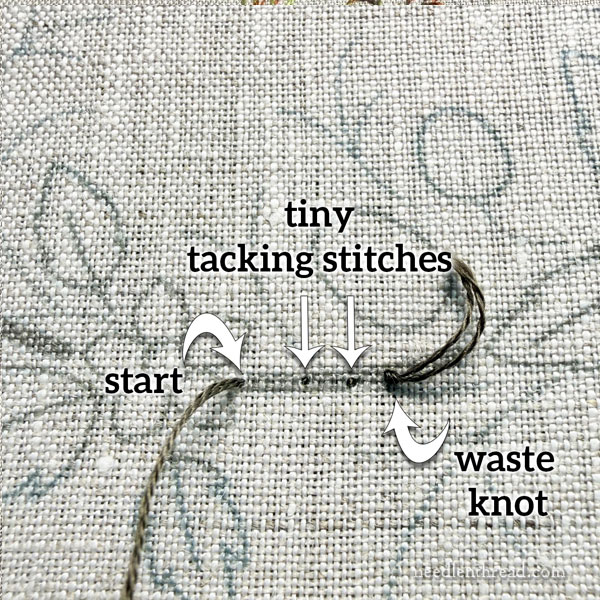
I like to use a waste knot and tiny tacking or holding stitches to start my threads. With a knot at the end of the thread, I pass down into the fabric on the design line, a short distance from where I will start stitching. Working towards my starting point, I take two or three teeny backstitches into the fabric (still on the design line or in the design area). These stitches will be covered with embroidery. As I approach the knot, I cut it off.
This is a secure way of starting your thread. You can end your threads this way, too, if you have a design area close to your ending point, so that you can cover your tacking stitches. In the case of ending the thread, you work three tiny tacking stitches in a close cluster within a design area that will be covered with embroidery and you snip the thread.
To each his own – if you prefer starting with a knot on the back, just use a knot!
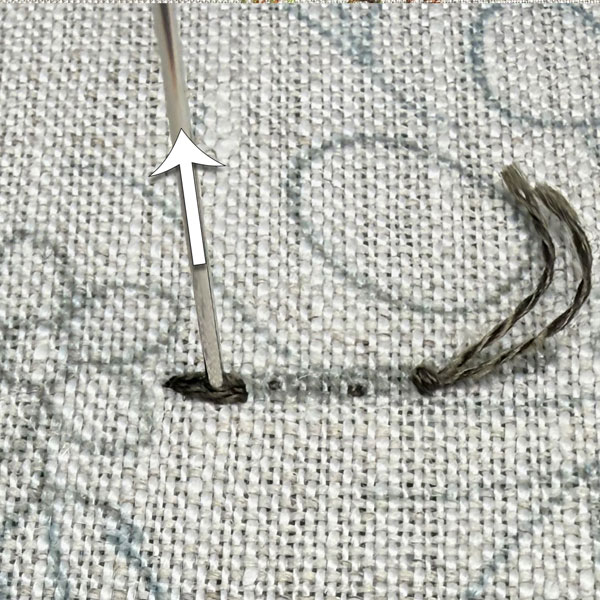
Using two strands of dark brown in the needle, you’ll be working the split stitch over the thick branch elements on the design.
You’ll work the split stitch in rows close together. The stitches can be long – about 1/4″ – or they can be shorter where they need to be.
When you work the split stitch, you go forward a stitch length and down into the fabric. Then you come up and split that stitch to start your next stitch. If you’re not familiar with the split stitch, you’ll find a video tutorial for it here.
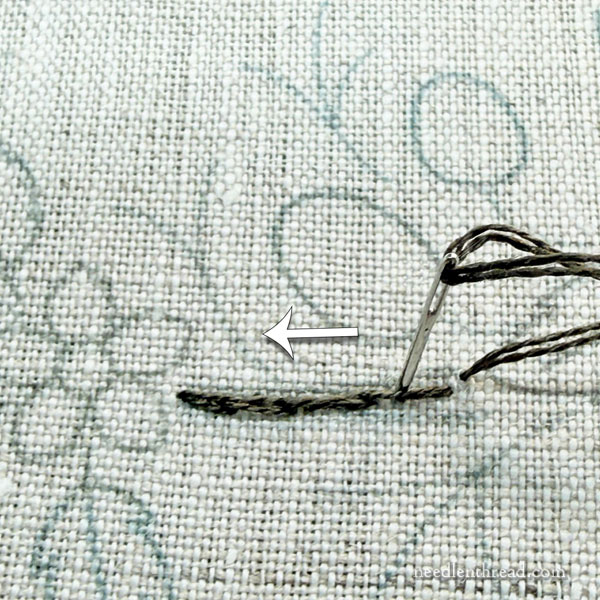
Work the split stitch in one direction over the thick branch line, and then, when you reach the end of that segment of the branch, return in the other direction.
Again, work the rows closely so that there’s no fabric showing between them.
You’ll fit three rows comfortably over the thick design line to cover it.
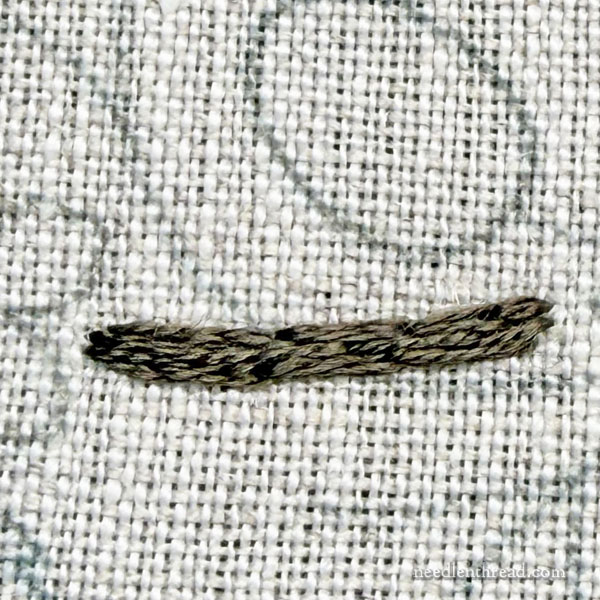
You don’t have to be at all obsessive about stitch length and consistency on this. It’s supposed to be a little rough and sketchy.
If you can alternate your stitch lengths so that they aren’t all starting and ending right next to the starts and ends of the stitches in the previous line, that’s great. But if you don’t, it doesn’t really matter. Your goal is simply to cover up the thick design line with about three closely worked rows of split stitch.
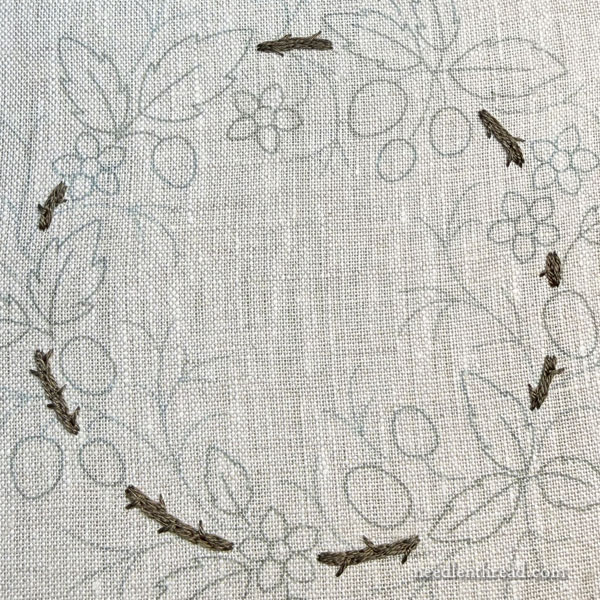
When you finish each branch segment – or when you finish all the segments (up to you!) – switch to one strand of dark brown and work little “thorns” along the branch segments.
These little thorns are made with two straight stitches that form a triangle, with the tip outside the branch.
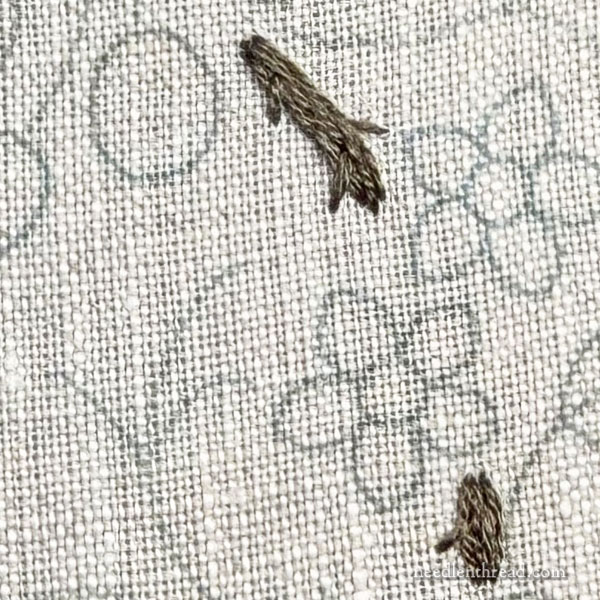
Sometimes, you might just use a single straight stitch.
Sometimes, the thorn will originate on the very edge of the branch segment.
Sometimes, the thorn might originate slightly inside the branch segment.
Vary this, but again, don’t obsess over “perfection.” Don’t try to make every thorn exactly the same length. You want some variety so that it looks natural.
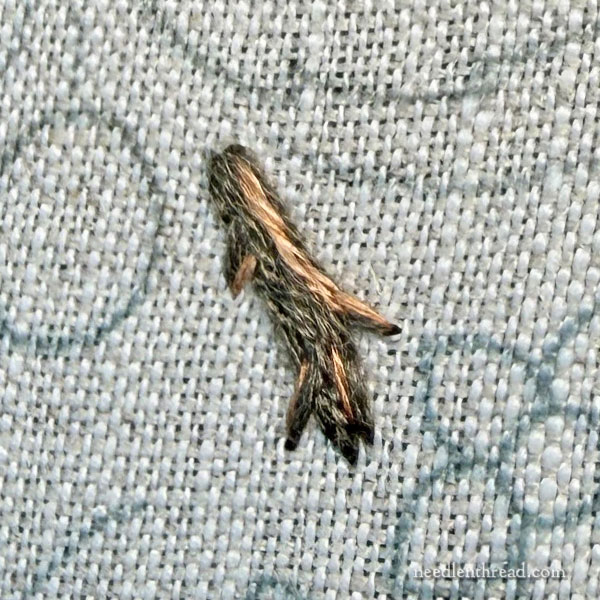
Now, switch to one strand of variegated brown.
Go over each branch segment and add some of the lighter brown along the branch segment, using split stitch or just a simple straight stitch here and there. You don’t have to cover one whole side of the branch segment – you just want to touch in some little sketchy lighter brown lines.
Add a tiny straight stitch of lighter brown to a thorn here and there, too, for variety.
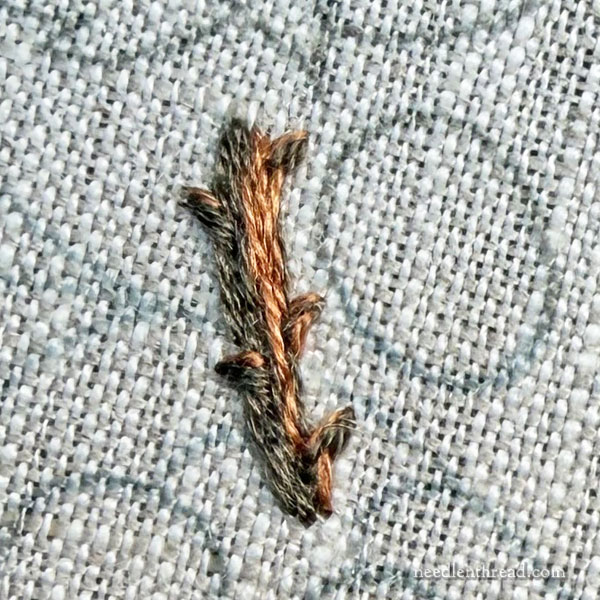
You can see on this segment that I added quite a bit of the lighter brown on one side. There’s no hard-and-fast rule here. You’re just touching in the lighter brown to add depth and interest to the branch.
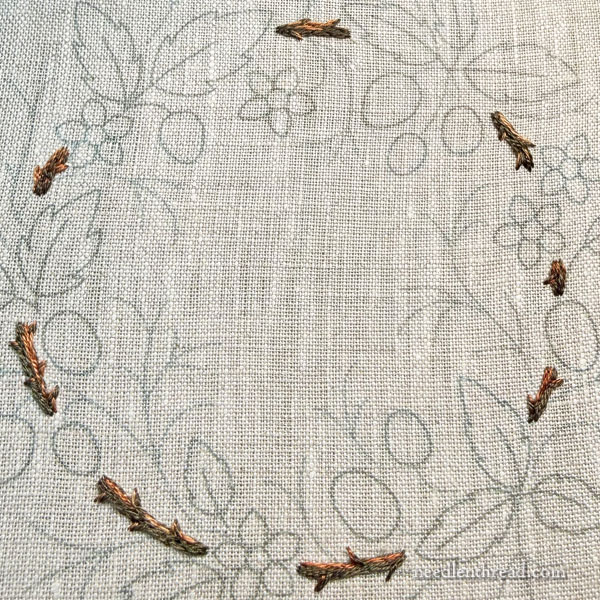
You can see here the placement of the highlights on my branch.
Placement does not matter so much – it’s a small touch of interest, and the design is quite small, so it won’t really matter in the overall scheme of things where these highlights end up.
When I worked mine, I imagined a light source from above the top edge of the embroidery, and I worked the highlight according to where I thought the light would shine on the branch from that source. Again, it doesn’t really matter on something this size, with as much “filler” that will be covering the branch. That’s just how I did it.
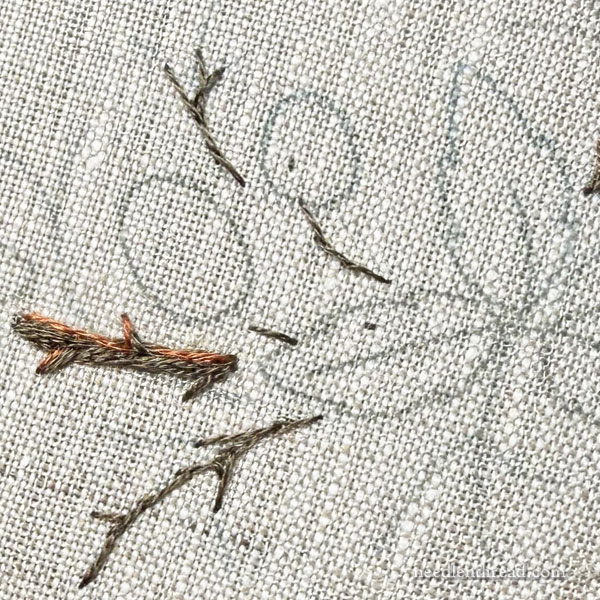
Now to the twigs!
Switch to one strand of dark brown.
Work long split stitches over the design lines that form the brambly twigs.
When you work these split stitches, it’s ok if your twigs are a bit angular and sketchy. That’s what you want! If you make your stitches somewhat long covering the main stems (say, 1/4″), and you split at the ends of the stitches, you’ll get nice, thin, twiggy lines, which is what you’re after.
As you go, add little “off shoots” of twigs onto the foundation lines, to fill in around them.
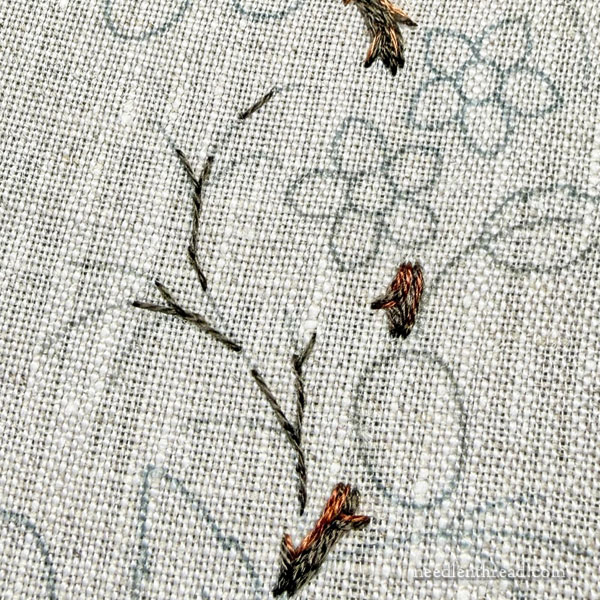
As you work these lines, don’t cover the whole line in the dark brown. Leave spaces here and there between the dark brown stitches, as shown above.
You’ll be coming back over this with the lighter brown to fill in those spaces.
This will give your twigs some variety and lighten them up.
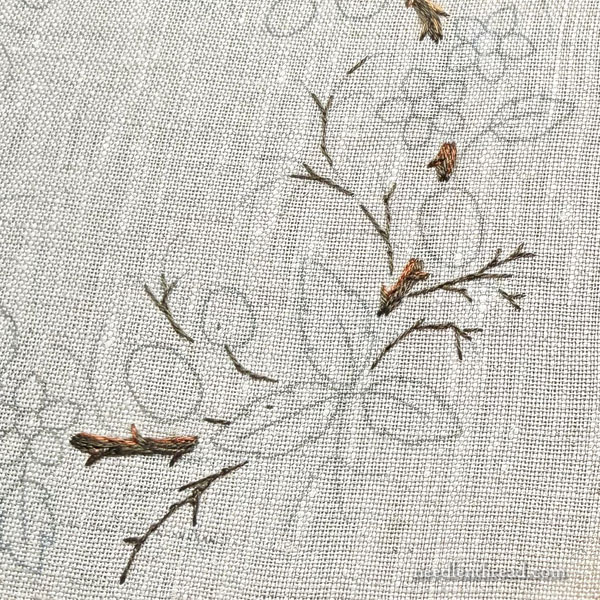
You can see how I’ve skipped parts of the design lines and left spaces. You can see where I’ve added little jutting twigs – some longer, some shorter, some with other twigs coming off them, filling out the whole bramble – as I stitched.
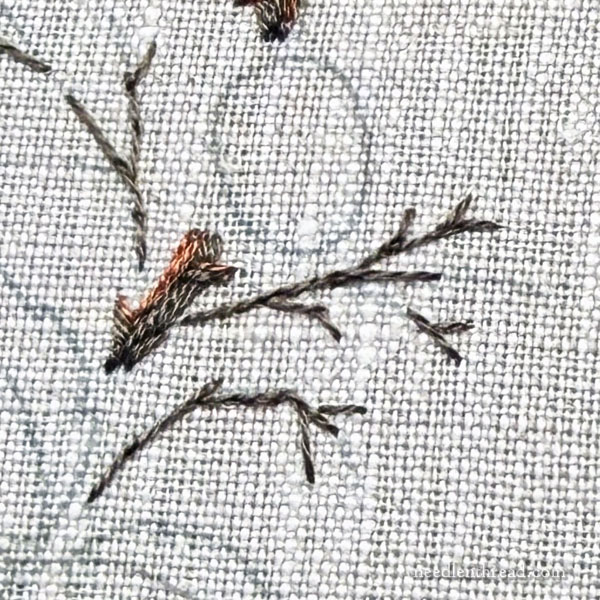
Notice that the stitches sometimes overlap each other. The starts and stops ar not perfect, the stitch length is varied. These are not structures, precisely stitches elements. You want them to be a little “free” in form.
The One Rule
The only rule for stitching the brambles is this:
Don’t extend any stitches beyond the farthest point of any design line that’s already provided. So, when you get to the end of a design line that’s farthest out on the outer edge of the design, don’t add anything beyond the end of that design line. Otherwise, one side of the circular wreath may end up off balance with the opposing side.
You want the overall design to be balanced, so it’s important to be aware of where the design lines end at the farthest points away from the center of the design.
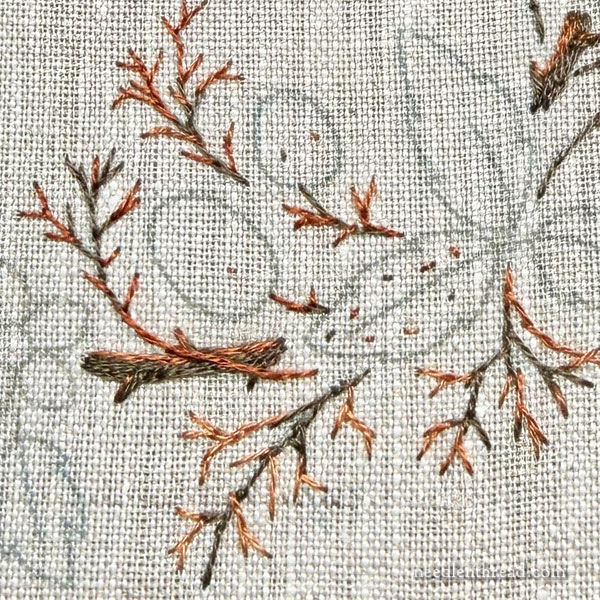
After you’ve worked the dark brown and left spaces on the design lines, switch to one strand of the variegated brown and fill in the spaces you left.
As you go, build smaller twigs off the main design lines, filling out the bramble with the lighter brown.
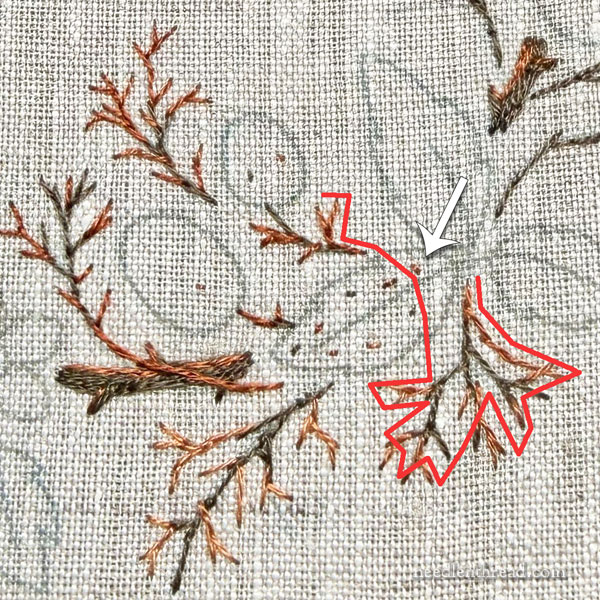
The red line in the image above indicates a typical stitching path that I used.
Whenever I came to a leaf or berry that interrupted the direction I was going, I continued to carry the thread across the back of the embroidery, behind that element, but I took a small stitch inside the element to keep the thread from being too long and loose on the back. That little holding stitch will be covered by the embroidered leaf or berry – and so will the longer stitch across the back of the work.
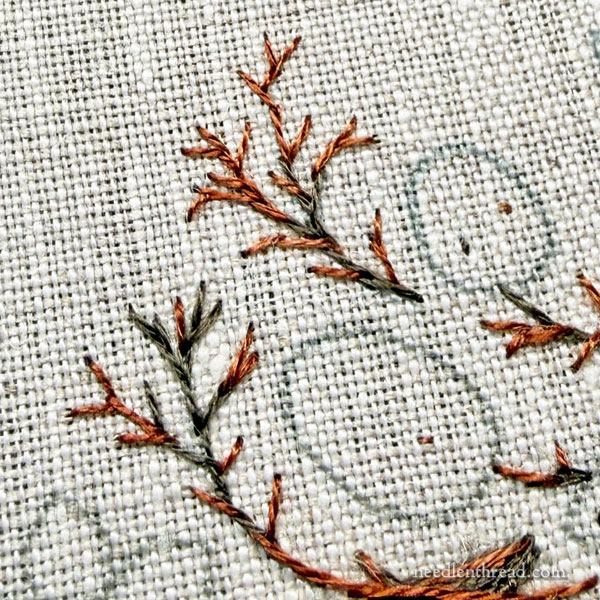
Here’s a close up of one of the bramble sections at this point. You can see how much I filled out with smaller twigs from the main design line.
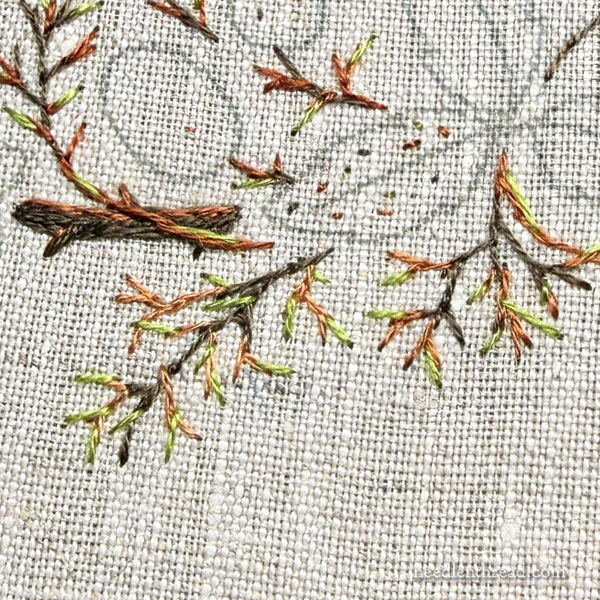
Now, switch to one strand of light or medium green in the needle. I used medium green on some sections and light green on others. If I were just going to work with one color of green, I’d probably pick the lightest green.
Continue to fill the bramble by touching in some green twigs at the tips and here and there along the main stems.
This completes the bramble elements.
I worked in sections around the wreath, doing one section of bramble at a time. As I worked, I tried to balance the overall density of each section with the previous section. It helps to occasionally hold the work out away from you and squint at it, to see that the filling is balancing out across the sections as you add them.
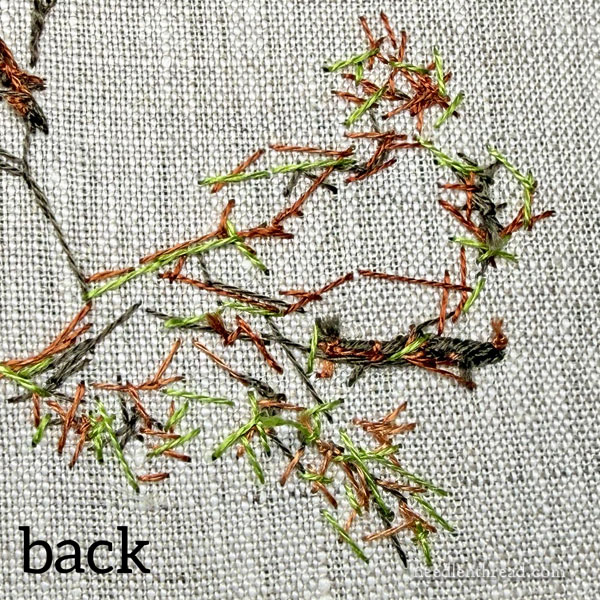
You can see that the back is a bit messy. That’s ok! As long as you aren’t carrying threads all the way from one side of the stitching area to the other and back again, that’s fine. Just follow logical paths as you stitch. And if you have to carry threads small distances across the back, that’s ok.
Tip: Be aware of your thread length as you are stitching. If you suddenly notice that your thread feels shorter than it should, check the back of your work for a knot. It’s always better to catch a knot right away, so you can remove it easily!
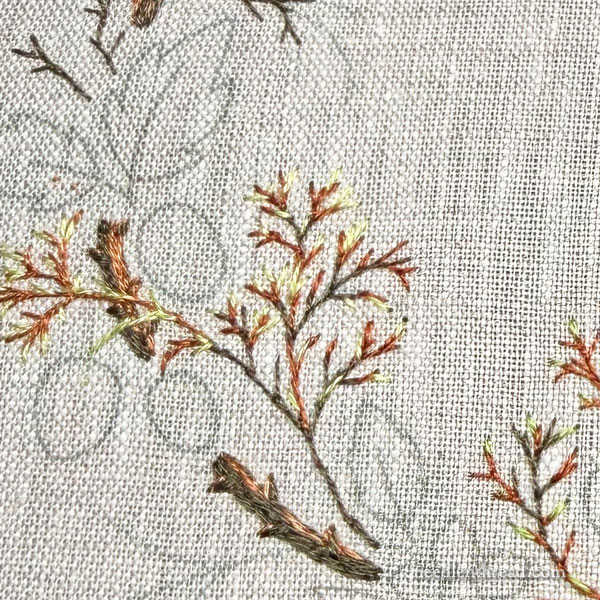
There’s a typical completed section.
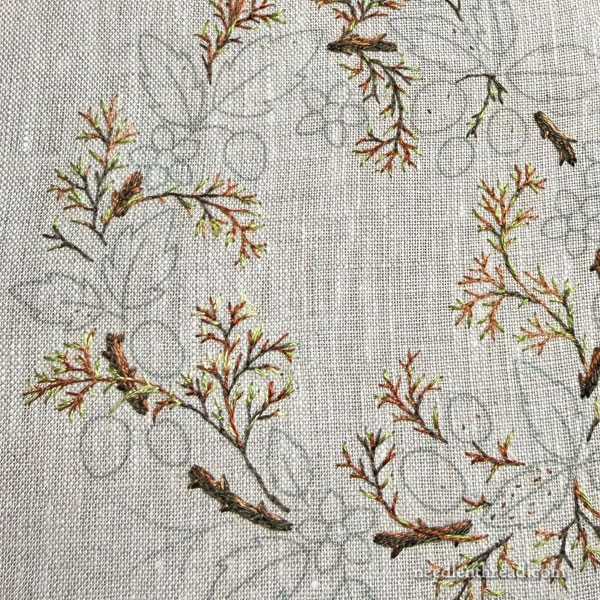
Try to relax while you’re doing this type of stitching. Take your time and enjoy the process!
Next week, we’ll move on to the leaves!
I’ll be posting a Project Index for this stitch-along later this week, so that you can easily access all the lessons as they develop.
Have a marvelous Monday!

Leave A Comment